
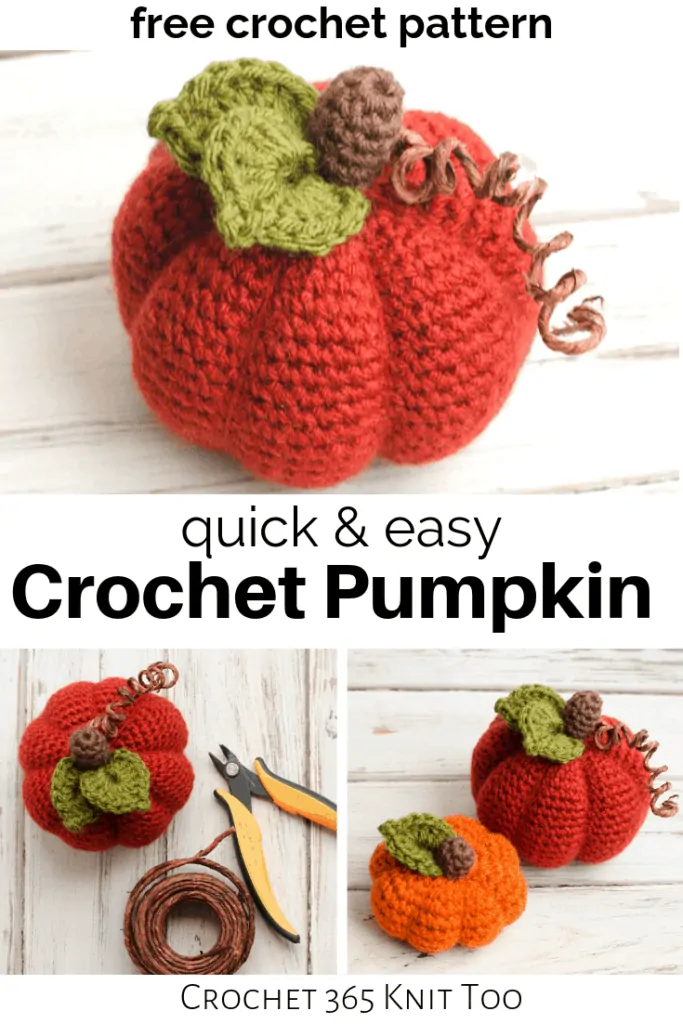
Crochet Pumpkin: 3 Perfect Sizes
This post may contain referral/affiliate links. Please read my disclosure for more info.
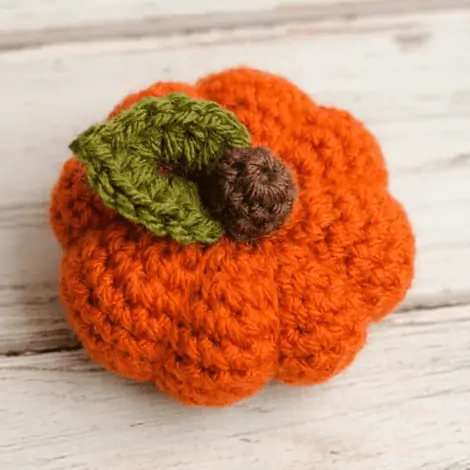
This sweet crochet pumpkin is my favorite. I love the rich orange juicy goodness, those delicious leaves and that tendril. Sigh. It makes me happy. It makes me want to make an entire collection of pumpkins and scatter them around my house.

In fact.. that is exactly what I am doing. You might remember the small pumpkin in all it’s squishy goodness. And the lovely large pumpkin ! And this, the delightful, delicious, medium size crochet pumpkin! So many pumpkin sizes!
How to Decorate with Crochet Pumpkins
I absolutely love decorating with crochet pumpkins and the best part is there are so many ways to display pumpkins around your home!
Shelf Decor: I love grouping my pumpkins of various sizes on a shelf or end table for a fun fall vibe.
Thanksgiving Tablescape: My Thanksgiving table looks amazing with my crochet pumpkin coasters at each place setting and coordinating cute crochet pumpkins displayed as part of the centerpiece.
At Your Workplace: A small crochet pumpkin tucks in nicely next to a computer and its always so fun to brighten up the workday with a little crochet!
They are so fun to make. And maybe you’ll find yourself crocheting this cute crochet pumpkin pattern and scattering pumpkins around your house too.
Yarn Substitutions
Are you wondering what the best yarn for crochet pumpkins is? Or what size crochet hook you need for pumpkins?
My darling little pumpkins use basic stitches and are all made with worsted weight yarn (which is a medium weight yarn popular in the United States). But the pattern also works in other sizes of yarn as well, making this pumpkin pattern a fun stash buster!
A thinner DK or sport weight yarn will make a smaller pumpkin which would be fun for smaller pumpkins on display. A chunky or super bulky yarn will make a big squishy pumpkin for those of you who love larger pumpkins.
Vary the yarn size for a whole pumpkin patch full of cute little pumpkins in different sizes!
Crochet Techniques To Know
This free pattern for a crochet pumpkin uses basic crochet stitches and techniques. Here are the basic stitches you’ll need to know:
- Single Crochet (sc): Insert crochet hook into the stitch, yarn over and pull up a loop (2 loops on hook). Yarn over again and pull through both loops.
- Single Crochet 2 Together (sc 2 tog): Insert hook into the next stitch, yarn over and pull up a loop (2 loops on hook), insert hook into the next stitch, yarn over (3 loops on hook). Yarn over again and pull through all 3 loops. Decrease made.
- Double Crochet (dc): To make a double crochet simply, yarn over and insert crochet hook into the stitch, yarn over and pull up a loop (3 loops on hook). Yarn over and then pull through the first 2 loops on the hook. This will leave 2 loops on the crochet hook. Yarn over again and pull through last 2 loops.
- Slip Stitch (sl st): To make a slip stitch, insert hook into the stitch, yarn over and pull through both the stitch and the loop on the crochet hook. Slip stitch made.
- Magic Ring: Each pumpkin and stem starts with a magic ring. Pop over to my free step by step tutorial on the magic ring for step by step photos.
This beautiful pumpkin is worked in continuous rounds so a stitch marker is helpful to keep track of your rows. There’s no seaming involved but you’ll use the yarn tail from the pumpkin leaf and stem with a yarn needle in the assembly process at the end. And the yarn tail from the pumpkin itself is used to wrap the pumpkin for the perfect 3d pumpkin shape!
I really love that this easy crochet pumpkin pattern is just so fun to make with no special stitches involved. Because it’s worked in a continuous circle (and not a rectangle), there is no unsightly seam. I used Lion Brand medium weight yarn which makes this the perfect pumpkin pattern for all that scrap yarn you have laying about.
Many of my readers reach out asking about my unique crochet leaves! First you chain and join a ring. Then you work a series of stitches into that ring including several double crochet stitches, a short chain and a slip stitch to form a little picot leaf point and then more double crochet stitches for the opposite side of the leaf.
Try not to over think it; simply work all the basic stitches as written into the ring you’ve made and when you’re done you’ll have the most darling crochet leaf!

Crochet Pumpkin Pattern
Materials
- 2 ounces worsted weight yarn in Orange, scraps of green and brown. I used Lion Brand Vanna’s Choice in Brick and scrap yarn for green and brown.
- US G6/4.00 mm crochet hook (these are my absolute favorite hooks I recommend to everyone!)
- Fiberfill stuffing
- Stitch marker (optional)
- Floral wire (I used this wire)
- Tapestry needle and scissors
- Wire cutters to cut floral wire (if using floral wire)
Resources and tutorials you may find helpful in following this pattern: Crochet Abbreviations, US to UK Crochet Conversion Chart. Find links to easy crochet basic stitches on the “Tutorial” menu: Getting Started will show basic stitches such as chain (ch), single crochet (sc), half double crochet (hdc) and double crochet (dc) and Crochet Stitch Dictionary shows our growing collection of crochet stitch tutorials.
Crochet Abbreviations:
- ch = chain stitch
- sc = single crochet
- sc 2 tog = single crochet 2 stitches together
- dc = double crochet
- sl st = slip stitch
- st = stitch(es)
Medium Pumpkin Size:
Finished size of medium size pumpkin measures approximately 4.5″ inches wide and 4″inches tall.
This free crochet pattern, like all patterns on Crochet 365 Knit Too is written in US terms.
Free Crochet Pumpkin Pattern:
Make a magic ring
R1: 8 sc into ring (8 sts).
R2: 2sc in ea st around (16 st)
R3: *sc in next st, 2sc in next st, repeat from * around (24 st)
R4: *sc in next 2 st, 2sc in next st, repeat from * around (32 st)
R5: *sc in next 3 st, 2 sc in next st, repeat from * around (40 st)
R6: *sc in next 4 st, 2 sc in next st, repeat from * around (48 st)
R7: *sc in next 5 st, 2 sc in next st, repeat from * around (56 st)
R8-16: sc around (56 st)
R17: *sc in next 5 st, sc 2 tog, repeat from * around (48 st)
R18: *sc in next 4 st, sc 2 tog, repeat from * around (40 st)
R19: *sc in next 3 st, sc 2 tog, repeat from * around (32 st)
R20: *sc in next 2 st, sc 2 tog, repeat from * around (24 st)
R21: *sc in next st, sc 2 tog, repeat from * around (16 st) Stuff
R22: sc 2 tog around (8 st) Fasten off, leaving a long yarn tail for sewing segments.

Stuff the pumpkin. Thread yarn needle with the long tail of yarn and pull yarn to gather up and to close the small hole opening. To get the perfect pumpkin shape, the sections are wrapped around the outside with yarn.
Keeping the yarn in the tapestry needle, wrap yarn over and around pumpkin to starting point to divide pumpkin in half. Pull tight and knot at center. Now divide in half again to form 4 equal sections, wrapping the yarn up and around. Loop under the knot you made and tighten it up. Knot whenever you feel like you need to hold the yarn and the end of a wrap. Divide the pumpkin 2 more times to have a total of 8 sections. Knot securely at center and finish off, using the darning needle to hide the tail inside the pumpkin.

Finishing:
At this point you have a choice which side of your crochet pumpkin you want to show as the top and which to show as the bottom of the pumpkin. I flipped mine over and made the starting magic ring the top of my pumpkin.
How to Crochet a Pumpkin Stem:
With brown yarn, make a magic ring
R1: 8 sc into ring (8 sts).
R2-5: sc around. At end of 3rd round, slip stitch to next stitch and finish off, leaving a long strand for sewing. Stuff.
Crochet Leaves:
With green yarn, *Chain 8 and join to form ring.
R1 in the ring just made work all of the following: ch 2, 6 dc, ch 3, sl st to 1st ch, 6 dc, ch 2, sl st.* One leaf made. Do NOT fasten off.
Repeat from * to * to make a 2nd leaf. Fasten off, leaving a long strand for sewing.
Using a yarn needle, sew the leaf and stem in place on top of the pumpkin.
Pumpkin Tendril:
Wind floral wire several times around a pen to create a spiral. Cut end. Bend one end and wedge underneath the stem on one side. Mine stays pretty well without gluing, but feel free to use a touch of hot glue to secure if yours wants to wiggle out a bit.

Free Crochet Pumpkin Patterns
If you love the my adorable crochet pumpkins, you might also like to check out these other crocheted pumpkins:
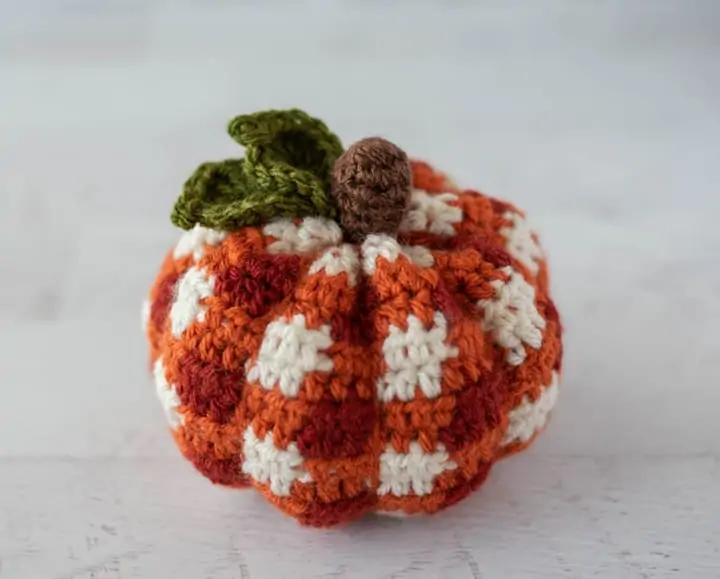
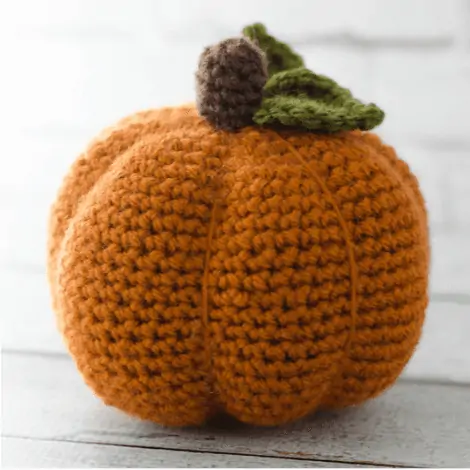
1. Small Crochet Pumpkin // 2. Crochet Plaid Pumpkin // 3. Large Crochet Pumpkin
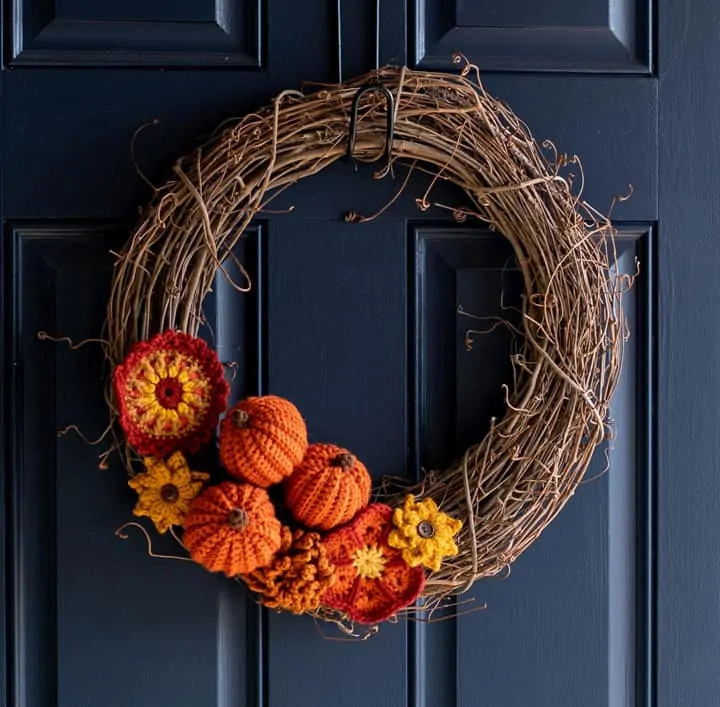
Looking for yet another pattern for a crochet pumpkin? Be sure to also check out the tiny pumpkins in my Fall Crochet Wreath pattern. The wreath features an easy to make cinched pumpkin with a ribbed texture.
Crochet Pumpkin Variations
I love how this pumpkin crochet pattern is so versatile because you can change the size even further by the size yarn you choose. Choose a bulky weight yarn for larger pumpkins or choose a DK weight yarn or even fingering weight yarn for an adorable crochet mini pumpkin.
Remember if you use a super bulky yarn to make larger pumpkins or use any other sized yarn remember to also choose the appropriate crochet hook size for the yarn you choose. A bulky weight yarn will require a larger hook and a thinner yarn will require a smaller hook. If you’re unsure of what size hook to use, take a look at the yarn label for guidance.
If you’re not up for an orange pumpkin, just change yarn color for a yellow pumpkin, a white pumpkin, black pumpkins, cream pumpkins or even a cute pumpkin coffee color! Did you know that a blue pumpkin spreads awareness of autism?
Use tiny pumpkins for a crochet pumpkin garland. Or any of the pumpkins as a base for a bear pumpkin, fox pumpkin, deer pumpkin or any other pumpkin amigurumi design.
You can also change up the crochet leaf for a different look. Check out this crochet leaf pattern collection for ideas.
How Do You Attach A Cinnamon Stick To A Crochet Pumpkin
If a twig, wooden pumpkin stem or a cinnamon stick stem is more your style, just omit the crochet pumpkin stem and use some hot glue to attach your stem of choice. A cinnamon stick can lend that fall fragrance to your pumpkin! Be sure to trim the cinnamon stick or dowel to the size you desire before gluing down.
You can change the height of your adorable pumpkins by working fewer rows for a shorter pumpkin (or squattier pumpkin) or work more rows for a taller size of pumpkin. Just remember when stuffing your pumpkin with fiber fill you might need more or less depending on the finished pumpkin size you end up making.
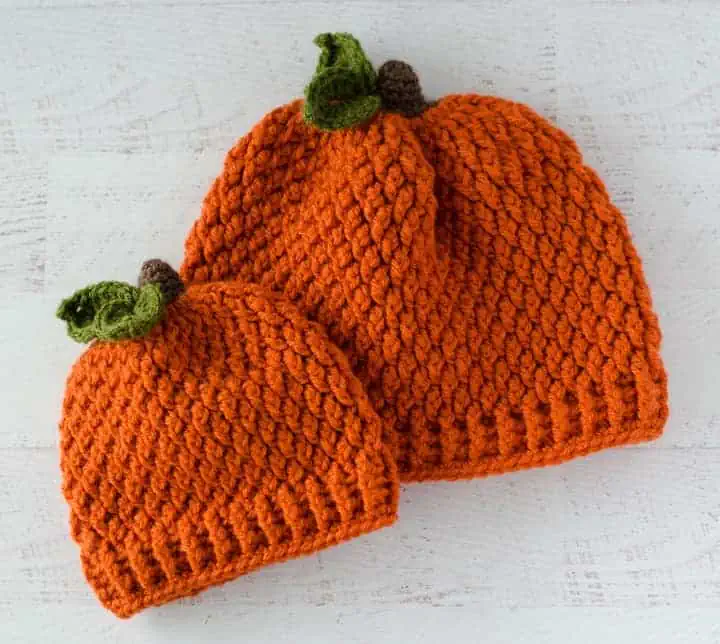
If you’re looking for something extra adorable, try this crochet pumpkin hat pattern, sized for everyone in the family
And one last look all three crochet pumpkins beauties! Sigh.. I love them so, so much! Whether you’re looking for a darling crochet pumpkin or an elegant pumpkin collection for your crochet pumpkin decor, these handmade pumpkins are your perfect go-to free crochet pattern. Remember to pop over to the larger pumpkin post or smaller pumpkin post for detailed instructions.

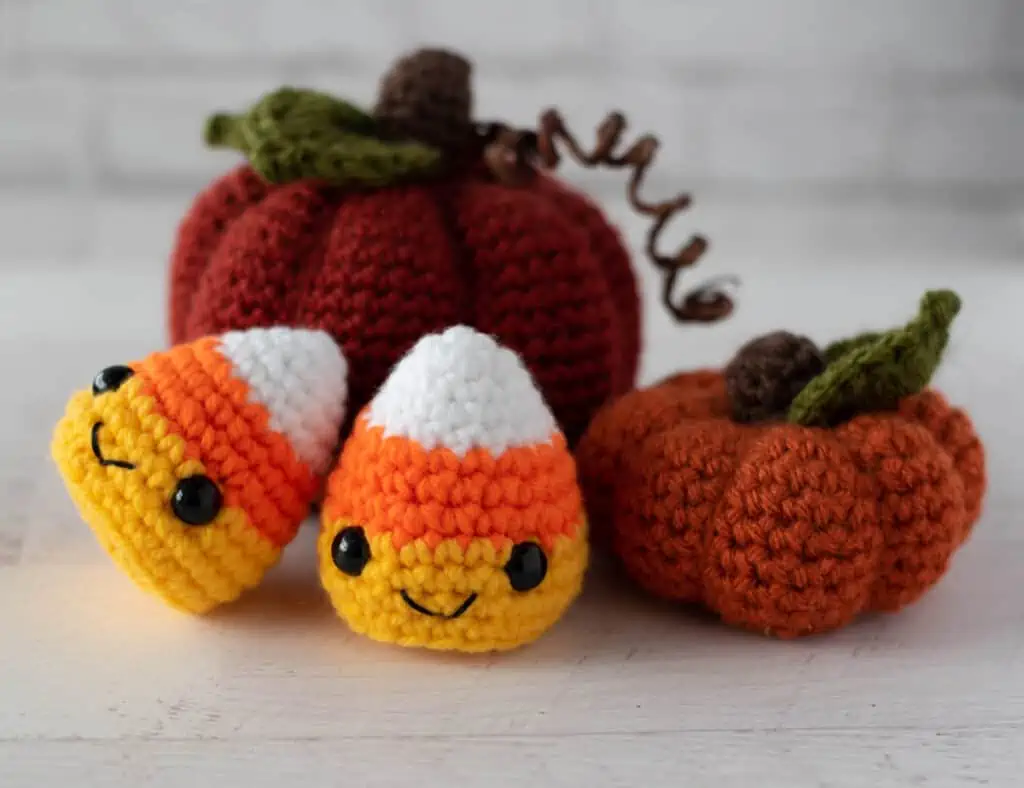
Looking for more ways to decorate for fall? Check out this darling crochet candy corn pattern! Perfect for nestling in with your pumpkins!
Explore More Crochet Patterns
Do you love crochet as much as I do? I think you’re going to love these other fun crochet patterns:
- Crochet Wine Bag in Fall Plaid
- Crochet Octopus for Preemies
- Crochet Crown
- Frankenstein Crochet Squish
- Crochet Gnome Collection
- Crochet Turtle
- Sunburst Granny Square
- Crochet Scrubbie
- Fall Crochet Patterns Collection
- Halloween Amigurumi Collection
- Crochet Fall Decor Collection
- Crochet Dragon Collection
- Granny Square Cardigan collection
- Crochet Pillow Patterns
If you’re looking for a little complete beginner crochet amigurumi kit you might enjoy my Woobles review too! So fun!
I love seeing your finished crochet projects! If you enjoyed making this easy Crochet Pumpkin, I’d love to see yours on Instagram, be sure to tag me @crochet365knittoo. If you are on Facebook, stop over to the Crochet 365 Knit Too Facebook page or pop over to the Crochet365KnitToo Club and share a photo! I’d love to see your work!
Are you joining the rounds ?
Yes, the rounds are joined.
so at the end of each round do you chain 1 and turn?
No. They are worked in continuous rounds.
Joining and adding a row or corkscrew typ rounds? This is very confusing. Joined rounds are usually increased by chaining up one aren’t they?
“joined round” would mean starting each row with a chain to get up to the stitch level and then finishing with a slip stitch to the starting chain. “continuous rounds” means that you are working in a spiral with NO chaining up and joining each round. Hope that helps clarify.
Then is there a seam?
This pattern is worked in the round (a continuous spiral).. so no seam. Hope that helps!
Both pumkins are so sweet! Thank you for sharing your patterns-im going to make a few in different sizes and colours
I love so many of your patterns. Thank you for sharing.
Hello Cheryl, I just wanted to say thanks for the lovely pumpkin pattern. I made one today as my sister wanted some decorations for her cafe. This has turned out so beautifully that I think I’ll be making lots for myself too. I’m thinking a big selection of them in all different colours! I will go and find you on Facebook and Instagram.
With kindest regards Kim. Xx
Glad you are enjoying them! I’d love to see your work. Be sure to tag me on Facebook and Instagram!
Thank you for sharing this pattern!
Super cute and relatively quick to make! I am not a master crocheter by any means, and the leaves had me stumped, turns out I misunderstood which chain to slip stitch, but once I figured that out it was smooth sailing. I’ll be making these in a few different neutral colors for fall, and various sizes. Thanks for the great pattern!
Very well designed.
Just made all 3 pumpkins. Quick and easy. I’m also going to make many more in different colors. Thank You so much for the patterns.
Just working on this now! Thanks for the free pattern 🙂 I’m just to the part where I’ve stopped increasing stitches, but my piece is rippled and not lying flat. Is this normal? Still relatively new to crochet so not sure how to fix it or whether it will fix itself as I carry on,
I would continue and see how it looks stuffed. I found that after stuffing mine it was looking more “normal” haha. Good luck on your pumpkins! They are so much fun to make 🙂
Thank you for the pumpkin pattern, very clear instructions.Do you happen to have a acorn pattern as well?I thought the would look so cute with the pumpkins for a Thanksgiving display.?
I do not have an acorn pattern, but you’re right.. it would be adorable in a Thanksgiving day display! If you find and make one, be sure to post a photo in our Crochet 365 Knit Too Club on Facebook! I’d love to see!
Where do I find the link for the large pumpkin or has it been posted yet?
https://www.crochet365knittoo.com/large-crochet-pumpkin/
Hi there. I am really struggling with the leaves. I think I’m ok up to ch 3, sl st to 1st ch, Is that the first ch of the original eight or from the 3ch after the dc? Nothing I’m trying seems to look right. If there’s any additional breakdown you can provide on the leaves, I would really appreciate it. Thank you for your help!
It’s right in that first sl st after your last dc. It should make a little “point” for your leaf. Hope this helps!
So the rounds are not joined but worked continuously?
Yes!
What do you slip stitch into at the end of the leaf? I just don’t know what stitch I’m slip stitching into.
For the leaf, you are making a foundation ring and working all the stitches in various sizes AROUND the chain ring. At the very end you work the slip stitch around the ring. This makes the very last bit of the leaf look like the beginning part of the leaf. Hope that helps!
Help! I’m new to crochet and have no idea how to do the leaves. I finished the pumpkin and stem just fine but have never done anything like these leaves before! is there a video of something similar I could watch for reference? or maybe some alternative form of instruction I might find more beginner-friendly?
The pictures are super cute and mine turned out really nice despite being a beginner! Very happy with my new fall decorations!
The leaves are worked in a foundation ring. You can find instructions on a foundation ring here. You can work any kind of stitch combination in a foundation ring. A granny square is another example of working into a foundation ring. In this case, you are working stitches of a different height into the ring. Hope that helps.
I made the small pumpkin. Very easy and very cute! I’ll be making more of these. Thank you for the patterns!
Great pumpkins and instructions, many thanks for your generosity in providing this. However, I recommend the Single Crochet Invisible Decrease instead of the SC 2 TOG. It is neater and your gaps would be much less. It’s easy as pie – you just work into the front loops. Thank you.
Anyway, I am still wondering which is preferable: your continuous in the round method or making a flat panel (with built-in ridges) which you sew together into a pumpkin shape. I guess the former looks more like a pumpkin, doesn’t it!
I love the invisible decrease too! I personally prefer the continuous round method for the pumpkins because I’m not a big fan of seeing that seam in the finished pumpkin.. BUT having said that, my plaid pumpkin is seamed and it’s one of my favorites too!