
How To Read A Crochet Pattern
This post may contain referral/affiliate links. Please read my disclosure for more info.
How to Read a Crochet Pattern. Sigh. Are you confused? Do you feel like you could do better? Never fear.. we’re about take pattern reading down to the basics so you can understand exactly how to read a crochet pattern!

Let’s talk. A lot of you have been emailing me. Many of you are learning how to crochet online, often by watching videos–which is so amazing!
I love that my favorite hobby is your favorite hobby too. And I also love that there are a variety of means to learn the craft—this blog is one of them. But here is what makes me really sad: A lot of you are also emailing me that you don’t know how to read a crochet pattern…not that you haven’t learned yet, but that you CAN’T.
And because you can’t, you can’t do a lot of other things… like crochet any amazing project you want or learn a new technique. You also have one huge problem when you get stuck in a pattern that you only learned on a video—you have to find the exact spot in the video to resolve your dilemma. And who has time for that? You could be crocheting!
Today is the day we change all that. Today, the buck stops here. You are going to learn to read a pattern. And guess what? It’s not so horrible. It’s not a foreign language. And you can totally do this.
I learned to crochet as a child from a grandmother who didn’t speak English well. She didn’t know how to read a pattern, so she couldn’t teach me to do that. When I was about 10 years old or so, I found a pattern in a magazine for a bear that I wanted to make. I had the yarn. My grandma lived 4 hours away and FaceTime hadn’t been invented yet.
So I learned how to read the pattern myself and made the bear. I was so very proud of that bear. And you are going to be pretty proud of yourself too. If 10 year old me can learn to read a pattern, so can you. We’re going to do this together.
How to Read a Crochet Pattern: First Things First
First off, let’s be clear. A written pattern is simply a means for a designer to communicate with a reader a set of instructions. If you take it one segment at a time, understanding one piece at a time, you will get this. Think of it as de-coding.
And if you have to totally retell the story or translate it into different words that make sense to you–that is completely ok! I do this all the time. I’ve been crocheting for 40+ years and I often still have a conversation in my head that goes like “pattern says X and X, but what it really means is to do this and then repeat it until I get to the end”.
Second, I am teaching you how to understand patterns written in American English terminology and standards. If you are looking at a pattern written in different terminology and standards it may read a bit differently. In time, learning how to read a crochet pattern gets easier and you will be able to understand a wide variety of written crochet patterns.
To start with though, give yourself the best chance for success. Start with commercially written crochet patterns. I’m talking about patterns in books and leaflets you can find at a chain store by a major brand you have heard of.
A commercially written crochet pattern goes through a publishing process that includes multiple people reading a pattern and verifying its accuracy and accordance to standards. Once you’ve worked through a few commercially written patterns, then venture out into the world of independent designers.
Skill Levels
Usually the first section in a pattern tells you about the skill level. Be mindful of where you are in your crochet journey and whether or not you are ready (or willing) to take on a challenge. A Beginner or Easy level pattern is a good one to practice your pattern reading skills because the instructions will be easier to understand as well.
| Beginner | Projects for first time crocheters using basic stitches. Minimal Shaping. |
| Easy | Projects using yarn with basic stitches, repetitive stitch patterns, simple color changes, and simple shaping and finishing. |
| Intermediate | Projects using a variety of techniques, such as basic lace patterns or color patterns, mid-level shaping and finishing. |
| Experienced | Projects with intricate stitch patterns, techniques and dimension, such as non-repeating patterns, multi-color techniques, fine threads, small hooks, detailed shaping and refined finishing. |
Pattern Details
Pattern details will be listed including the type of yarn the designer used in the project along with quantities, notions (including hook size) needed, measurements of the finished piece and gauge. You can read all about how to work a gauge swatch here.
Stitches and special stitch combinations will also be listed before the actual instructions. Often the designer assumes you know the most basic stitches and will offer instructions on the less common stitches as well as special stitch combinations. Unsure about how to work a particular stitch, check out the tutorials here.
Abbreviations
Written patterns make use of crochet abbreviations. Knowing crochet abbreviations is really important in learning how to read a crochet pattern. You can find a list of crochet abbreviations here.
Sizes
As you are learning how to read a crochet pattern, it is really important to take note of any size differences. If you are making a garment, the pattern will likely list multiple sizes and finished dimensions. For instance, it might say: “Sizes: S (M, L)” and then later give finished dimensions such as “To Fit Bust: 32(36,40)” and then give a “Finished Bust: 36(40,44).
The pattern will proceed to give information in multiples. To use this information, first determine the size you wish to make based on the “to fit” measurement. The finished measurement will be the corresponding measurement in the “finished” section. For example, if I wanted to make a Large based on the information above, I would expect it to fit a bust size of 40 inches and the finished garment would actually measure 44 inches around the bust.
The best way to handle a pattern with multiple sizes is to circle all the numbers pertaining to the size you are making. That way, you will not get confused when you are working the pattern.
Clothing will also instruct you to work in sections: the back, the front, the sleeves, etc. Once you learn how to read a pattern, following size directions is not hard at all. However, when you are still learning how to read a pattern, I would stick with an easy pattern that does not have multiple sizes.
Pattern Terminology
Here is a little bit of shorthand that you need to understand in order to learn how to read a crochet pattern:
* An asterick (or double asterisks **) indicate a portion of the instructions will be repeated. For example, the instructions might say *dc in next st, 2 dc in next st, repeat from * around. This means you will be repeating the double crochet in one stitch and 2 double crochet in the next stitch all the way around the row.
( ) Parentheses set off or clarify a group of stitches to be worked into the same space or stitch. For example the instructions might say (sc, ch 1, sc) in next st. This means you work a single crochet, a chain 1 and then another single crochet all in the same stitch.
[ ] Brackets and ( ) parentheses also provide additional information. For example a row might start with the words: ch3 (counts as a dc here and throughout). This means that when a row starts with a chain of 3, that chain 3 “counts” as a double crochet.
Continue in Pattern (Patt) as Established: This means to continue to follow the pattern as it has been described thus far.
Finish off or Fasten off: This means to end your work by cutting your yarn, leaving several inches of yarn and to pull the end through the last loop on the hook to prevent your work from unraveling.
Work Even: Continue to work in the pattern without increasing or decreasing stitches
Right Side/Wrong Side: Refers to the side of the garment that will be seen or not seen as worn.
Right Front: Right side of a garment as worn on the front right side of the body
Left Front: Left side of a garment as worn on the front left side of the body
Decoding the Actual Pattern
Now on to the actual pattern reading. Take a deep breath. You can totally do this. You can learn how to read a crochet pattern, my friend. Remember, you are simply decoding the instructions step by step:
- Before working each row, read the instructions for that row all the way through, pausing after each comma to make sure you understand each segment.
- Look for the repeat (as there is almost always a repeat of some sort).
- If the instructions direct you to work a specialty stitch identified earlier, find the spot in the pattern that tells how to make that specialty stitch.
- Do you need to “translate” or “re-word” something so that it makes more sense to you? If so, do that.
- Pick up your yarn and hook and work each segment of the pattern. Work to the next comma. Then work to the next.
- At the end of the row, count your stitches and verify that they match the stitches the pattern row indicates.
- Take a deep breath and start on the next row
- Don’t forget. You can find links to stitches on the “Tutorial” menu: Getting Started will show basic stitches used in many patterns and Crochet Stitch Dictionary shows our growing collection of crochet stitch tutorials.
How to Read A Crochet Pattern: Tips and Tricks
- Write on the pattern as you go. I usually photocopy a pattern. That way I have a rough and tumble version that can go in my crochet bag that I can write on.
- Check off rows as you complete them
- Make your own “translate” notes. For instance if the pattern says: R9-13: sc around, I write down the number “5” so I know I need to make five rows of single crochet. Then I tick off each of those rows as I complete them
- Use a scrap piece of yarn to mark the beginning of every round
- Count after every round. Especially if it is a difficult round.
- Identify the repeat. Often a row has a section that is simply repeated with something a little different to start and something a little different to end. Read and understand what you are mostly going to do in the row. Pause. Then do the starting bit. Then all your repeats. Then look back at the pattern for the ending bit.
- It is ok to slow down and crochet a few stitches and then verify that you did them correctly. When I am doing complicated rows, I slow down and check and double check to make sure I am understanding correctly. This is completely normal.
- If you follow the instructions and things don’t work out correctly, do not throw down your work and declare that the instructions MUST be wrong. 9 times out of 10, you are wrong. But it is ok. Re-read the instructions. Did you miss a step? Even the most experienced crocheter misunderstands patterns now and then. Try to think ‘what is the overall objective of this row?’ Sometimes that helps to pinpoint where the problem lies.
- Sometimes if you just can’t get it. You know how to read a crochet pattern, but the pattern really IS wrong. If you ended on the right stitch, but only the stitch count is off, perhaps just the count is wrong. If things are way off and you can’t figure it out, it really might be that the directions are incorrect. If so, here are a couple of options:
- Look at the preceding row or the next row to see if you can get some “clues” to what is supposed to occur in the problem row. Sometimes you can use that detective work to figure out what is missing or wrong in the written directions
- Call a crocheting friend or take the directions to a yarn shop for help
- Post a question in a crochet Facebook group
- If you purchased a pattern online and can reach the designer, email the designer
- If you purchased a book, the publisher may list errata (which are corrections to the pattern) on its website
How to Read A Crochet Pattern Written in a Foreign Language
I’m not going to lie to you. Deciphering a pattern in a foreign language can be a challenge and sometimes, even using the tips below, I simply cannot figure it out. But it is worth a try and here are my best tips:
- If it is on a website, I use Google Translate to translate the whole web page. I read it over and see how much I can understand. The words will be different at times and not phrased in a way that you are used to, but you can often get the gist of how the pattern goes.
- Next, I pay close attention to the stitch counts provided. Amigurumi and other items worked in the round typically increase by 6 stitches evenly spread on a particular round. So you can often determine which rows have increases and which rows are worked even.
- I look at the photos to see if it gives me any clues.
- If there is a video, I will watch it to see if I can understand that way. I usually will mute the volume, however, as I find listening to a language I can’t understand distracts me from concentrating on what I am seeing.
- If I still can’t figure it out, I will take a step back and think about what exactly intrigues me about that pattern. I will focus on figuring out just that one element and then incorporate it into a similar pattern that is written in American English. Often it’s a color sequence or a particular stitch that catches my eye. I can use the foreign pattern as a stepping stone to find something else that I can understand better. I like to use the Pinterest search bar to search for a pattern element I like. For instance, search for “flower granny square”.
- You can also use Pinterest to pin similar patterns. Once you click on a pin, you can scroll down and find a similar pin.
See… if you take it slow and go step by step, you can learn how to read a crochet pattern!
I love seeing your finished projects! If you enjoyed making one of my patterns I’d love to see yours on Instagram, be sure to tag me @crochet365knittoo. If you are on Facebook, stop over to the Crochet 365 Knit Too Facebook page or pop over to the Crochet365KnitToo Club and share a photo! I’d love to see your work!
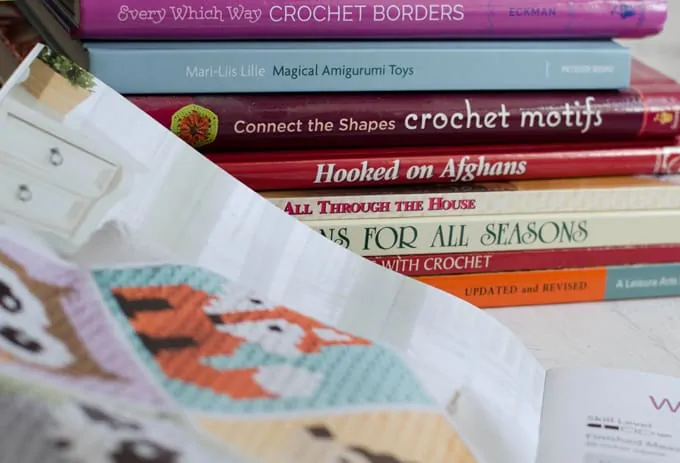
What is the pattern in the picture on the How to read patterns
It is the Lost in Time Shawl, which you can find here: https://mijocrochet.wordpress.com/2017/03/15/lost-in-time-shawl-sjal/ The shawl pattern is in several different languages, just scroll down to the end of that post and you will find it. Isn’t it just lovely?
Thank you for the help in reading patterns!
I’m very sure that I can do it now—–
I am so glad it was helpful!
Wow this Yarn you are using for the shawl is BEAUTIFUL… can you PLEASE tell me what brand/name it is..? Have made the shawl for my sister and would love to make it for my self in that color.
Looking forward to hearing from you.
Happy new year 2018 from Denmark.
Kind regards.
Ulla
The yarn for the shawl is Red Heart Unforgetable.
Thanks so much.
Hello. This is an excellent tutorial! I learned crochet and knitting when I was young, also.
What a beautiful shawl! I can’t wait to make one. Do you happen to know that color of the unforgettable? Thank you!
I believe the color is Gossamer
Yes I just checked. It is Gossamer!
I have a runner pattern that has two waving lines between rows 50 and 75 with no instruction as what to do. Do you know what this means?
Sorry I’m a bit delayed in responding to your comment and I hope you have figured it out by now. I have never seen that kind of notation. I suggest reaching out to the designer–hopefully you can find him/her online and if not, you should be able to find an email contact for the publisher. Good luck!
Thanks for the crochet instruction definitions. You’re the only site I found like this. Question; do you have information on how to read crochet diagrams?
I have a post on Crochet Chart Symbols (From the Craft Yarn Council): http://www.crochet365knittoo.com/crochet-chart-symbols/
It’s not really a ‘how to read diagrams’ sort of post, but it might get you started.
Thank you so much!!!
Great advice.
I am a 62yo male and have been crocheting for just 6 weeks.
I can read patterns ad well.
Just put my mind to it.
Having so much fun and so relaxing
Regards
Richard
I’m glad it was helpful! Enjoy your new hobby!
Hi Cheryl, I am absolutely a virgin at this but would LOVE LOVE LOVE to learn, I have bought a book on Crochet, is there any advice you could give me that you think may help me in my journey to learning Crochet…?
Lots to learn here! Just click on things in the menu. 🙂 The tutorials are a good place to start!
What is different for left handers?
I am right handed and definitely not an expert on left handed crocheting. Here is a resource you might find helpful: http://www.lionbrand.com/blog/3-crochet-tips-for-the-left-handed/
I know it appears simple, but can you please provide the pattern for the Watermelon Cup Holder?
Thank you SO VERY MUCH for the pattern, yarn, and color information for the shawl. Those are the most beautiful yarn colors. I love jewel tones!
When I first started the blog, I didn’t offer the ad-free PDF options (I started doing so because my readers asked for them). So that’s why some of the earlier patterns do not have that option. I’ll definitely put the Watermelon Cup Holder on the list to do though!
I love the shawl yarn color way too!
Thank you so much, Cheryl! ?
Hi, Cheryl!
To aid in my my Crocheting & Knitting projects, I add a photocopy or PC print-out of my favorite patterns to a 3-ring binder Sheet Protector. I also store all of my Patterns in a 3-ring Binder!
When I need to use my Patterns, I MARK OFF COMPLETED ROWS with a DRY ERASE MARKER! I MAKE NOTES on the Pattern Sheet Protectors TEMPORARILY until my Project is completed! When finished, I can add any Changes/Notes permanently to the Pattern (for posterity!) & JUST WIPE OFF THE PAGE! Voila: ready for the next time! Sheet Protectors & Dry Erase Markers have ROCKED my Fiber World! ♥️? Armed with Google & YouTube, I can DO ANYTHING!!! ????
Hope this helps anyone else, Beginner or Expert, on their Projects!
Wishing YOU & YOURS a PEACEFUL Christmas this year! Thank-you for sharing all of your wonderful Projects, Patterns & such Crafting LOVE & Life LOVE this year!!! ♥️♥️
Do you have a printable version of this How to read a pattern?
I don’t but that’s an excellent idea. When I get to that, just pop back over to this post and there will be a link! Thanks for the suggestion!