
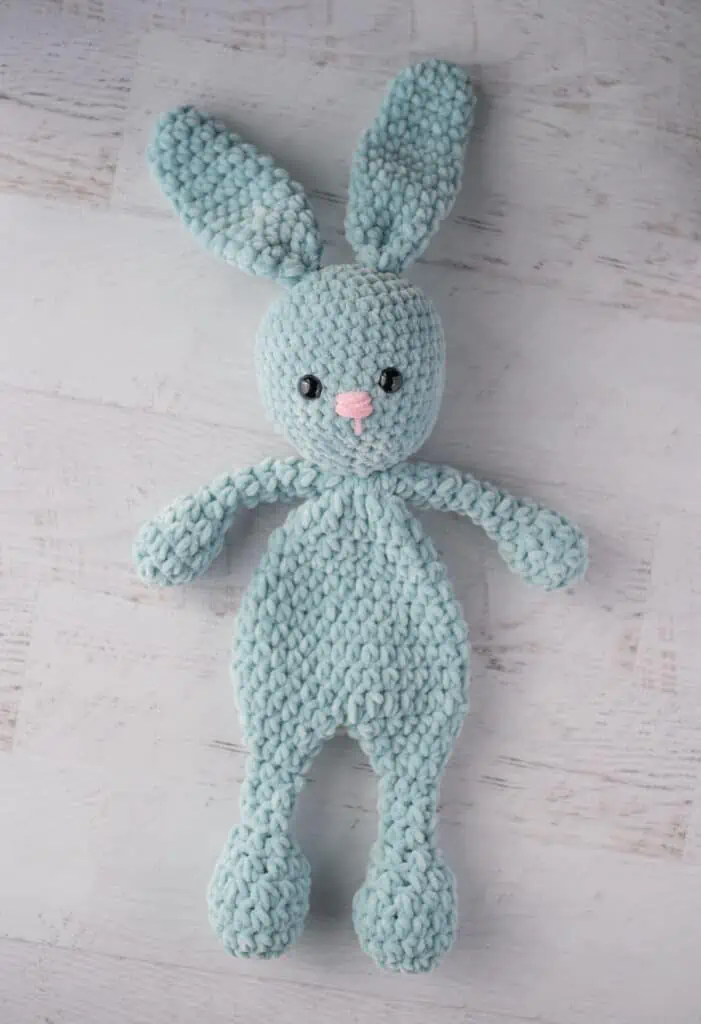
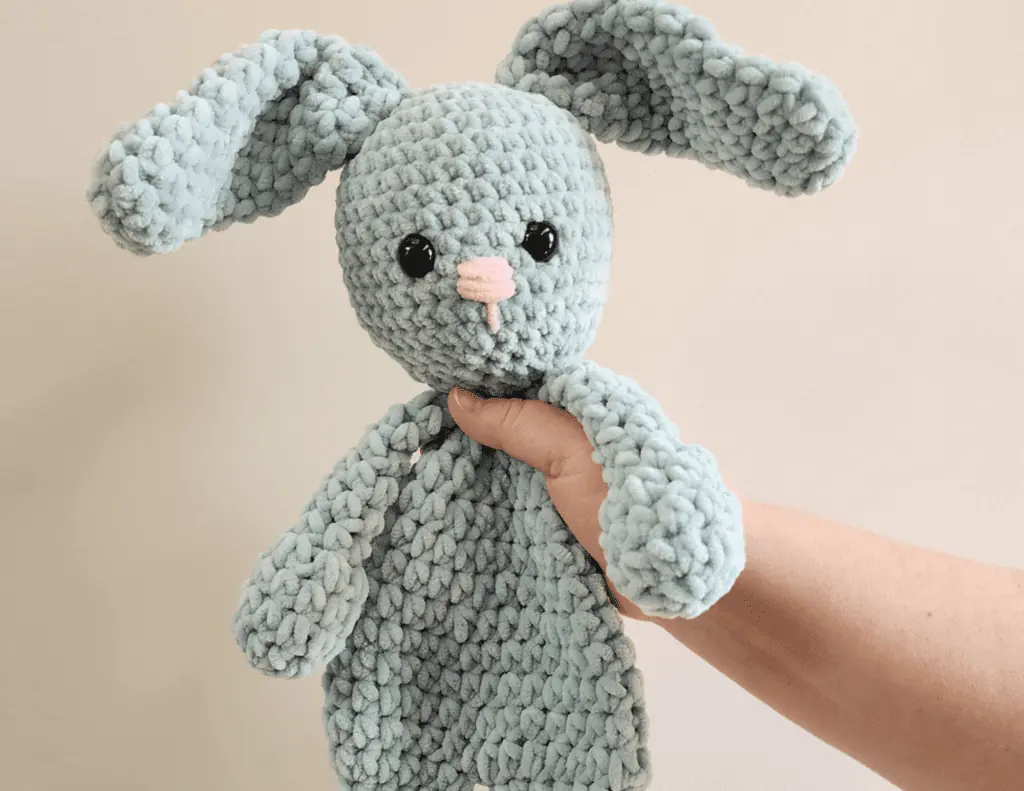
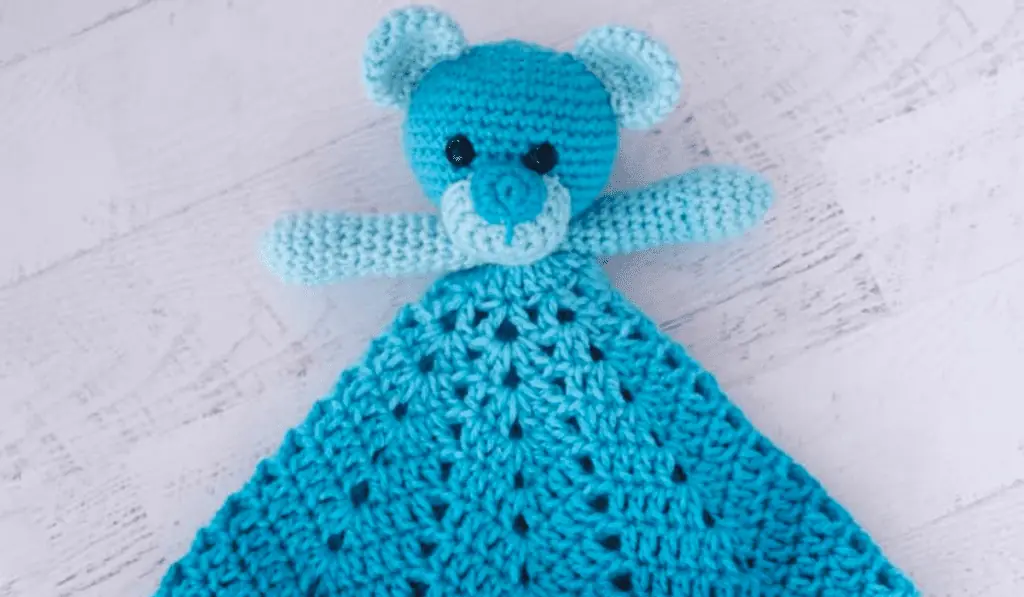
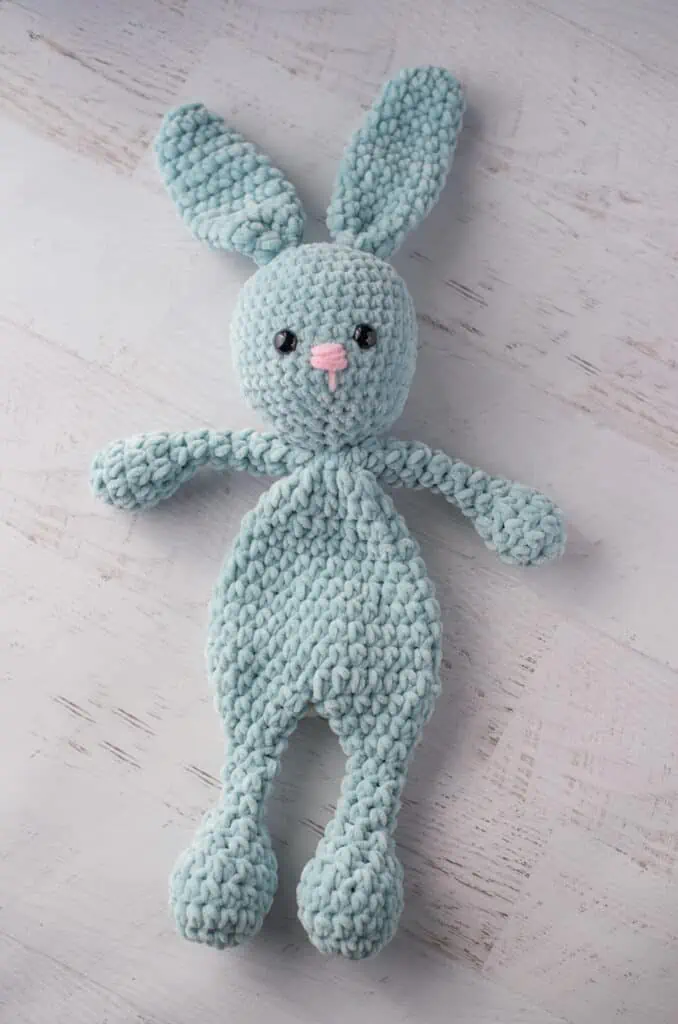
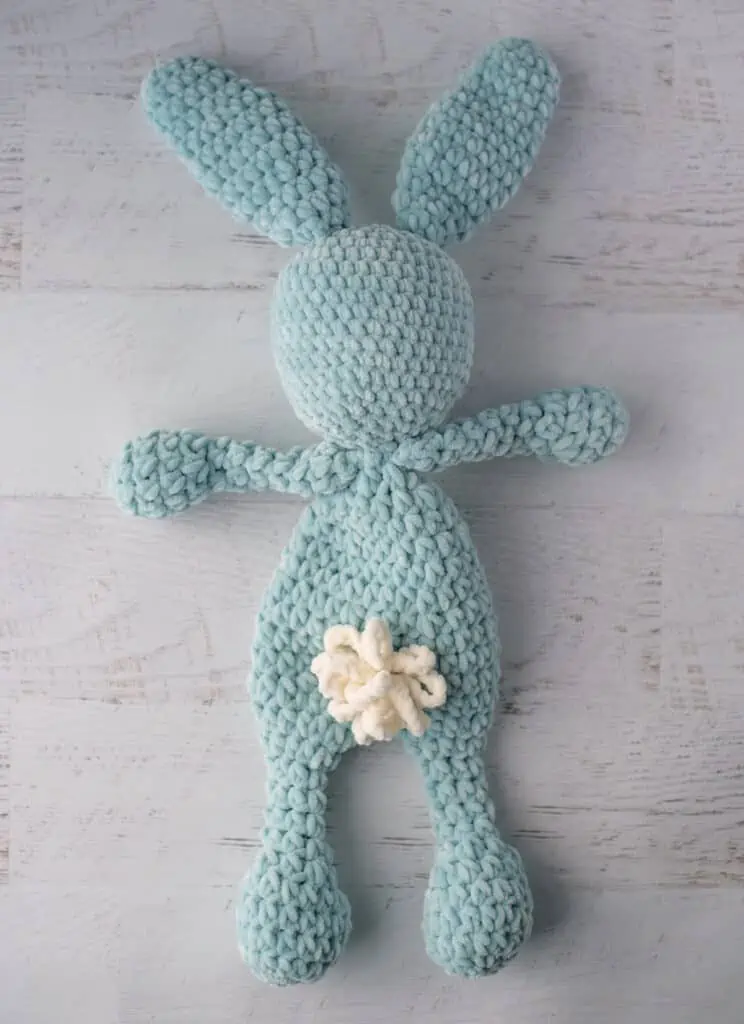
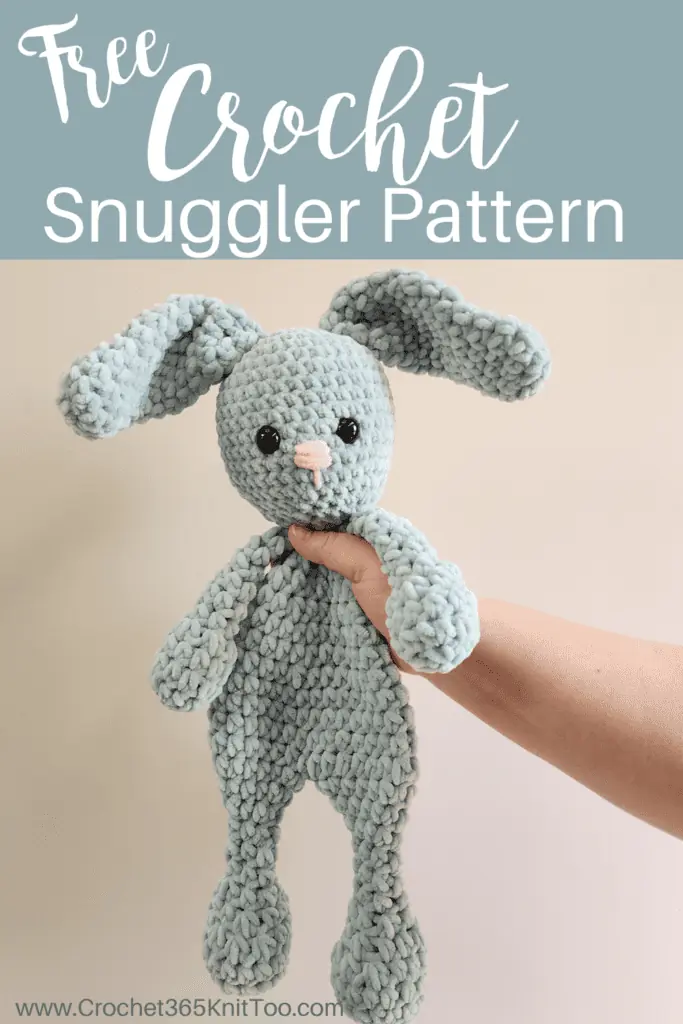
Bunny Crochet Snuggler
This post may contain referral/affiliate links. Please read my disclosure for more info.
I am completely obsessed. Obsessed with this squishy, delectable bit of goodness. This darling Bunny Crochet Snuggler!
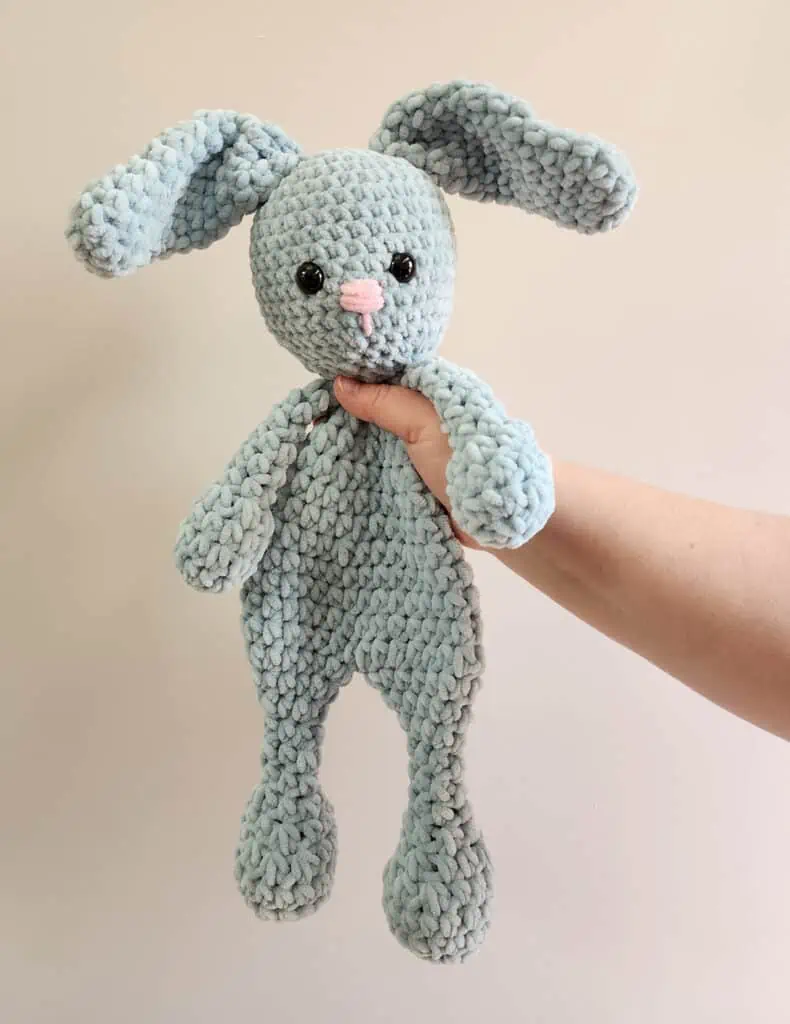
Meet Buggy, the very first in my series of Crochet Snuggler Patterns!
Remember when I made my amigurumi heart with chenille yarn and I told you I didn’t think my life would ever be the same. I was not even kidding.
I’ve fallen head over heels with Premier Parfait Chunky chenille yarn. Premier Parfait Chunky is a #6 super bulky weight yarn which means quick projects and unbelievable squishy goodness.
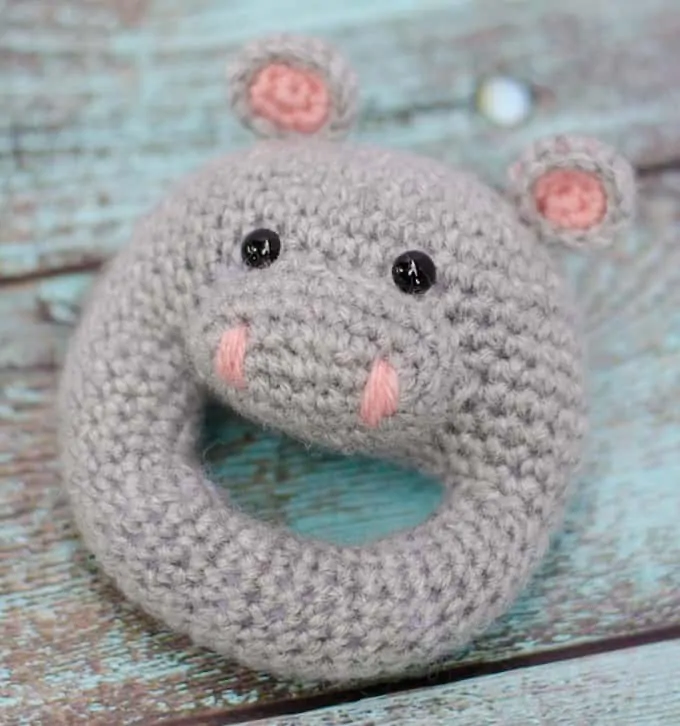
It makes me so happy to design adorable things with this yarn. In fact, I may have even designed a whole SLEW of crochet snuggler patterns… like this cutie pie crochet bear snuggler!
I told you I was obsessed!
My daughter in law, the queen of all things fun and squish able named this little cutie “Buggy”. I think it’s perfect!
So let’s talk details for our little Buggy Crochet Snuggler!
First up.. what exactly IS a snuggler?! I’ve been watching this trend grow for a few years and I’ve finally decided to design my own. They are part amigurumi and part lovey. Typically the head, feet and hands are stuffed, but the rest of the Snuggler remains unstuffed.
I love using the chenille bulky weight yarn because the project goes fast and you have a velvety snuggle buddy in an evening or two! You could try a different chunky yarn but I’ve found that gauge really does change a lot when you switch yarns. Bernat blanket yarn, for instance is much thicker.
I really love the Premier Parfait Chunky chenille blue yarn I used for this design. It has a soft and velvet feel, but you can still easily see your stitches, which makes it such a joy to crochet with.
Because we’re using bigger yarn we also use a bigger crochet hook. We’re using two crochet hooks. The 8.0 mm larger crochet hook is used for the arms, legs and body and the smaller 6.5 mm hook is used for the head, ears and tail.
A crochet snuggler (also called a crochet cuddler) makes an inseparable friend, perfect for a kid gift. If you want to make a cuddly friend for a baby shower gift or even a toddler gift, be sure to embroider or crochet eyes instead of using safety eyes (as they can be a choking hazard for very young children).
Purchase the Beautifully Formatted AD-FREE PDF DOWNLOAD
More Baby Patterns
If you love the crochet snuggler pattern, you might also like to check out these darling patterns:
Bunny Crochet Snuggler
Here is what you will need:
- US L 11/8.00 mm crochet hook and US K 10.5/6.50 mm crochet hook (these are my absolute favorite crochet hooks I recommend to everyone!).
- Super Bulky Weight #6 yarn:
- Main: 3.5 oz, sample used Premier Parfait Chunky in RainTail: 5.5 yards white, sample used Premier Parfait Chunky in Cream
- Nose: 1 yard pink, sample used Premier Parfait Chunky in Ballet Pink
- 15mm Safety Eyes (Note: if making for a baby or young child, embroider eyes instead)
- Stitch Markers to keep track of rows and to mark center top of feet
- Polyester Fiberfill
- Tapestry needle and scissors
Gauge: Using the smaller, 6.50 mm hook, my gauge is 5.5 sc to 2 inches. However, gauge is not important in this pattern. You may use other weights of yarn. Adjust hook size to fit your needs.
Note: Use a stitch marker to mark the last stitch of each round as you work, moving the stitch marker as you work each round.
Resources and tutorials you may find helpful in following this pattern: Crochet Abbreviations, US to UK Crochet Conversion Chart. Find links to stitches on the “Tutorial” menu: Getting Started will show basic stitches such as the single crochet, double crochet and chain stitch used in many patterns and Crochet Stitch Dictionary shows our growing collection of crochet stitch tutorials.
Crochet Abbreviations:
- ch = chain
- sc = single crochet
- hdc = half double crochet
- sl st = slip stitch
- st = stitch(es)
Special Stitches:
Half Double Crochet 2 Together (hdc 2 tog): I use a modified half double crochet decrease in this pattern. Complete the stitch as follows: Yarn over, insert hook into next stitch and pull up a loop, insert stitch into next stitch and pull up a loop, Yarn over and pull through all 4 loops on hook. Half double crochet decrease made.
Finished Crochet Snuggler Size
Bunny Crochet Snuggler shown measures 16-1/2” from bottom of feet to top of head (excluding ears)
If you’re looking to learn how to make the best amigurumi, be sure to check out my Amigurumi: A Beginner’s Guide. It’s a massive 165 page ebook of detailed tutorials, tips and tricks (plus exclusive patterns). You’ll learn everything you can think of from the magic ring and working in continuous rounds to invisible decreases and other pro tips. .

Legs (make 2):
Using the larger (L/8.00 mm) hook, make a magic ring.
R1: 6 sc into ring (6 sts). Work in rounds
R2: *2hdc in ea st, repeat from * around (12 st)
R3: *hdc in next 3 st, 2 hdc in next st, repeat from * around (15 st)
R4: hdc in next 5 st, (hdc 2 tog) three times, hdc in last 4 st (12 st)
Note: Use an additional stitch marker to mark around the 2nd decrease (to identify the top center of the foot)
R5: *hdc in next 2 st, (hdc 2 tog) repeat from * around (9 st)
R6: *hdc in next st, (hdc 2 tog), repeat from * around (6 st)
Stuff feet only, leaving rest of leg and body unstuffed.
R7-10: hdc around (6 st)
R11: *hdc in next st, 2 hdc in next st, repeat from * around (9 st)
R12: *hdc in next 2 st, 2 hdc in next, repeat from * around (12 st)
R13: *hdc in next 3 st, 2 hdc in next st, repeat from * around (15 st)
For first leg, at end of last round, single crochet into next stitch, slip into next stitch, then fasten off, leaving a long strand for sewing.
Repeat for 2nd leg, but do not fasten off.
Body:
In the next row, the legs are crocheted together and form the bottom of the body. Position the legs so that they are in the correct position with both feet facing forward, using the stitch markers in the top center of each foot to assist in alignment. Use an additional stitch marker to mark where the two legs meet in the middle. This stitch marker holds the center stitch from each leg to each other. Make sure that you also have a stitch marker in the last stitch worked in the leg just completed. This stitch will be the last stitch worked in this row.
R1: hdc in the next stitch of the leg just worked. Continue to half double crochet in each stitch until you reach the marker holding the 2 legs together. Work a half double crochet in the next stitch (which is the stitch holding the legs together). THEN work a half double crochet in the matching stitch on the OTHER leg. You can remove the stitch marker if you’d like. Continue to half double crochet all the way around the other leg (15 stitches on that leg). You are now at the middle of the doll on the opposite side. Half double crochet in the remaining unworked stitches on the first leg worked in this row, finishing in the stitch you marked as the end of the row. Count your stitches for this row. There should be 30 stitches in the row. If you have more or less than this, take a look at the stitches worked at the joining points and see if you’ve missed or worked an extra stitch here.
R2-4: hdc around (30 st)
R5: *hdc in next 3 st, (hdc 2 tog), repeat from * around (24 st)
Pause your work and sew up the hole between the 2 legs with the fastened off yarn left from one of the legs. Weave in ends, then continue with remainder of body as follows:
R6-7: hdc around (24 st)
R8: *hdc in next 2 st, (hdc 2 tog), repeat from * around (18 st)
R9: hdc around (18 st)
R10: *hdc in next st, (hdc 2 tog), repeat from * around (12 st)
R11: (hdc 2 tog) around (6 st)
R12: working in BLO, sc around (6 st), cut long strand, weave through ends to close.
Head:
Using the smaller (K/6.5mm) hook, make a magic ring.
R1: 6 sc into ring (6 sts). Work in rounds
R2: 2 sc in ea st (12 st)
R3: *sc in next st, 2 sc in next. Repeat from * around. (18 st)
R4: *sc in next 2 st, 2 sc in next. Repeat from * around. (24 st)
R5: sc in next st, 2 sc in next *sc in next 3 st, 2 sc in next. Repeat from * around until last 2 stitches, then sc in the next 2 st. (30 st)
R6: *sc in next 4 st, 2 sc in next. Repeat from * around. (36 st)
R7-14: sc around. (36 st)
R15: *sc in next 4 st, sc next 2 st together. Repeat from * around (30 st)
R16: *sc in next 3 st, sc next 2 st together. Repeat from * around (24 st)
R17: *sc in next 2 st, sc next 2 st together. Repeat from * around (18 st)
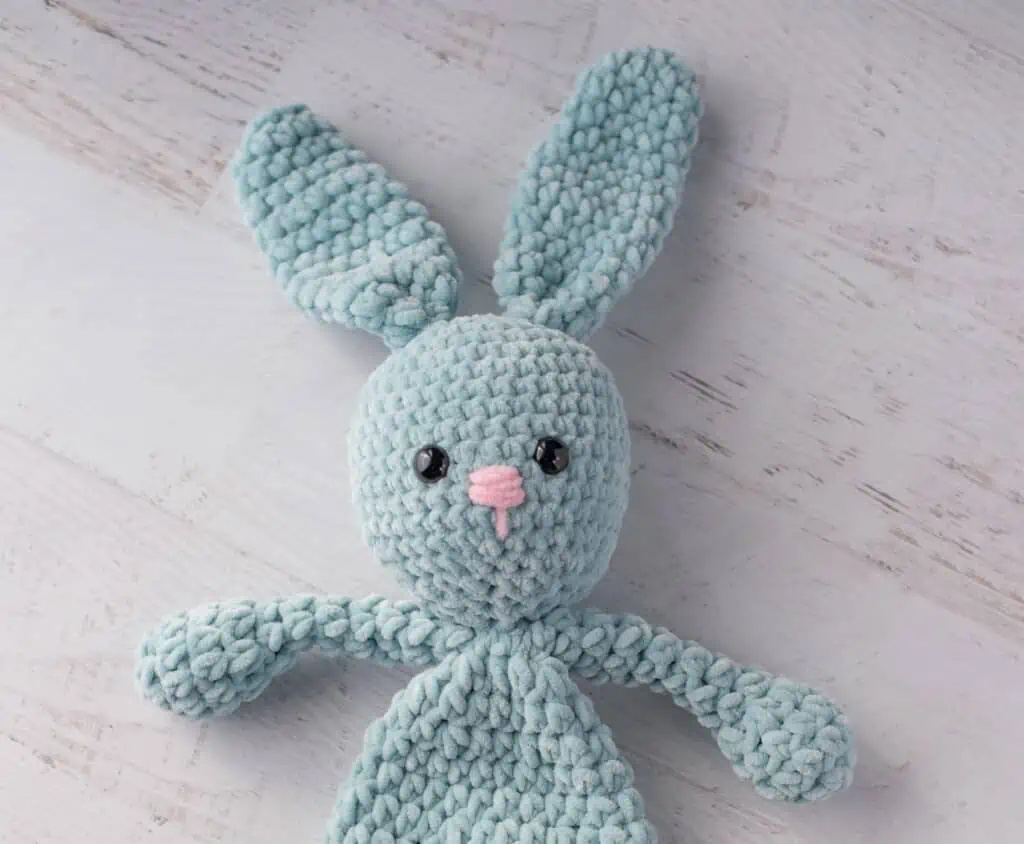
Insert safety eyes between rows 11 & 12, leaving 5 stitches in between them. Begin stuffing.
R18: *sc in next st, sc next 2 st together. Repeat from * around (12 st)
R19: *sc next 2 st together. Repeat from * around (6 st). Fasten off, leaving a long strand for finishing.
Facial Features
Using a strand of pink yarn and referring to the photo to embroider several horizontal stitches for the nose. Before fastening off, make one stitch downward from the bottom of the nose, covering a few stitches. Then fasten off.
Ears (Make 2):
Using the smaller (K/6.5mm) hook, make a magic ring.
R1: 6 sc into ring (6 sts). Work in rounds
R2: *2hdc in ea st, repeat from * around (12 st)
R3-5: hdc around (12 st)
R6: *hdc in next 3 st, 2 hdc in next st, repeat from * around (15 st)
R7-9: hdc around (15 st)
R10: *hdc in next 3 st, hdc 2 tog, repeat from * around (12 st)
R11-12: hdc around (12 st)
R13: *hdc in next 2 st, hdc 2 tog, repeat from * around (9 st)
R14: hdc around (9 st).
Then sc to next st, sl st to next stitch.
Fasten off, leaving a long strand for sewing.
Arms (make 2):
Using the larger (L/8.00 mm) hook, make a magic ring.
R1: 5 sc into ring (5 sts). Work in rounds
R2: 2 hdc in ea st (10 st)
R3-4: hdc around (10 st)
R5: (hdc 2 tog) around (5 st)
R6-12: hdc around (5)
Sc in next st, sl st to next st and fasten off leaving a long strand for finishing. Stuff hand only, leaving rest of arm unstuffed.
Tail (Loopy Pom Pom):
Using 6.5mm hook and white yarn, chain 120, then slip stitch into every 10 stitches, forming loops. Fasten off, leaving a long strand. Use strand to gather slip stitches to form a loopy pom pom. Sew Tail on bottom, centering on row 3 of body.
Snuggler Assembly
Using strand of yarn from head, position on body so that head is facing the front. Attach last row of head to the free front loops from the last round of the body. Go around the head a second time, working through all layers to sew it firmly on the body. Then fasten off and weave in ends.
Flatten the top of the arms and whip stitch closed, then fasten the arms on either side of the body near the head.
Flatten the bottom of each ear and then fold in half again and stitch through all thicknesses to close. Repeat for other ear. Then refer to photo and sew ears to top of bunny head over round 3 of head.
Look for more crochet snuggler plushie toys patterns coming your way soon! These crochet kid patterns make an adorable gift and they are so fun to crochet you might just want to keep one for yourself too!
There’s something about crocheting cute things that speaks right to my heart! Be sure to check out these free heartwarming patterns:
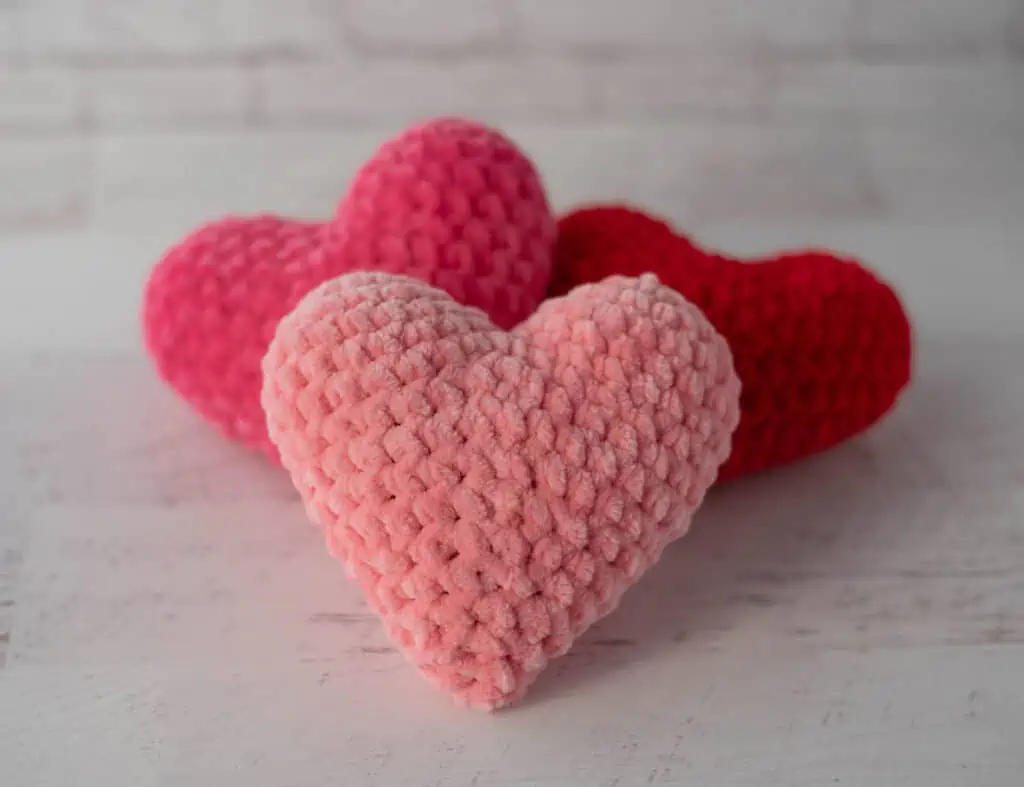
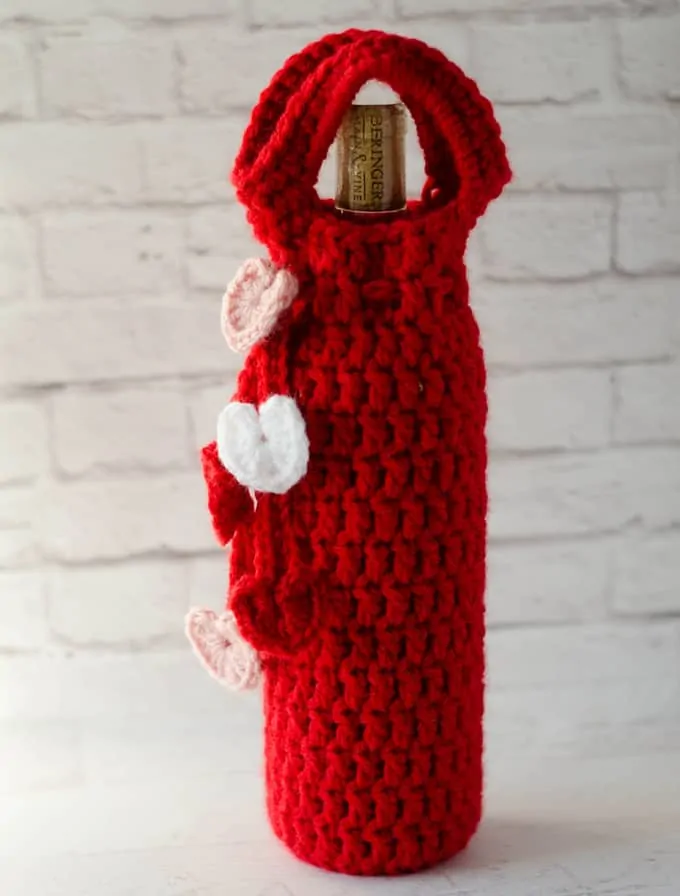
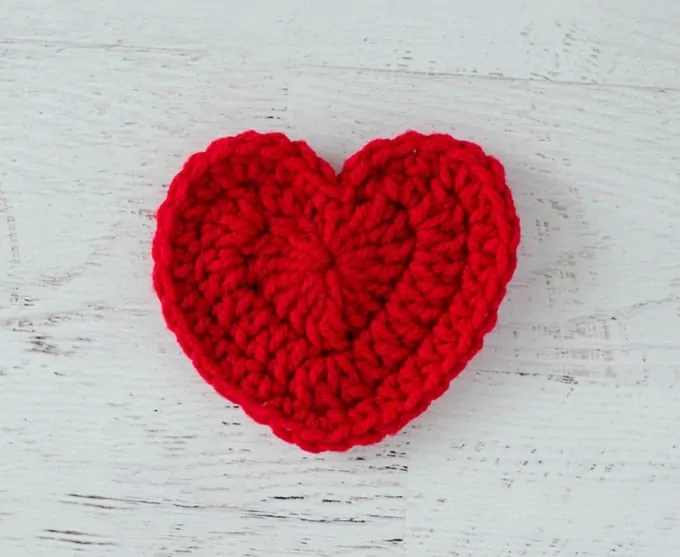
So many of you love my darling amigurumi crochet heart pattern, my valentine crochet bottle cover and the ever so popular crochet heart appliqué!
If you’re looking for a beginner friendly afghan you might love the Bespoke Bliss Blanket. Just pick out yarn in coordinating colors for a perfect gift! And if you’re looking to get into amigurumi making, my darling Laurel crochet doll is a must make!
I love seeing your finished projects! If you enjoyed making this Crochet Snuggler Bunny or any of my crochet patterns, I’d love to see yours on Instagram, be sure to tag me @crochet365knittoo. If you are on Facebook, stop over to the Crochet 365 Knit Too Facebook page or pop over to the Crochet365KnitToo Club and share a photo! I’d love to see your work!
I love this especially the loopy Pom Pom I’m making a jump suit for my nephew’s new baby that has Pom poms on but I don’t like them because they could undo easily and get into baby’s mouth I’m going to use the loopy ones for her jump suit and make this lovey also
He’s really cute, but I have a question. I’ve heard that velvet or chenille type yarns are hard to work with, and the knots tend to come undone. Did you have any issues with this brand??
I found the Premier Parfait Chunky to be really easy to work with. My biggest concern was whether I would have trouble seeing the stitches and that was no problem at all. I don’t knot my work; I weave in the ends and so far have not had trouble with them coming loose. I suppose the only “cons” I’d say is that it’s better not to rip out, if you can help it. I felt like that changed the smoothness of the yarn a little bit. Also if you tend to make a magic ring with tight stitches, it is helpful to make them a bit looser so you can properly pull the magic ring tight. But both of those issues were really minor to me and easy to work around. Overall I just love the yarn.
Tail (loopy pom pom)
I have no trouble crocheting a chain and slip stitching into every stitch. What puzzles me is “forming loops in every 10 Stitches”.. Can you possibly make the instructions clearer?
If you look at the tail it looks like a chain, cinched together to form loops. To do this, you chain and then to form the loops, you slip stitch in every 10th stitch so the “skipped stitches” form the loop of the tail.
Hope that helps.
Do you have a video for making this snuggler? I bought the yarn and I’ve always used videos.
There is no video available. You could try reading my How To Read A Crochet pattern post to get started on reading crochet patterns.
Can you clarify how much of the blue yarn you used? Is it 3.5 oz, so I only need one skein?
Yes, I used most of the 3.5 oz skein. Hope that helps!
I made the Buggy snuggler in white premier yarn. Thank you for the pattern!!
Hello: I purchased the pattern for the Bunny Crochet Snuggler. I’m stuck in the instructions on the Body section. Do you have instructions that have pictures along the way so I can understand exactly what you are referencing? For example, If I follow the instructions that say “R1: hdc in the next stitch of the leg just worked. Continue to half double crochet in each stitch until you reach the marker holding the 2 legs together.” – My understanding is that this row of stitches are at the top of the body, yet the instructions say I should be reaching the “marker holding the 2 legs together”. That area is at the bottom of the body.
All the photos I have are in the post and/or in the printed pattern. You might find it easiest to zoom in on the photo online. Basically you work the legs first and then in round 1 of the body you are connecting those 2 legs together so you can continue to stitch the body from the bottom up. I hope that helps! You can also pop into our Crochet 365 Knit Too Club on Facebook with some photos and people there will jump in to help too.
I love the pattern. Super easy to follow. I feel like my bunny comes out SOOOOOOO much larger than yours. The head is like 3 times the size. So weird. Just got a request to make two of these so we will see how this set goes.
The head is worked in single crochet whereas the body is in half double crochet. Is it possible you worked the head in a larger stitch?
I don’t have an 8mm crochet hook will a 9 work just fine?
This pattern uses 2 sizes of hooks and the gauge is based on those 2 sizes. If you increase the size of the hook for the body, it will make the body overall bigger, while keeping the head the same size (since that’s with the smaller hook). You could try it out and see what you think, but for best results I would use the recommended sizes.
How do you keep stuffing in hands and feet? Won’t it eventually shift out of hands and feet?
The stuffing stays in the feet and hands for a few reasons. First the feet and hands are slightly bigger than the limbs. Second the crochet actually helps hold it in place, assuming you stuff it enough. It won’t shift out of the feet and limbs on its own.
Thank you for sharing your patterns. Love the bunny smuggler. My sister in laws daughter is expecting in the spring. This will be a great gift for baby .❤️
I’ve tried 3 different chenille yarns and they “wormed”. Is this yarn “wormy” ? Getting part way through a project and finding random loops that have loosened out is the worst!
Chenille yarn can be challenging. I haven’t tried all the different kinds of chenille yarn, so I’m not sure how Premier Parfait is in comparison. What I’ve found is that if I’m just crocheting and weaving in the ends, it is fine. If I need to rip it out it can sometimes do that worming you described, especially if the stitches are tight. Crocheting with chenille yarn isn’t for everyone; my best suggestion is to give it a try and see what you think. The finished projects are so cute so you might find it all worthwhile!
Thank you so much for sharing your pattern. It is one of the most well written patterns, easy to understand. It went together seamlessly. The bunny tail is a very creative detail that takes it to next level cuteness! And so much easier to me than a pompom that falls apart.. love it!
I am working on making three of this pattern for my three great grandchildren! Love it! Can’t wait to see a new pattern in this yarn for one that is a litter older.The pattern is so easy to follow.
Gosh golly this is darling! I’m making two(one as a “backup”) for my 1st grandbaby due in November. Your pattern is well written and easy to understand. Thank you for sharing it with the world!
Hi Cheryl, I love all your patterns and thank you for sharing them. I’m currently working on your bunny snuggler and have a question. I sewed the head to body and wanted to know if it’s normal for the head to flop back and forth from the body? Do I sew more stitches from the head to body to keep it more secure? I feel right now the head is secure but flops. Please help. Thank you
It is normal for the head to be floppy. The lovey is meant to be like a squishy blanket with a few amigurumi elements. Hope that helps!
I have one question. When you stuff the feet and head, does the stuffing ever migrate out into the limbs, body?
In my experience, the stuffing stays in the head and body. The small opening and the texture of the yarn helps with that.
Thank you for sharing this pattern. It is adorable.
I’m having a bit of trouble understanding how to make the body off the feet.
Check out my post on joining Amigurumi Limbs. I that will help you understand the overall process a bit better.