
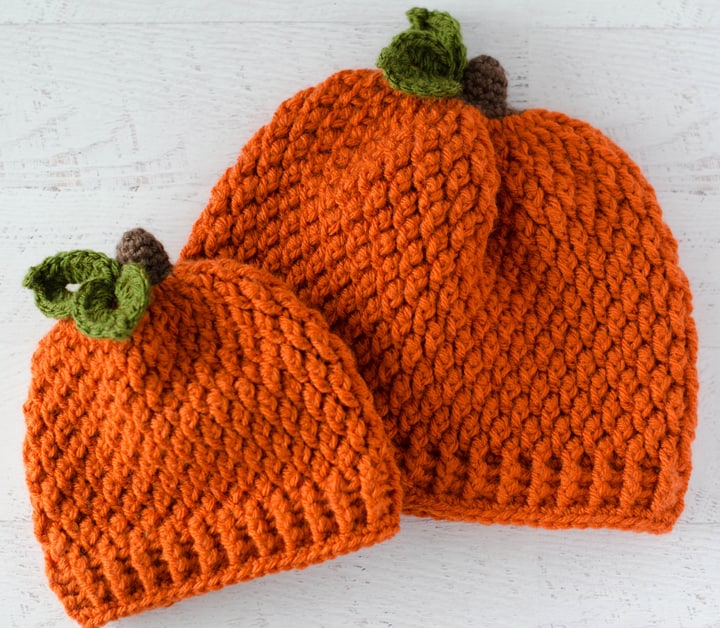
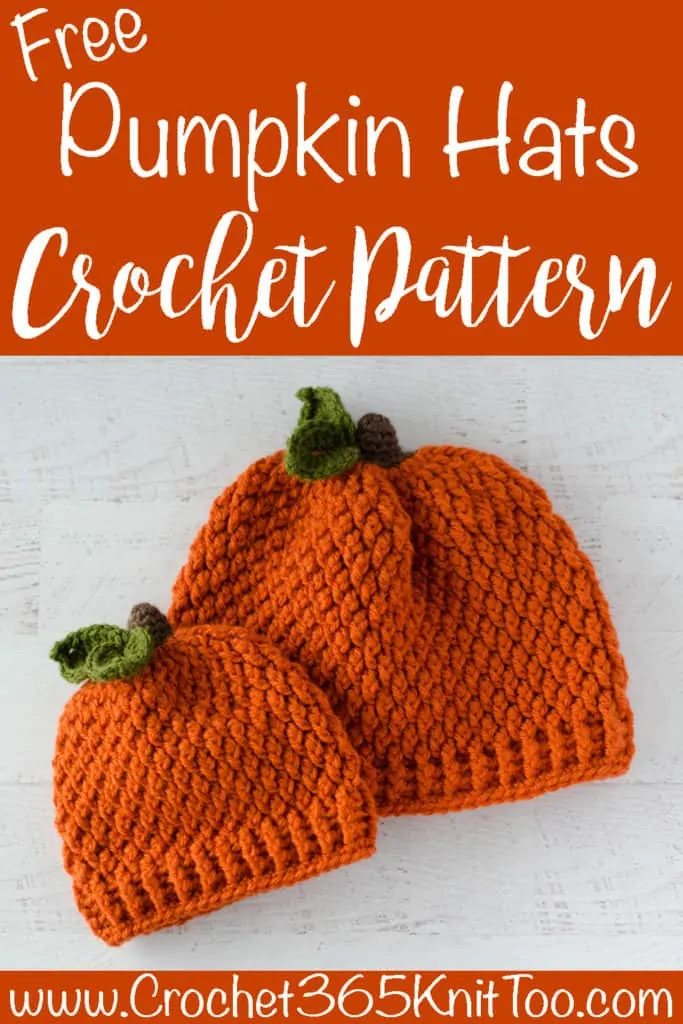
Crochet Pumpkin Hat in All Sizes
This post may contain referral/affiliate links. Please read my disclosure for more info.
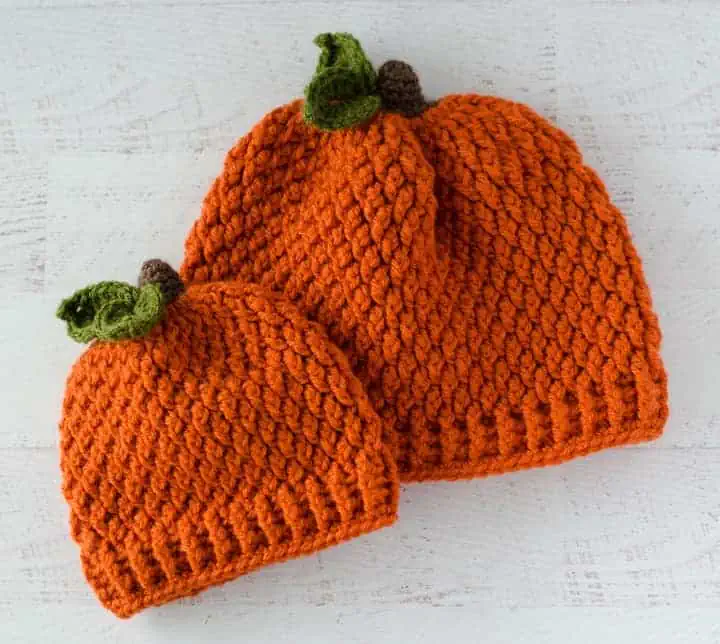
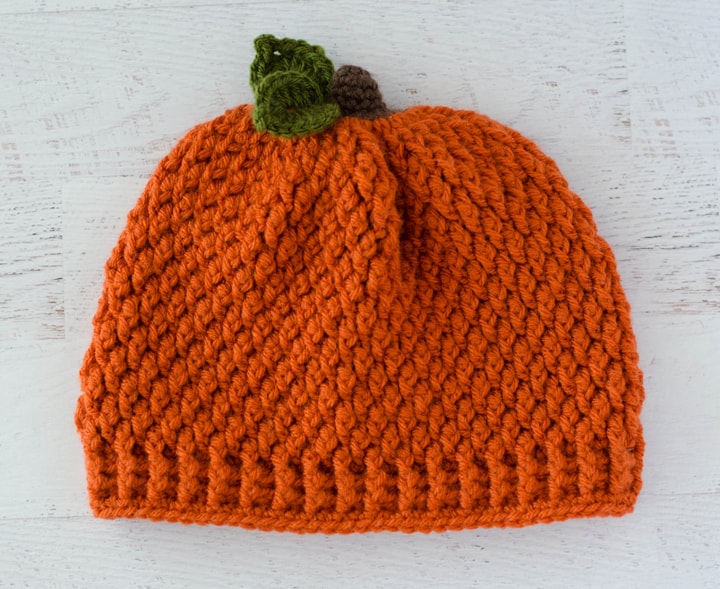
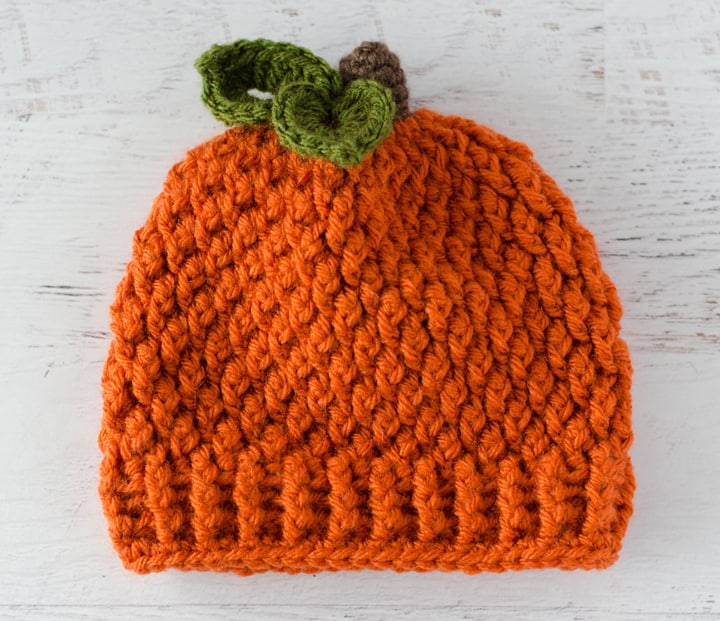
What do you get when you combine texture, cozy and a burst of fall color? Why, a crochet pumpkin hat, of course!
Let me tell you why I love this pumpkin hat (and you will too).
First up.. here in Michigan, we don’t mess around. Our winters are cold and sometimes our autumns are as well. One day it’s sunny skies and beautiful fall leaves and the next it’s snow and frigid temperatures. So when it comes to cold weather hats, I like ’em warm and cozy!
The stitch on this hat is a modified Alpine stitch. The Alpine stitch alternates front post double crochets with a normal double crochet and then offsets the next time around. Because we are working in joined rounds (and not going back and forth), we’re able to work this stitch alternating the post stitch every row, creating this amazing texture!
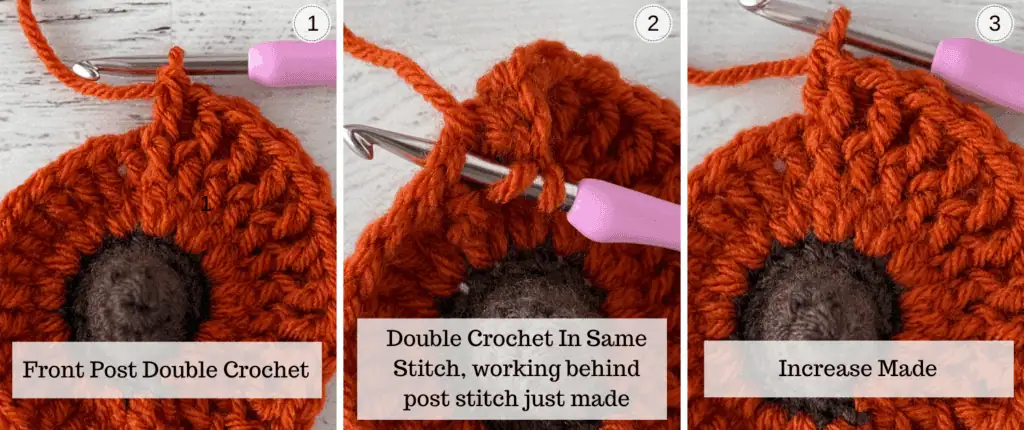
I also worked a little wizardry with the increases in row 9 so that you increase in every stitch in a unique way. First you work a front post double crochet around the next stitch. THEN you work a double crochet like normal into the same stitch. That sets up the texture perfectly for the rest of the hat! And it gives the effect of the texture from the top right down to the ribbing–which I just love!
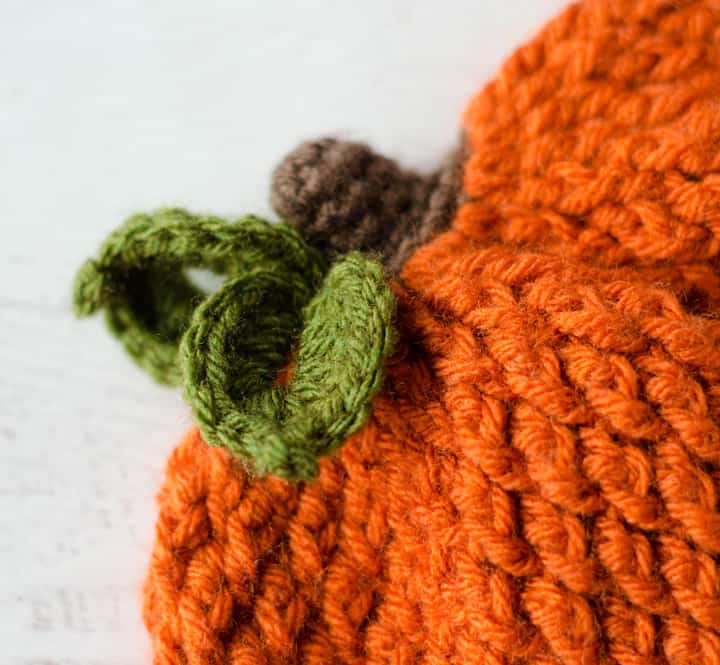
And then top off that little stem with the cutie pie leaves from the crochet pumpkin…and sigh… deliciousness in a hat, I tell you!
One more thing before we dig in… I really wanted to offer a lot of sizes so you could make a hat for everyone on your wish list. Know that you might find your hat measurement a little more or less when it comes time to measure before starting the ribbing. Don’t worry about this! The hat is very stretchy and very forgiving.
Get the measurement as close as you can and then if you need to add a row or two in the ribbing area, it will be just fine. You also don’t have to worry too much about guessing the right size hat for your little one. This is the kind of hat that will last through a few growth spurts and still look amazing.
Ready to crochet? Let’s go!
Crochet Pumpkin Hats
Materials:
- Lion Brand Vanna’s Choice, size 4 worsted weight, 100% acrylic, 170 yds/156m per 3.5 oz/100g skein
- 1 skein Terra Cotta color, 2-3.25 oz used per hat
- Scraps of green and brown for leaves and stem
- US G6/4mm and H8/5mm crochet hooks
- Tapestry needle and scissors
Resources and tutorials you may find helpful in following this pattern: Crochet Abbreviations, US to UK Crochet Conversion Chart. Find links to stitches on the “Tutorial” menu: Getting Started will show basic stitches used in many patterns and Crochet Stitch Dictionary shows our growing collection of crochet stitch tutorials.
Pumkin Hat Sizes:
Sizes listed as Adult (3-6m, 6-12m, 12-24m) (toddler, child, teen)
Circumference 22 (14.5, 16, 17) (18, 19.5, 21)” around
Height 8.5 (6, 6.25, 6.5) (7.5, 8, 8)” tall
Crochet Abbreviations:
- ch = chain
- hdc = half double crochet
- dc = double crochet
- FPDC = front post double crochet
- FPHDC = front post half double crochet
- BPHDC = back post half double crochet
- sc = single crochet
- sl st = slip stitch
- st = stitch(es)
- picot = ch 3, sl st in third ch from hook
Pattern Notes:
Hats are worked top down starting at the top of the stem. They are very stretchy and forgiving. If you find it difficult to get to the length before starting the ribbing, go a little bit short and add row(s) of ribbing to get to the correct size.
Pattern is written for Adult size with smaller sizes listed in parentheses as (3-6 months, 6-12 months, 12-24 months) (Toddler, Child, Teen). When one number or one set of instructions is listed, it applies to all sizes. Where needed, separate instructions will be written for certain sizes. Please pay attention to which size you are working, if necessary, circle or highlight your size before starting.
Please note how the starting chain is handled in each row. Sometimes it counts as a stitch and other times it does not. A stitch marker comes in handy to keep track of the first stitch in the row.
This pattern features stitches that increase the hat quickly. It is normal for the hat to look a bit ruffled at first, but it will resolve as you continue to work the hat.
In some rows, you increase by working a front post double crochet stitch around the post of the indicated stitch and also work a double crochet into the same stitch (as a normal double crochet). Here is a photo of how that process works:
Pumpkin Hat Stem:
Stem Notes: All sizes follow the same basic instructions for the stem. The adult size starts with 9 sts, all the remaining sizes start with 6 sts then increase to 9 sts in round 2. All sizes work up to 5 rounds then increase in Round 6. For Round 6, follow instructions specific for your size, then proceed to pumpkin instructions.
Adult Size Only:
Using smaller (G/4mm) hook and brown yarn, make a magic ring. Note that the stem is worked in continuous rounds.
R1: 9 sc into ring. (9 st)
R2-5: Sc around. (9 st)
R6: 2 sc in ea st around. At end of round sl st to next st, changing to orange in last stitch (and changing to larger hook for next round). Fasten off brown yarn, leaving a strand to weave in later. (18 st)
Sizes – (3-6m, 6-12m, 12-24m) (Toddler, Child, Teen) Only:
Using smaller (G/4mm) hook and brown yarn, make a magic ring. Note that the stem is worked in continuous rounds.
R1: 6 sc into ring. (6 st)
R2: *Sc in next st, 2 sc in next, repeat from * around. (9 st)
R3-5: Sc around. (9 st)
Size 3-6m Only:
R6: *Sc in next 2 st, 2 sc in next. Repeat from * around. At end of round sl st to next st, changing to orange in last stitch (and changing to larger hook for next round). Fasten off brown yarn, leaving a strand to weave in later. (12 st)
Size 6-12m Only:
R6: Sc in next st, 2 sc in each of next 2 sts, *sc in next 2 sts, 2 sc in next. Repeat from * once. At end of round sl st to next st, changing to orange in last stitch (and changing to larger hook for next round). Fasten off brown yarn, leaving a strand to weave in later. (13 st)
Size 12-24m Only:
R6: *Sc in next st, 2 sc in each of next 2 st.* Repeat from * to * once, then sc in next 2 sts, 2 sc in next. At end of round sl st to next st, changing to orange in last stitch (and changing to larger hook for next round). Fasten off brown yarn, leaving a strand to weave in later. (14 st).
Size Toddler Only:
R6: *Sc in next st, 2 sc in each of next 2 st.* Repeat from * to * twice. At end of round sl st to next st, changing to orange in last stitch (and changing to larger hook for next round). Fasten off brown yarn, leaving a strand to weave in later. (15 st)
Size Child Only
R6: *Sc in next st, 2 sc in each of next 2 st. Repeat from * once. 2 sc in each of the next 3 sts. At end of round sl st to next st, changing to orange in last stitch (and changing to larger hook for next round). Fasten off brown yarn, leaving a strand to weave in later. (16 st)
Size Teen Only
R6: Sc in next st, then 2 sc in each of the remaining stitches. At end of round sl st to next st, changing to orange in last stitch (and changing to larger hook for next round). Fasten off brown yarn, leaving a strand to weave in later. (17 st)
Pumpkin (All Sizes):
Using larger (H/5mm) hook and orange yarn:
R7: Ch 2 (does NOT count as hdc), 2 hdc in ea st around. Join with sl st to 1st stitch in row. (36 (24, 26, 28) (30, 32, 34) sts)
R8: Ch 3 (counts as 1st st here and throughout pumpkin section), FPDC around ea st. Join with sl st to top of starting chain.
In the next round, increase in every stitch by first working a front post double crochet over the next stitch, then working a dc in the top of the same stitch just worked.
R9: Ch 1, FPDC around ch-3 from previous round, dc in top of starting ch, *FPDC around next st, dc in top of same stitch. Repeat from * around. Slip stitch to top of 1st stitch. (72 (48, 52, 56) (60, 64, 68) sts)
R10: Ch 3, *FPDC around next st, dc in next st. Repeat from * around ending with a FPDC. Sl st to top of starting chain 3.
R11: Ch 1, FPDC around ch-3 from previous round, dc in next st, *FPDC around next st, dc in top of nextstitch. Repeat from * around. Slip stitch to top 1st stitch.
Repeat rows 10 & 11 until hat measures 7.5 (5, 5.25, 5.5) (6.5, 7, 7)” (ending with row 11). Measure height starting between rows 4 & 5 to bottom of work. Then, follow directions for ribbing and leaves.
Ribbing (All Sizes):
Ribbing is worked in front and back post HALF double crochet stitches. Note: If you find your hat needs to be a little bit longer, just repeat row 2 until you reach the desired length.
R1: Ch 2 (counts as 1st st throughout ribbing), *FPHDC around next st from previous round, BPHDC around next st. Repeat from * around. Sl st to top of 1st st.
R2-3: Ch 2, *FPHDC around next st, BPHDC around next st. Repeat from * around. Sl st to top of 1st st.
R4: Ch 1, sc in same st as joining, sc around. Join with sl st to 1st st and fasten off. Weave in ends.
Leaf (all sizes):
Samples used larger hook (H/5mm). However, you may use the smaller hook (G/4mm) if you desire smaller leaves.
Picot: ch 3, sl st in third ch from hook
Chain 8 and join to form ring.
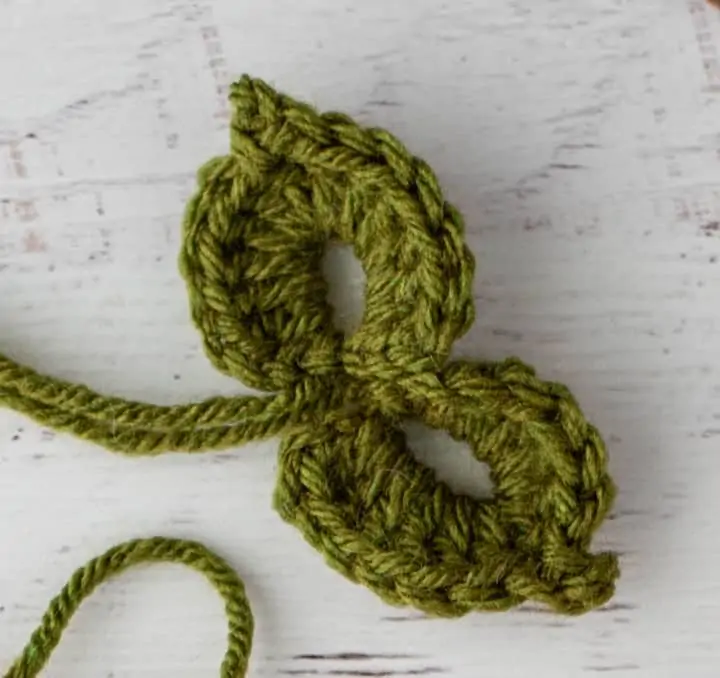
Leaf 1: Ch 2, work (6 dc, picot, 6 dc, ch 2, sl st) in ch-8 loop. First leaf made. Do NOT fasten off.
Leaf 2: Ch 8, sl st to 8th ch from hook, repeat instructions for Leaf 1 in this second ch-8 loop.
Sew the leaves in place on top of the pumpkin at base of stem. Weave in ends.

MORE CROCHET PUMPKIN PATTERNS
If you love the this darling pumpkin hat crochet pattern, you might also like to check out these other pumpkin patterns. You can find all our Home Decor Patterns here.
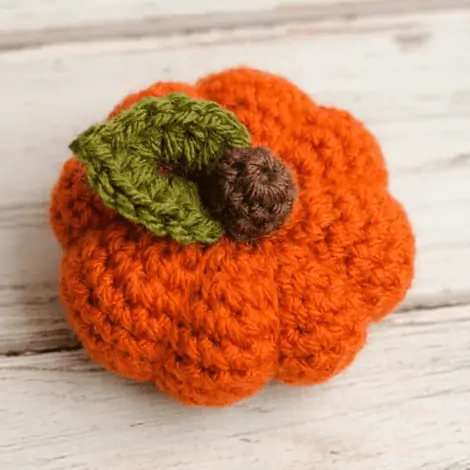
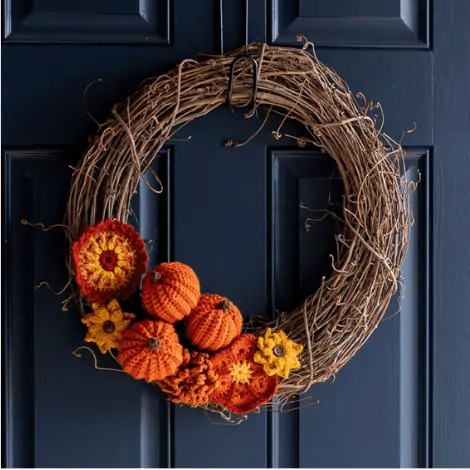
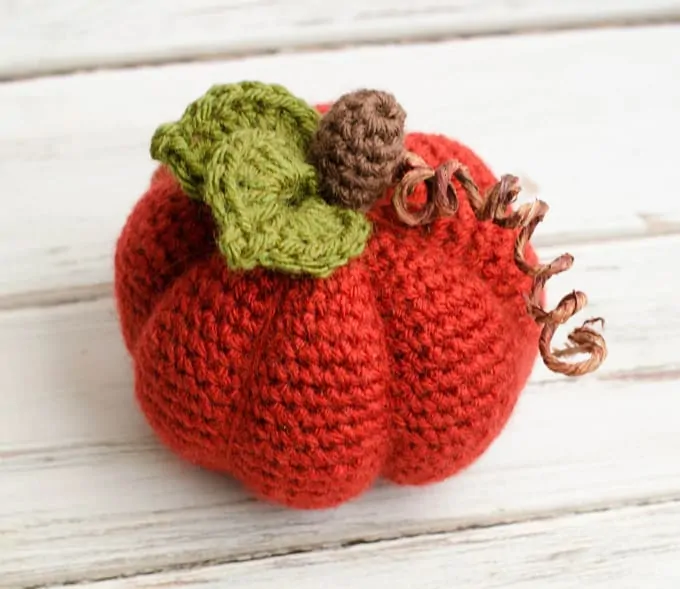
Small Crochet Pumpkin Pattern // Crochet Wreath // Medium Crochet Pumpkin
Explore Even More Crochet Patterns
Do you love crochet as much as I do? I think you’re going to love these other fun crochet patterns:
- Crochet Candy Corn
- Crochet Pumpkin Rattle
- Crochet Cat Sweater
- Crochet Sock Monkey Hat
- Fall Crochet Patterns Collection
- Crochet Fall Decor Collection
I love seeing your finished projects! If you enjoyed making the Crochet Pumpkin Hat I’d love to see yours on Instagram, be sure to tag me @crochet365knittoo. If you are on Facebook, stop over to the Crochet 365 Knit Too Facebook page or pop over to the Crochet365KnitToo Club and share a photo! I’d love to see your work!
Hi Cheryl!
This pumpkin beanie is absolutely amazingly adorable!
I’ll certainly be making one!
Thanks for sharing your crochet goodness and incredible inspiration!
Thank you for the pumpkin hat patterns!! They come just intime for me to make my grandson, wifey and son hats to celebrate the upcoming new “little pumpkin” at their baby shower! She is due end of Nov, early Dec. <3
How lovely!
Is there a step missing in the patterns? I’m making the child-sized hat, and I couldn’t get mine to look like yours unless I turned my work at the beginning of round 8.
The hat is worked with the right side facing at all times for all sizes. The first row of post stitches CAN look odd. But it looks more “normal” as you work the subsequent rows.
Would the teen size work for a 12 year old?
I would think so, and then they could grow into it too! Best of luck!
Hi! I was wondering if at the end of each round in the pumpkin section if you join then turn or if you just work in the round all the way. Thank you!
In the pumpkin portion, you join but do not turn. The end of the row directions in that section direct you to join with a slip stitch. Hope that helps.
Hi there! I really can’t make any sense of the instruction to “increase in every stitch by first working a front post double crochet over the next stitch, then working a dc in the top of the same stitch just worked.” Is there any way you can provide a picture of what this step is supposed to look like? I’m pretty sure I’m doing it wrong.
So normally when increasing into a stitch you would work 2 stitches into the top of the stitch on the row before. With me so far? In this pattern instead of doing THAT, you first work AROUND the post of the designated stitch (one stitch worked), then you go back and work a SECOND double crochet into the top of the stitch (like normal). This gives you 2 stitches–just increased in a different way. It looks really, really odd at first because you are increasing so fast.. but it looks more normal as you get several rows into the pattern.
I’m on Row 11 of the teen size and when I completed the next round of Row 10 again, I had 70 stitches instead of the listed 68. Is this correct? Should the number increase or am I going crazy?
For the teen size, row 11 should have the same # of stitches (68) as row 10. You likely accidentally increased at the beginning or end of the row. Hope that helps!
If you’d like a pattern smaller than the smallest size available, you could try using a smaller hook to get a smaller gauge. Hope that helps.
Thanks for sharing this pattern! I make hat to donate for charities and this is adorable! I was wondering what I should change to make new born size?
The smallest size is 3-6 months. I would make this size and the child could grow into it, or alternatively, adjust your hook or tension to make it a bit smaller.
Hi! I was wondering if the stitch count is off some how. It says to add a chain that counts as a stitch and add a double crochet as well, the fpdc each 36 stitches which would make 74 instead of 72 stitches. Are you supposed to skip stitches?
In the previous round the dc counts as one of the stitches, leaving 36 stitches in that row. In the next row, you essentially work a stitch around the stitch in the previous row AND on top of it, which doubles the number of stitches, going from 36 to 72. Hope that helps.
You are so kind and helpful. Thank you for the lovely pattern and pictures. I am going to get the ad free version and make for my grand-daughters. Thanks again!
I have crocheted 7 of these for babies and they are adorable!
I am now crocheting the adult size and it definitely is not working out. I’m wondering if anyone else has worked the adult size and how it worked out.
Hi! I have made this whole hat and I love it! But I’m confused on the leaves for some reason. Is there any way to show me pictures or something? I’m confused where all of the 6 DC fit. I think I just need maybe something more specific explained
Each leaf is worked by making a chain loop and then working several stitches of varying heights into and around that chain. There is a close up photo of the leaves on the Plaid Pumpkin. Perhaps taking a look at that will help you to see how it is done.
Hey!
I loved making this hat and wanted to know if I would be allowed to sale my finished hats from this design, if I give you credit for the pattern on my post and labels?
As long as you don’t sell or reproduce the written pattern, you are welcome to use any of the free or paid Crochet 365 Knit Too patterns to make items to sell. Please include a link to the free pattern with credit for the design on any online listing. If you are selling at a fair or retail shop, just note this information on the tag. Thank you!
This hat is precious and I had fun making it! I just finished making my first one for my 3 month old using the 6-12 month size. Unfortunately, it didn’t fit. The stitches have a lot of tension when he wears it and would definitely need a larger size. Thing is, his head circumference is average and my tension wasn’t tight. I’ll definitely be making another one though! It’s too cute to not replace.
The pumpkin hat is definitely a cute hat pattern and I’m glad to hear you like it! The finished size for the 6-12 month size is 16” around and 6.25” long. If your hat measured smaller than this, then you are crocheting at a tighter gauge than I did. You can either go up a hook size or two, or try a bigger size hat. Hope that helps.
Hello. Thank you for this pattern, but I think I may be don’t something wrong. I am alternating FPDC and then DC as instructed, but I’m not getting the same pattern look as yours. Not sure where I’m going wrong. I’ve frogged a few times. Thank you.
It does take a few rows for the pattern to be visible. Once you get into the main part of the hat, you essentially are working post stitches around the prior row’s double crochets and vice versa. The rows start slightly differently so you get this effect. You can also pop over to our Facebook group and post a picture there and people can help identify if something is going wrong.
Ok having hard time with the leaves…would you maybe link a video or explain another way?
The leaves are formed by working several different sized stitches into a chain loop. The different sized stitches make the shape of the leaf So you simply chain, join (this forms the loop). Then work the stitches indicated into the loop. Hope that helps.
Just finished making this pattern today, I really love how my hat turned out! Thank you for the pattern 🙂
So glad you enjoyed it!
I also feel like the patterns run small. I just make the next size bigger than what I think I need. I also add a little pumpkin tendril next to 1 leaf. So cute! Love this pattern! I made one last yr for a friend and just finished my 2nd today for a friend’s grandbaby!
Everyone’s gauge can be a little bit different. If you’re finding the pattern is working up a bit small, the easiest solution is to go up a hook size. Glad you’re enjoying make these cute hats!
Is this pattern in US or UK stitches?
Thanks
All my patterns are in US terminology.
I ❤️ this pattern. I have made several of the pumpkin hats. I also use this pattern minus the stem and leaves for cozy hats that fit well. Thank you.
I love that idea! So fun! Glad you enjoyed the pattern!
Thank you so much for sharing this pattern! I just finished the hat for my grandson and it turned out super cute!
I am new to crochet and do not understand the asterisks (*) in the pattern. For example, what is this statement instructing me to do ” Repeat from * to * once”?
You would go back to the asterisks and repeat that part of the pattern. You can find a very helpful guide to understanding written crochet patterns here.
Does each row (10 & 11) increase in stitches or should they remain the same number of stitches as row 9?
Row 9 is the last row of increasing. From there on out you are working in the pattern of rows 10 & 11 until you get to the measurement indicated for the size you’re making.
Are we able to sell the finished product? I can link the pattern and give credit of course!
As long as you don’t sell or reproduce the written pattern, you are welcome to use any of the free or paid Crochet 365 Knit Too patterns to make items to sell. Please include a link to the free pattern with credit for the design on any online listing. If you are selling at a fair or retail shop, just note this information on the tag.