
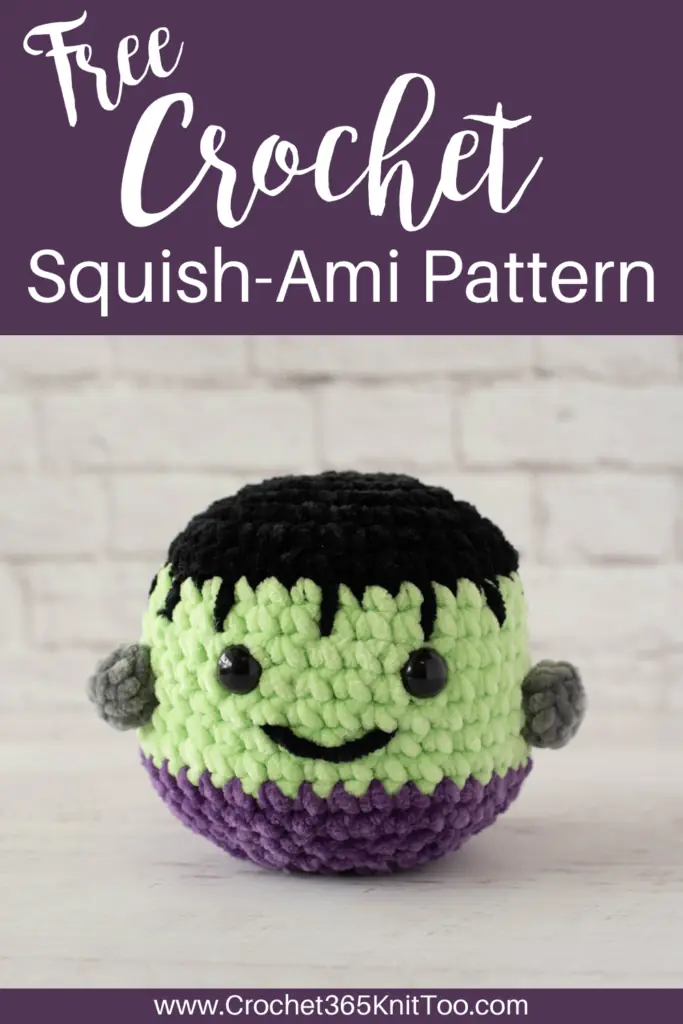
Frankenstein Crochet Squish Ami
This post may contain referral/affiliate links. Please read my disclosure for more info.
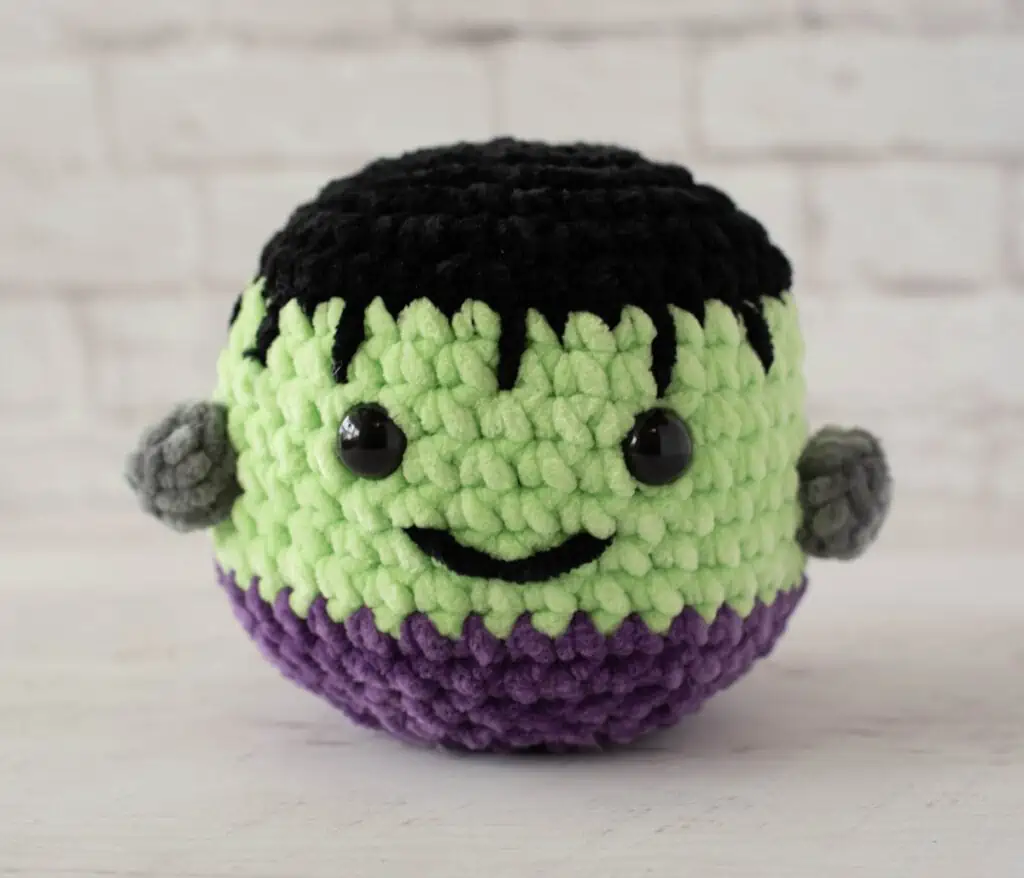
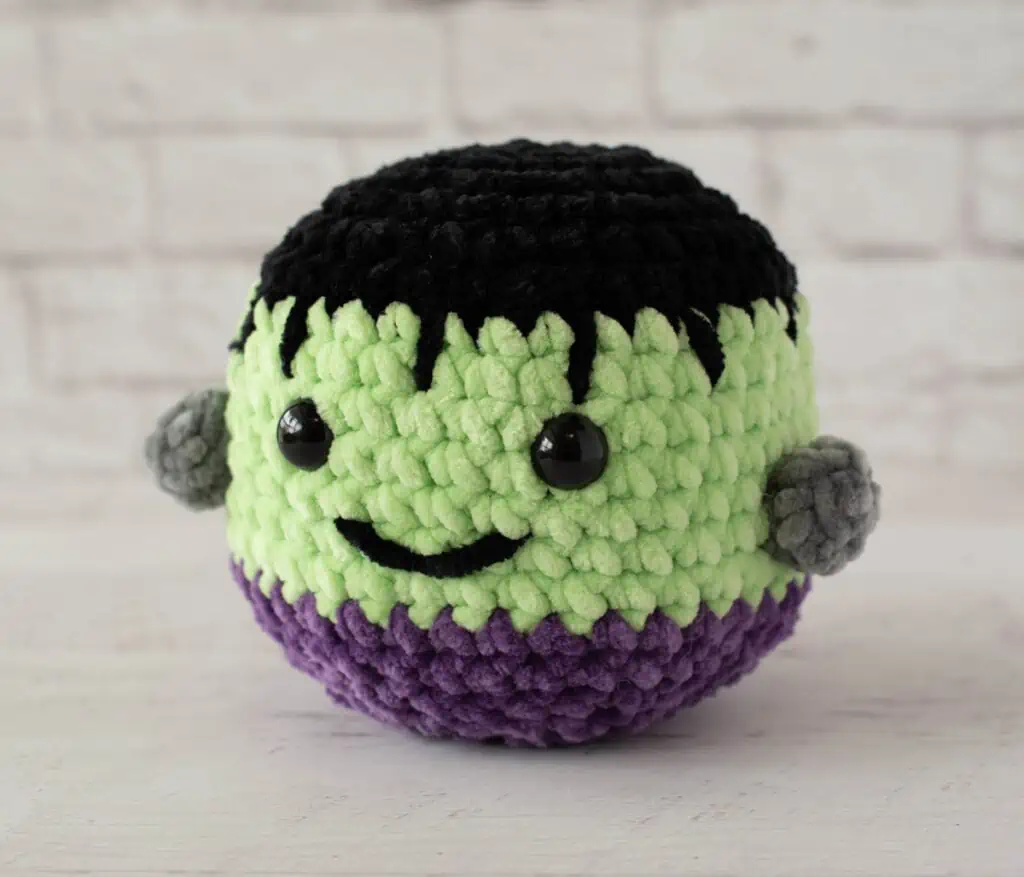
Be still my little Halloween heart, because this darling Frankenstein crochet squish-ami just entered my life!
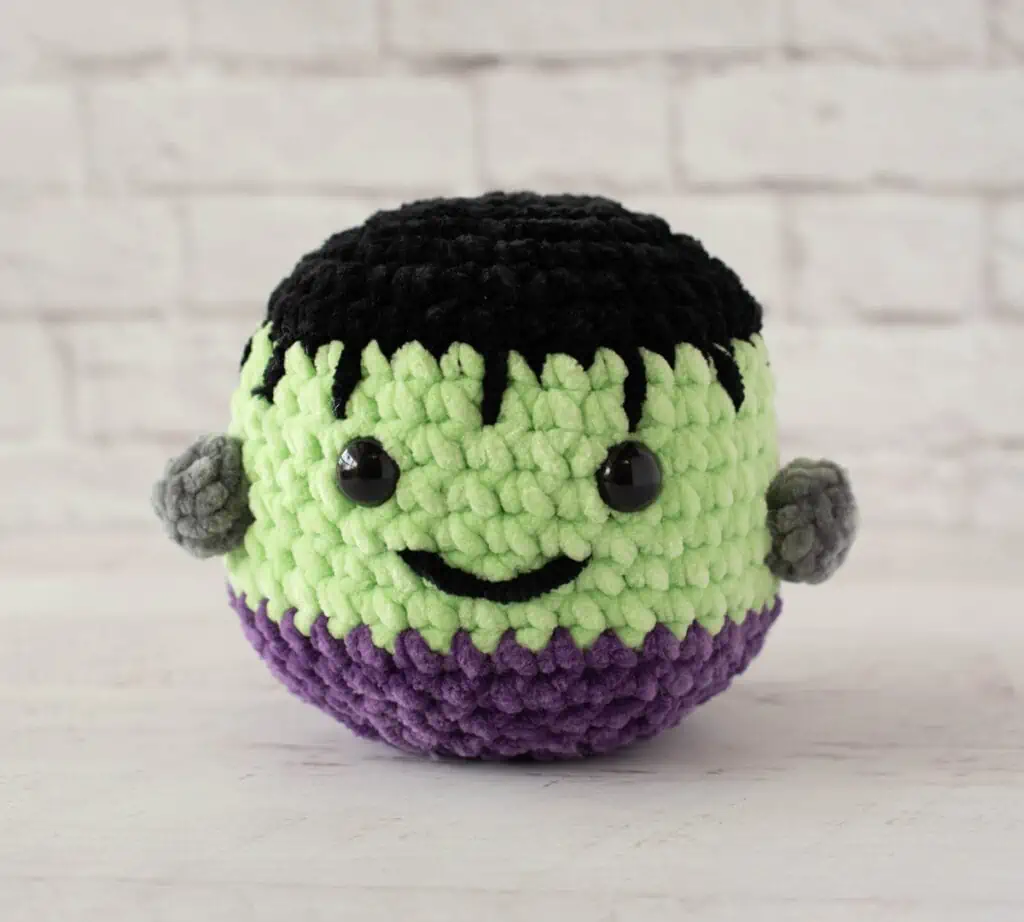
He’s adorable. He’s soft. He’s totally fun. And, of course, oh so so squishy!
What is a Squish-Ami?
So glad you asked! If you like soft and squishy amigurumi, you know that squishy balls of goodness are so popular right now. And really, what’s not to love about them? Soft + Squishy = All the things we love about comforting toys.
Enter the crochet version of all things squish and I figured what better name than to combine two loves: ‘squish’ and ‘amigurumi’ into one lovely name: squish-ami or squishami, whichever you prefer!
ket me know in the comments what you think about the term for this fun crochet squish amigurumi and if you’d like to see more squish-ami patterns in the future!
Easy Crochet Squish Ami.
Here’s what I love about this guy:
He’s incredibly fast and fun to make. Using the #6 Super Bulky weight yarn with a larger 6.50 mm hook, you can crochet Frankenstein’s monster up speedy quick!
This fluffy yarn free pattern also uses basic crochet stitches like single crochet and simple increases and decreases, making it a good beginner project! Be sure to use a stitch marker to keep track of your continuous rounds!
I love the contrast of colors and the fun essence of Frankenstein in a cute little amigurumi, don’t wyou?
More Amigurumi Patterns
If you love this turtle crochet pattern, you might also like to check out these darling patterns:
Let’s dive into this completely adorable Frankenstein Crochet Squish Ami…
Frankenstein Crochet Squish Ami Pattern
Materials
- US K/6.50 mm for crochet hook (these are my absolute favorite crochet hooks I recommend to everyone!).
- Super Bulky Weight #6 yarn:
- Black: ¾ oz, sample used Premier Parfait Chunky in Black
- Green: ¾ oz, sample used Premier Parfait Chunky in Key Lime
- Purple: ½ oz sample used Premier Parfait Chunky in Iris
- Gray: 3 yards, sample used Premier Parfait Chunky in Seal
- 15 mm Safety Eyes (Note: crochet eyes instead if making for a baby or young child)
- Fiberfill Stuffing
- Stitch Marker to keep track of rows, if desired
- Yarn needle and scissors
Gauge:
Using a 6.50 mm hook, my gauge is 5.5 sc to 2 inches. However, gauge is not important in this pattern. However, gauge is not important in this pattern. You may use other yarn weights. Adjust hook size to fit your needs.
Note: Use a stitch marker to mark the last stitch of each round as you work, moving the stitch marker as you work each round.
Resources and crochet tutorials you may find helpful in following this pattern: Crochet Abbreviations, US to UK Crochet Conversion Chart. Find links to stitches and basic crochet skills on the “Tutorial” menu: Getting Started will show basic stitches such as the slip stitch, single crochet, double crochet and chain stitch used in many patterns and Crochet Stitch Dictionary shows our growing collection of crochet stitch tutorials.
Crochet Abbreviations:
- sc = single crochet
- sl st = slip stitch
- st = stitch(es)
Finished Frankenstein Squish Size
Squish-Ami shown measures 5” tall by 5” wide (excluding bolts)
If you’re looking to learn how to make the best amigurumi, be sure to check out my Amigurumi: A Beginner’s Guide. It’s a massive 165 page ebook of detailed tutorials, tips and tricks (plus exclusive patterns). You’ll learn everything you can think of from the magic ring and working in continuous rounds to invisible decreases and other pro tips. .

Head
Using black yarn, make a magic ring.
R1: 6 sc into ring (6 sts). Work in continuous rounds
R2: 2 sc in ea st (12 st)
R3: *sc in next st, 2 sc in next. Repeat from * around. (18 st)
R4: *sc in next 2 st, 2 sc in next. Repeat from * around. (24 st)
R5: sc in next st, 2 sc in next *sc in next 3 st, 2 sc in next. Repeat from * around until last 2 stitches, then sc in the next 2 st. (30 st)
R6: *sc in next 4 st, 2 sc in next. Repeat from * around. (36 st)
R7: sc around, changing to green in last stitch. (36 st)
R8-13: With green sc around. (36 st)
R14: sc around, changing to purple in last stitch. (36 st)
R 15-16: With purple, sc around. ( 36 st)
R17: *sc in next 4 st, sc next 2 st together. Repeat from * around (30 st)
R18: *sc in next 3 st, sc next 2 st together. Repeat from * around (24 st)
R19: *sc in next 2 st, sc next 2 st together. Repeat from * around (18 st)
Insert safety eyes between rows 10 & 11, leaving 5 stitches in between them. Begin stuffing. Continue to stuff as you work.
R20: *sc in next st, sc next 2 st together. Repeat from * around (12 st)
R21: *sc next 2 st together. Repeat from * around (6 st). Fasten off, weave end through last stitches and pull tight.
Bolts (Make 2)
Make a magic ring.
R1: 6 sc into ring (6 sts). Work in rounds
R2: sc around (6 st). Sl st to next st and fasten off (or use an invisible join), leaving a long tail for sewing.
Stuff lightly and sew one bolt to each side of the head.
Hair and Finishing
Thread a yarn needle with a long strand of black yarn. The smile is formed by making 2 straight stitches to form a V worked over row 13, as shown in the photo.
When complete, continue to work hair strands as follows:
The hair strand are single stitches worked over rows 8 & 9, leaving a space of 3 stitches between each strand (or as desired). When satisfied with placement, bury ends inside the stuffed amigurumi.
Explore More Crochet Patterns
Do you love crochet as much as I do? I think you’re going to love these other free crochet patterns:
I love seeing your finished projects! If you enjoyed making this Frankenstein Crochet Squish-Ami or any of my crochet patterns, I’d love to see yours on Instagram, be sure to tag me @crochet365knittoo. If you are on Facebook, stop over to the Crochet 365 Knit Too Facebook page or pop over to the Crochet365KnitToo Club and share a photo! I’d love to see your work!
That is adorable! Also the name is pretty much perfect because in French, “ami” means friend. Which is exactly what this little squish ami is going to become for somebody.
I love this little Frankenstein pattern. But after row 17 are the rows supposed to be decreasing?
They are decreasing. When the pattern reads “sc next 2 st together” that means you are taking 2 stitches and decreasing them into 1 stitch. Hope that helps!