
How to Crochet an Invisible Seamless Join
This post may contain referral/affiliate links. Please read my disclosure for more info.
 If you want to kick your crochet up a notch, learn how to crochet an invisible seamless join in 3 easy steps!Whether you call it crocheting an invisible join or crocheting a seamless join, this is a great finishing technique when working in the round. You can use it when working continuous rounds (as in the photos here) or joined rounds. I am wishing I knew this technique before I crocheted all those squares for the Happily Ever Afghan!
But you are in luck.. because not only did I learn how to do this fabulous finishing technique, but I’m going to teach it to you in 3 easy steps that you will be sure to remember!
Traditionally when after finishing the last stitch in a project, you join with a slip stitch to the first stitch, cut the yarn, and pull through the loop. It ends up leaving a knot at the end of your work and a bit of a jagged finish. When you crochet an invisible seamless join, there is no knot and you can’t even tell where the join is!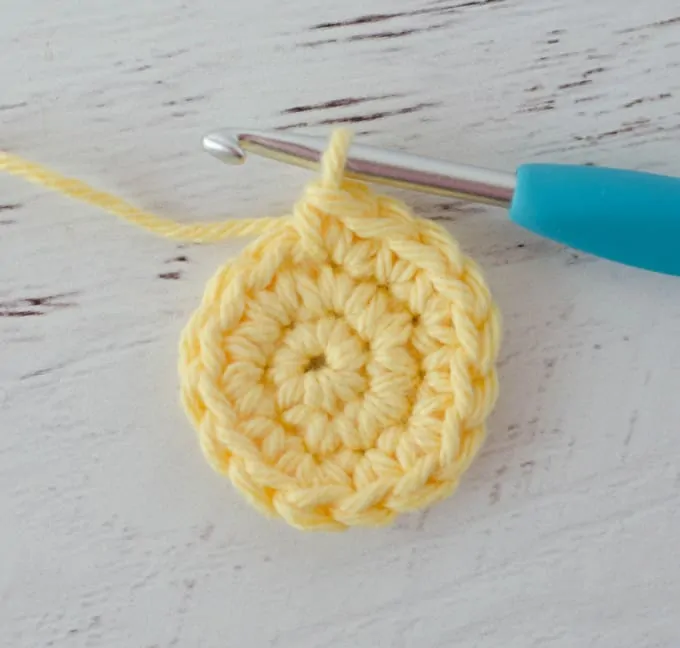
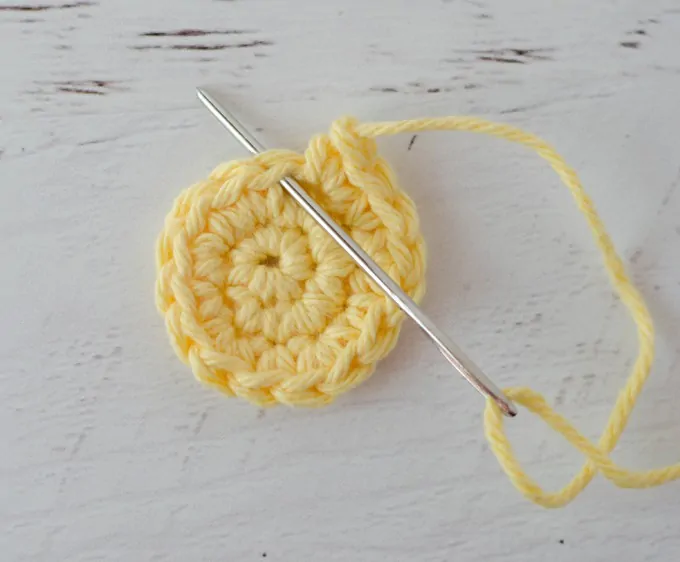
Step 1: After the last stitch Cut Yarn, Pull Loop
After the last stitch, cut the yarn. Take you hook out of the loop and pull the loop up….
Continue to pull the loop, making it bigger
Continue pulling this loop until the cut end of the yarn pulls right though. Then take the yarn end and thread a yarn needle.
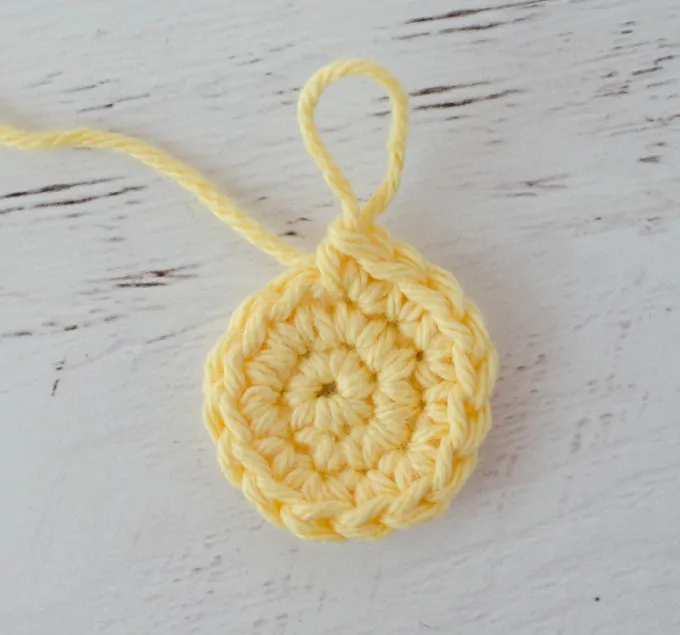
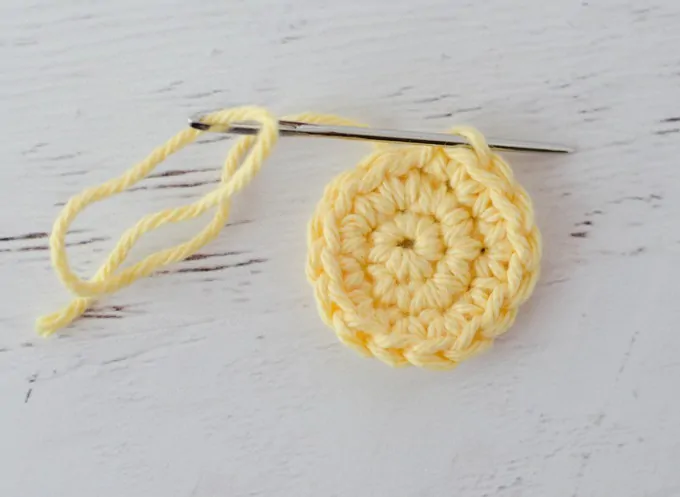
Step 2: Insert needle under both loops of 1st stitch
When working in the round, the 1st stitch of the row is the next stitch. Insert the yarn needle under both loops of this stitch and pull through. When you are done with step 2, it looks like this:
Note that I am working in continuous rounds for this example, so there is a little bit of a “jog” effect’. If you are working in joined rounds (starting each row with a ch 1 and then your 1st stitch), there will not be a jog. Just remember to insert the needle under both loops of the 1st stitch in the row just completed.
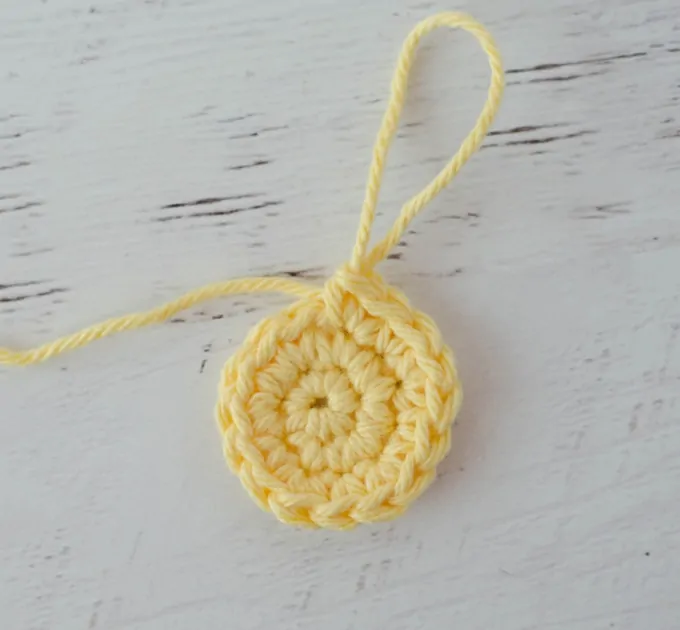
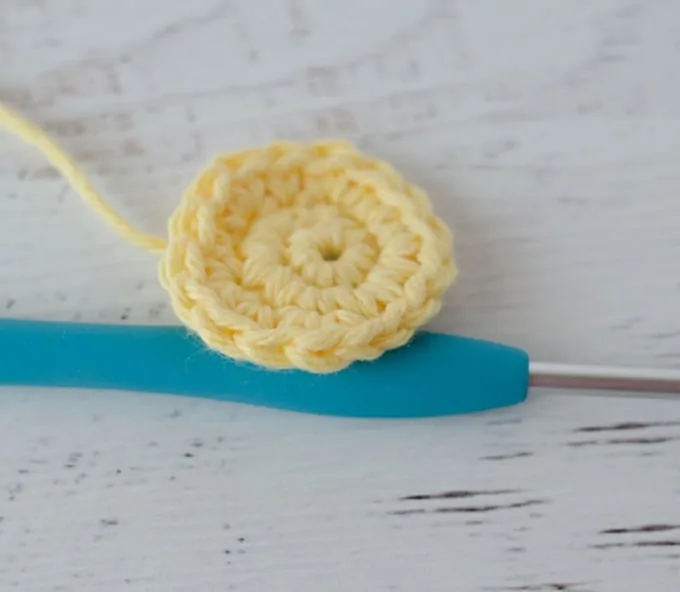
Step 3: Insert needle into middle of last stitch
Now take the needle and come down from the top into the center of the last stitch of the row. For some reason this feels like an odd thing to do as it is the opposite of what we normally do when we crochet. So just tell yourself “top center” so you remember to come down from the top to the center and then out the back of the work.
You would then work under several stitches on the wrong side to weave in the end.
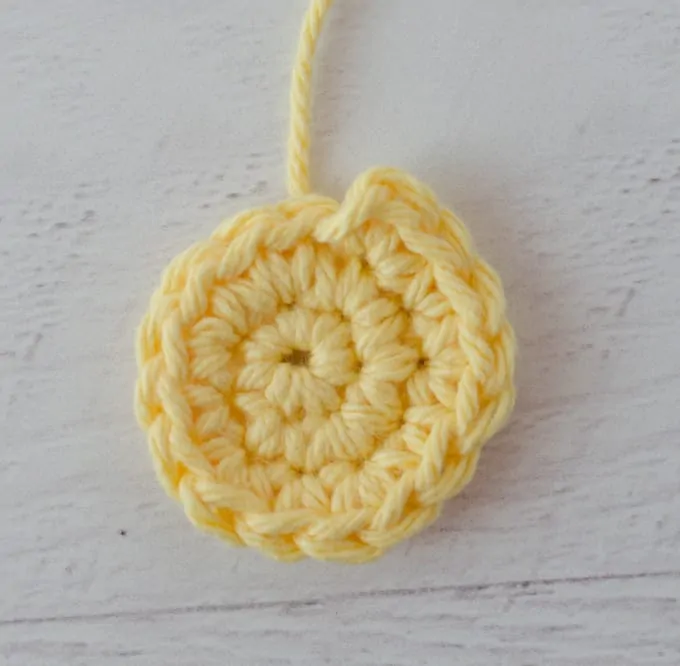
And here’s the finished piece! The join is on the front edge and it is so perfectly matched that even I can’t tell (or remember) which of the front stitches was the actual joined edge!
Isn’t that a great technique?!
I love seeing your finished projects! If you enjoyed making one of my patterns I’d love to see yours on Instagram, be sure to tag me @crochet365knittoo. If you are on Facebook, stop over to the Crochet 365 Knit Too Facebook page or pop over to the Crochet365KnitToo Club and share a photo! I’d love to see your work!

I am using this on every join. I love it!
I’m doing the same! It’s great, isn’t it?!
How do you start the next round? Thx!
The invisible seamless join is typically used on the last round so that the start and end point are not visible. If you want to add additional rounds, you can join yarn with a slip stitch and chain up to start a new round.
I’ve been using this method for a while now. It makes for such a nice finish!! And it’s very easy!
How clever! I guess I’ll use this all the time now… Thanks
Thank you for the information, I am going to use that from now on.
Thank you, Cheryl! Reading your emails makes my day, everyday! I love to hear about Winston. He’s a hoot! But most of all I want to thank you for all the great patterns you provide us.
Winston is a big hit! I think he could have his own fan club! LOL. Thanks for your kind words and for being a newsletter subscriber! I love our little email chats!
I’ve always joined in this manner. Thought I had “invented” it myself. LOL. Now I see how many other crocheters have been doing the same thing.
GRACIAS. Es sencillo y perfecto!!
SALUDOS
Like you, I wish I had learned this way to end a WIP years ago. Thank you sooo much for this easy method that I use exclusively now that it’s part of my arsenal of tricks?
I love the look of the invisible seamless join. But without a knot at some point, won’t it unravel either with use or in the wash?
You just weave in the end back and forth real well like you would any other time you finish off your work. As long as it is woven in well, it should not unravel.
Thank you for sharing this technique, this works really well!
Thank you for sharing the technique, this works really well!
NICE! 53 years and Now I learn this. Thanks.
This is so great, thank you!! I immediately started using it on an ongoing amigurumi and my finishes instantly looked better.
That’s awesome! I’m so glad this was helpful for you!
I have always wondered how everyone got such smooth finishes,
Thank you sooooo much. Nobody has ever showed me that. It’s great,!Linda Li
I would truly love to make the tapestry crossbody. Been looking for bag like this forever, at least it feels so. I just need to get a bit of positivity. I do not want to mess it up. THANK you so very much for the pattern.??
Hi Cheryl,
I to enjoy reading your email. I love to crochet and other crafts.. it helps me relax and I’m happy making things for my family and friends.i want to know if you ever crochet anything using demin from old blue jeans. I can’t throw them out and there too tater to donate
Thank
Judy
I haven’t tried crocheting with blue jeans, but it does sound like a fun idea! You can always find my patterns by clicking on the patterns link in the menu. I also let my subscribers know when new things come out, so you might enjoy my newsletter if you’re not already getting it.
Can’t wait to try it out.
I am looking forward to trying your way to end items without the bump. Thank u.
I keep a “B” hook handy at all times. So often, it saves me from having to thread a tapestry needle to finish a project and weave in ends. This seamless join is one example. If you take your time, you can grab the yarn ends with the “B” hook and do all the same steps you would do with the tapestry needle. It saves you a little bit of time, and the end result is exactly the same. Just a suggestion if you don’t care for fiddling with needles (like me).
That’s a great idea.. because I totally know what you mean about threading a tapestry needle! Sometimes it is so much easier with a hook!
I am going to use this finish from now on. I live in a Northern State and crochet a lot of warm hats. This will make them look SO much better!
I love this invisible join. It works perfectly for the round cat beds that I make. I was having so much trouble not making the ending look uneven. Now they look a lot better. Thank you!
Thanks for letting us know that ❤️👍
thank you again and again a new crochet advocate. my sister taught me to crochet as she was a cancer patient. She crocheted with a passion and donated her items to Cancer patients. Infants, children and adults. Through a Cancer organization. Since she has died, I feel connected to her but she cannot help me when things go astray. I cannot donate my items because there is just something wrong or crocked but not quite right. Your ideas and suggestions have helpped me as I continue to learn
I’m glad you found crochet and that it’s a way to stay connected to your sister. I do encourage you to donate even your non-perfect items. None of us are perfect and sometimes a small imperfection is not noticeable and a sign of something hand made. Take care and crochet on!
Hey, Cheryl. First i would love to say WoW! You are amazing instructor 😊.I have been crocheting 2 years and still learning a lot. I just made Sunburst granny square and it turned out perfect, and also did the invisible seamless join. Your written pattern, and visual pictures help so much!!! Thank You❤️
I’m so glad everything is so helpful! The Sunburst Granny is one of my favorites! So pretty!
Thanks for your help. The ends of my work have never looked neater.
I’m not new to crochet, but have renewed my love for it in the last few years. I get your blog and enjoy your musings. No grandchildren to make gifts for or to pass along my love for crochet. I’m just happy to be part of your “fan base” and crochet along. New stitches are so much fun.
Thanks for your tip on the invisible finish. After I finish a blanket or any project and wash it my ends always pop out. I will keep learning from your techniques! Very helpful!
I always weave the ends one way, then go back and weave the opposite direction. It seems to help.