
Millie The Crochet Cow
This post may contain referral/affiliate links. Please read my disclosure for more info.
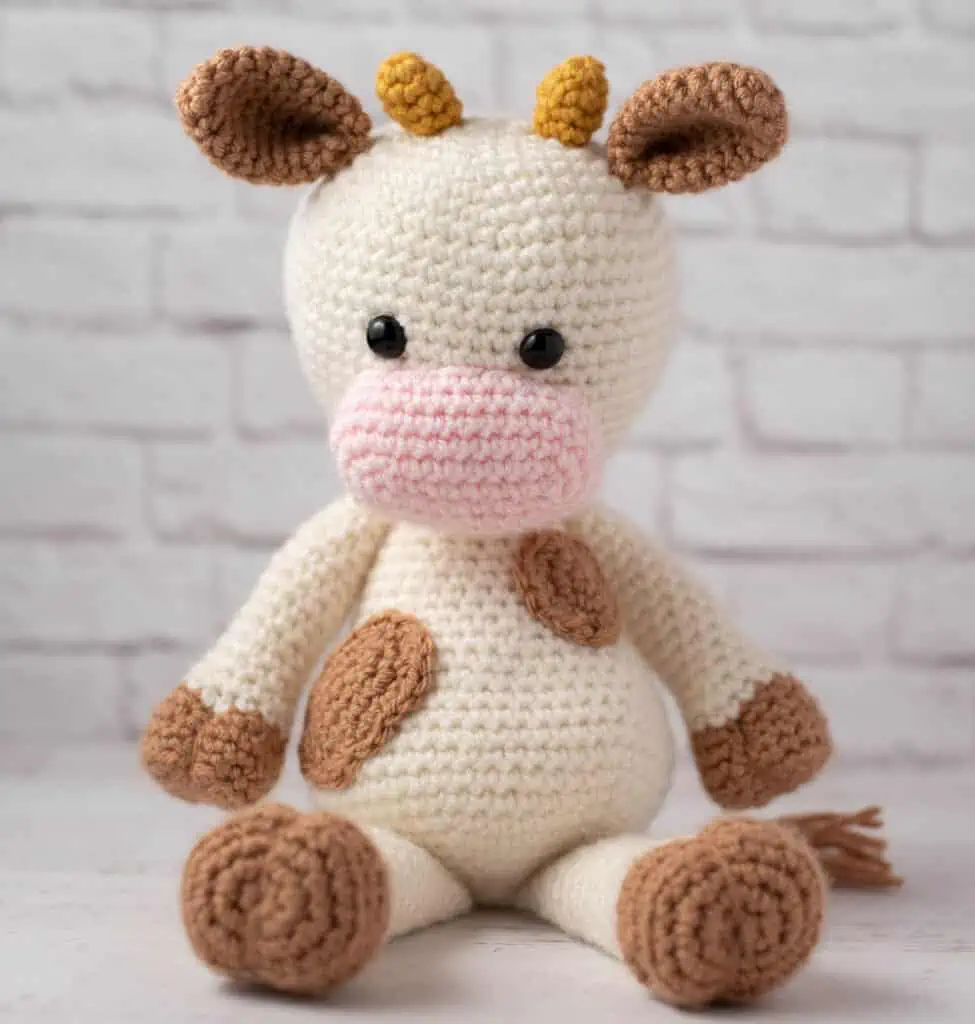
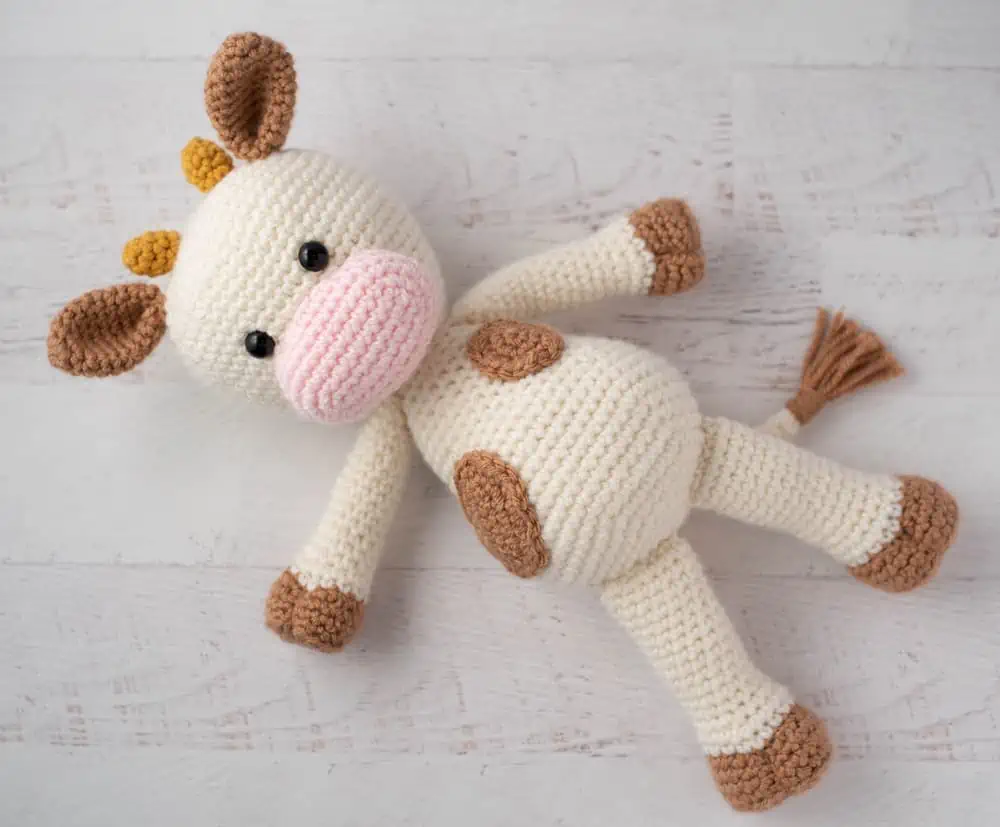
Well hello there, little cutie pie crochet cow! Sigh. Meet Millie: quite possibly the cutest crochet cow ever!
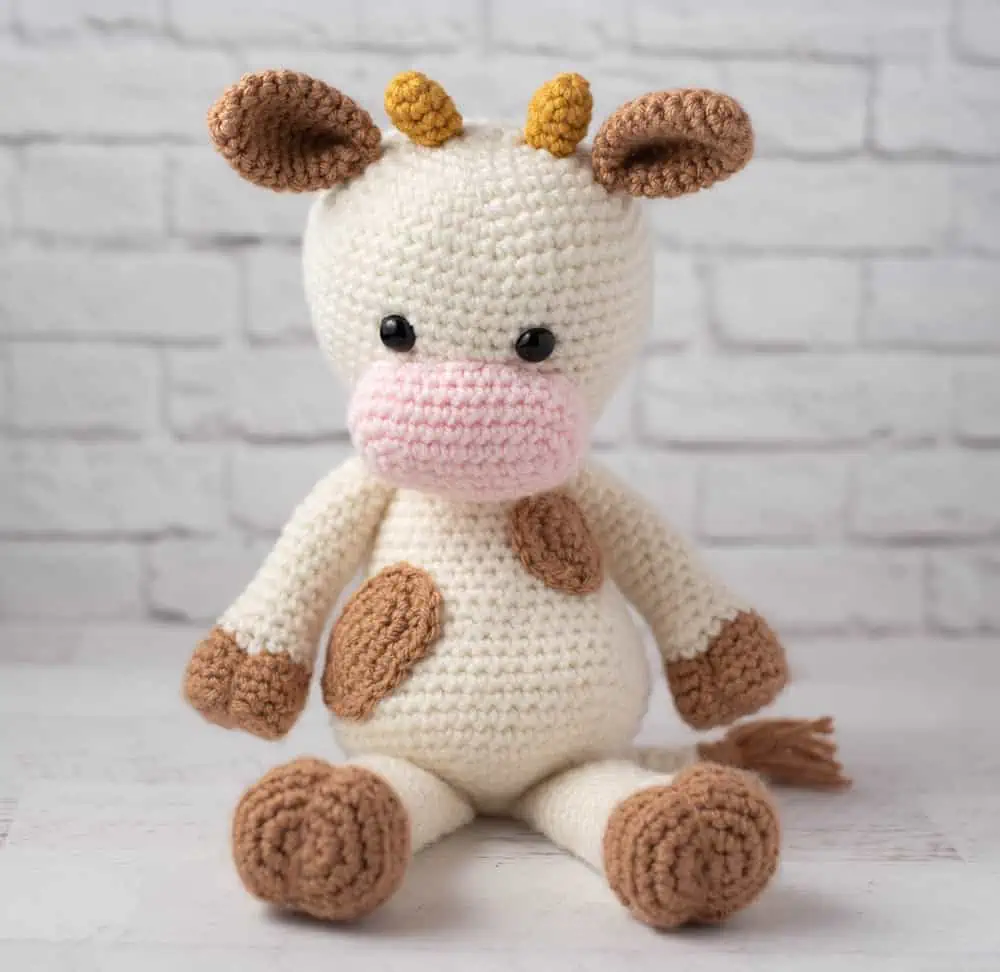
I’m completely smitten with this cream and toffee bit of adorableness. If you’re looking for a completely fun make, you’re going to love this little cow on your hook.
When I was little, my grandma had a close friend. A cousin, I think. Her name was Millie. And not just Millie, but ‘Millie Kunas’ as if there were other Millie’s in her life that needed distinction.
I got the impression that Millie was all kinds of fun.
My grandmother spoke English as a second language and quite often would get on the phone, speaking in fluent Slovak to Millie Kunas. And even though I couldn’t understand a word, I could tell they were good friends by the animated tone and laughter now and then.
Once in awhile she’d pepper the conversation with our names.. the names of her grandchildren. But always with a smile on her face so you know nice things were being shared. Plus she pretty much loved to tell everyone when we came to visit because it was her favorite time of all.
She loved us big.
And I hope someday, if I’m blessed with grand babies, they grow up to know I loved them big too.
In any case, this adorable bit of something.. this cuter than cute crochet cow .. reminds me of a Millie: Fun. Good for secret. A listening ear. And a good hug now and then too.
If you’ve been with me a bit, you might actually recognize Millie from my premium pattern shop. I decided to try a little experiment and bring this sweet girl over to the blog for more people to enjoy.

This crochet cow is so fun to crochet. I like to start with the head and then all the pieces for the head and face. For whatever reason it motivates me to see that little sweet face while I’m working on the rest.
But you can work whichever piece you’d like first on this adorable amigurumi cow and then sew everything together at the end, if you’d prefer.
More Amigurumi Patterns
If you love this cow crochet pattern, you might also like to check out these darling patterns:
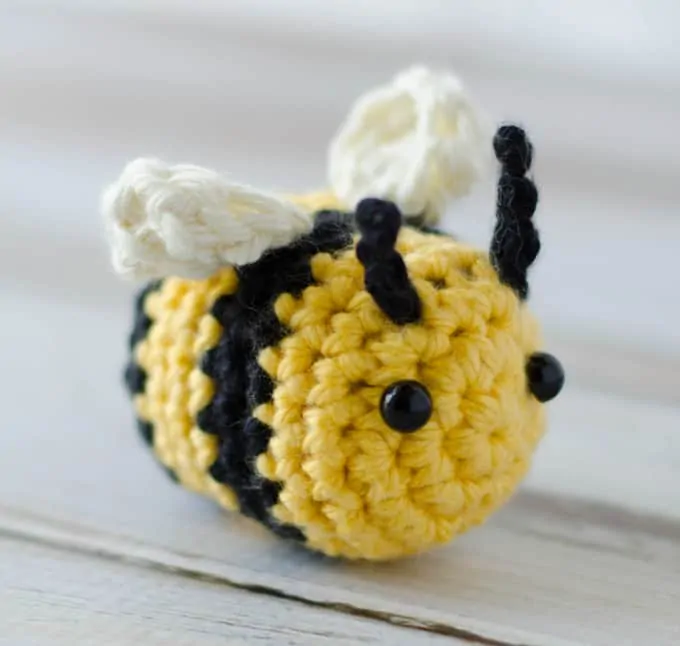
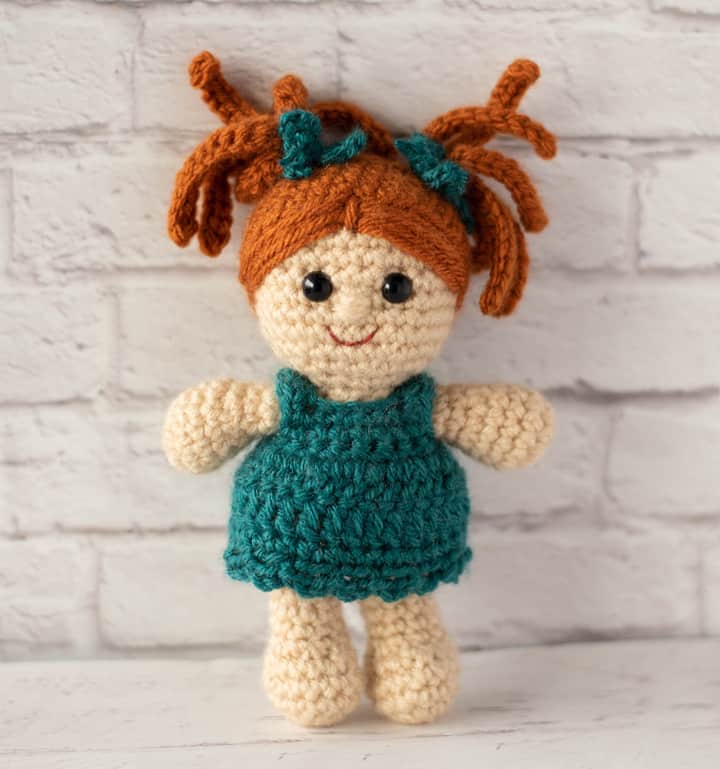
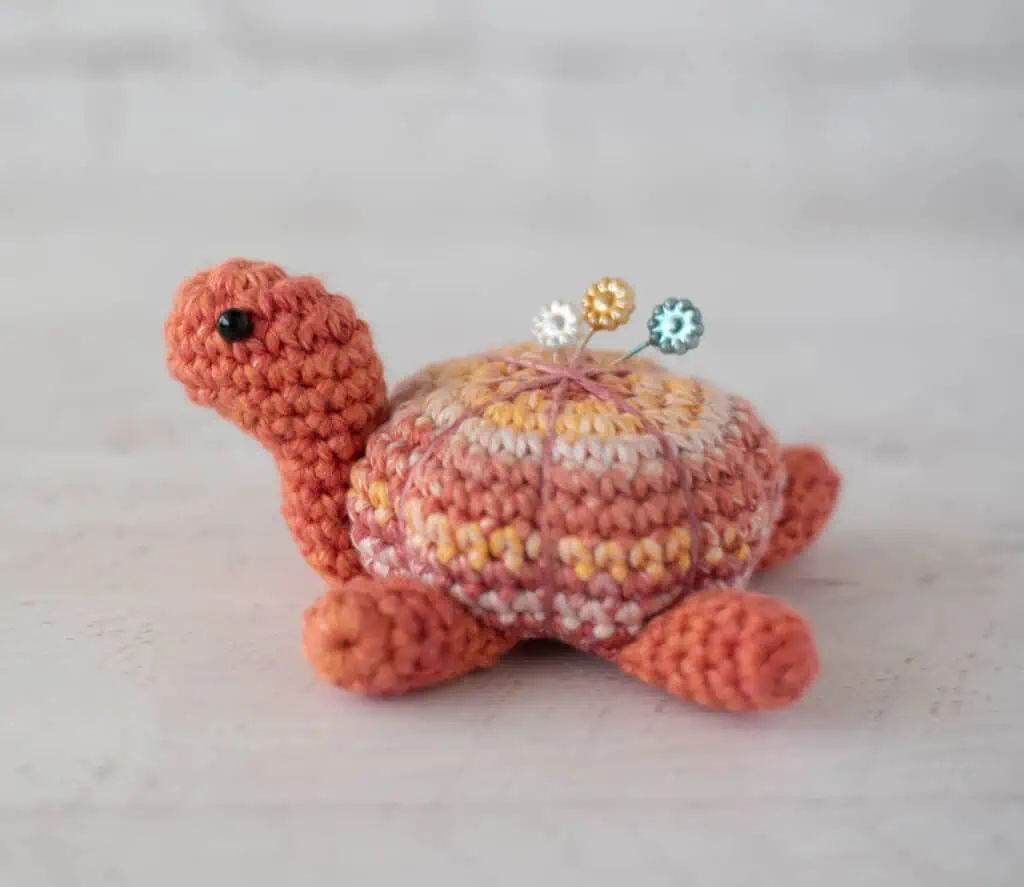
Crochet Bee // Rachel Crochet Doll // Crochet Turtle
What Do You Need To Crochet A Cow?
This free crochet cow pattern is so fun to crochet in simple stitches! It uses a white yarn or cream worsted weight yarn for the main body and head color with a light brown yarn for accents and a bit of pink and gold yarn for the muzzle and horns. For the limbs, we start with the brown yarn for the hooves and then make a color change to cream yarn for the rest. The spots are crocheted separately with a yarn tail for sewing on later.
When I’m making crochet amigurumi I use stitch markers to keep track of my place. This amigurumi cow pattern uses 12 mm safety eyes but you could embroider them if making this cute cow for a very young child.
All the pieces for this cute cow are worked in the round in the single crochet stitch.
Let’s dive into this darling crochet cow pattern. She just might make the perfect gift for a special someone, but I won’t tell if you think this cute amigurumi is just for you!
print & stitch
Purchase the Beautifully Crafted AD-FREE PDF Download Today
Do you just want to relax and crochet? This nicely formatted pattern features clear instructions and perfectly sized photos for a more enjoyable crochet experience.
Get the free pattern below or purchase an ad-free pattern on Etsy or Ravelry
Cow Crochet Pattern
Here is what you will need:
- US G 6/4.00 mm crochet hook (these are my absolute favorite crochet hooks I recommend to everyone!).
- Worsted weight #4 yarn, Sample used Hobby Lobby I Love This Yarn in the following colors:
- 4-1/2 oz Ivory
- 1-3/4 oz Toasted Almond (a light brown color)
- 1/8 oz Soft Pink
- Scraps of Sungold
- 12mm Black Safety Eyes
- Fiberfill Stuffing
- Stitch Marker to keep track of rows, if desired
- Tapestry needle and scissors
Gauge:
Gauge is not important in this free pattern. With the yarn and hook size given, Cow shown is about 4 sc per inch (after piece is stuffed).
Resources and crochet tutorials you may find helpful in following this pattern: Crochet Abbreviations, US to UK Crochet Conversion Chart. Find links to stitches and basic crochet skills on the “Tutorial” menu: Getting Started will show basic crochet stitches such as the slip stitch, single crochet, double crochet and chain stitch used in many patterns and Crochet Stitch Dictionary shows our growing collection of crochet stitch tutorials.
Crochet Abbreviations:
- sc = single crochet
- sc 2 tog = single crochet 2 stitches together
- sl st = slip stitch
- st = stitch(es)
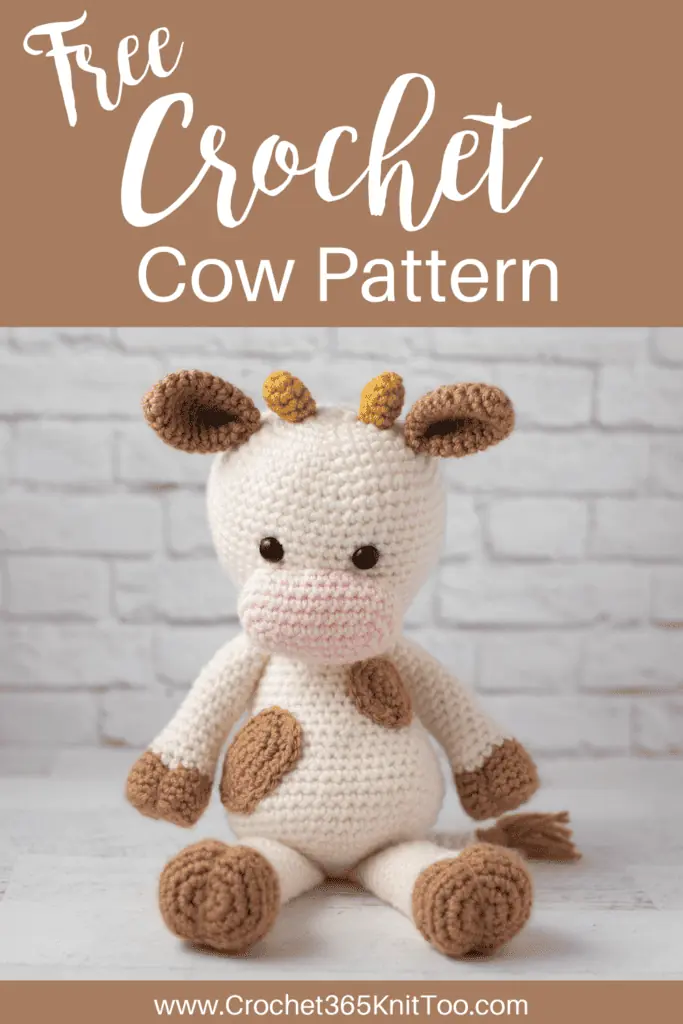
Finished Crochet Cow Size
Cow shown measures 13.5” tall, from top of head to bottom of feet
If you’re looking to learn how to make the best amigurumi, be sure to check out my Amigurumi: A Beginner’s Guide. It’s a massive 165 page ebook of detailed tutorials, tips and tricks (plus exclusive patterns). You’ll learn everything you can think of from the magic ring and working in continuous rounds to invisible decreases and other pro tips. .

Cow Head
With ivory yarn, make a magic ring
R1: 6 sc into ring (6 sts). (Do not join, worked in rounds)
R2: 2 sc in ea st around (12 st)
R3: *sc in next st, 2 sc in next st, repeat from * around (18 st)
R4: *sc in next 2 st, 2 sc in next st, repeat from * around (24 st)
R5: *sc in next 3 st, 2 sc in next st, repeat from * around (30 st)
R6: *sc in next 4 st, 2 sc in next st, repeat from * around (36 st)
R7: *sc in next 5 st, 2 sc in next st, repeat from * around (42 st)
R8: *sc in next 6 st, 2 sc in next st, repeat from * around (48 st)
R9: sc around (48 st)
R10: *sc in next 7 st, 2 sc in next st, repeat from * around (54 st)
R11-16: sc around (54 st)
R17: *sc in next 7 st, sc 2 tog, repeat from * around (48 st)
R18: sc around (48 st)
R19: *sc in next 6 st, sc 2 tog, repeat from * around (42 st)
R20: sc around (42 st)
R21: *sc in next 5 st, sc 2 tog, repeat from * around (36 st)
R22: sc around (36 st)
Insert Safety Eyes between rows 14 &15, leaving 6 stitches in between. Then, start stuffing head with fiberfill, continuing as you go.
R23: *sc in next 4 st, sc 2 tog, repeat from * around (30 st)
R24: Sc around (30 st)
R25: *sc in next 3 st, sc 2 tog, repeat from * around (24 st)
R26: *sc in next 2 st, sc 2 tog, repeat from * around. Sl st to next stitch and fasten off. (18 st)
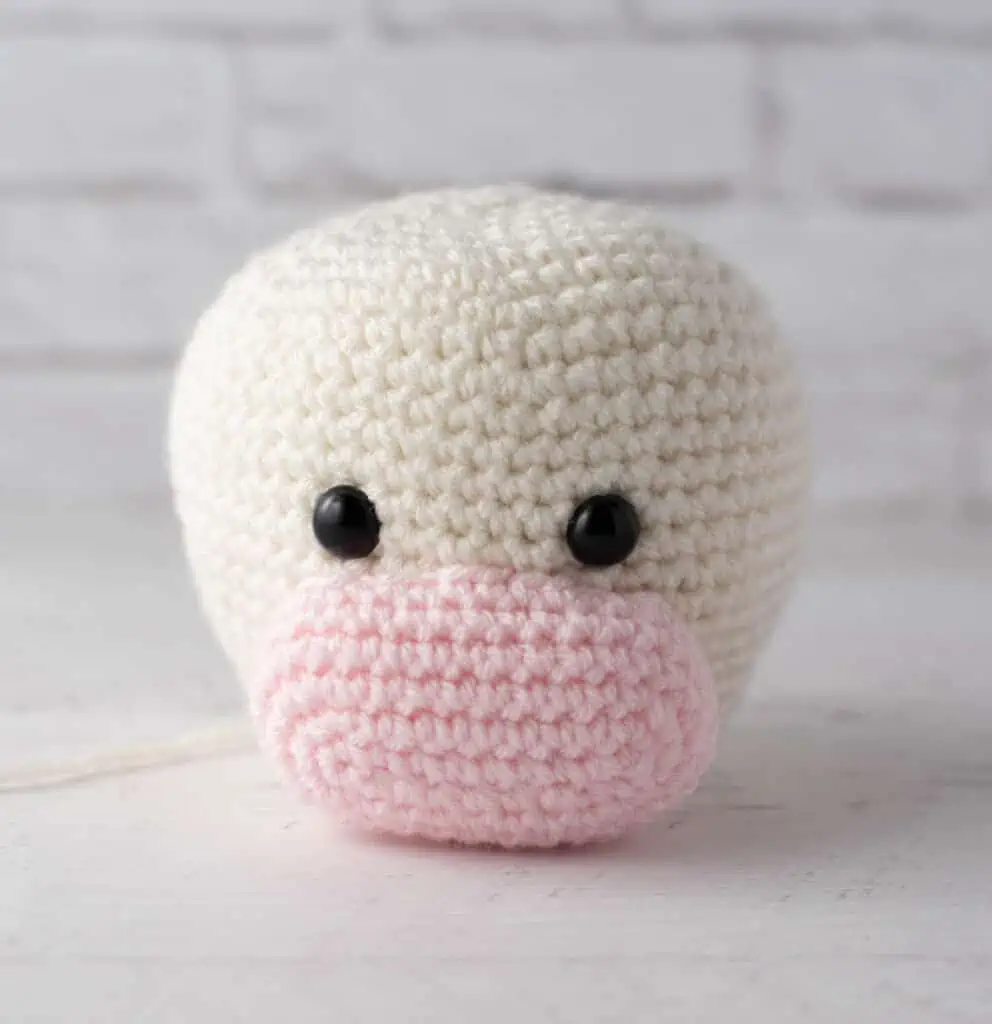
Cow Snout
With pink yarn, chain 10. Stitches are worked on both sides of the starting chain.
R1: sc in the 2nd ch from hook, sc in the next 7 st, 3 sc in the last st, rotate work to work on opposite side of chain, sc in next 7 st, 2 sc in last st. (20 st) Do not join; work in rounds.
R2: 2 sc in next st, sc in next 7 st, 2 sc in next st (3 times), sc in next 7 st, 2sc in next st (twice) (26 st).
R3: 2 sc in next st, sc in next 9 st, 2 sc in next st (4 times), sc in next 9 st, 2sc in next st (3 times) (34 st).
R4-6: sc around.
Fasten off, leaving a long strand for sewing. Join with an invisible join to next stitch, or, alternatively, slip stitch in the next stitch.
Stuff snout lightly and sew on head, centered below eyes over rows 17-23.
Ears
With Light Brown (Toasted Almond) yarn, make a magic ring
R1: 6 sc into ring (6 sts). (Do not join, worked in rounds)
R2: *sc in next st, 2 sc in next st, repeat from * around (9 st)
R3: *sc in next 2 st, 2 sc in next st, repeat from * around (12 st)
R4: *sc in next 2 st, 2 sc in next st, repeat from * around (16 st)
R5-11: sc around (16 st).
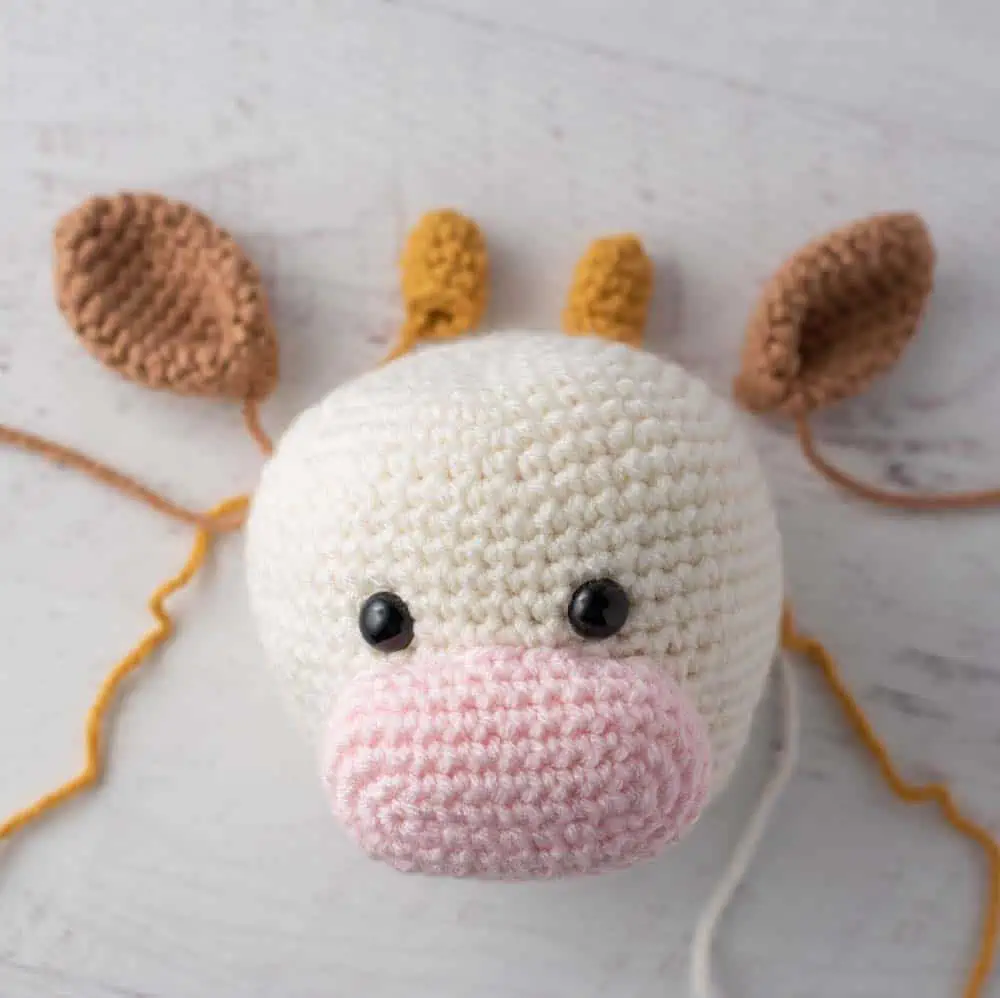
Sl st to 1st st in round and fasten off, leaving a tail for sewing. Fold each ear in half and stitch together. Then fold in half again, and sew an ear on either side of head over row 6 or as desired.
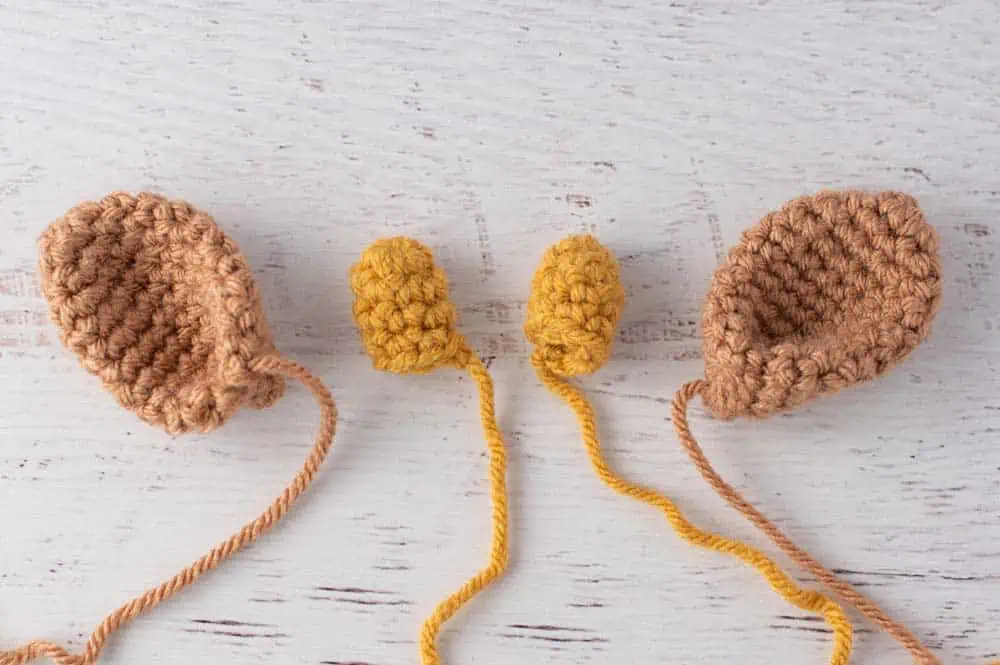
Horns
With Gold yarn, make a magic ring
R1: 7 sc into ring (7 sts). (Do not join, worked in rounds)
R2-4: sc around (7 st). Fasten off and leave a long tail for joining. Horns are not stuffed.
Sew horns on head in between the ears.
Cow Body (Starting at Bottom)
With ivory yarn, make a magic ring
R1: 6 sc into ring (6 sts).
R2: 2 sc in ea st around (12 st)
R3: *sc in next st, 2sc in next st, repeat from * around (18 st)
R4: *sc in next 2 st, 2sc in next st, repeat from * around (24 st)
R5: *sc in next 3 st, 2 sc in next st, repeat from * around (30 st)
R6: *sc in next 4 st, 2 sc in next st, repeat from * around (36 st)
R7: *sc in next 5 st, 2 sc in next st, repeat from * around (42 st)
R8: *sc in next 6 st, 2 sc in next st, repeat from * around (48 st)
R9: *sc in next 15 st, 2 sc in next st, repeat from * around (51 st)
R10: *sc in next 16 sc, 2 sc in next, repeat from * around (54 st)
R11-13: sc around (54 st)
R14: *sc in next 16 st, sc 2 tog, repeat from * around (51 st)
R15: sc in next 7 st, sc 2 tog, *sc in next 15 st, sc 2 tog, repeat from * once, sc in next 8 st (48 st)
R16: *sc in next 14 st, sc 2 tog, repeat from * around (45 st)
R17: *sc in next 13 st, sc 2 tog, repeat from * around (42 st)
R18: *sc in next 5 st, sc 2 tog, repeat from * around (36 st)
Start stuffing body with fiberfill, continuing as you go.
R19: sc around (36 st)
R20: *sc in next 4 st, sc 2 tog, repeat from * around (30 st)
R21-22: sc around (30 st)
R23: *sc in next 3 st, sc 2 tog, repeat from * around (24 st)
R24-25: sc around (24 st)
R26: *sc in next 2 st, sc 2 tog, repeat from * around (18 st)
R27: sc around (18 st)
Sl st to 1st st in round and fasten off, leaving a tail for sewing.
Stuff body. Sew to head, using the mattress stitch.
Arms (Make 2)
With light brown (toasted almond) yarn, make a magic ring
R1: 6 sc into ring (6 sts) (Do not join, work in rounds)
R2: 2 sc in ea st around (12 st)
R3: *sc in next st, 2 sc in next st, repeat from * around (18 st)
R4: Working through the back loop for this row only, sc around (18 st)
R5-6: Sc around (18 st)
R7: *sc in next 4 st, sc 2 tog, repeat from * around, change to ivory yarn in last stitch (15 st)
R8-9: With ivory, sc around (15 st)
Begin stuffing arms and continue to stuff as you work the rest of the arm.
R10: *sc in next 3 st, sc 2 tog, repeat from * around (12 st)
R11-23: sc around. At the end of round 23, sl st to the next stich, then fasten off, leaving a long end for sewing.
Stuff arms, leaving top ½” unstuffed. Flatten the top and sew closed.
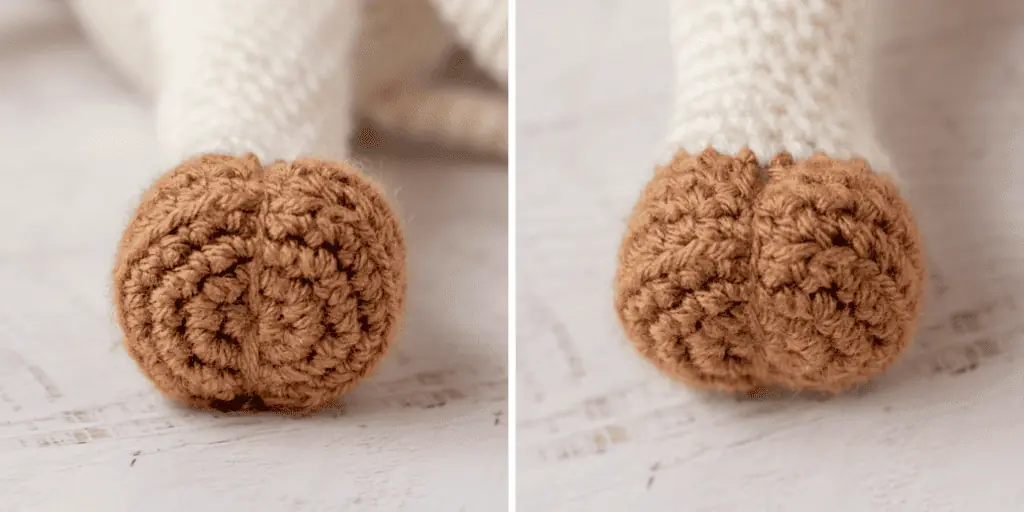
Hoof Detail
To make hoof detail on arms and legs, cut a length of toasted almond yarn, knot one end and insert into the limb and come out in the middle of the magic ring (center bottom of the stuffed limb). Tug on the yarn so that the knot is hidden inside the limb. Then make 2 long stitches, pulling tightly after each stitch.
Each stitch goes from the center up and over row 7 in the center front and center back. Pull tightly after each stitch to create hoof definition. When done, insert needle into the limb, come out, knot off yarn, and then insert the needle back into the limb and tug to bury the knot inside the limb. Cut close to work. Repeat for other limbs.
Sew arms to either side of body between rounds 26-27.
Legs
With light brown (toasted almond) yarn, make a magic ring
R1: 6 sc into ring (6 sts). (Do not join, work in rounds)
R2: 2 sc in ea st around (12 st)
R3: *sc in next st, 2 sc in next st, repeat from * around (18 st)
R4: *sc in next 2 st, 2 sc in next st, repeat from * around (24 st)
R5: Working through the back loop for this row only, sc around (24 st)
R6-7: Sc around
R8: *sc in next 2 st, sc 2 tog, repeat from * around, change to ivory yarn in last stitch (18 st)
R9-10: With ivory, sc around (18 st)
Begin stuffing legs and continue to stuff as you work the rest of the leg.
R11: *sc in next 4 st, sc 2 tog, repeat from * around (15 st)
R12-24: sc around (15 st). At the end of round 24, sl st to the next stich, then fasten off, leaving a long end for sewing.
Flatten the leg and sew closed. Sew Hoof detail as described for arms. Then sew legs on an angle to lower body over rounds 2-5.
Tail
The tail is worked in rounds, starting with light brown and changing to ivory after the first row. When tail is complete strands will be inserted and finished off, similar to a tassel to complete the tail.
With light brown (toasted almond) yarn, make a magic ring
R1: 5 sc into ring, changing to ivory yarn in the last stitch (5 sts). (Do not join, work in rounds)
R2-11: With ivory yarn, sc around (5 st) At end of round 12, fasten off yarn, leaving a long strand for sewing.
Tail is NOT stuffed.
For tail hair, cut several 3-inch pieces of light brown yarn. Pull several yarn strands through the bottom of the tail so that one half of each strand is sticking out on either side of the center bottom of the tail. Cut a long piece of light brown yarn. While holding the yarn hair pieces in place, use the long strand of yarn to wrap around the tail to secure the hair strands at the end of the tail, as though you are making a tassel. Knot off the long strand and hide the ends. Trim the hair strands so that they are even in length.
Flatten tail and then sew to body between rows 7 & 8 at the center back.
Small Spots (Make 2):
With light brown (toasted almond) yarn, make a magic ring
R1: 6 sc into ring (6 sts). (Do not join, work in rounds)
R2: 2 sc in ea st around (12 st)
R3: *sc in next st, 2 sc in next st, repeat from * around (18 st). Fasten off and join with an invisible join (or slip stitch to the next stitch). Fasten off and leave a tail for sewing.
Large Spots (Make 2):
With light brown (toasted almond) yarn, chain 6. Stitches are worked on both sides of the starting chain.
R1: sc in the 2nd ch from hook, sc in the next 3 st, 3 sc in the last st, rotate work to work on opposite side of chain, sc in next 3 st, 2 sc in last st. (12 st) (Do not join; work in rounds.)
R2: 2 sc in next st, sc in next 3 st, 2 sc in next st (3 times), sc in next 3 st, 2sc in next st (twice). (18 st).
R3: sc in next st, 2 sc in next st, sc in next 4 st, (2sc, sc) 3 times, sc in next 2 st, (2sc sc) 2 times. (24 st). Fasten off and leave a tail for joining.
Sew 2 spots on the front of cow and 2 spots on the back of cow as desired.
To see even more adorable patterns check out my post with my favorite Free Crochet Animal Patterns here.
I love seeing your finished projects! If you enjoyed making this Crochet Cow or any of my crochet patterns, I’d love to see yours on Instagram, be sure to tag me @crochet365knittoo. If you are on Facebook, stop over to the Crochet 365 Knit Too Facebook page or pop over to the Crochet365KnitToo Club and share a photo! I’d love to see your work!
She’s the cutest!
Your items are adorable! Millie Kunas, the name, sounds familiar to me, somehow. Could it be because I live near a Mill(ie) Run?
The beautiful M. Cow, is
perfect crochet stuffed toy that I have been looking for years for. Thank you for making it available free.
So glad you enjoyed the pattern! One of my favorites!
I made this and it turned out too cute 😍 💕 💓
So glad to hear! She is one of my favorite patterns!
I love your stories about “Winston pup.” They are such fun to read and I usually get a giggle out of them. I also love your patterns. They are easy to read & understand.
Awww.. thanks! 🙂 Crochet and my family (including Winston pup): they are my world!
hi! what do you use to sew your parts onto your cow? regular sewing thread, or yarn? thank you.
I always use the same yarn to sew pieces together on my amigurumni.