
Textured Crochet Pumpkin
This post may contain referral/affiliate links. Please read my disclosure for more info.
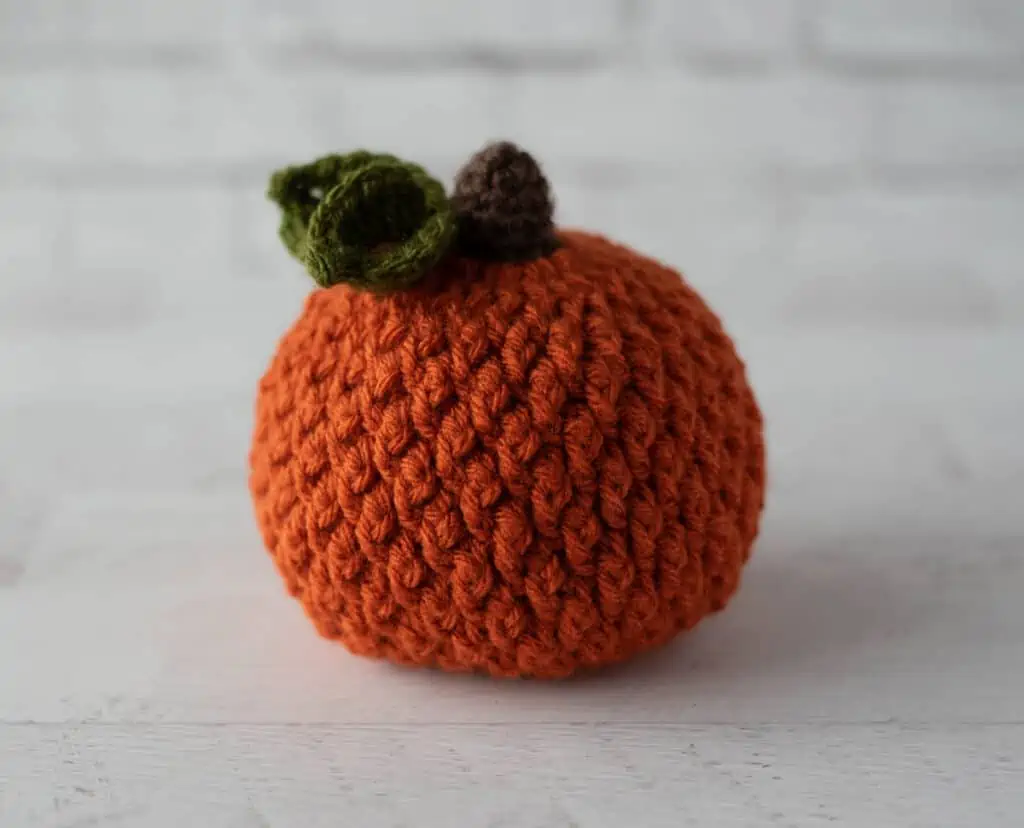
If the orange, rusts and reds of the fall season speaks to your little crochet heart, then you’re going to adore this little textured crochet pumpkin.
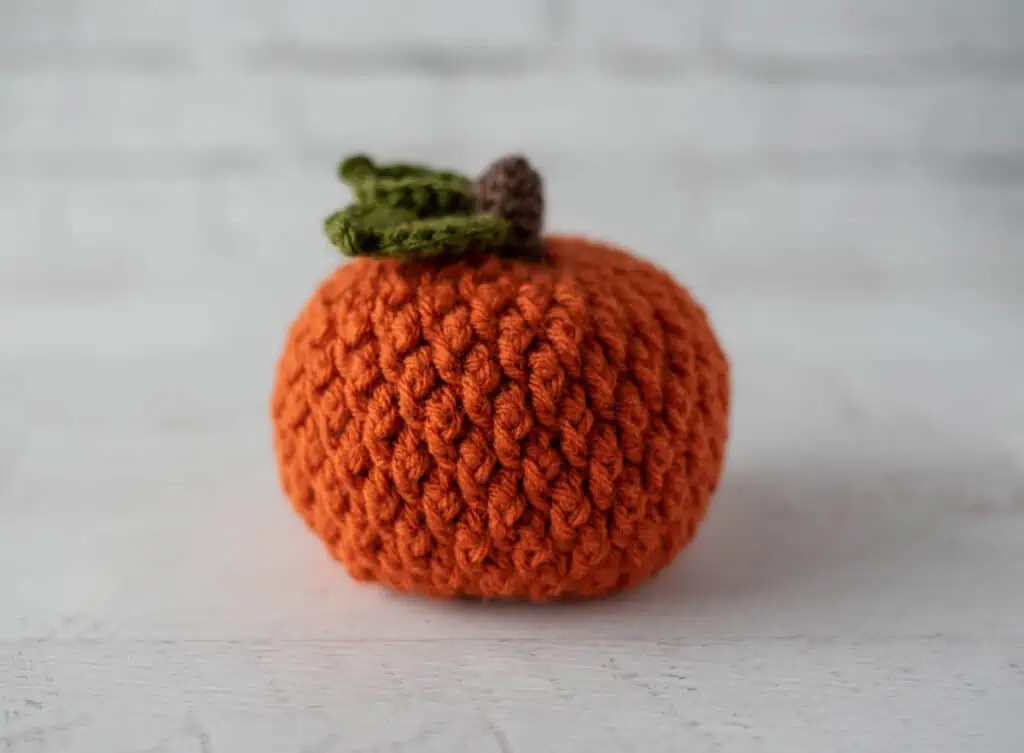
Sigh. I love that delicious rib like vibe of this beautiful pumpkin. Perfect for nestling into your fall decor and a quick to make project too.
You may also be thinking.. hmm.. isn’t that a tiny bit familiar? And you’d be right! It’s like my gorgeous crochet pumpkin and my crochet pumpkin hat got together and made the cutest baby ever!
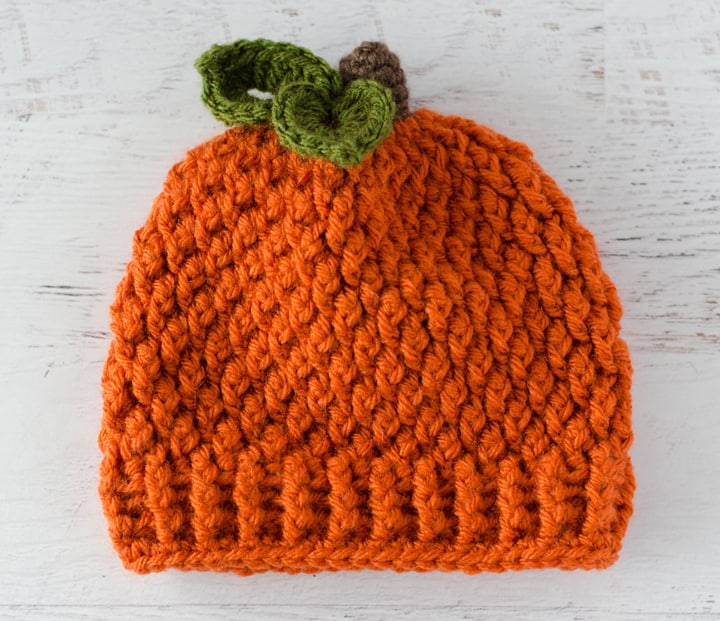
Mostly I was looking at the hat and thinking “wouldn’t this make the CUTEST little crocheted pumpkin?”
And I totally love this textured pumpkin vibe. You start out with brown yarn at the top for the stem, then change to orange yarn to start the pumpkin portion. Like the hat, we use a combination of strategically placed front post double crochet stitches and double crochet stitches to get that delicious ribbed texture!
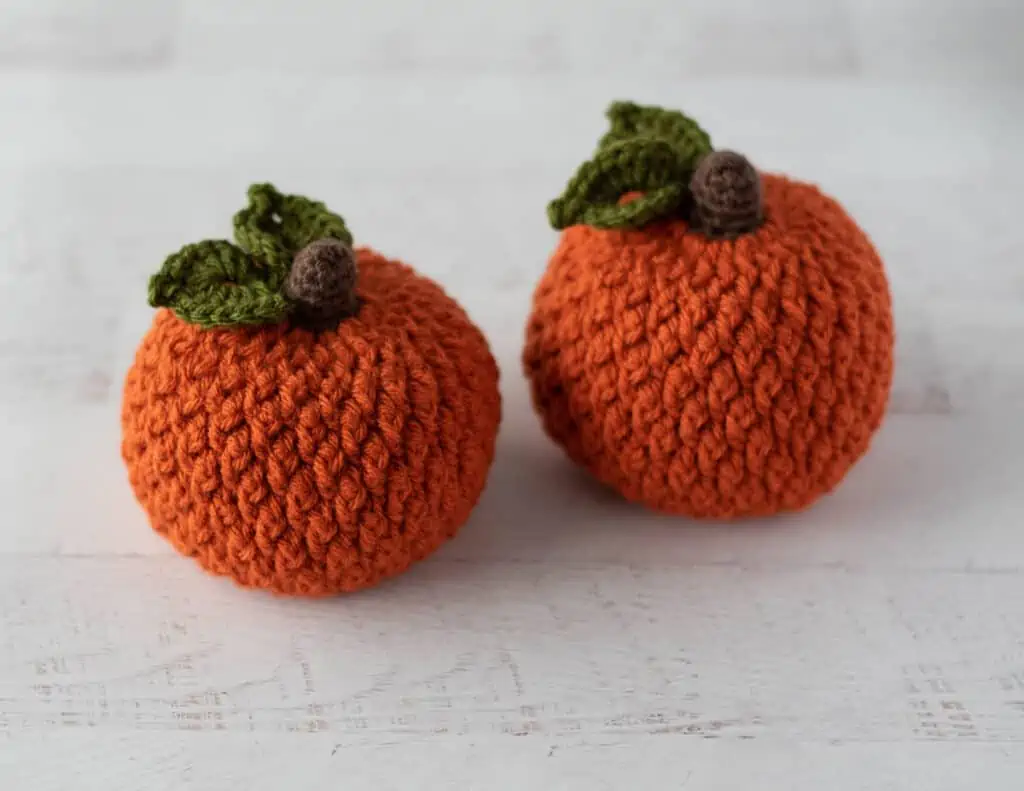
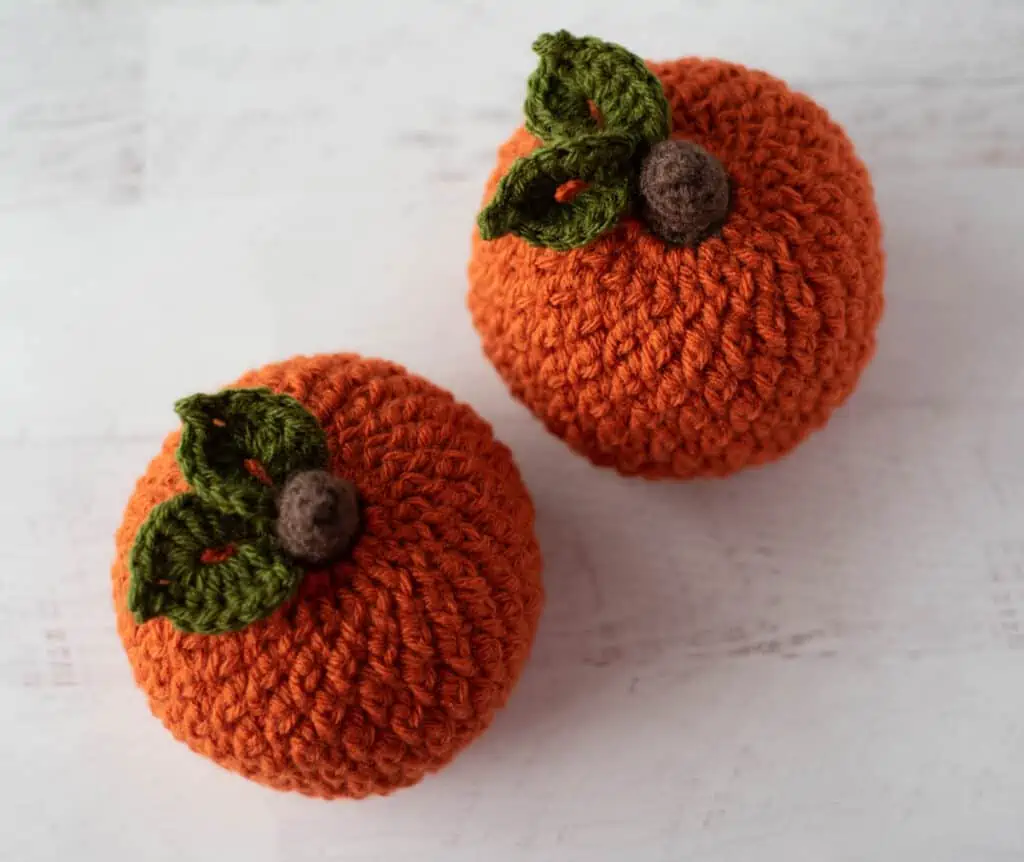
I’m also loving that the fun texture gives the feeling of the vertical ribs on a pumpkin so there’s no shaping required… unless you want to cinch it in a tiny bit. I couldn’t decide which way I liked it my finished pumpkins … On the photo belowof the 2 solid-colored pumpkins, the left pumpkin is cinched in a little to sit a little squatter. The pumpkin on the right is not cinched.. which is a little easier finishing and looks equally gorgeous!
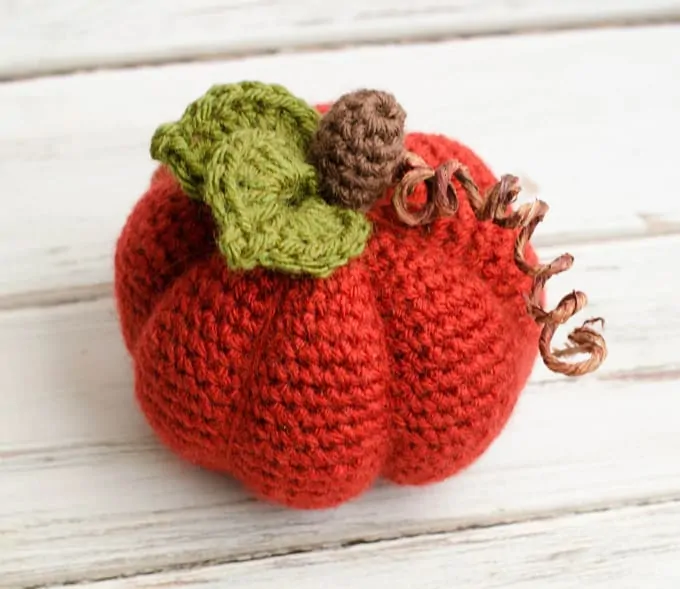
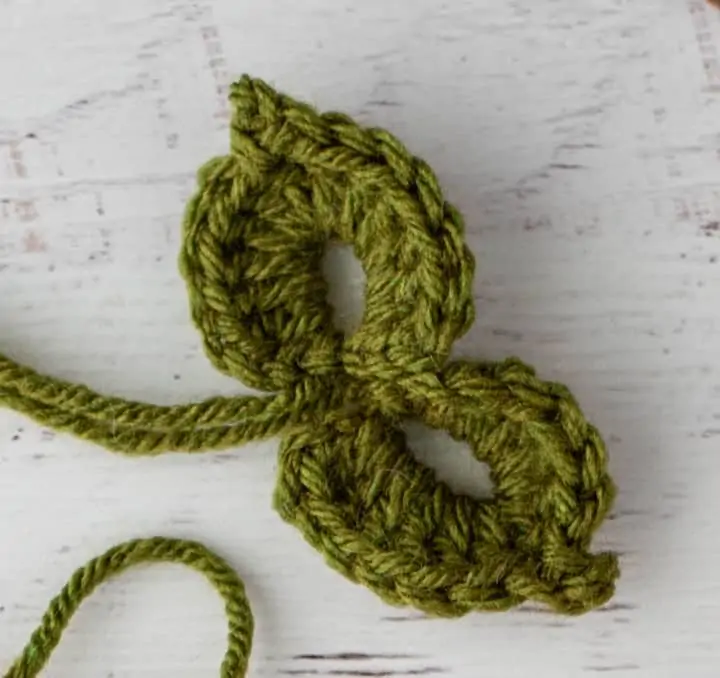
And let’s not forget the glorious leaves! I’ve used these leaves on countless pumpkins including the adorable crochet plaid pumpkin and the pumpkin wine cozy! It’s simply a combination of stitches worked in a magic ring for one amazing leaf!
Let’s dive into this beautiful texture crochet pumpkin pattern!
Crochet Textured Pumpkin Pattern
Here is what you will need for this pattern:
- US G 6/4.00 mm crochet hook (these are my absolute favorite hooks I recommend to everyone!)
- 2 ounces worsted weight yarn in Orange, scraps of green and brown. I used Vanna’s Choice in Terra Cotta and scrap yarn for green and brown.
- Fiberfill Stuffing
- Yarn needle and scissors
Resources and tutorials you may find helpful in following this cotton pumpkin crochet pattern: Crochet Abbreviations, US to UK Crochet Conversion Chart. Find links to stitches on the “Tutorial” menu: Getting Started will show show basic crochet stitches such as chain stitch, single crochet and double crochet stitch used in this pattern. This pattern uses the front post double crochet stitch. You can learnhow to crochet post stitches here. And the Crochet Stitch Dictionary shows our growing collection of crochet stitch tutorials.
You might find a stitch marker or piece of yarn helpful for keeping track of rows.
Textured Crochet Pumpkin Size:
Pumpkin measures approximately 4.5″ in width and 4.5″ in height.
Textured Pumpkin Pattern
Pumpkin is worked top down starting at the top of the stem.
Pumpkin Stem:
With brown yarn, make a magic ring. Note that the crochet stem is worked in continuous rounds.
R1: 6 sc into ring (6 st).
R2: *sc in next st, 2sc in next. Repeat from * around (9 st)
R3-5: sc around. (9 st)
R6: *sc in next 2 st, 2sc in next. Repeat from * around (12 st). At end of round slip st to next st, changing to orange in last stitch. Fasten off brown yarn, leaving a strand to weave in later. Continue with orange yarn to work pumpkin.
Pumpkin:
R7: With orange yarn, ch 2 (does NOT count as hdc) 2hdc in ea st around. Join with sl st to 1st stitch in row (24 st)
R8: ch 3 (counts as 1st st), FPDC around ea st (24 st). Join with sl st to top of starting chain.
In the next row, increase in every stitch by first working a front post double crochet over the next stitch, then working a dc in the top of the same stitch just worked.
R9: ch1, FPDC around ch 3 from previous round, dc in top of starting ch, *FPDC around next st, dc in top of same stitch. Repeat from * around. Slip stitch to top 1st stitch. (48 st)
R10: Ch3, *FPDC in next st, dc in next st. Repeat from * around ending with a FPDC. Sl st to top of starting chain 3. (48 st)
R11: ch1, FPDC around ch 3 from previous round, dc in next st, *FPDC around next st, dc in top of nextstitch. Repeat from * around. Slip stitch to top 1st stitch. (48 st)
R12-17: Work in pattern, repeating rows 10 & 11
The next row is a row of double crochet decreases worked as follows: Yarn over, insert hook into next stitch, yarn over, pull through 2 loops, insert hook AROUND next stitch as if to FPDC, yarn over, pull through 2 loops, yarn over and pull through all 3 loops on hook. FPDC Decrease made.
R18: ch 1, work FPDC decreases around. Sl st to top of first st. (24 st)
Begin to stuff pumpkin with polypill.
R19: ch 2 (counts as hdc, hdc in next st, (hdc 2 tog), *hdc in next 2 st, (hdc 2 tog). Repeat from * around. Sl st to top of starting ch 2. (18 st)
R20: ch 1, *sc in next st, (sc 2 tog). Repeat from * around, do not join (work remainder in spiral). (12 st)
R21: (sc 2 tog) around. Fasten off, leaving a very long strand. (6 st).
Weave opening closed.
If desired, use long strand to shape the pumpkin further and cinch it downward a bit. To do this, use the threaded needle with the same yarn used for weaving closed the last row. Insert the needle up to a stitch next to the base of the stem, then back into the work and to the opposite side of the base of the stem. Pull tight to cinch up and then while holding tension on the pumpkin, insert the needle back down to the bottom of the pumpkin. When satisfied with the pumpkin shape, knot off the yarn and fasten it to the bottom of the pumpkin, hiding the ends of the yarn inside.
Crochet Pumpkin Leaves
Using Green yarn, *Chain 8 and join to form ring.
R1 in the ring just made work all of the following: ch 2, 6 dc, ch 3, sl st to 1st ch, 6 dc, ch 2, sl st.* One leaf made. Do NOT fasten off.
Repeat from * to * to make a 2nd leaf. Fasten off, leaving a long strand for sewing.
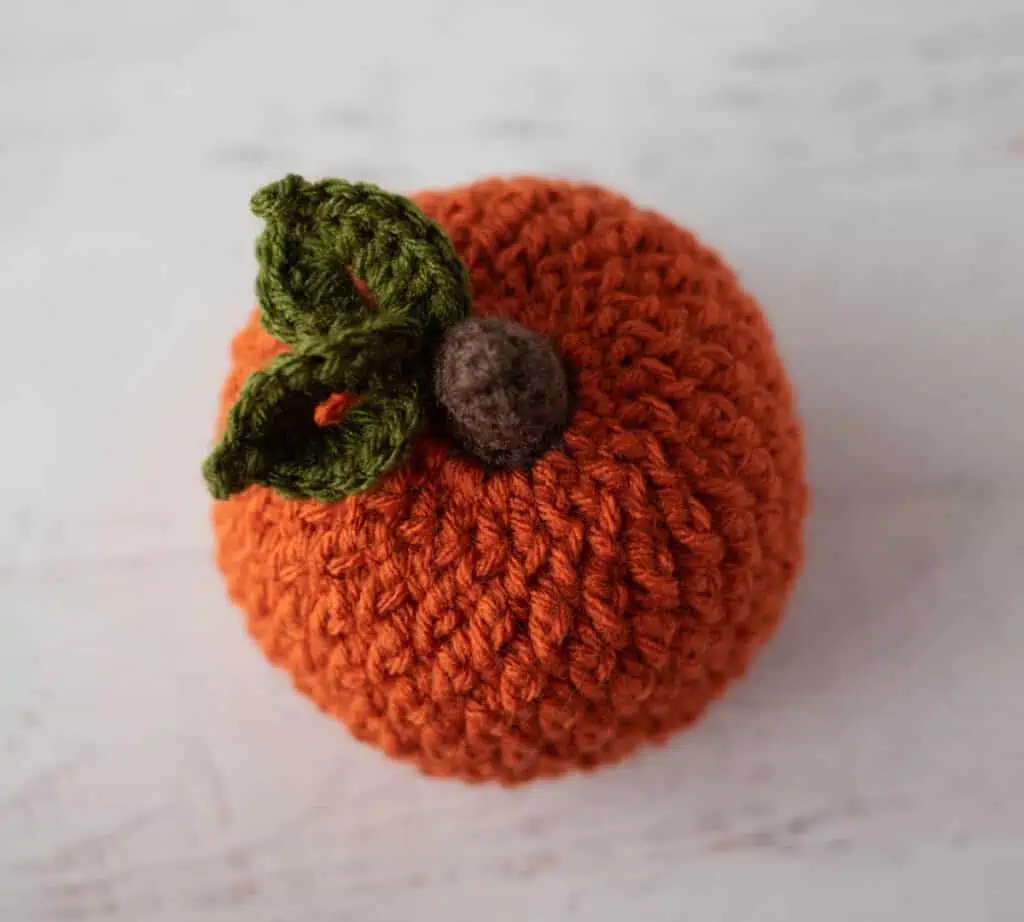
Sew the leaves next to the stem on top of the pumpkin.
Then.. Go forth and crochet an entire pumpkin patch. Put one on your fireplace mantle or scatter them into your decor. Or make an adorable amigurumi pumpkin for your favorite person. This cute crochet pumpkin pattern might just be your favorite make of the season.
Pumpkin Variation Ideas
If you love these bumpy pumpkins and are wondering about a different sized pumpkin, you could could work additional rows to make it taller. This pattern is based on the 3-6 month sized Pumpkin Hat, so you could even pop over to that post and follow the directions to make a larger hat and add some extra decreases to finish off your larger pumpkin.
This pattern uses medium weight yarn, but you could use a different yarn weight to achieve a different sized pumpkin. A bulky weight yarn or chunky yarn will make a bigger pumpkin. A DK or fingering weights of yarn will make a much smaller pumpkin.
Likewise, you can also vary up the type of yarn you use. Try cotton yarn for a crisp look or wool yarn for a warm and cozy vibe.
These adorable crochet pumpkins look great in lots of colors! You can vary the color of the pumpkin to make a more rustic pumpkin design or try white, teal or blue pumpkins. Scatter them throughout your home for your fall classic crochet pumpkin decor! Crocheting pumpkins might just become your favorite past time!
Explore More Crochet Patterns
Do you love crochet as much as I do? I think you’re going to love these other fun crochet patterns:
I love seeing your finished projects! If you enjoyed making this Textured Crochet Pumpkin Pattern, I’d love to see yours on Instagram, be sure to tag me @crochet365knittoo. If you are on Facebook, stop over to the Crochet 365 Knit Too Facebook page or pop over to the Crochet365KnitToo Club and share a photo! I’d love to see your work!

That is the cutest thing!!! I showed my hunny and he said it looks like a pineapple so… If you need another pattern make it longer and do it in a dusty yellow. LOL Like we don’t all have more projects lined up than we have life expectancy for LOL I love it now I need to make time to make it.
Love the look of this. Thank you
Trying to make this but having trouble. The textured pattern isn’t coming through. It seems the pattern alternates fpdc and dc, but on the next row, should the fpdc be on the dc, dc on the fpdc from the row below? Or should the fpdc be on the fpdc from below and the dc on the dc? Not sure if that makes sense. But I tried both ways and neither way gave this look.
When you get to the repeat portion of the pattern (rows 10 & 11) the post stitches alternate every row. So the fpdc is on the dc of the previous row and the dc is on the fpdc of the previous row. The rows do start differently to get you there. Be aware that you have to get into the repeats before the textured look becomes apparent. All the increases make the pumpkin look odd but then it sort of transforms as you go along. Hope that helps!
I’ve restarted this several times and after R9 I have 50 stitches . If your ch 3 counts as a stitch on R8 and you FPDC 24 times that’s 25 stitches. Once you start R9 you are making 2 Stitches over every stitch of the previous row so that would be 50 stitches. What am I miscounting?
The ch 3 counts as the first post stitch and the 24 stitches are for ALL the stitches in the row (including the ch 3). In the next row you are doubling the number of stitches, going from 24 to 48. Hope that helps.