
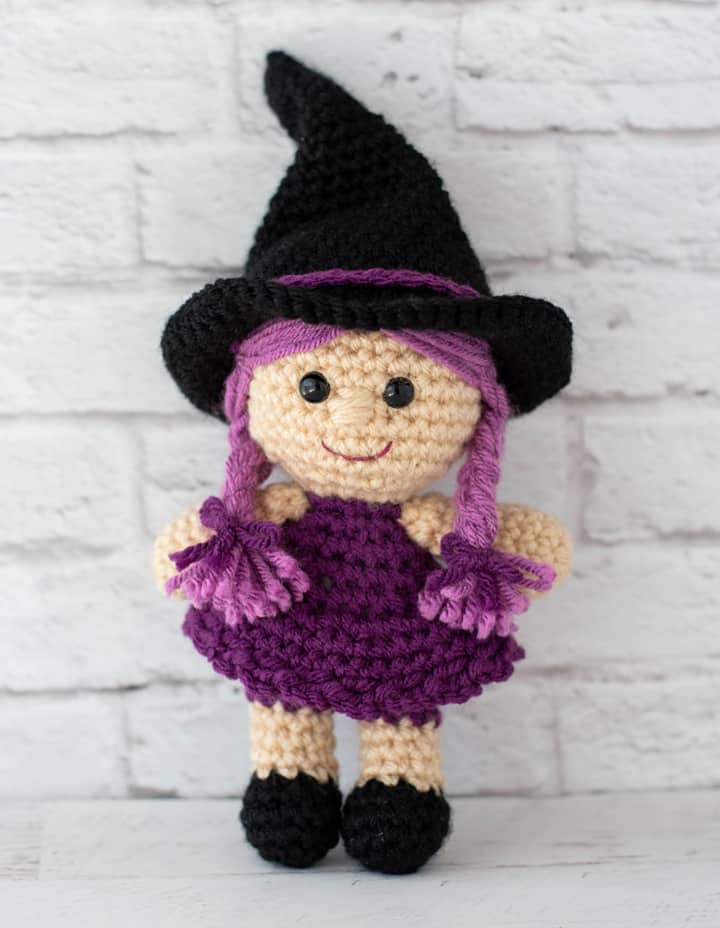
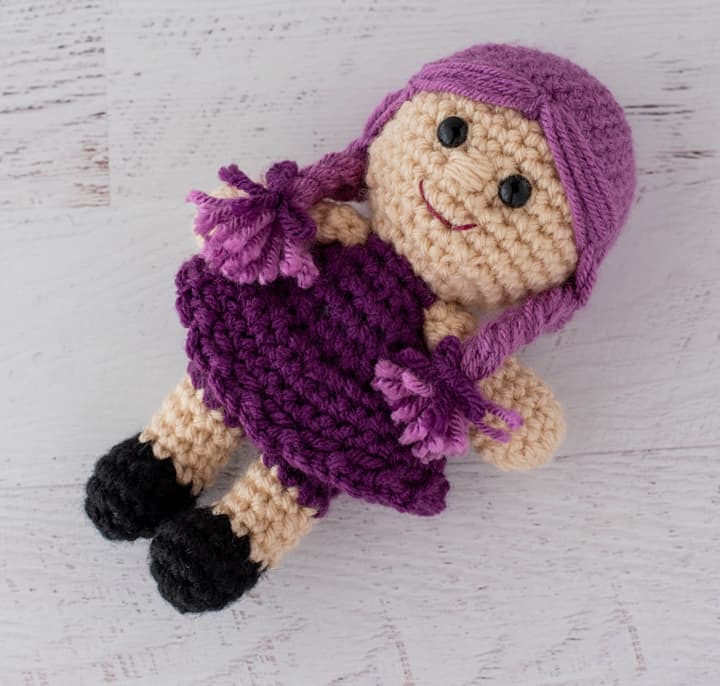
Crochet Witch ~ Sami
This post may contain referral/affiliate links. Please read my disclosure for more info.
Oh, be still my little Halloween heart. I’m completely smitten with this adorable crochet witch!
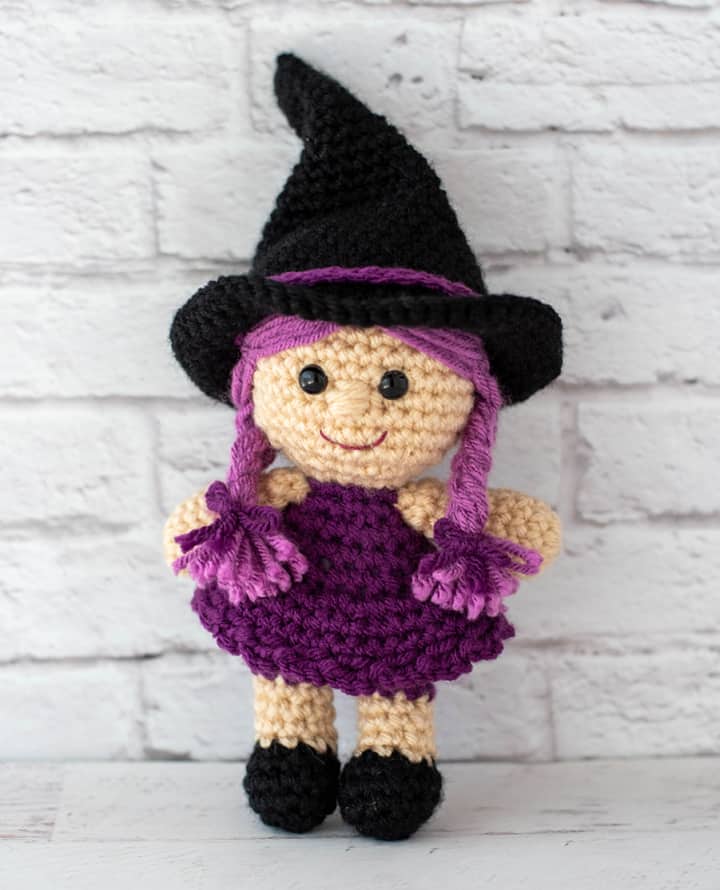
Meet my latest make: Sami. She’s the latest free pattern in my Tamingo series of little crochet amigurumi.
What’s a Tamingo you might ask? Good question! The word “Tamingo” is a made-up word. It was my son’s mispronunciation of the word “Flamingo” when he was a young boy. But it’s too darn cute NOT to be in our everyday vocabulary, right? A Tamingo is a small crocheted friend. These cute crochet dolls are a mere 6.5″ tall. They are perfect for clutching in a little one’s hand. Also, they look adorable in your home or office. No crochet judgment zone here.
We started the Tamingo Series with Rachel and now Sami, this little crochet witch has stolen my heart! Isn’t she just about the sweetest thing ever? I’m loving all the berry shades of goodness with just a tad of black.. which is respectable for every little witch doll, I think.
When I was a young girl, my absolute favorite TV show of all time was Bewitched. Our heroine had a serious problem: trying to reign in her clever and efficient witchy tendencies to accommodate her human husband. But she often couldn’t help herself and with a twitch of her nose, the magic would happen.
A few years ago, I bought the entire series on DVD and prepared myself for a charming walk down memory lane. I’m going to be honest right here and say that while I still love our heroine, my older, wiser self is glad we do a better job these days of encouraging young girls to be their true selves rather than conforming to a societal norm. I also realized that sometimes memories are best when they stay in the past, with only the good, warm, fond things flickering there.
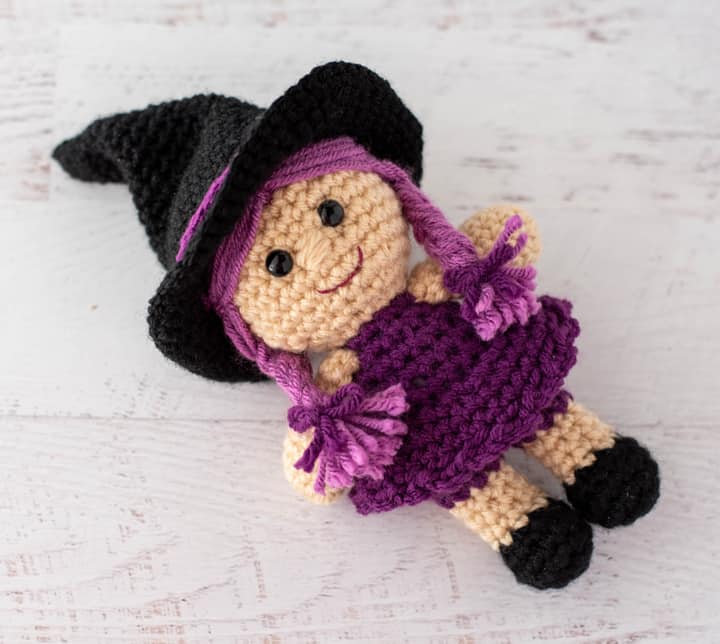
So with a nod to my favorite good witch, I thought I’d give my little amigurumi crochet witch a more modern, fun name, suitable to her cute self. I’m calling her Sami and oh man… am I ever smitten with this cute pattern!
She’s such a fun make! Some clever color changes on her body form the base of her dress and panties. Then a quick skirt worked in the front loops of a row makes for a fun and full skirt. If you’re looking for a removable dress, you might try making some adjustments to Rachel’s crochet doll dress instead.
Little Sami is a great little witch for Halloween and the fall season, but is versatile for other seasons too! That is what I love about this Tamingo series, so many interchangeable elements! I love when I can get more than one use out of a crochet pattern!
Add a little broom and add Sami into your halloween decor as a cute little crochet witch gnome. Or deck your little one out in a witch costume and take Sami along as an accessory for trick or treating (and she can always go in the treat basket if your little one gets tired of holding her).
And let’s talk about this adorable crochet witch hat, shall we? I can’t decide if I like the hat brim or the witchy vibes of the crooked part on this cute witch hat.
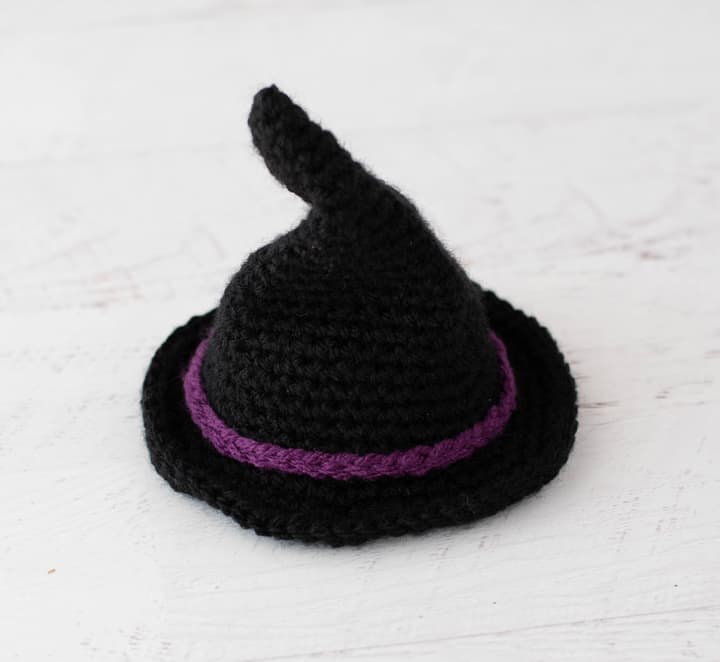
Seriously, I think this witch hat pattern could be a THING all by itself. Isn’t it the cutest? This witch hat is fast and fun, it’s worked in one color with a little strand of yarn chain in a contrasting color. Personally, I went for a cute purple yarn, but you could do green yarn, orange yarn, or really anything that suits your fancy. It would also make a darling wizard hat too!
I also stuck with the traditional black yarn witch hat, but if a little one is dressing up for Halloween and has a different color hat, it could be really cute to change out the black yarn to have it match your little one’s outfit more.
I also struck with the traditional black yarn witch hat, but if a little one is dressing up for Halloween and has a different color hat, it could be really cute to change out the black yarn to have it match your little one’s outfit.
If you’re looking to learn how to make the best amigurumi, be sure to check out my Amigurumi: A Beginner’s Guide. It’s a massive 165-page ebook of detailed tutorials, tips, and tricks (plus exclusive patterns). You can read about that right here.
MORE TAMINGO AMIGURUMI PATTERNS
If you love the Sami, the Crochet Witch pattern, you might also like to check out these other patterns in the Tamingo Series:
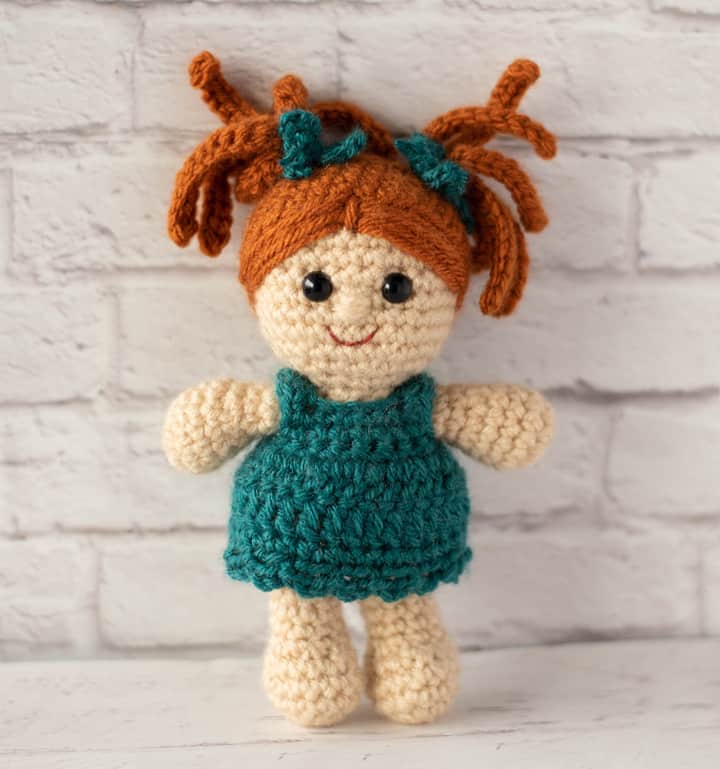
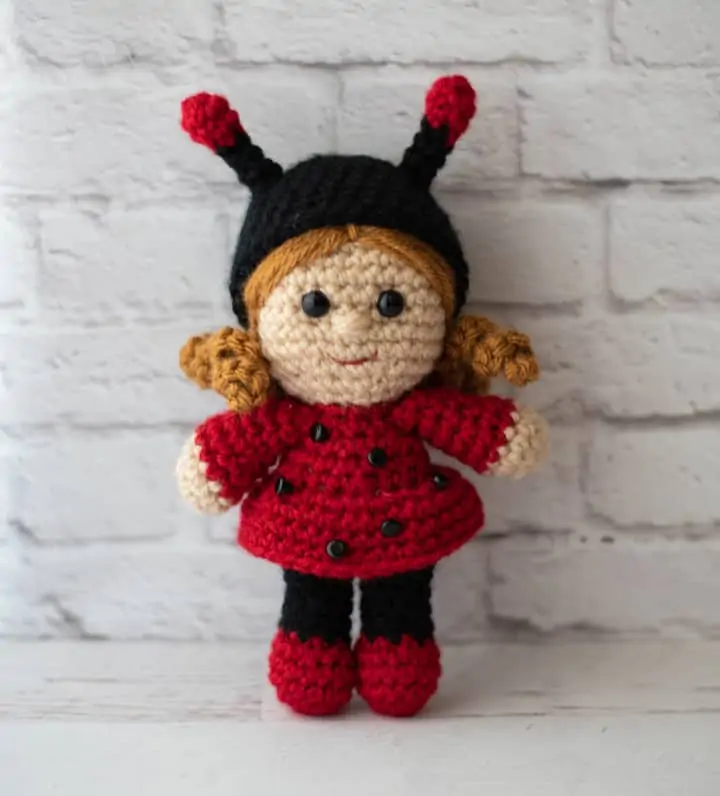
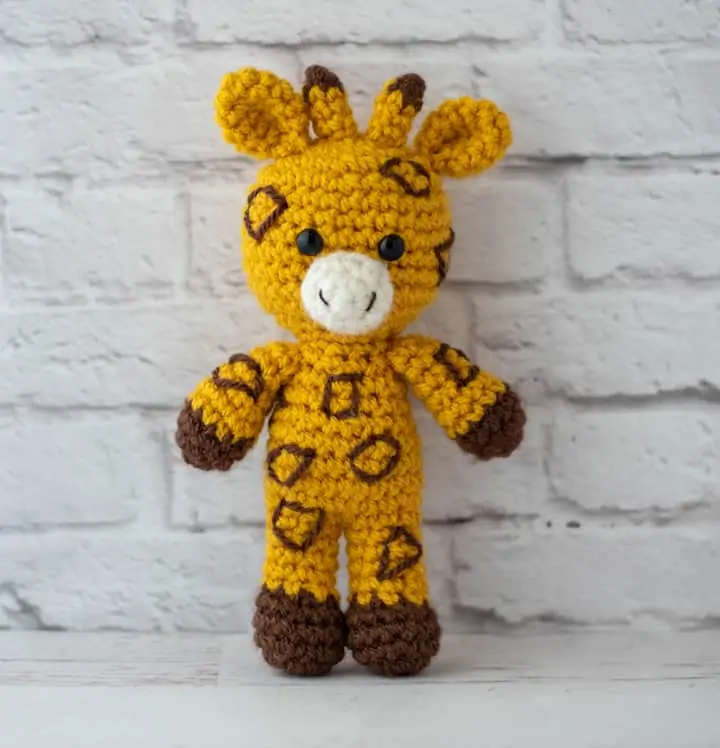
Rachel Crochet Doll // Lucy the Ladybug // Gigi the Crochet Giraffe
Let’s get started on crocheting Sami, the adorable crochet witch in our Tamingo series…
Purchase an ad-free printable version of Sami ~ Crochet Witch Tamingo Pattern Here
Crochet Witch Pattern
Here is what you will need:
- US G 6/4.0 mm crochet hook (these are my absolute favorite hooks I recommend to everyone!)
- Worsted Weight yarn
- Main: 1 oz, sample used Vanna’s Choice in Beige
- Hair: 3/4 oz, sample used Hobby Lobby I Love This Yarn in Hot Orchid
- Dress: 1 oz, sample used Hobby Lobby I Love This Yarn in Mixed Berry
- Shoes & Hat: 1 oz, sample used Vanna’s Choice in Black
- Fiberfill
- Stitch Marker
- Tapestry needle and scissors
Resources and tutorials you may find helpful in following this pattern: Crochet Abbreviations, US to UK Crochet Conversion Chart. Find links to stitches on the “Tutorial” menu: Getting Started will show basic crochet stitches, such as single crochet stitch, double crochet stitch, slip stitch (slst), and any other additional stitches that may be used in many other patterns.
You’ll want to be sure you know how to single crochet increase (inc) and decrease (dec). (I love using the single crochet invisible decrease with my amigurumi but you can use a regular crochet decrease if you prefer.) There is also the Crochet Stitch Dictionary which is a delightful guide to our growing collection of crochet stitch tutorials.
Gauge is not important in this crochet pattern. You may use other weights of yarn. Adjust the hook size to fit your needs. With the yarn and 4.0 mm hook, the gauge is about 4 single crochet stitches to an inch.
The finished doll is approximately 6.5″ tall from the top of the head (without hat) to the bottom of the feet.
For this pattern, the recommended skill level is advanced beginner to intermediate.

Head
With Main Color yarn, make a magic ring
R1: 6 sc into ring (6 sts). (Do not join, worked in rounds)
R2: 2 sc in ea st (12 st)
R3: *sc in next st, 2 sc in next. Repeat from * around. (18 st)
R4: *sc in next 2 st, 2 sc in next. Repeat from * around. (24 st)
R5: *sc in next 3 st, 2 sc in next. Repeat from * around. (30 st)
R6-11: sc around. (30 st)
R12: *sc in next 3 st, sc2tog. Repeat from * around (24 st) Begin stuffing head
R13: *sc in next 2 st, sc2tog. Repeat from * around (18 st)
Insert safety eyes between round 8 and 9, leaving 3 stitches in between the eyes. Adjust stuffing and stuff the remainder of the head.
R14: *sc in next st, sc2tog. Repeat from * around (12 st). Fasten off leaving a long tail for sewing.
Note on Limb and Body construction: The legs are worked separately and then joined together in the first row of the body. The body is worked to the neck and fastened off. Then the arms are worked and the pieces are sewn together. Please follow the instructions carefully for stuffing and fastening off notes. There is a detailed photo tutorial in the Amigurumi Beginners Guide if you would like more detailed instructions on how to work this method of leg-to-body construction.
Legs (Make 2)
With Shoe Color, make a magic ring
R1: 6 sc into ring (6 sts). (Do not join, worked in rounds)
R2: 2 sc in ea st (12 st)
R3: *sc in next 3 st, 2 sc in next. Repeat from * around. (15st)
R4: sc around
R5: *sc in next 3 st, sc2tog. Repeat from * around. Change to Main Body Color in last stitch (12 st).
R6: sc in next 3 st, [(sc2 tog) three times], sc in last 3 st (9 st). Stuff the feet.
R7-9: sc around (9 st), changing to Dress Color yarn in last stitch.
R10: sc around (9 st), Fasten off for first leg. After 2nd leg, do not fasten off, continue to body below. Stuff the rest of the legs.
Witch Body
In the next row, the legs are crocheted together and form the bottom of the body. Position the legs so that they are in the correct position with both feet facing forward. Use a stitch marker to mark where they meet in the middle. This stitch marker holds the center stitch from each leg to each other. Also, make sure that you also have a stitch marker in the last stitch worked in the leg just completed. This stitch will be the last stitch worked in this row.
R1: Continuing with dress color yarn, sc in the next stitch of the leg just worked. Continue to single crochet in each stitch until you reach the marker holding the 2 legs together. Work a single crochet in the next stitch (which is the stitch holding the legs together). THEN work a single crochet in the matching stitch on the OTHER leg. You can remove the stitch marker if you’d like. Continue to single crochet all the way around the other leg (9 stitches on that leg). You are now at the middle of the doll on the opposite side. Single crochet in the remaining unworked stitches on the first leg worked in this row, finishing in the stitch you marked as the end of the row. Count your stitches for this row. There should be 18 stitches in the row. If you have more or less than this, take a look at the stitches worked at the joining points and see if you’ve missed or worked an extra stitch here.
R2: Continuing to work in the round, *sc in next 2 st, 2sc in next st, repeat from * around (24 st)
R3-5: sc around. (24 st)
The next round ONLY is worked through the back loops as follows:
R6: Work this round in the Back Loop Only (blo): *sc in next 2 st, sc2tog. Repeat from * around (18 st)
R7-8: Working through both loops again, sc around (18 st). Stuff body.
R9: *sc in next st, sc2tog. Repeat from * around (12 st).
R10: sc around (12 st). Fasten off leaving a long strand for joining. Stuff the body.
Skirt
Hold body, feet side up with the back of doll facing. Attach dress color yarn with a slip stitch to a front loop (flo) on row 6 of the body.
R1: ch1 and sc in same stitch as joining, 2 sc in next front loop, *sc in next front loop, 2sc in next front loop. Repeat from * around. Join with sl st to top of 1st sc in round. (36 st)
R2-3: ch 1, sc in same stitch as joining, sc around. Join with sl st to top of 1st sc in round. (36 st)
R4: *ch 3, skip next st, sl st in next. Repeat from * around, slip stitching at base of starting ch 3 in round to join. Fasten off and weave in ends.
Arms (Make 2)
With Main Color yarn, make a magic ring
R1: 6 sc into ring (6 sts). (Do not join, worked in rounds)
R2: 2 sc in ea st (12 st)
R3-5: sc around (12 st).
R6: *sc in next st, (sc2 tog, repeat from * around (8 st). Lightly stuff hand
R7-9: sc around
Leave remainder of arm unstuffed.
Crochet Witch Body Assembly
Using yarn from ends of work, sew head to body. Sew arms to sides near the neckline.
Witch Hair Wig
It’s important to work the steps for the hair in the correct order. First, crochet the wig cap. Then cut and attach hair strands for the braids to the wig cap. Next, sew the entire wig cap to the doll’s head. Finally, the hair strands are braided and the bangs are embroidered on.
With Hair Color yarn, make a magic ring
R1: 6 sc into ring (6 sts). (Do not join, worked in rounds)
R2: 2 sc in ea st (12 st)
R3: *sc in next st, 2 sc in next. Repeat from * around. (18 st)
R4: *sc in next 2 st, 2 sc in next. Repeat from * around. (24 st)
R5: *sc in next 3 st, 2 sc in next. Repeat from * around. (30 st)
R6-10: sc around (30 st). Join with slip stitch to next stitch. Fasten off leaving a long strand for sewing.
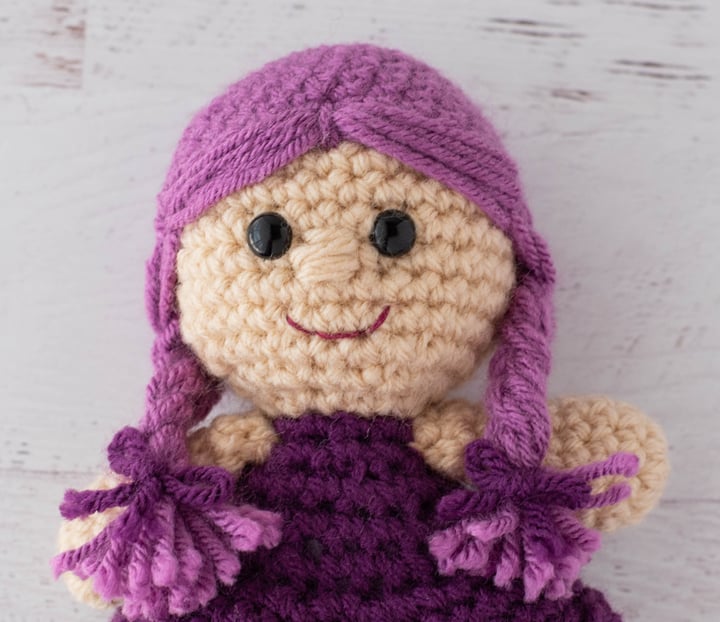
Pigtail Braids
Cut 20 pieces of yarn, each approximately 11” long. I used the short end of a notebook to wrap yarn for the strands. The strands will be cut after hair is attached and braided so it’s ok if your strands are a little longer than this to start, but they should be at least 11” long.
Fold each strand in half and attach one strand to each stitch on the sides and back of the wig cap. (Note: you will still have the long strand from fastening off the wig cap which you will be using later to attach the wig cap to the head; just work around this as best you can in this step).
Use the hook to pull the folded end of each strand through each stitch, making a small loop, then pull the cut ends through the loop and tighten. Repeat to place a strand in each of the 20 stitches around the sides and back of the wig cap.
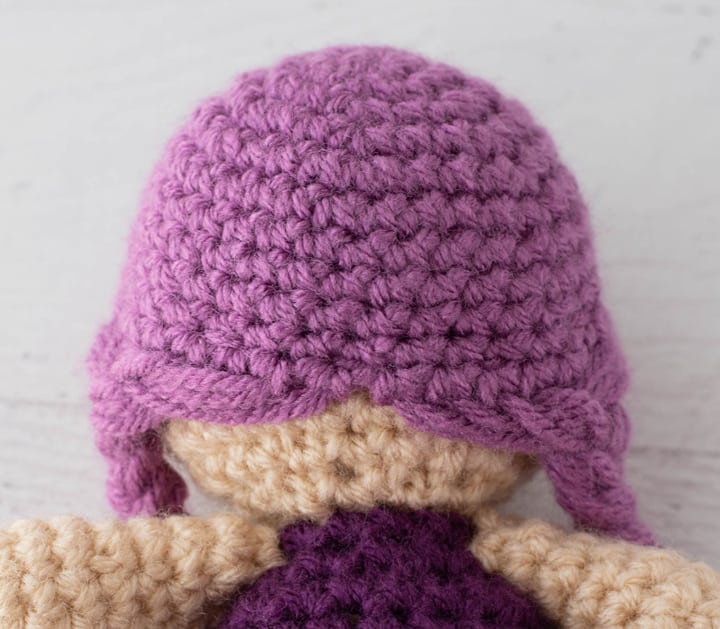
Place hair (wig) on head of doll, and adjust. The bottom of the wig should sit approximately between rows 11 &12 of the head at the back of the neck. Use a yarn needle to sew carefully, being careful not to catch the loose hair strands and do not pull stitches too tightly so that wig sits on head and is not noticeably sewn down.
Then divide the strands of hair in half and braid each side to a pleasing length. Use a scrap piece of hair color yarn to tie the hair in place. Cut the remaining strands of hair so that the ends of the braid are even.
Hair Ties (Make 2)
Cut a long strand of dress color yarn. Carefully tie a bow. Then double knot the bow so the hair tie stays in place. Trim the loose ends of the yarn so that the bow and tie look appropriately sized.
Add Bangs
To add bands, thread tapestry needle with yarn, sewing several stitches to each side of center front as shown. Finish with 1 or 2 short stitches to simulate a part in the bangs at the center front.
Witch Amigurumi Facial Features
With Main Color yarn, work 3-4 stitches to form nose. Work over 2 or so stitches centered between the eyes, starting approximately between rows 8-9 of head and working downward.
Use a scrap of pink color floss or yarn to stitch a smile a few rows beneath the nose, referring to photo. First stitch the horizontal portion of mouth about 1.5-2 stitches below bottom of nose. Then make one stitch on each side of line slanting up and out to form smile.
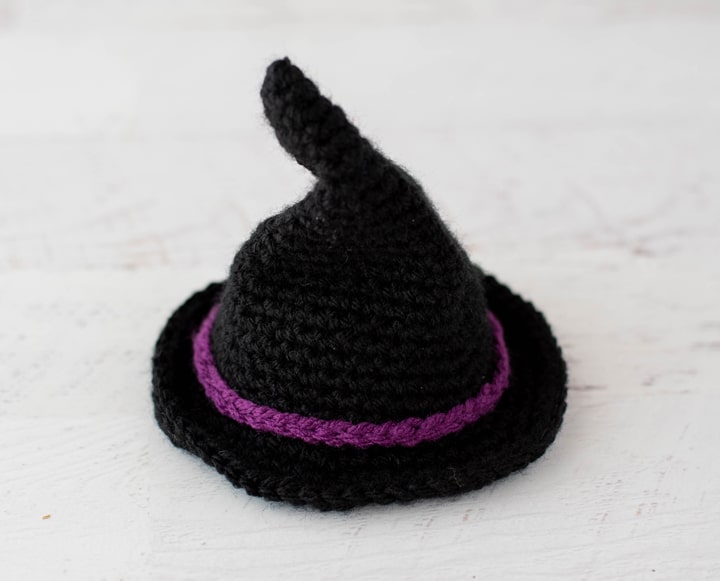
Crochet Witch Hat Pattern
With Hat Color yarn, make a magic ring
R1: 3 sc into ring (3 sts). (Do not join, worked in rounds)
R2: 2 sc in ea st (6 st)
R3: sc around (6 st)
R4: *sc in next st, 2 sc in next. Repeat from * around. (9 st)
R5: sc around (9 st)
R6: *sc in next 2 st, 2 sc in next. Repeat from * around. (12 st)
R7: sc around (12 st)
R8: *sc in next 3 st, 2 sc in next. Repeat from * around. (15 st)
R9: sc around (15 st)
R10: *sc in next 4 st, 2 sc in next. Repeat from * around. (18 st)
R11: sc around (18 st)
R12: *sc in next 5 st, 2 sc in next. Repeat from * around. (21 st)
R13: sc around (21 st)
R14: *sc in next 6 st, 2 sc in next. Repeat from * around. (24 st)
R15: sc around (24 st)
R16: *sc in next 7 st, 2 sc in next. Repeat from * around. (27 st)
R17: sc around (27 st)
R18: *sc in next 8 st, 2 sc in next. Repeat from * around. (30 st)
R19: sc around (30 st)
R20: *sc in next 9 st, 2 sc in next. Repeat from * around. (33 st)
R21: sc around (33 st)
R22: *sc in next 10 st, 2 sc in next. Repeat from * around. (36 st)
R23: sc around (36 st)
R24: *sc in next 11 st, 2 sc in next. Repeat from * around. (39 st)
R25: sc around (39 st)
R26: *sc in next 5 st, 2 sc in next, sc in next 6 st, 2sc in next. Repeat from * around. (45 st)
R27: *sc in next 6 st, 2 sc in next, sc in next 7 st, 2sc in next. Repeat from * around. (51 st)
R28: *sc in next 7 st, 2 sc in next, sc in next 8 st, 2sc in next. Repeat from * around. (57 st)
R29: *sc in next 8 st, 2 sc in next, sc in next 9 st, 2sc in next. Repeat from * around. (63st). At end of round, sl st to next st and fasten off. Weave in ends.
Crochet Witch Hat Band
With Dress Color yarn, chain 39. Fasten off and position on the witch hat just above the brim. Sew in place, taking care to line up starting and ending points of chain to form a continuous strip of color.
Purchase an ad-free printable pdf version of Sami ~ Crochet Witch Tamingo Pattern Here
Explore More Crochet Patterns
Do you love crochet as much as I do? I think you’re going to love these other fun crochet patterns:
- Crochet Pumpkin
- Crochet Spider
- Crochet Fall Decor Collection
I love seeing your finished projects! If you enjoyed making this Crochet Witch Pattern I’d love to see yours on Instagram, be sure to tag me @crochet365knittoo. If you are on Facebook, stop over to the Crochet 365 Knit Too Facebook page or pop over to the Crochet365KnitToo Club and share a photo! I’d love to see your work!

Absolutely adorable! Thank you for sharing the pattern.
Thia little witch is so cute, thank you so much, can’t wait to make her
Your Tamingos are adorable!!!!! I love your blog!
Yes. Yes. Yes. Sweetest Girl. The Sunny and Warm Smile makes her Snazzy!!!
She is very pretty! The purple is the perfect color.