
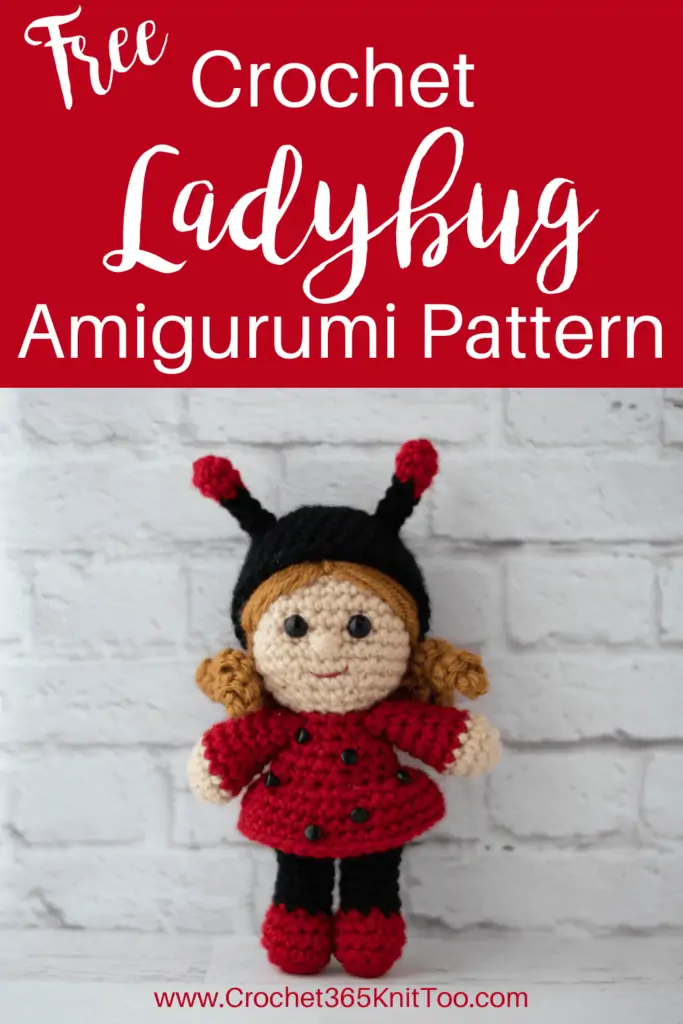
Lucy the Ladybug Amigurumi
This post may contain referral/affiliate links. Please read my disclosure for more info.
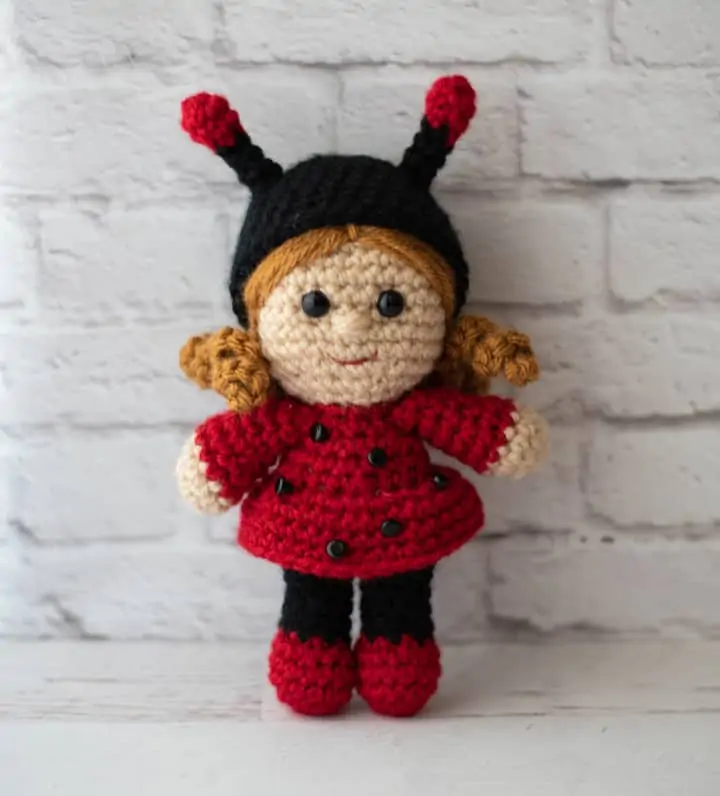
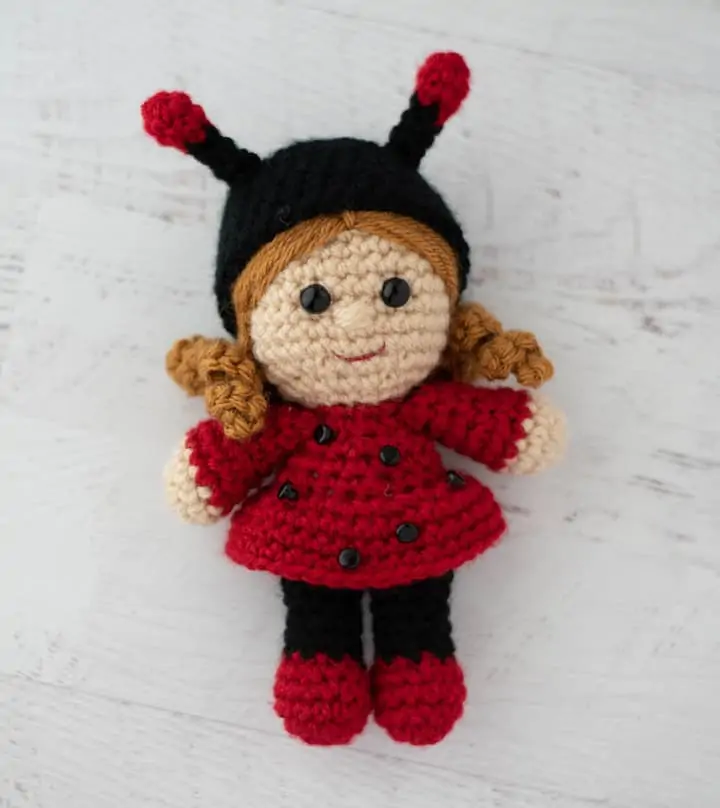
Meet Lucy the Ladybug! She’s decked out for summer fun! From her cute blonde curls to that darling black hat, this is one ladybug amigurumi you’ll love on your hook!
Be still my summer heart because Lucy has arrived! She’s the latest in my Tamingo series of darling crochet amigurumi.
What’s a Tamingo? Great question! The word “Tamingo” is a made up word. It was my son’s mispronunciation of the word “Flamingo” when he was a young boy. Since I love the word, I thought I’d use it for my fun collection of small crocheted amigurumi. These cute crochet dolls are a mere 6.5″ tall. They are perfectly sized for your favorite little one to hold. There’s a lot young at heart folks that love these little makes too. She makes awfully nice office companion, after all!
When I made my Ladybug Rattle a bit ago, I got into the ladybug vibe and thought a little doll dressed up as a ladybug would be super cute. I love her fun hairstyle with her locks of curls and it’s so easy to do! Her dress and outfit are just fun color changes! I found some tiny 1/4″ black buttons in my stash and knew the “spots” just got easy (though you could embroider yours instead if sewing on buttons isn’t your thing).
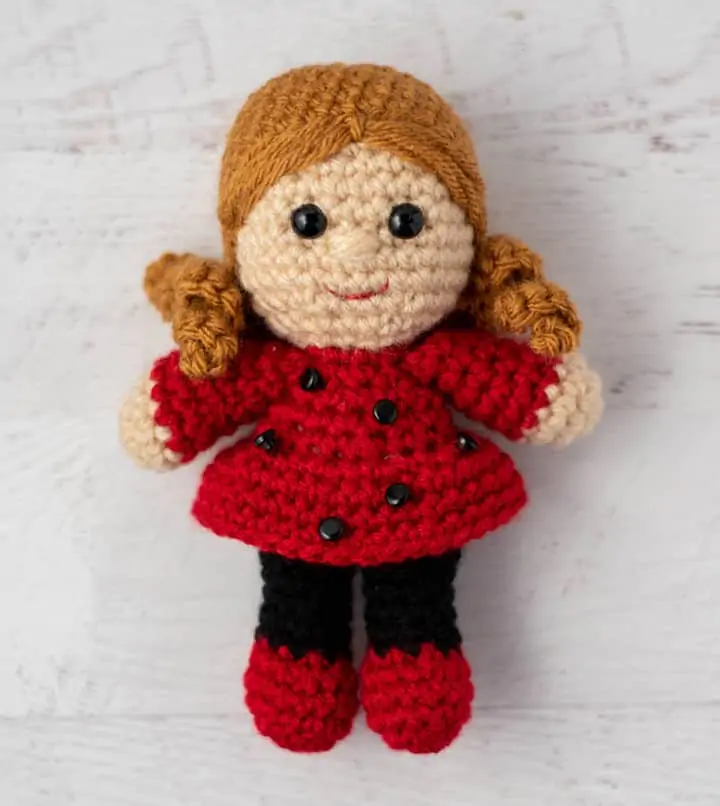
This is a fun pattern to ‘make your own’. Change her dress color and make her legs flesh tone and you’ve got a cute girl in an ordinary dress. Leave the antennae off the hat and she’s has a beanie. You could even add a cute little pom pom to the top! So many ideas to customize this fun ladybug pattern!
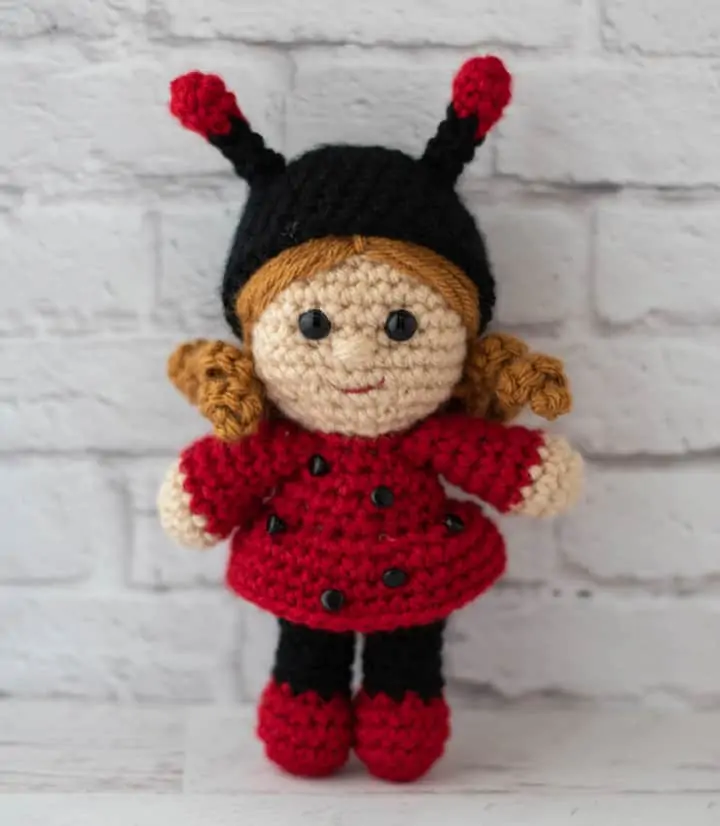
Isn’t she darling? Sigh. I just love these little makes so much! They are so fun to crochet up in an evening or two. Fun to work the little details. And even more fun to give away or display.
MORE TAMINGO AMIGURUMI PATTERNS
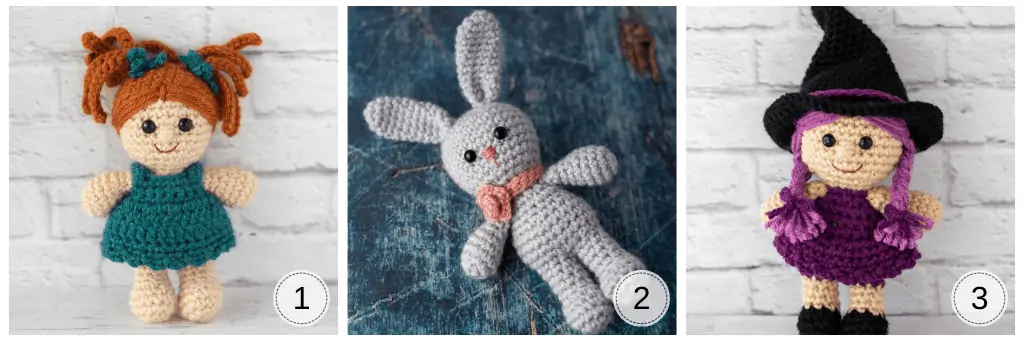
If you love the Lucy the Ladybug Amigurumi crochet pattern, you might also like to check out these other patterns in the Tamingo Series:
1. Rachel // 2. Bernadette the Bunny // 3. Sami the Witch
Let’s get started on crocheting Lucy our adorable ladybug amigurumi pattern…
Crochet Ladybug Amigurumi
Here is what you will need:
- US G 6/4.0 mm crochet hook(these are my absolute favorite hooks I recommend to everyone!).
- Worsted Weight yarn
- Main: 1/2 oz, sample used Lion Brand Vanna’s Choice in Beige
- Dress, Shoes and tips of Antennae, 1 oz Red, sample used Hobby Lobby I Love this Yarn in Red
- Legs and Hat: 1/2 oz Black, sample used Hobby Lobby I love this Yarn in Black
- Hair: 1/2 oz Gold, sample used Lion Brand Vanna’s Choice in Honey
- 9 mm Black Safety Eyes
- Embroidery floss for mouth
- Fiberfill
- (12) 1/4″ black buttons (plus sewing needle & thread)
- Tapestry needle and scissors
Resources and tutorials you may find helpful in following this pattern: Crochet Abbreviations, US to UK Crochet Conversion Chart. Find links to stitches on the “Tutorial” menu: Getting Started will show basic stitches used in many patterns and Crochet Stitch Dictionary shows our growing collection of crochet stitch tutorials.
Gauge is not important in this pattern. You may use other weights of yarn. Adjust hook size to fit your needs. With the yarn and hook size given, my gauge is about 4 single crochet stitches to an inch.
Finished ladybug amigurumi is approximately 6.5″ tall from top of head (excluding hat, etc) to bottom of feet.

Head:
With Main Color yarn, make a magic ring
R1: 6 sc into ring (6 sts). (Do not join, worked in rounds)
R2: 2 sc in ea st (12 st)
R3: *sc in next st, 2 sc in next. Repeat from * around. (18 st)
R4: *sc in next 2 st, 2 sc in next. Repeat from * around. (24 st)
R5: *sc in next 3 st, 2 sc in next. Repeat from * around. (30 st)
R6-11: sc around. (30 st)
R12: *sc in next 3 st, sc2tog. Repeat from * around (24 st) Begin stuffing head
R13: *sc in next 2 st, sc2tog. Repeat from * around (18 st)
Insert safety eyes between rows 8 and 9, leaving 3 stitches in between the eyes. Adjust stuffing and stuff the remainder of the head.
R14: *sc in next st, sc2tog. Repeat from * around (12 st). Fasten off leaving a long strand for sewing.
Note on Limb and Body construction: The legs are worked separately and then joined together in the first row of the body. The body is worked to the neck and fastened off. Then the arms are worked and the pieces are sewn together. Please follow the instructions carefully for stuffing and fastening off notes. There is a detailed photo tutorial in the Amigurumi Beginners Guide if you would like more detailed instructions on how to work this method of leg to body construction.
Legs (Make 2):
With Red yarn, make a magic ring
R1: 6 sc into ring (6 sts). (Do not join, worked in rounds)
R2: 2 sc in ea st (12 st)
R3: *sc in next 3 st, 2 sc in next. Repeat from * around. (15st)
R4: sc around
R5: *sc in next 3 st, sc2tog. Repeat from * around. Change to Black yarn in last stitch (12 st).
R6: With Black yarn, sc in next 3 st, [(sc2 tog) three times], sc in last 3 st (9 st). Stuff the feet.
R7-10: sc around (9 st). Fasten off for first leg. After 2nd leg, do not fasten off, continue to body below. Stuff the rest of the legs.
Body:
In the next row, the legs are crocheted together and form the bottom of the body. Position the legs so that they are in the correct position with both feet facing forward. Use a stitch marker to mark where they meet in the middle. This stitch marker holds the center stitch from each leg to each other. Also make sure that you also have a stitch marker in the last stitch worked in the leg just completed. This stitch will be the last stitch worked in this row.
R1: Continuing with black yarn, sc in the next stitch of the leg just worked. Continue to single crochet in each stitch until you reach the marker holding the 2 legs together. Work a single crochet in the next stitch (which is the stitch holding the legs together). THEN work a single crochet in the matching stitch on the OTHER leg. You can remove the stitch marker if you’d like. Continue to single crochet all the way around the other leg (9 stitches on that leg). You are now at the middle of the doll on the opposite side. Single crochet in the remaining unworked stitches on the first leg worked in this row, finishing in the stitch you marked as the end of the row. Count your stitches for this row. There should be 18 stitches in the row. If you have more or less than this, take a look at the stitches worked at the joining points and see if you’ve missed or worked an extra stitch here.
R2: Continuing to work in the round, *sc in next 2 st, 2sc in next st, repeat from * around (24 st)
R3-4: sc around. Change to Red yarn in last stitch of row 4. (24 st)
R5: With Red yarn, sc around (24 st)
The next round ONLY is worked through the back loops as follows:
R6: Work this round in the Back Loop Only: *sc in next 2 st, sc2tog. Repeat from * around (18 st)
R7-8: Working through both loops again, sc around (18 st). Stuff body.
R9: *sc in next st, sc2tog. Repeat from * around (12 st).
R10: sc around (12 st). Fasten off leaving a long strand for joining. Stuff the body.
Skirt:
Hold body, feet side up with the back of doll facing. Attach dress color yarn with a slip stitch to a front loop on row 6 of the body.
R1: ch1 and sc in same stitch as joining, 2 sc in next front loop, *sc in next front loop, 2sc in next front loop. Repeat from * around. Join with sl st to top of 1st sc in round. (36 st)
R2-4: ch 1, sc in same stitch as joining, sc around. Join with sl st to top of 1st sc in round. At end of last round, fasten off, (or you can join with an invisible join, if you desire) and weave in ends. (36 st)
Arms (Make 2):
With Main Color yarn, make a magic ring
R1: 6 sc into ring (6 sts). (Do not join, worked in rounds)
R2: 2 sc in ea st (12 st)
R3: sc around, changing to red yarn in the last stitch (12 st).
R4-5: With red yarn, sc around (12 st).
R6: *sc in next st, (sc2 tog, repeat from * around (8 st). Lightly stuff hand
R7-9: sc around.
Fasten off leaving a long strand for sewing. Leave remainder of arm unstuffed.

Ladybug Amigurumi Body Assembly:
Using yarn from ends of work, sew head to body. Sew arms to sides near the neckline. Using sewing needle and thread, randomly sew buttons for spots on dress skirt and bodice, referring to photos.
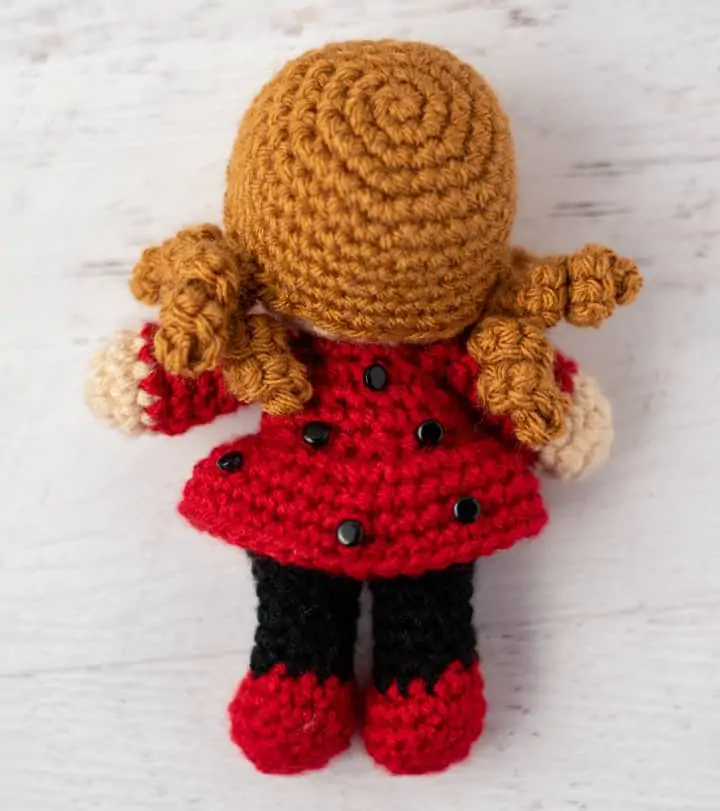
Hair Wig:
It’s important to work the steps for the hair in the correct order. First crochet the wig cap, noting that the curls are crocheted right into the last row of the wig cap. Then sew the wig cap to the doll’s head, positioning the curls so they lay at either side of the neck. Finally, embroider on the bangs.
With Hair Color yarn, make a magic ring
R1: 6 sc into ring (6 sts). (Do not join, worked in rounds)
R2: 2 sc in ea st (12 st)
R3: *sc in next st, 2 sc in next. Repeat from * around. (18 st)
R4: *sc in next 2 st, 2 sc in next. Repeat from * around. (24 st)
R5: *sc in next 3 st, 2 sc in next. Repeat from * around. (30 st)
R6-10: sc around (30 st). Join with slip stitch to next stitch.
In the next round, the curls are crocheted as part of the round.
R11: [Sl st to next st, *chain 10, 2 sc in 2nd ch from hook and 2 sc into each chain across, sl st to next st on hair cap. Repeat from * TWICE.] this forms the first set of curls. Then sc in next 7 st and repeat the instructions between the brackets [ ] to form 2nd set of curls. The remaining stitches of the row are left unworked. Fasten off leaving a long strand for sewing.
Place hair (wig) on head of doll, and adjust. The bottom of the wig should sit approximately between rows 12 & 13 of the head at the back of the neck. Sew carefully, being careful not to catch the curls and do not pull stitches too tightly so that wig sits on head and is not noticeably sewn down.
Add Bangs:
To add bands, thread tapestry needle with yarn, sewing several stitches to each side of center front as shown. Finish with 1 or 2 short stitches to simulate a part in the bangs at the center front.
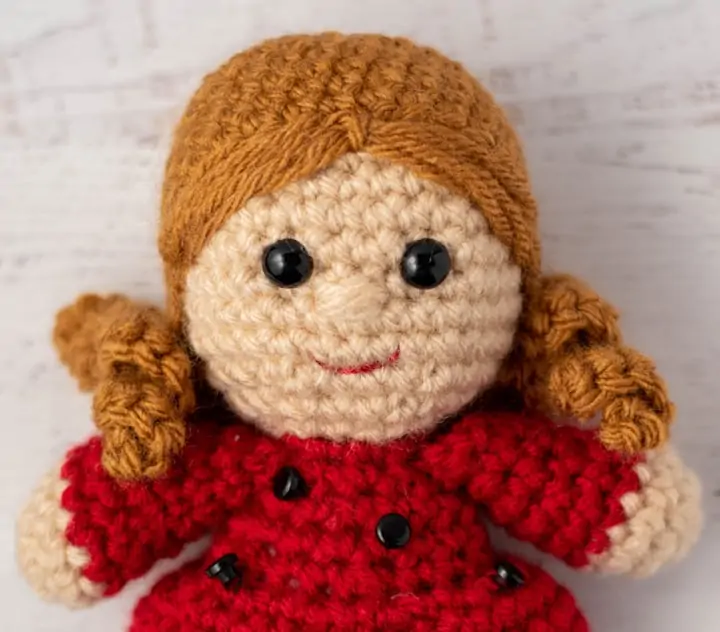
With Main Color yarn, work 3-4 stitches to form nose. Work over 2 or so stitches centered between the eyes, starting approximately between rows 8-9 of head and working downward.
Use a scrap of red color floss or yarn to stitch a smile a few rows beneath the nose, referring to photo. First stitch the horizontal portion of mouth about 1.5-2 stitches below bottom of nose. Then make one stitch on each side of line slanting up and out to form smile.
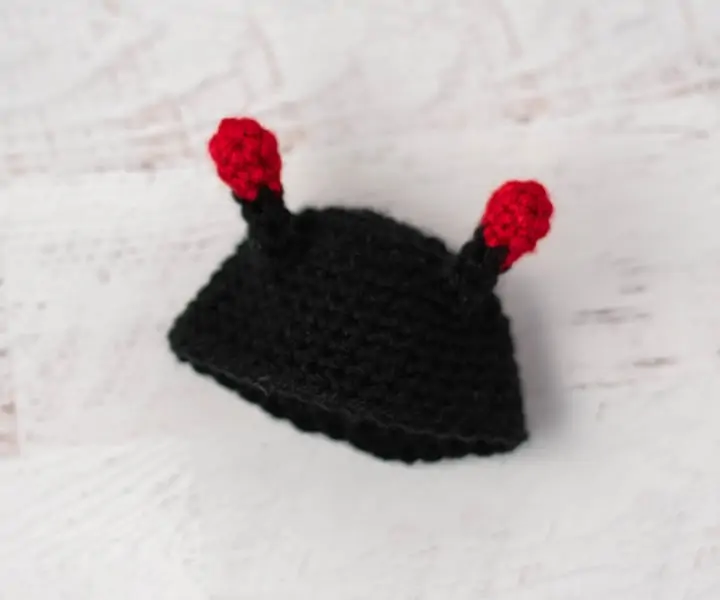
Ladybug Amigurumi Hat
With Black yarn, make a magic ring
R1: 6 sc into ring (6 sts). (Do not join, worked in rounds)
R2: 2 sc in ea st (12 st)
R3: *sc in next st, 2 sc in next. Repeat from * around. (18 st)
R4: *sc in next 2 st, 2 sc in next. Repeat from * around. (24 st)
R5: *sc in next 3 st, 2 sc in next. Repeat from * around. (30 st)
R6-12: sc around (30 st). At end of last round, join with sl st to next st. Fasten off and weave in ends.
Crochet Ladybug Antennae (Make 2)
With Red yarn, make a magic ring
R1: 6 sc into ring (6 sts). (Do not join, worked in rounds)
R2: *sc in next 2 st, 2 sc in next. Repeat from * once. (8 st)
R3: *sc in next 2 st, sc2tog. Repeat from * once (6 st) Stuff antennae tip very lightly
R4: : *sc in next st, sc2tog. Repeat from * once, change to black in last stitch (4 st)
R5-7: With Black, sc around (4 st). Fasten off leaving a long strand for joining. Do not stuff rest of antennae.
Sew antennae over row 5 of hat, leaving approximately 6 stiches between antennae. You may wish to position the hat on the doll’s head to be sure you are satisfied with the antennae placement and adjust as needed.
Fasten off and weave in all ends.
There’s something about crocheting cute things that speaks right to my heart! Be sure to check out these free heartwarming patterns:

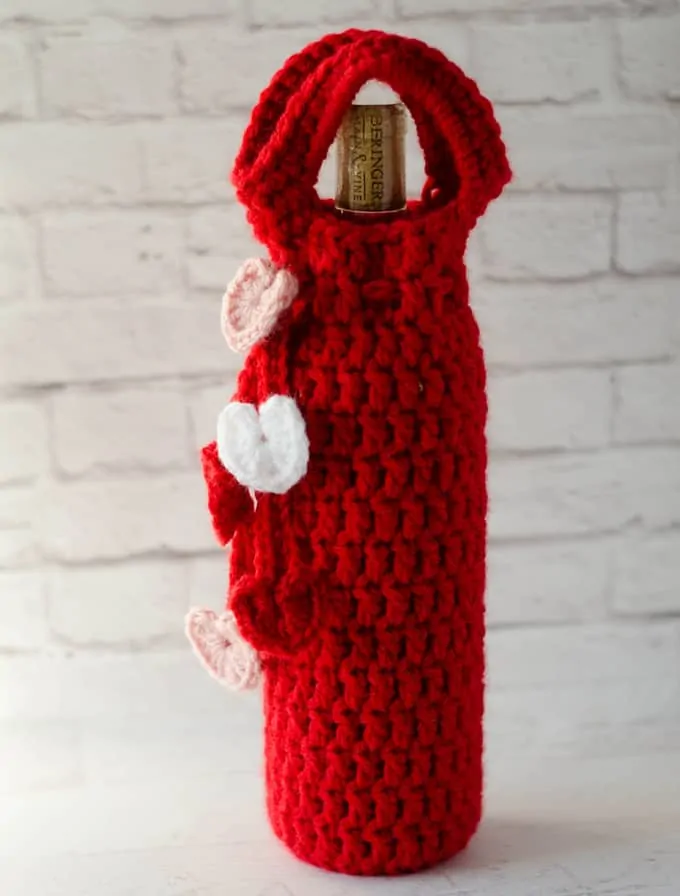
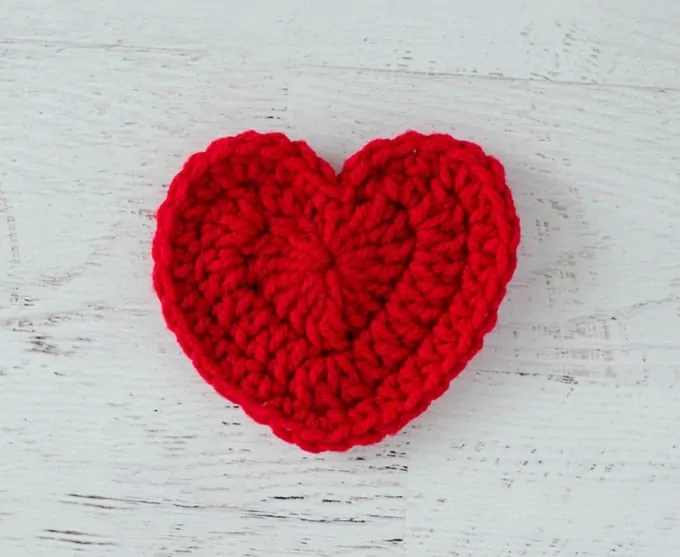
So many of you love my darling amigurumi crochet heart pattern, my valentine crochet bottle cover and the ever so popular crochet heart appliqué!
I love seeing your finished projects! If you enjoyed making Lucy the Ladybug Amigurumi Pattern I’d love to see yours on Instagram, be sure to tag me @crochet365knittoo. If you are on Facebook, stop over to the Crochet 365 Knit Too Facebook page or pop over to the Crochet365KnitToo Club and share a photo! I’d love to see your work!
Just read your email. I love your little snippets of life! You are so right it is those little and often unexpected moments of joy that make life precious. Thank you for sharing yours and for reminding me to cherish mine. I get as much please urge from your “ moments” as I do from your crochet patterns.
It was my birthday yesterday and I was delighted to get 2 crochet books and a set of clover hooks. (Maybe with a little nod in that direction). I cannot wait to immerse myself in them. More joy! However, having just seen your new ladybug pattern, I may be heading that way before I open my books.
So really. I just wanted to say, thank you! Thank you for sharing your stories, your patterns and for connecting us crocheters all over the world in these strange, frustrating and a little scarey times. I wish you many more moments of unexpected smiles and please keep passing them on. Xxx
Aww… what kind words! Thank you! I’m glad crochet connects us all!
Super cute!
I love the Tamingo dolls. I was looking for something for my adopted great-granddaughters and they fit the bill.
Thank you so much.