
Crochet Snowman Pattern
This post may contain referral/affiliate links. Please read my disclosure for more info.
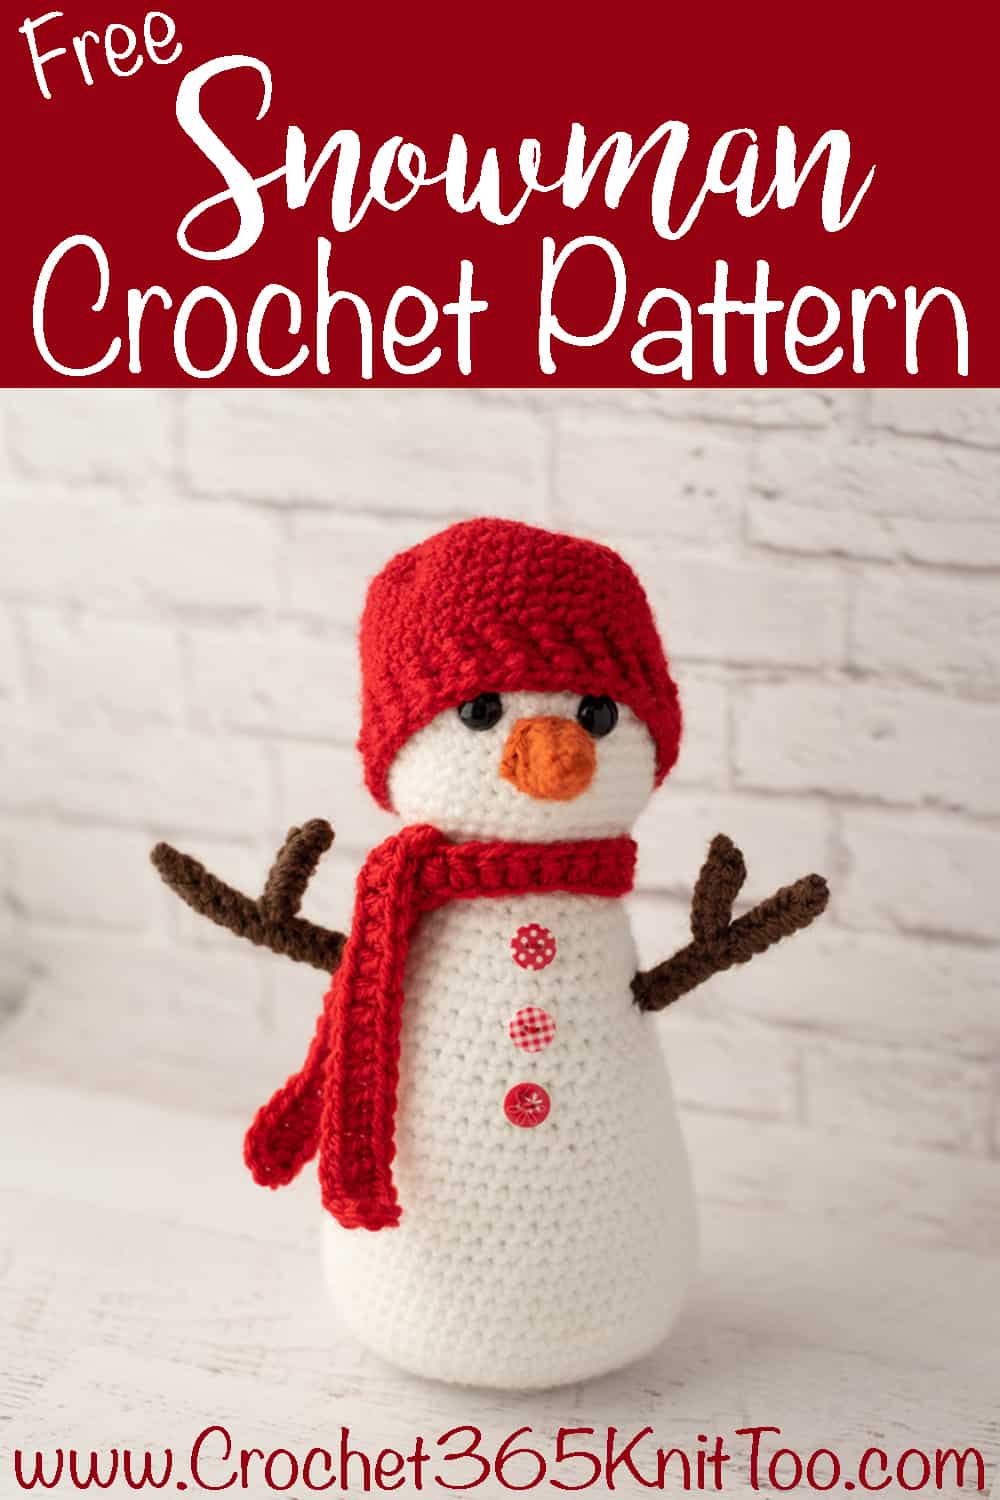
What’s cute, festive and soon to be on your hook? Why this cute little crochet snowman, of course!
When you think about it, who doesn’t need a good crochet snowman in their life?
A snowman conjures up all the wonderful memories of childhood. Outside in the winter air. Packing snow seeping inside wet mittens. Cold noses and rosy cheeks. And most of all, laughter. Because building a snowman is best done with family and friends. And there’s sure to be a snowy mishap along the way.
So why not bring all those fun-filled memories inside with an adorable amigurumi snowman? Your cute crochet snowman can come out just as the weather turns cold.. stay for the holidays.. and then linger a bit after Christmas until you’re all over the snow and cold for the season.
Make a crocheted snowman for yourself and smile every time you spy it in your house. Or crochet one or more for gifts and share the smiles and memories with others.
This snowman crochet pattern is a great introduction to amigurumi. Amigurumi is a Japanese word that means ‘knit or crochet stuffed toy’. I love the crochet snowman as a beginner amigurumi project because there are only two stuffed pieces to make: the head and body.
You basically get the amigurumi experience without a lot of pieces to attach at the end. And a crocheted snowman is a lot like a real made-from-snow kinda snowman; if he’s a little misshapen from lack of experience, it just adds to the charm!
How to Crochet A Snowman
A cute crochet snowman is a fun and easy project with no complicated stitches involved. Here are ten simple steps to crochet a snowamn:
- Crochet the head from top to bottom in single crochet
- Insert the safety eyes
- Stuff the snowman head
- Crochet the body from bottom to top in single crochet
- Stuff the entire snowman body
- Sew the head and body together
- Crochet the nose
- Crochet the arms
- Attach nose and arms to snowman doll
- Sew snowman buttons to body
- Crochet hat and scarf and place on snowman
This crocheted snowman is an especially fun make whether you’re looking for a fun Christmas crochet project or just something to decorate for the cold weather months.
Here’s a bit more detail on how to crochet this cute holiday snowman. Using worsted weight yarn, crochet two simple pieces for the body and head. I used acrylic yarn but you could use any medium weight yarn.
My favorite thing about this amigurumi snowman is that we are not using special stitches here. You start with a magic ring and then work single crochet, which is a simple stitch most beginners know.
This cute snowman crochet pattern is worked in a continuous spiral like most amigurumi. So be sure to use stitch markers and to move your stitch marker every row to keep track of your rows. Make sure to leave a tail for sewing so you can easily put together your amigurumi snowman.
A classic snowman doll has coal button eyes, right? To get the same effect, in a nice clean look, insert safety eyes. If you don’t like coal button safety eye look or simply don’t have safety eyes on hand, you have other options.
You could use a regular button (I personally like black buttons but you could use other colors as well). You could make a crocheted button by working some single crochet stitches into a magic ring and joining with an invisible seamless join. Or you could use some black yarn in a tapestry needle to embroider the eyes.
Stuff the snowman head with polyester fiberfill. I do this as I go along. Also note that it’s easier to insert safety eyes before the snowman doll head is stuffed. But button sewing to snowman after the head is stuffed is much easier if you’re using buttons.
Use the same basic stitch and techniques for the body crocheted piece of your amigurumi snowman. Remember to use those stitch markers for keeping track of rows and be sure to leave a tail for sewing so that after the body is stuffed with polyester fiberfill, you can sew the head and body of your snowman together!
Then the fun part of your fun snowman pattern begins! You’ll crochet two easy triangles to sew together for a little carrot nose. Finally, make some cutie pie twig arms with the help of some pipe cleaners.
A tiny bit of sewing with a yarn needle and leftover tail of yarn and ta-da! A beautiful crochet snowman. Serious fun!
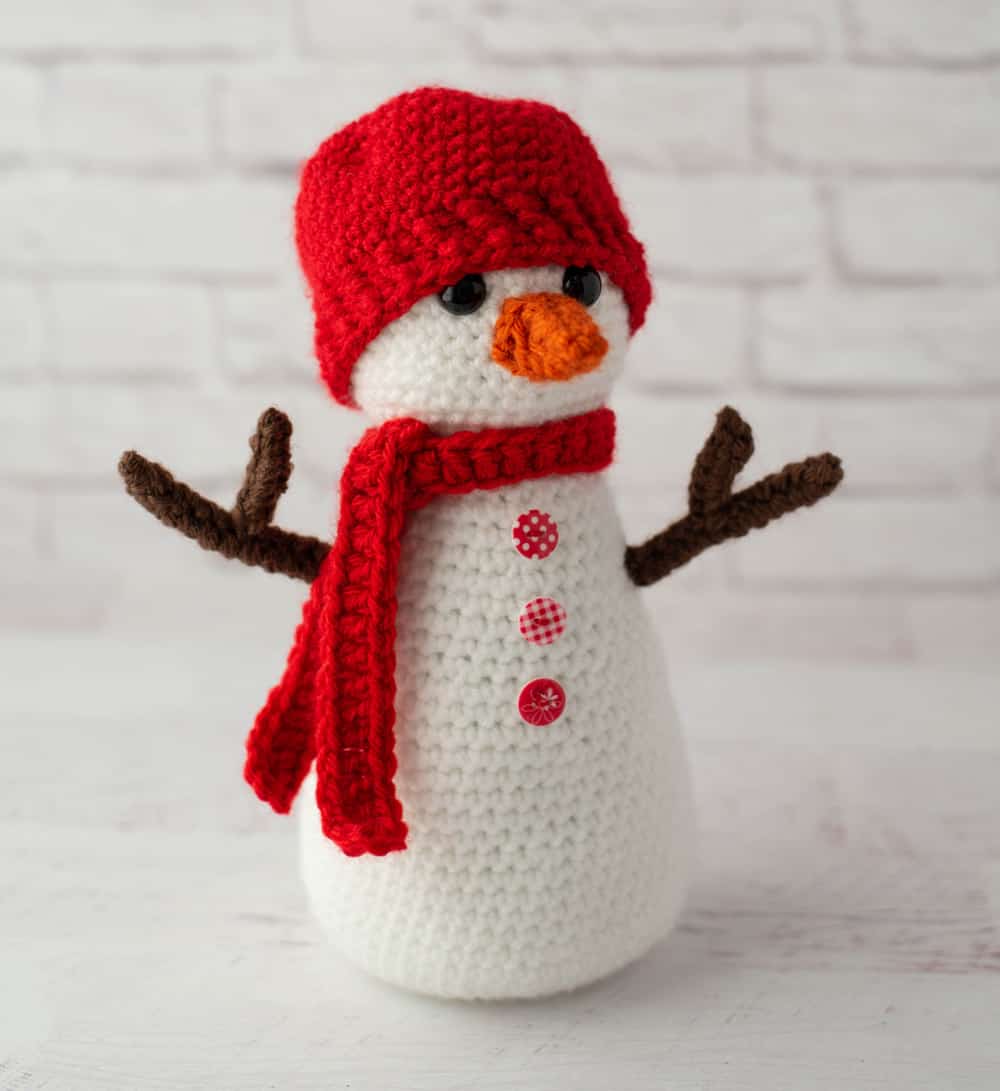
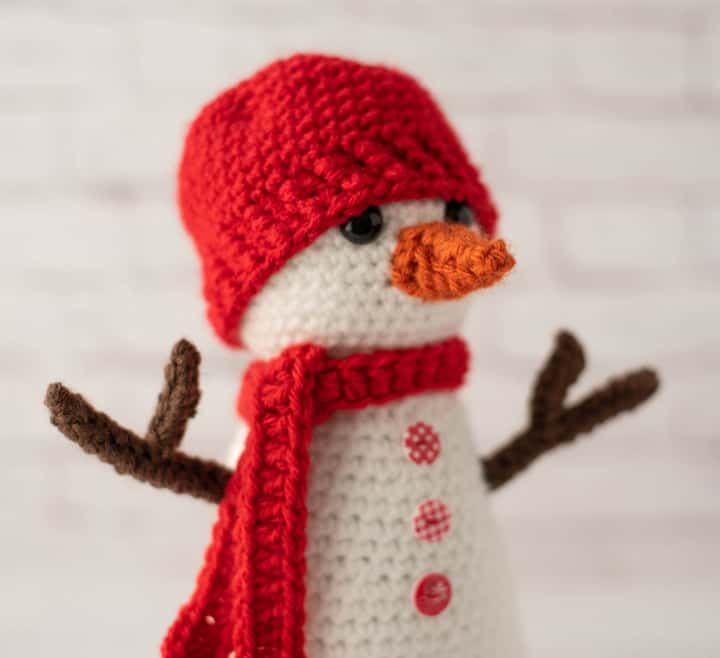
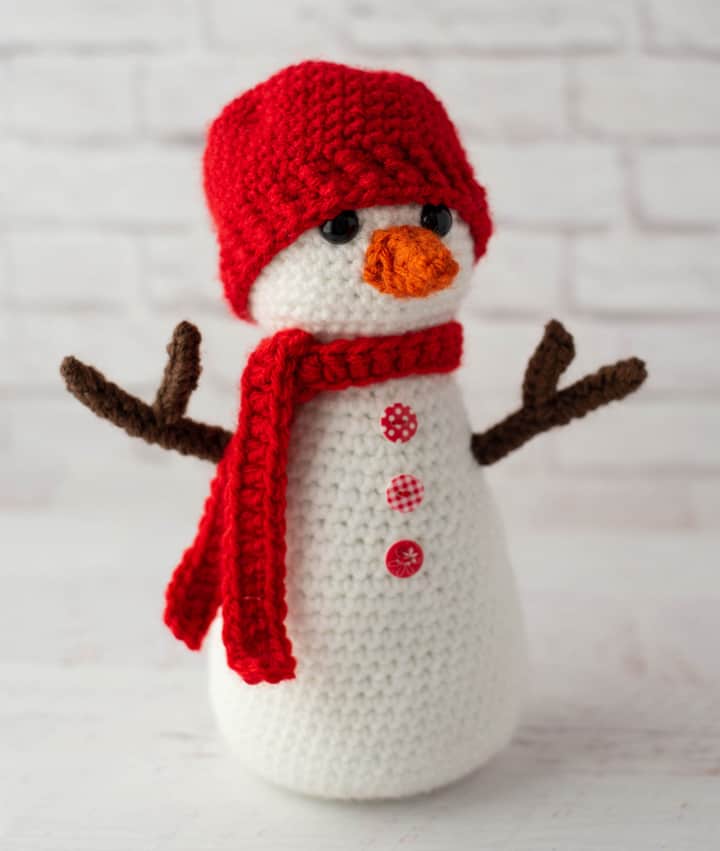
This cutie pie crochet snowman is decked out in a red stocking style red hat and an easy-to-crochet scarf. The cute buttons on the body are decorative, but you could make crocheted buttons or embroider them instead or leave them off altogether.
I like the look of 3 buttons on the snowman doll, but if you have a different idea for button placement, go for it! Two buttons or even 5 or 7 buttons would look cute too!
The snowman would look adorable with a different color hat and scarf or you could go with a different hat style and scarf design altogether if you wish. A snowman top hat, for instance, is a classic! This snowman crochet pattern is easily adapted to fit your decor.
Purchase the Beautifully Formatted AD-FREE PDF DOWNLOAD
Let’s dive into this fun crochet snowman free pattern:
Snowman Crochet Pattern
Materials
- US G 6/4.0 mm crochet hook (these are my absolute favorite hooks I recommend to everyone!)
- Worsted Weight yarn
- White: 1.5 oz, sample used Hobby Lobby I Love This Yarn in White
- Red: 3/4 oz, sample used Hobby Lobby I Love This Yarn in Red
- Orange and Brown Scraps, sample used Vanna’s Choice yarn scraps
- 12 mm safety eyes
- (2) Pieces of brown pipe cleaner (each cut to 5.5″ in length)
- (3) Small buttons, sample used 13 mm buttons from an assorted button pack from Hobby Lobby
- Fiberfill
- Tapestry needle and scissors
Resources and tutorials you may find helpful in following this pattern: Crochet Abbreviations, US to UK Crochet Conversion Chart. Find links to stitches on the “Tutorial” menu: Getting Started will show basic stitches such as single crochet, chain stitch and double crochet. My Crochet Stitch Dictionary shows our growing collection of crochet stitch tutorials.
Gauge
Gauge is not important in this pattern. I used worsted weight acrylic yarn, but you can use other weights of yarn. Adjust the hook size to match different size yarn and know that your snowman doll might turn out smaller or bigger. With the medium dyarn and hook size given, the gauge is about 4 single crochet stitches to an inch.
Snowman Finished Size
The finished crochet snowman is approximately 9.25″ tall from the top of the head (without hat) to the bottom of the body.
Special Stitches for Snowman Crochet Pattern:
Front and Back Single Crochet Post Stitches: The brim of the hat uses single crochet post stitches. Post stitches are worked AROUND the indicated stitch.
To make a FRONT post single crochet, insert your hook around the post of the next stitch starting in the front of the stitch, then make a single crochet as normal.
To make a BACK post single crochet, insert your hook around the next stitch starting in the back of the stitch, then make a single crochet as normal.
Find a complete photo tutorial on how to crochet post stitches here.

Snowman Head
With white yarn, make a magic ring
R1: 6 sc into ring (6 sts). (Do not join, worked in rounds)
R2: 2 sc in ea st (12 st)
R3: *sc in next st, 2 sc in next. Repeat from * around. (18 st)
R4: *sc in next 2 st, 2 sc in next. Repeat from * around. (24 st)
R5: *sc in next 3 st, 2 sc in next. Repeat from * around. (30 st)
R6: *sc in next 4 st, 2 sc in next. Repeat from * around. (36 st)
R7: sc around (36 st)
R8: *sc in next 5 st, 2 sc in next. Repeat from * around. (42 st)
R9-14: sc around (42 st)
R15: *sc in next 5 st, sc2tog. Repeat from * around (36 st)
R16: *sc in next 4 st, sc2tog. Repeat from * around (30 st)
R17: *sc in next 3 st, sc2tog. Repeat from * around (24 st)
R18: *sc in next 2 st, sc2tog. Repeat from * around 18 st). Fasten Off, leaving a long strand for sewing.
Insert 12mm safety eyes between rows 9 & 10, leaving 5 stitches in between. Stuff head firmly.
Snowman Body
With white yarn, make a magic ring
R1: 6 sc into ring (6 sts). (Do not join, worked in rounds)
R2: 2 sc in ea st (12 st)
R3: *sc in next st, 2 sc in next. Repeat from * around. (18 st)
R4: *sc in next 2 st, 2 sc in next. Repeat from * around. (24 st)
R5: *sc in next 3 st, 2 sc in next. Repeat from * around. (30 st)
R6: *sc in next 4 st, 2 sc in next. Repeat from * around. (36 st)
R7: *sc in next 5 st, 2 sc in next. Repeat from * around. (42 st)
R8: *sc in next 6 st, 2 sc in next. Repeat from * around. (48 st)
R9: *sc in next 7 st, 2 sc in next. Repeat from * around. (54 st)
R10-18: sc around (54 st)
R19: *sc in next 7 st, sc2tog. Repeat from * around. (48 st)
R20-23: sc around (48 st)
R24: *sc in next 6 st, sc2tog. Repeat from * around. (42 st)
R25-27: sc around (42 st)
R28: *sc in next 5 st, sc2tog. Repeat from * around. (36 st)
R29-31: sc around (36 st)
R32: *sc in next 4 st, sc2tog. Repeat from * around. (30 st)
R33: sc around (30 st)
R34: *sc in next 3 st, sc2tog. Repeat from * around. (24 st)
R35: *sc in next 2 st, sc2tog. Repeat from * around. (18 st)
Fasten off. Stuff Snowman Body. Sew open ends of snowman head and body together.
Crochet Snowman Nose (Make 2 Sides)
The nose is made of 2 triangles which are then sewn together.
With orange yarn, chain 7
R1: slip stitch in 2nd chain from hook, sc in next 2 chains, hdc in next chain, dc in next chain and tr in last chain. Fasten off.
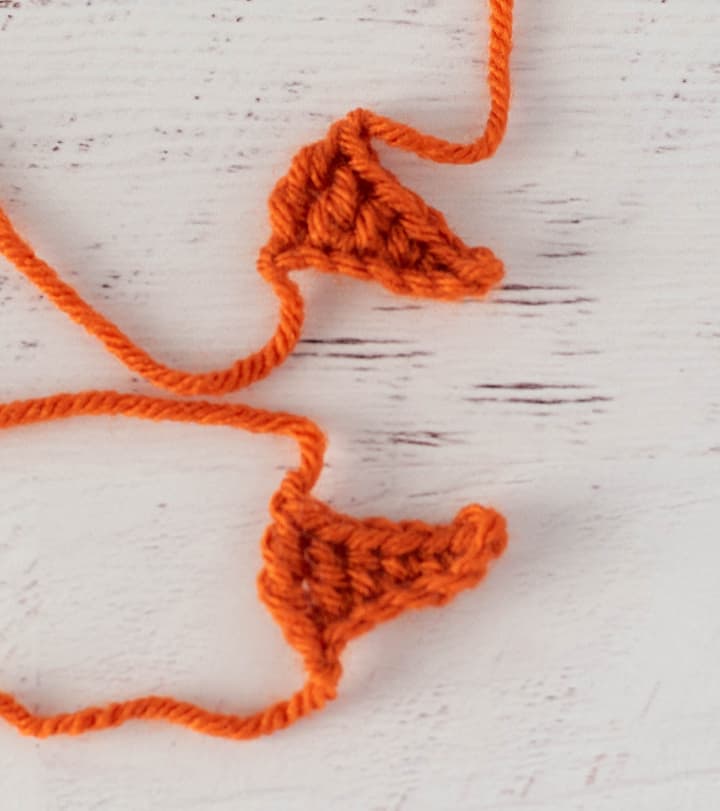
Make 2nd side of nose. Then match the nose points and long sides together. Use one of the fastened off ends to whip stitch all the way around the nose, leaving the wide end (by the triple crochet stitch) open.
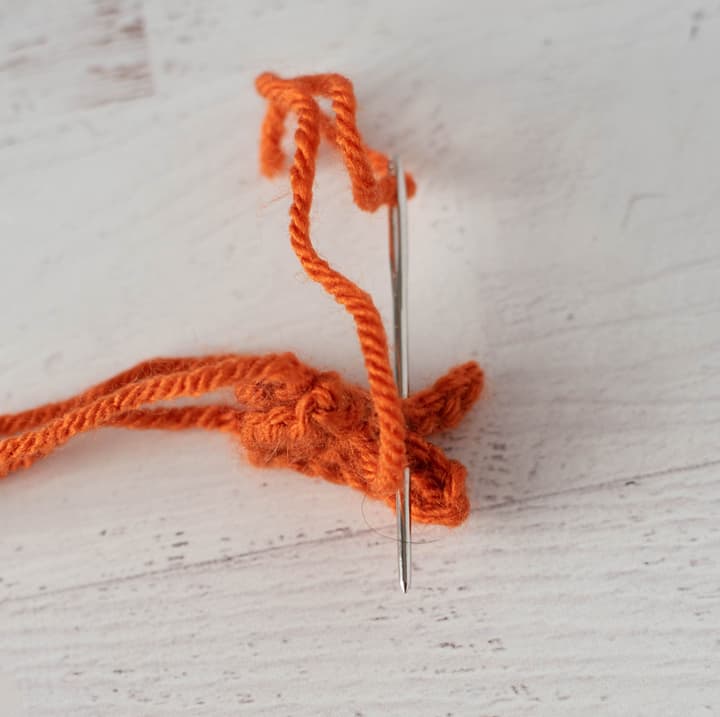
If the strand just used to sew together is long enough, plan to use it in the subsequent step of sewing on the nose. Otherwise weave that strand in and designate one of the other ends for sewing.
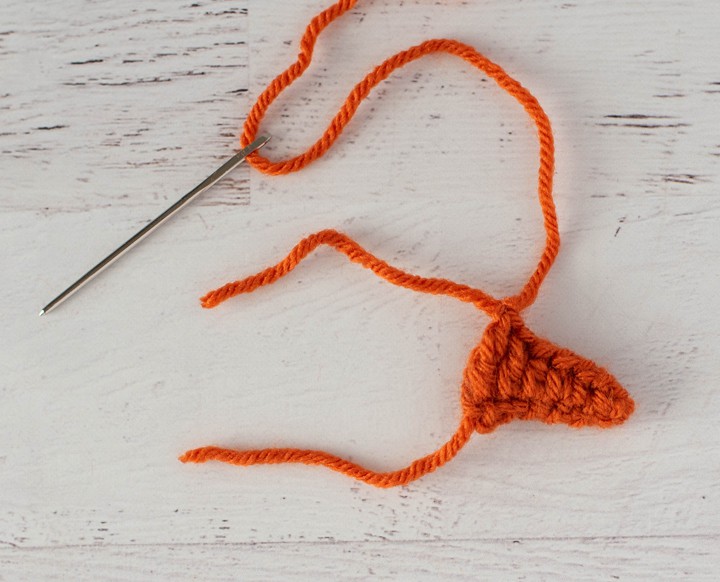
Take the remaining strands and cut them to about 1 to 1.5” in length and use those ends to “stuff” the nose a bit and then sew the open ends of the nose to the snowman’s face under the eyes.

Snowman Twig Arms (make 2)
For each arm, cut a piece of pipe cleaner to a length of 5.5 inches. Bend over the edges just enough so that the wire end does not poke out.
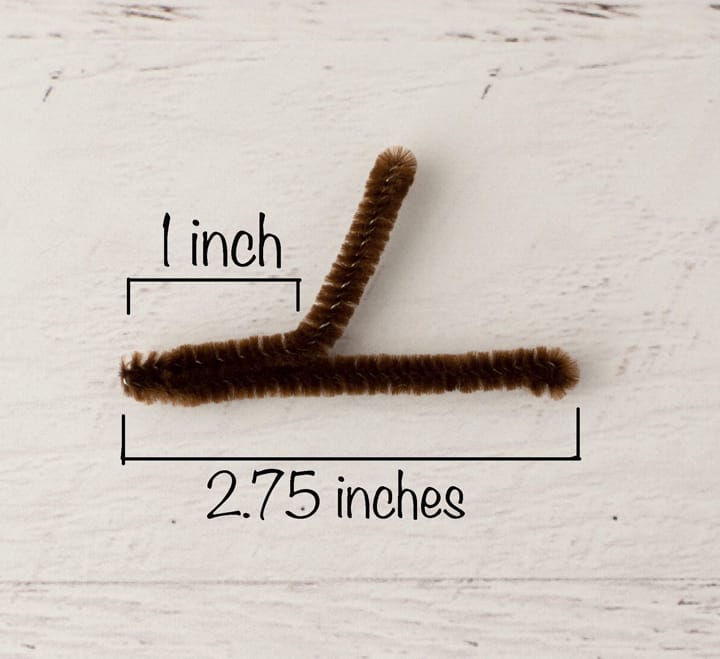
The pipe cleaner is then bent over on itself to form a little branch. Make the first bend approximately 2.75” from one end. This portion lies flat against the main branch portion. Then bend the other end 1” up at an angle. This 1” portion forms the smaller branch.
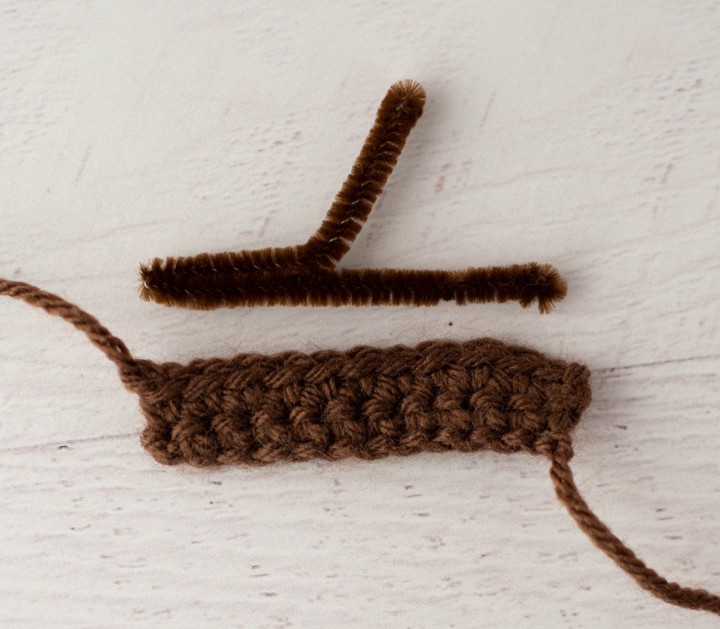
You will then crochet a covering for the pipe cleaner twig arm.
With brown yarn, chain 13. Take a moment to hold the chain against the long part of the pipe cleaner. The chain should extend past the pipe cleaner by 1 chain. The finished piece will stretch a little, so if you need to pull on the chain a little to get it to “fit” then that is ok. However, if your chain is way too big or too small, adjust the number of chains to fit.
R1: sc in the 2nd chain and across. Ch 1 and turn.
R2: sc across. Fasten off, leaving a long strand for sewing.
Fold the crochet piece over the long portion of the arm and whip stitch closed. Fasten off but do not cut off the end yet. Note that the small 1” twig will be sticking out of the crochet at this point.
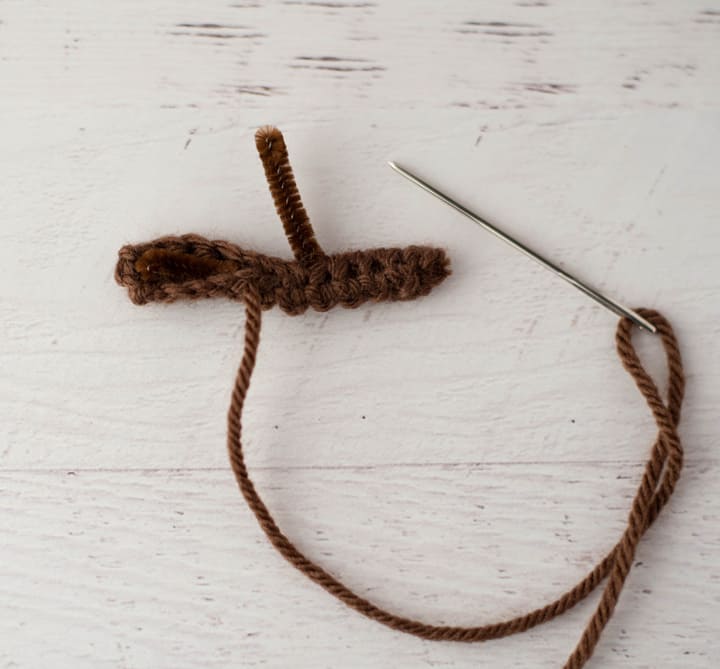
Now make the covering for the small portion of the twig arm. Chain 5 or 6 and measure against the exposed pipe cleaner in the last step. Adjust the number of chains if need be and then crochet 2 rows of single crochet, just as in the last step. Then fasten off, leaving a strand for sewing.
Hold piece over the pipe cleaner and use a whip stitch to sew it closed, securing it to the main, large branch. Weave in any ends.
Using fastened off yarn ends, sew twig arm to side of snowman referring to photo. Make several stitches to securely hold in place. Then knot off yarn and bury in work. Weave in any remaining ends.
Repeat process for the 2nd twig arm.
MORE HOLIDAY PATTERNS
If you love the Crochet Snowman Pattern, you might also like to check out these other patterns for the season:
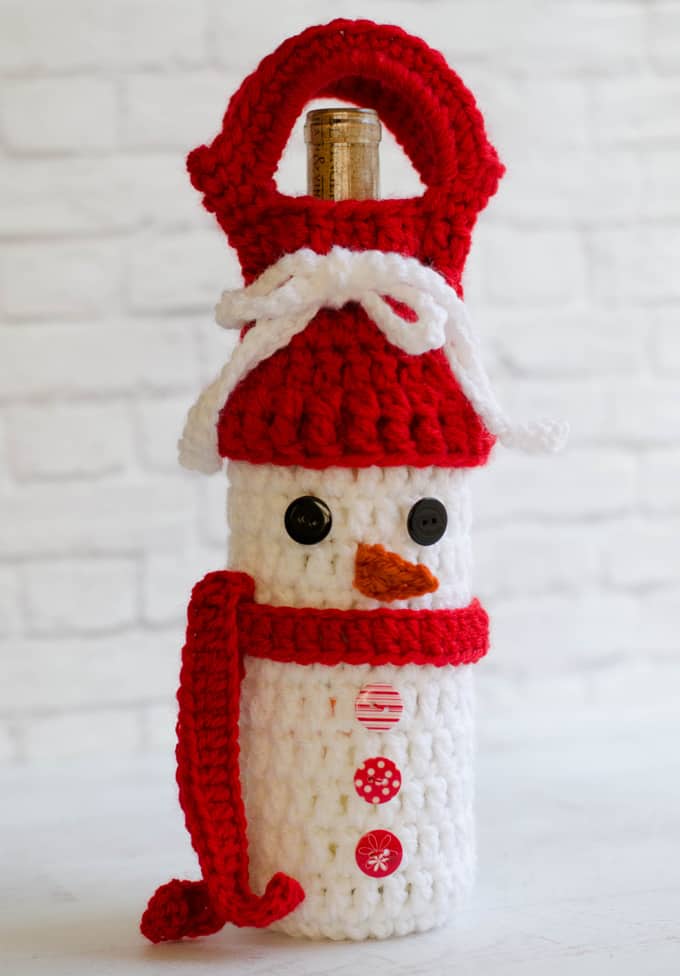
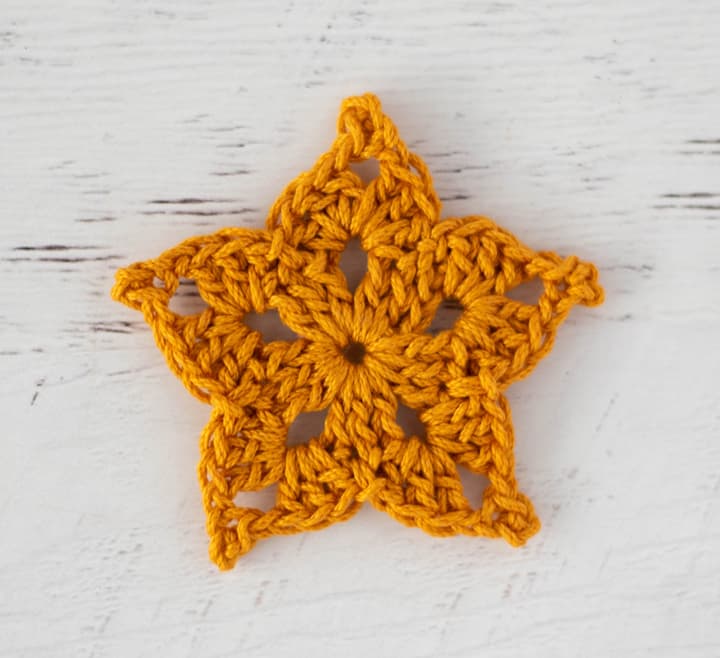
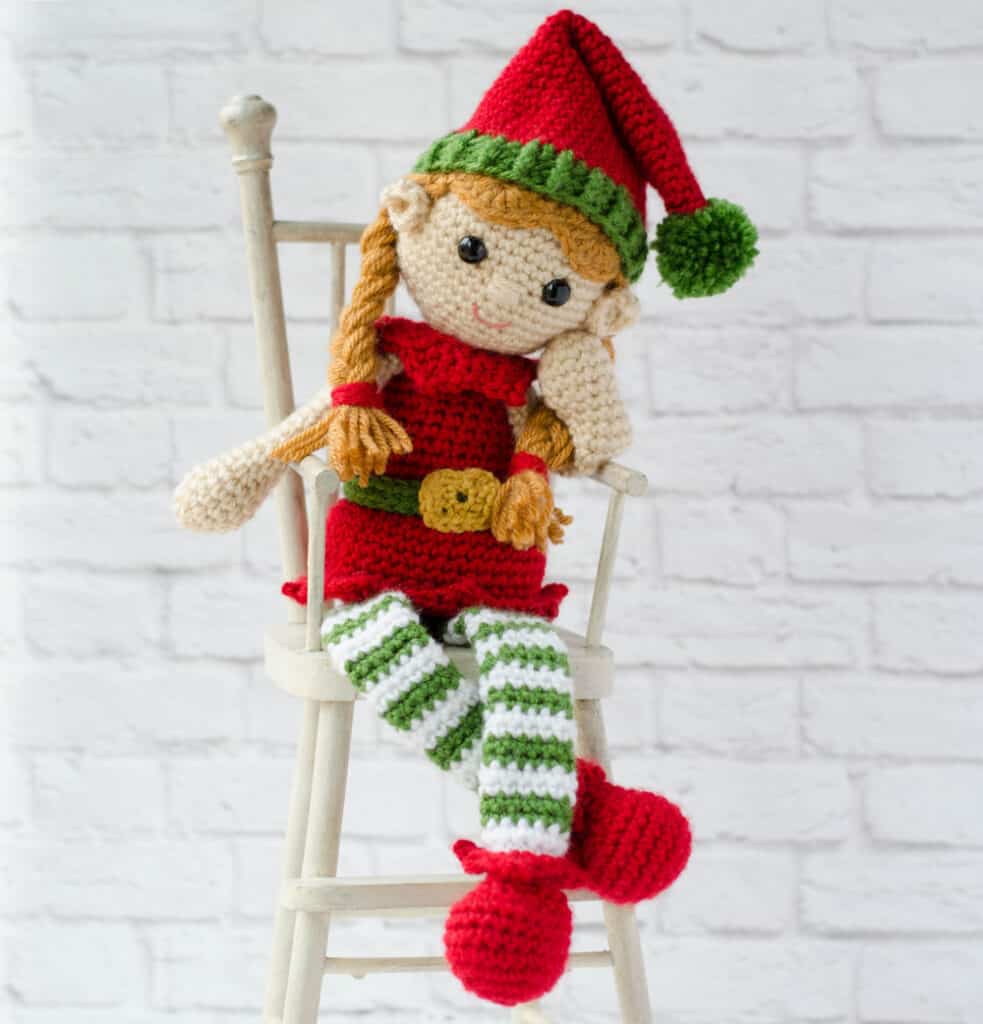
Snowman Wine Cozy // Easy Crochet Star // Elaine the Elf
Crochet Snowman Hat
With red yarn, make a magic ring
R1: 6 sc into ring (6 sts). (Do not join, worked in rounds)
R2: 2 sc in ea st (12 st)
R3: *sc in next st, 2 sc in next. Repeat from * around. (18 st)
R4: *sc in next 2 st, 2 sc in next. Repeat from * around. (24 st)
R5: *sc in next 3 st, 2 sc in next. Repeat from * around. (30 st)
R6: *sc in next 4 st, 2 sc in next. Repeat from * around. (36 st)
R7: *sc in next 5 st, 2 sc in next. Repeat from * around. (42 st)
R8-13: sc around (42 st)
R14: Sl st to next st, ch 1, *front post sc around next st, back post sc around next st. Repeat from * around. At end of round, join with a slip stitch to top of first stitch.
R15: ch 1, *front post sc around next st, back post sc around next st. Repeat from * around. At end of round, join with a slip stitch to top of first stitch, using an invisible join if desired.
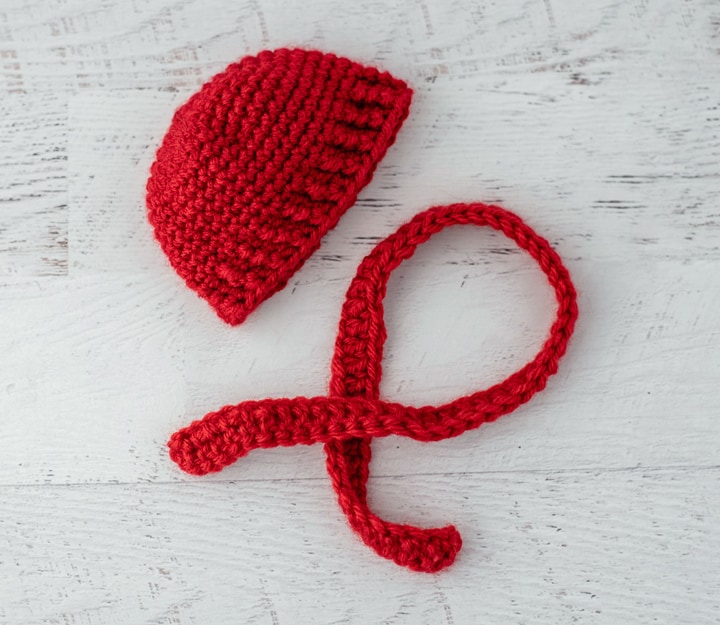
Snowman Scarf
Note: If you tend to chain tightly, consider going up a hook size for the chain only portion of this scarf.
With red yarn, chain 60.
R1: Working in the back bump of the chain, dc in 3rd ch from hook, dc in each chain across, continuing to work in the back bump. At the end of the row, chain 3 and attach to the bottom of the very first chain, using the invisible join method if desired. Fasten off and weave in ends.
Crochet Snowman Finishing
Sew on the buttons to the front of the snowman. Weave in any ends. If desired, tack down the hat and scarf.
And ta-da! A fun crochet snowman is complete!
I hope you loved this fun snowman pattern as much as I did!
Explore More Crochet Patterns
Do you love crochet as much as I do? I think you’re going to love these other fun crochet patterns:
- Adorable Crochet Snowman Hat
- Christmas Crochet Gnome
- Crochet Crown
- Crochet Snowman Coasters
- Crochet Santa Hat
I love seeing your finished projects! If you enjoyed making this Crochet Snowman Pattern I’d love to see yours on Instagram, be sure to tag me @crochet365knittoo. If you are on Facebook, stop over to the Crochet 365 Knit Too Facebook page or pop over to the Crochet365KnitToo Club and share a photo! I’d love to see your work!
Beautiful pattern. Making it and it’s coming out so neat
Snowman looks so cute I can’t wait to make it all I Gotta do is go get some white yarn and I will try it I love to crochet been making Dory three years if you have any afghan patterns or styles suitable for men I would love to see one I have two sons and would like to make a meeting after being in their in their football team colors thank you
What a fun idea!
The instructions for the snowman body stop at row 35. Is this the end of the body? Are there any specific instructions on how to assemble? Thanks in advance.
There is a sentence after that row instructing you to sew the open end of the body to the open end of the head. Sorry about that; I somehow missed inserting that line in the blog version of the pattern. If you go back you should see it there now.
I am in the process of making this snowman but have a few questions.
What stitch do you use to attach the head and the body? Also is it easier to sew the buttons and the arms on the body and the nose and eyes on the head before stuffing? Thank you for any hints.
Generally I tend to do a mattress stitch, but you can use whatever you prefer. The eyes are safety eyes so you’ll have to fasten them in before you finish stuffing. For the rest, I find it easiest to sew them on after the snowman is stuffed. Sometimes things shift when stuffing and I find it lays better if I sew those last bits on afterward.