
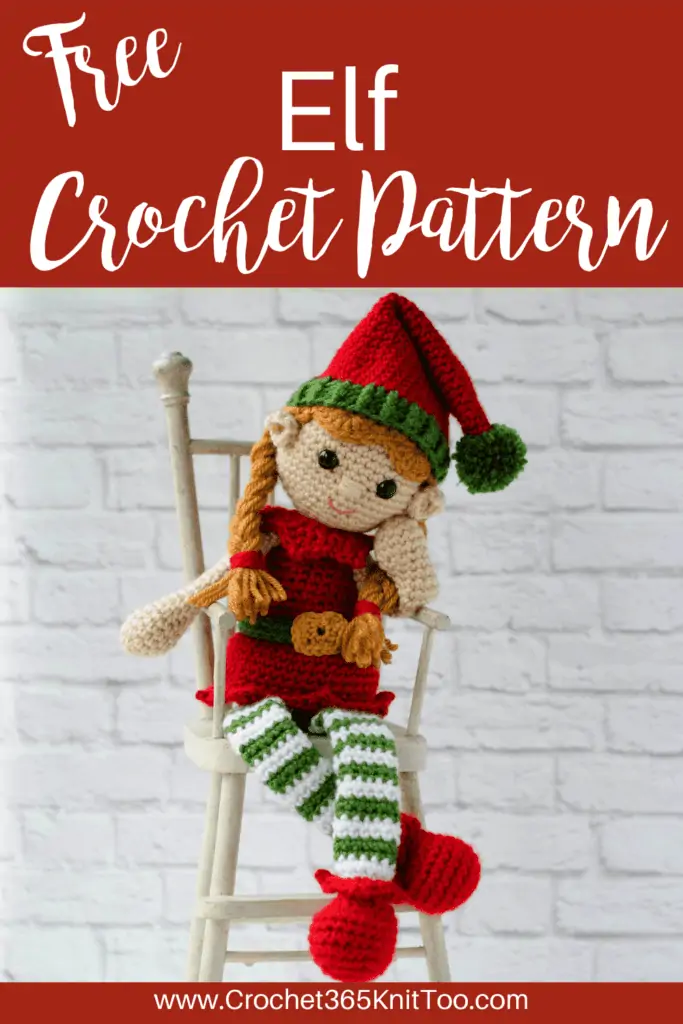
Crochet Elf
This post may contain referral/affiliate links. Please read my disclosure for more info.
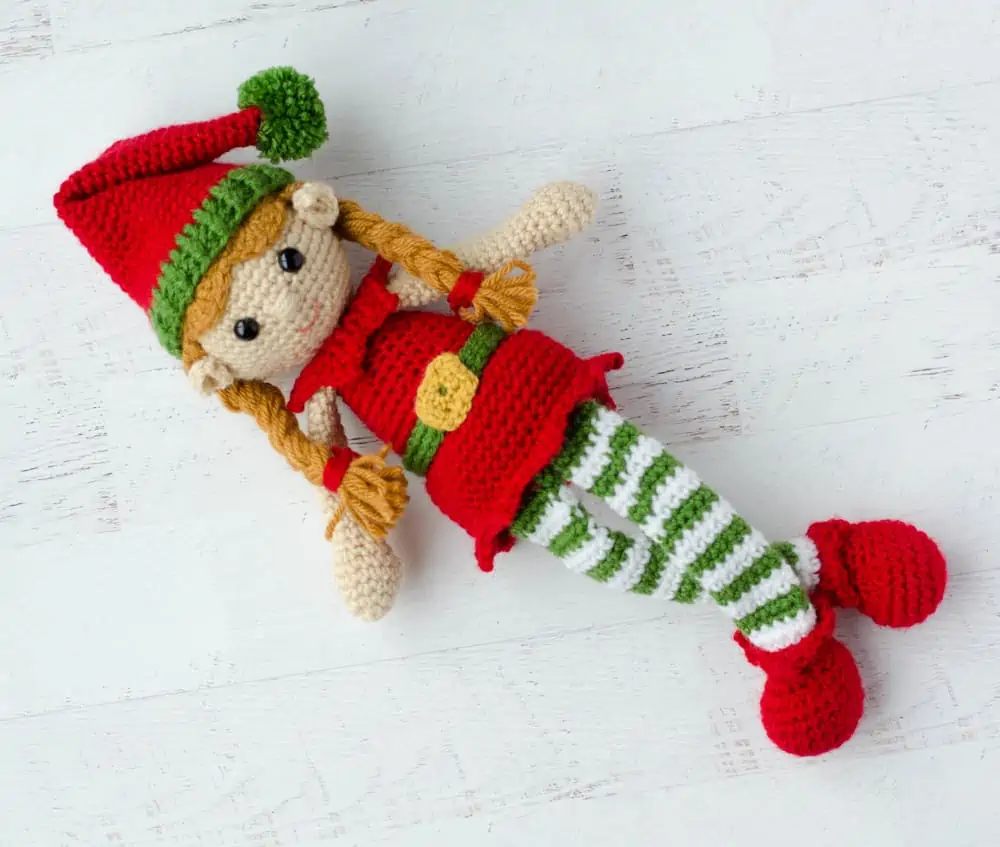
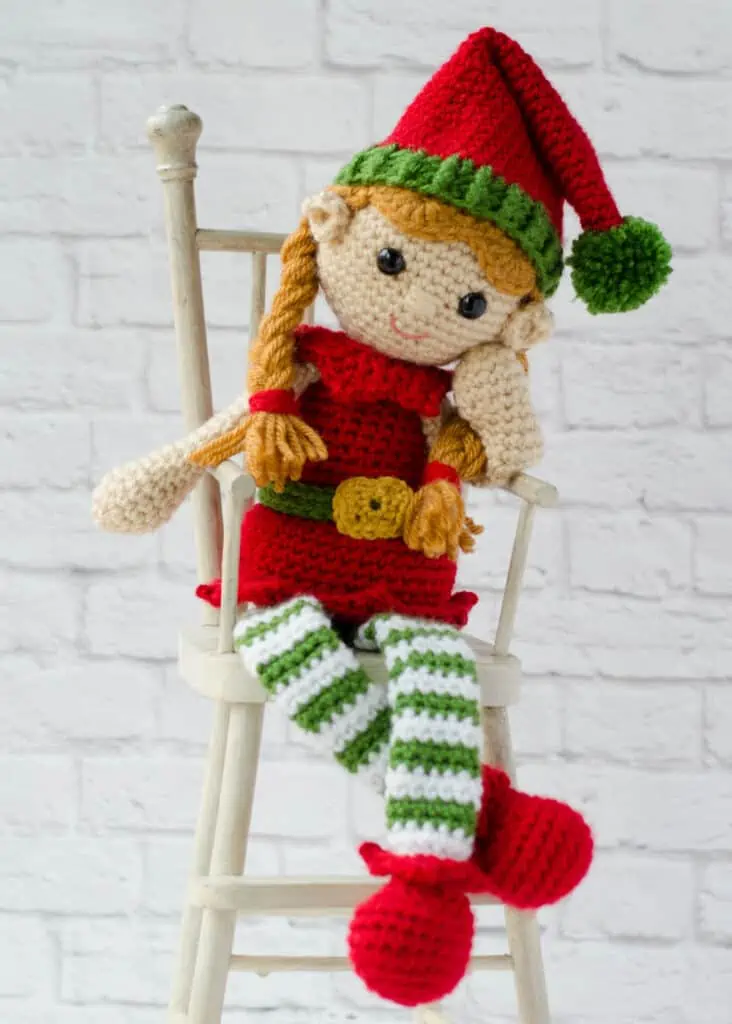
You know what you need for the holiday season? An adorable crochet elf, that’s what!

Meet Elaine. Quite possibly the cutest thing you’ll have lounging around your house this year!
This little cutie pie has been living out the past few years as a premium pattern in my pattern shops. But I thought it might be nice to bring her on home to the blog as a free pattern! Sound good to you?!
Elaine was actually a re-make of an even earlier in my career elf pattern (named Ellie). This most recent elf is my favorite crochet elf of all time. Her legs are not stuffed, making her very posable, so if you like the idea of putting her into mischievous positions all over your house, she’s up for it!
Elaine is an advanced crochet pattern. If you’re familiar with amigurumi, you won’t find it difficult. But there are a lot of details in the construction. She’s a joy to make but probably not a binge-worthy Netflix project… unless you’re like me and hate the scary movies your husband loves and would just as soon tune out anyway!
I love to start my dolls with the head first. Mostly because I enjoy seeing their smiling faces while I work on the more tedious body parts. So this little cute crochet elf starts with the head. Then you crochet the limbs and set them aside because as you work the body, you’re actually crocheting IN the limbs.
This is actually awesome for those of us who hate sewing limbs on after the fact. Just work the body to the point indicated. Then hold the limb closed and crochet right over those stitches and the next stitches on the body. Easy!

Wondering if you can make a boy elf out of this pattern? You sure can! I would suggest making one more round of the hair/wig before working the bangs. That will make his hair just a little longer so that it peeks a bit more out from under that adorable hat! And then skip the braids.
Purchase the Beautifully Formatted AD-FREE PDF DOWNLOAD
This elf can be color themed for your Christmas color style! Just change up the yarn color to suite your decor. Pinks and greens and blues and silvers all would be lovely. She’d also be a great doll to make out of scrap yarn. So fun!
Crochet Elf Pattern
Here is what you will need for this pattern:
- US G 6/4.0 mm crochet hook(these are my absolute favorite hooks I recommend to everyone!)
- Worsted Weight yarn
- Arms, face, ears: 2.25 oz Beige, sample used Vanna’s Choice in Beige
- Hair: 2 oz Brown, sample used Vanna’s Choice in Honey
- Shoes, dress, hat: 4.25 oz, sample used Hobby Lobby I Love This Yarn in Red
- Legs, belt, hat trim and pom pom: 1.5 oz Green, sample used Vanna’s Choice in Kelly Green
- Leg stripes: 1 oz White, sample used Vanna’s choice in white
- Belt Buckle: Gold scraps, sample used 1-2 yards of Wool Ease in Gold
- Scraps of beige yarn and pink embroidery floss for embroidered features
- 12mm Black Safety Eyes
- Fiberfill
- (Optional) Small amount of poly pellets (1/2-3/4 cup) and nylon hose or other makeshift bag to hold pellets.
- 1-3/8” Clover Pom Pom Maker (optional) to make pom pom on hat
- Stitch Markers (optional, but helpful)
- Yarn needle and scissors
Resources and tutorials you may find helpful in following this crochet elf pattern: Crochet Abbreviations, US to UK Crochet Conversion Chart. Find links to stitches on the “Tutorial” menu: Getting Started will show show basic crochet stitches such as slip stitch, chain stitch, single crochet and double crochet stitch used in this and other patterns. And the Crochet Stitch Dictionary shows our growing collection of crochet stitch tutorials.
Crochet Elf Finished Size:
Finished piece measures approximately 16.5” tall, from top of head (without hat) to bottom of feet.
Gauge:
Gauge is not important in this pattern. You may use other weights of yarn. Adjust hook size to fit your needs. With the yarn and hook size given, doll shown is about 4 sc per inch.
Head:
With beige yarn, make a magic ring
R1: 6 sc into ring (6 sts). (Do not join, worked in rounds)
R2: 2 sc in ea st (12 st)
R3: *sc in next st, 2 sc in next. Repeat from * around. (18 st)
R4: *sc in next 2 st, 2 sc in next. Repeat from * around. (24 st)
R5: *sc in next 3 st, 2 sc in next. Repeat from * around. (30 st)
R6: *sc in next 4 st, 2 sc in next. Repeat from * around. (36 st)
R7: *sc in next 8 st, 2 sc in next. Repeat from * around. (40 st)
R8-16: sc around. (40 st)
R17: *sc in next 2 st, sc2tog. Repeat from * around (30 st)
R18: *sc in next 3 st, sc2tog. Repeat from * around (24 st)
R19: *sc in next 2 st, sc2tog. Repeat from * around (18 st) Begin lightly stuffing head.
R20: *sc in next st, sc2tog. Repeat from * around (12 st). Fasten off leaving a long strand for sewing.
Insert safety eyes between rows 11 and 12, leaving 5-6 stitches in between the eyes. Adjust stuffing and stuff the remainder of the head.
Ears (make 2):
With beige yarn, make a magic ring
R1: 6 sc into ring (6 sts). (Do not join, worked in rounds)
R2: Sc in 1st st, (hdc, dc, ch2, sl st in 2nd ch from hook, hdc) in next st, sc in next st, sl st in next 3 st. To finish, sl st in starting sc of row. Fasten off, leaving a long strand to attach to head of doll.
Hair (wig):
With Honey Color yarn, make a magic ring
R1: 6 sc into ring (6 sts). (Do not join, worked in rounds)
R2: 2 sc in ea st (12 st)
R3: *sc in next st, 2 sc in next. Repeat from * around. (18 st)
R4: *sc in next 2 st, 2 sc in next. Repeat from * around. (24 st)
R5: *sc in next 3 st, 2 sc in next. Repeat from * around. (30 st)
R6: *sc in next 4 st, 2 sc in next. Repeat from * around. (36 st)
R7-11: sc around (36 st)
R12: sl st in 1st st, skip 2 st, 6 dc in next st, skip 2 st, sl st in next st, skip 2 st, 6 dc in next st, skip 2 st, sl st in next st, sc across rest of row to last stitch, slip stitch in last stitch. Fasten off, leaving a long strand for sewing.
Pigtails
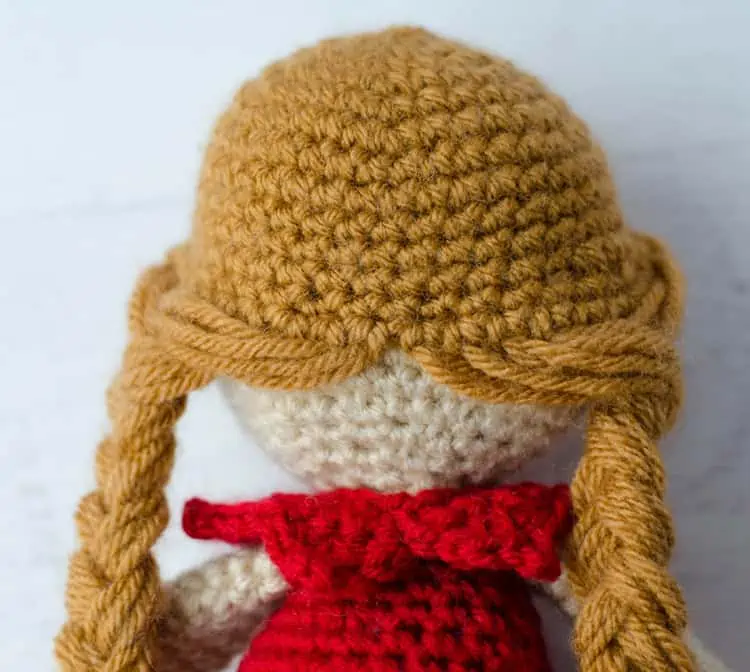
The dc in round 12 form the bangs of the hair. Now it’s time to make the hair for the pigtails. Cut 24 pieces of yarn, each approximately 18” long. Fold each strand in half and attach one strand to each stitch on the sides and back, starting with the first stitch next to the bangs. Use the hook to pull the folded end of the strand through each stitch, making a small loop, then pull the cut ends through the loop and tighten. Repeat to place a strand in each of the 24 stitches on either side of the bangs (around the sides and back).
Place hair (wig) on head of doll, adjusting bangs to center over eyes and then back on the head. The wig should come down in the back of the head covering up row 6. Once satisfied with the placement, carefully sew the wig down to the head, being careful not to catch the loose strands .
Then divide the strands of hair in half and braid each side to a pleasing length. Use a scrap piece of honey color yarn to tie the hair in place. Cut the remaining strands of hair so that the ends of the braid are even.
Hair Ties (make 2)
With Red, ch 25. Fasten off. Pull each knot tight and cut close. Wrap around braid twice and tie tight, hiding knot behind braid. Note, if you do not like the looks of the exposed knot, you may chain 30 instead and tie the ties in bows.
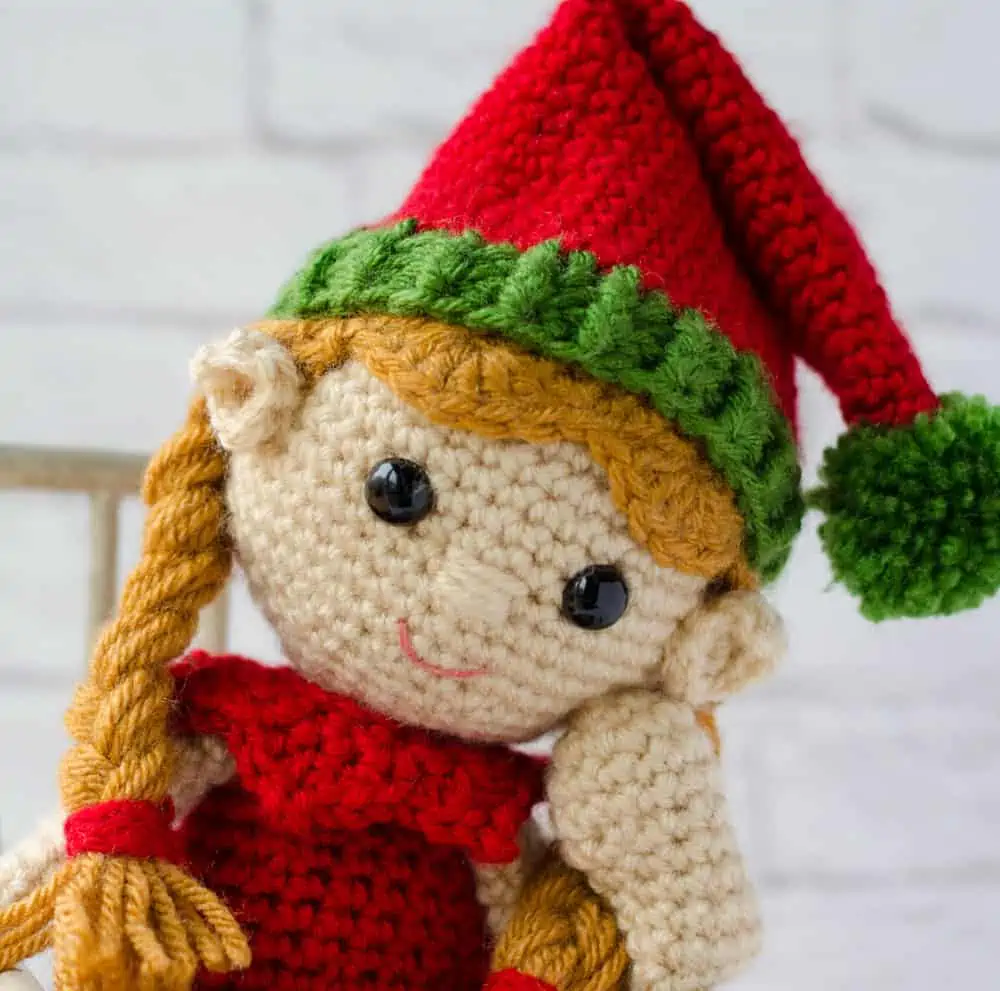
Facial Features:
With beige yarn, work 3-4 stitches to form nose. Work over 2 or so stitches centered between the eyes, starting approximately between rows 8-9 of head and working downward.
Use a scrap of pink floss or yarn to stitch a “V” smile a few rows beneath the nose, referring to photo. The center of the “V” is approximately 3 rows below the bottom of the nose and the smile stitches extend up one row and out to each side, slightly wider than the width of the nose.
Hat
With red yarn, make a magic ring
R1: 6 sc into ring (6 sts). (Do not join, worked in rounds)
R2: sc around (6 st)
R3: *sc in next 2 st, 2 sc in next. Repeat from * once. (8 st)
R4: sc around (8 st)
R5: *sc in next 3 st, 2 sc in next. Repeat from * once. (10 st)
R6: sc around (10 st)
R7: *sc in next 4 st, 2 sc in next. Repeat from * once. (12 st)
R8: sc around (12 st)
R9: *sc in next 5 st, 2 sc in next. Repeat from * once. (14 st)
R10: sc around (14 st)
R11: *sc in next 6 st, 2 sc in next. Repeat from * once. (16 st)
R12: sc around (16 st)
R13: *sc in next 7 st, 2 sc in next. Repeat from * once. (18 st)
R14: sc around (18 st)
R15: *sc in next 8 st, 2 sc in next. Repeat from * once. (20 st)
R16: sc around (20 st)
R17: *sc in next 9 st, 2 sc in next. Repeat from * once. (22 st)
R18: sc around (22 st)
R19: *sc in next 10 st, 2 sc in next. Repeat from * once. (24 st)
R20: sc around (24 st)
R21: *sc in next 11 st, 2 sc in next. Repeat from * once. (26 st)
R22: sc around (26 st)
R23: *sc in next 12 st, 2 sc in next. Repeat from * once. (28 st)
R24: sc around (28 st)
R25: *sc in next 13 st, 2 sc in next. Repeat from * once. (30 st)
R26: sc around (30 st)
R27: *sc in next 14 st, 2 sc in next. Repeat from * once. (32 st)
R28: *sc in next 7 st, 2 sc in next, repeat from * around (36 st)
R29-31: sc around
R32: *sc in next 17 st, 2 sc in next, repeat from * once (38 st)
R33: sc around, changing to green yarn in last st.
R34: Begin working in joined rounds. With green, slip stitch to next stitch and chain 2 (counts as first hdc). Hdc around, join with sl st to top of starting chain. (38 st)
R35-36: ch 2, fphdc around next st, bphdc around next st. (38 st). Fasten off and weave in ends.
Pom Pom
Using green yarn, make a small pom pom using the Clover 1-3/8” pom pom maker (or make a small pom pom using another method). Attach pom pom to point of hat. Try hat on doll, fold point over (approximately at row 18 of hat). Using red yarn, tack the point of the hat down to the rest of the hat with a stitch or two where it hits the hat to help hold the shape. You may tack the hat down to the head if you wish, or leave it as a removeable piece.
Important Word about the Arms and Legs: The limbs are crocheted first and then worked in as the body is crocheted.
Foot (make 2):
With Red yarn, make a magic ring
R1: 6 sc into ring (6 sts). (Do not join, worked in rounds)
R2: 2 sc in ea st (12 st)
R3: *sc in next st, 2 sc in next. Repeat from * around. (18 st)
R4: *sc in next 2 st, 2 sc in next. Repeat from * around. (24 st)
R5-8: sc around (24 st)
R9: sc in next 6 st, *sc2tog) six times, sc in last 6 st (18 st)
R10: sc in next 6 st, (sc2tog) three times, sc in last 6 st (15 st)
R11: *sc in next 3 st, sc2tog. Repeat from * around (12 st).
R12-13: sc around (12 st).
R14: (Picot Round) Working in FRONT LOOP ONLY and continuing with red yarn, flip foot so that the foot is facing AWAY from you. (Note you will be starting in the last stitch of row 13 and working in the opposite direction). *hdc in next st, (dc, ch 3, sl st in 3rd ch from hook, dc) in next st, hdc in next st, sl st in next st. Repeat from * around. Join with slip stitch to top of starting hdc. Fasten off red and weave in ends.
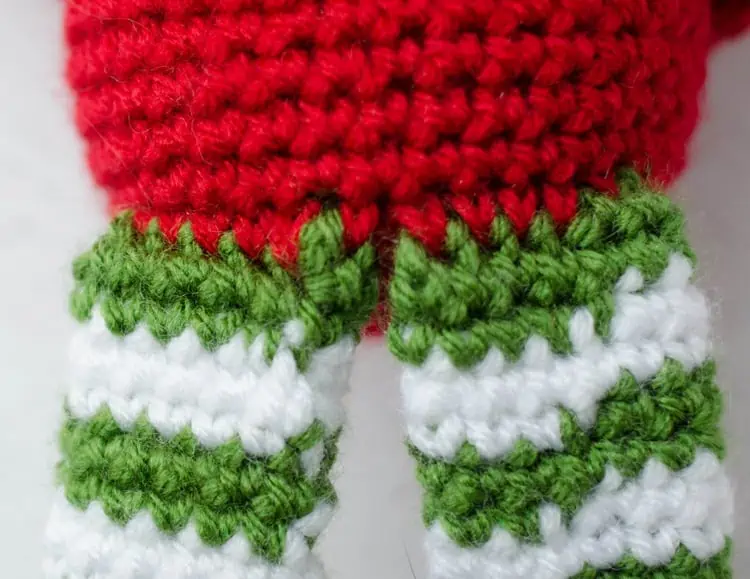
A Word about Working Stripes In The Round: To minimize the jog of the color changes in the legs, change color in the last stitch of the previous round, then slip stitch in the first stitch of the new round and sc in the remaining stitches of the round.
Leg:
The legs begin by working in the free loops from row 14 of foot.
R1: Attach white yarn to unworked back loop from row 14. Sc around. (12 st)
R2: Working through both loops (for remainder of leg), sc around. Change to green in last stitch. (12 st).
Take a moment to stuff the foot. The legs are not stuffed.
R3-4: With green, sc around, changing to white in last st (12 st)
R5-6: With white, sc around, changing to green in last st (12 st)
R7-28: Continue to work in sc rounds, alternating every 2 rows between green and white for a total of 14 stripes. End with 2 rows of green.
Set legs aside until working body.
Arms (make 2):
With beige yarn, make a magic ring
R1: 5 sc into ring (5 st). Do not join, work in rounds.
R2: 2 sc in each st (10st)
R3: *sc in next st, 2sc in next st, repeat from * around (15 st)
R4-5: Sc in each st around (15 st)
R6: *sc in next st, sc 2 tog, repeat from * around (10 st) Stuff hands (remainder of arms are unstuffed).
R7-23: Sc around (10 st).
Set arms aside until working body.
Body (starting at bottom):
With red yarn, make a magic ring
R1: 6 sc into ring (6 sts). (Do not join, worked in rounds)
R2: 2 sc in ea st around (12 st)
R3: *sc in next st, 2sc in next st, repeat from * around (18 st)
R4: *sc in next 2 st, 2sc in next st, repeat from * around (24 st)
R5: *sc in next 3 st, 2 sc in next st, repeat from * around (32 st)
Legs are worked into row 6. Fold a leg in half with the foot facing towards you. Lay the first leg so that the folded edge is on top of the next stitch to be worked on the edge of the circle.
R6: Insert hook through 1st stitch on leg (through both thicknesses) AND the first stitch on the body to work a single crochet. Carefully work a single crochet in the next 5 leg stitches, working through the corresponding stitch on the body. Then repeat with the 2nd leg stitches. At this point both legs are attached to the body around edge of the circle (this forms the front of the body) and a total of 12 stitches are worked in the round. Single crochet around the remaining stitches in the round.
R7-13: sc around (32 st) Now that a few rows of the body are worked, take a moment to make sure that the legs are extending out of the front of the body and that both shoes are pointing in the proper direction.
R14: Sc in back loop for this round only (32 st). (Note: skirt will be worked in the front loops later)
R15-18: Working in both loops (for remainder of body), sc around (32 st)
R19: *sc in next 2 st, sc 2 tog, repeat from * around (24 st)
R20-21: sc around (24 st)
R22: *sc in next 4 st, sc 2 tog, repeat from * around (20 st)
R23: sc around (20 st)
Optional: Insert approximately ½ – ¾ cup of poly pellets into the toe portion of a nylon hose. Then make tie a knot in the hose close to the pellets and cut off the excess hose. Stuff this piece into the body now and add polyfill. Alternatively, stuff the body (with all polyfill) at this step.
R24: *sc in next 3 st, sc 2 tog, repeat from * around (16 st)
Arms are attached in next row as follows:
R25: Fold top of arm in half. Insert hook through 1st stitch on arm (through both thicknesses) AND the first stitch on the body to work a single crochet. Carefully work a single crochet in the next 4 arm stitches, working through the corresponding stitch on the body. Sc in next 3 st. Attach 2nd arm with sc in the next 5 st. Sc in last 3 st.
Take a moment to look at the position of the arms in relationship to the body. The legs and feet are at the front of the body and the arms are on either side of the body. If your work looks differently, simply determine the correct placement for the arms and adjust the other single crochets in the row.
R26: *sc in next 2 st, sc 2 tog, repeat from * around (12 st)
R27: Sc around. Fasten off, leaving a strand for sewing. (12 st).
Stuff the rest of body and sew head on to body. Weave in any ends.
Skirt:
R1: Working in front loops (on body round 14), attach red yarn: *sc in next 3 st, 2 sc in next. Repeat from * around (40 st)
R2-7: sc around (40 st)
R8: *sc in next 2 st, hdc in next st, (dc, ch 2, sl st in 2nd ch from hook, dc) in next st, hdc in next st. Repeat from * around. Sl st to starting sc. Fasten off and weave in end.
Collar:
Collar is worked back and forth in rows, then sewn together in place on doll.
R1: With red, ch 17. Sc in 2nd ch from hook and across. (16 st) Turn work.
R2: ch 1, *sc in next st, 2 sc in next. Repeat from * around (24 st) Turn work.
R3: sl st in next st, *hdc in next st, (dc , ch 3, sl st to 3rd ch from hook, dc) in next st, hdc in next st, sl st. Repeat from * around. Fasten off, leaving a long length for sewing. Place collar on doll and sew ends together.
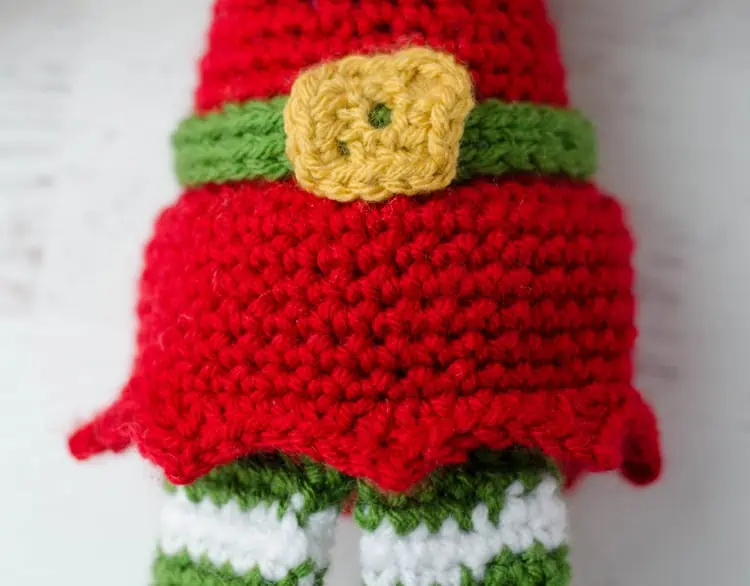
Belt:
R1: With green, ch 33. Sc in 2nd ch form hook and across. At end of row, ch 1, turn, sl st on side of row just worked.
R2: Working on the opposite side of foundation chain, sl st across. Fasten off and position at doll’s waist, sewing ends together. Tack down belt around doll to stay in place.
Buckle:
The buckle is a very loose, open square. Because of its small size, it holds its shape once it is sew on the belt. As you work, the 3 sc in a stitch, form a corner, so turn your work as though you are turning a corner as you go along.
R1: With gold, ch 8, sl st to 1st ch.
R2: ch 1, sc in same st as joining, 3 sc in next st, *sc in next st, 3 sc in next st. Repeat around working 3 sc in each corner and 1 sc on each side. Sl st to starting sc and fasten off. Sew buckle to belt and dress to secure.
And your darling crochet elf is ready for action!
Explore More Crochet Patterns
Do you love crochet as much as I do? I think you’re going to love these other fun crochet patterns:
- Crochet Snowman Amigurumi
- Crochet Snowman Hat
- Christmas Crochet Gnome
- Crochet Snowman Coasters
- Crochet Santa Hat
I love seeing your finished projects! If you enjoyed making this adorable Elf Crochet Pattern, I’d love to see yours on Instagram, be sure to tag me @crochet365knittoo. If you are on Facebook, stop over to the Crochet 365 Knit Too Facebook page or pop over to the Crochet365KnitToo Club and share a photo! I’d love to see your work!
Absolutely charming, Cheryl! Thank you so much for sharing!
She is so cute! Thank you for the pattern!!
On the Free Elf Pattern there are so specifics on how to attach the head to the body. Where would I find that direction. This is the first time I am trying a doll and just love this Girl Elf which I am making for my granddaughters. Thank you so much for any advice you can share.
You can either whip stitch the two parts together or use an invisible seaming method. I do not currently have tutorials on this on my blog, but it is covered (along with a lot of other things) in my amigurumi ebook.