
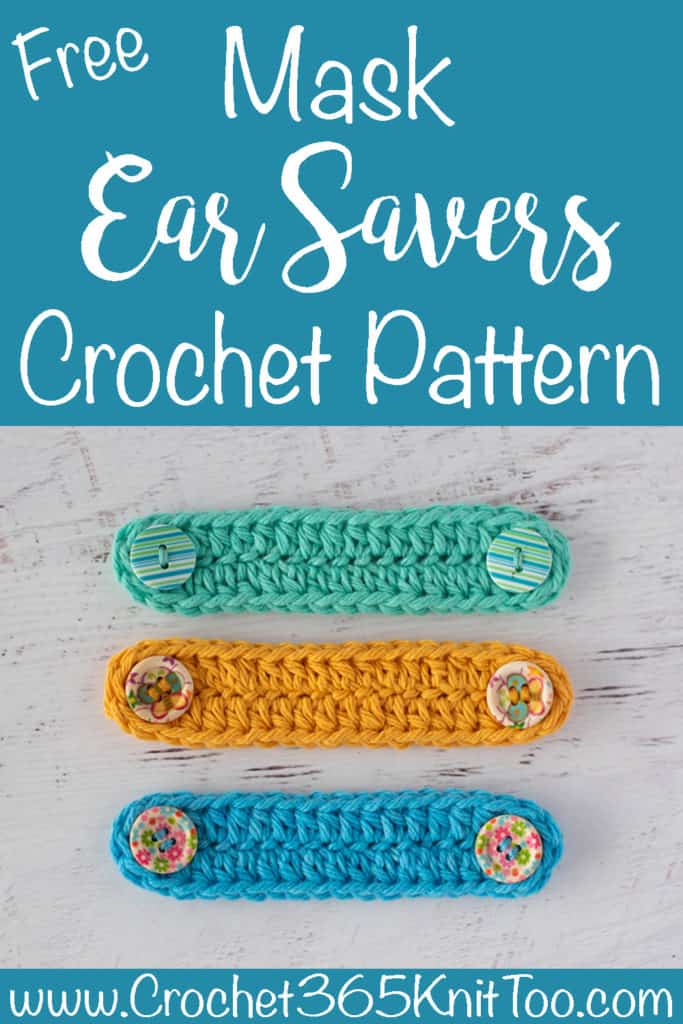
Easiest Crochet Ear Savers To Make Your Ears Happy
This post may contain referral/affiliate links. Please read my disclosure for more info.
Meet the most useful thing you might come across today: crochet ear savers! So quick and fun to make out of scraps and most importantly they make mask wearing so much more comfortable!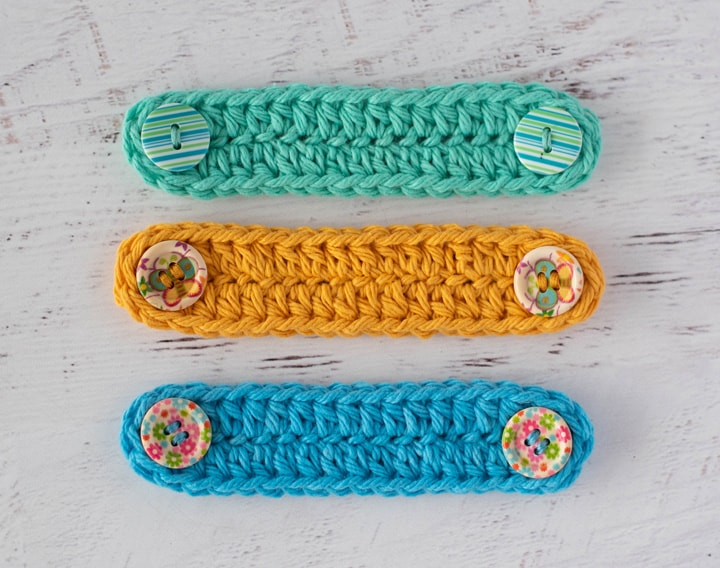
What are Savers for Masks?
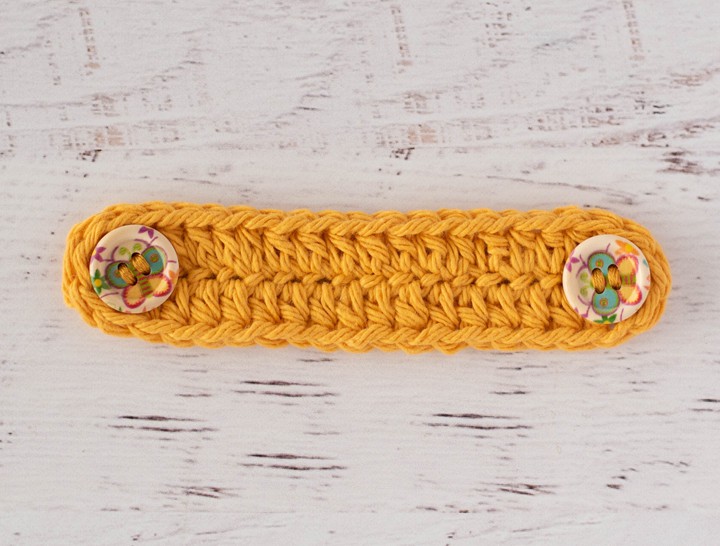
savers for masks are small strips of with buttons on either end. When used, they take the pressure from the off the backs of the ears and place them on the buttons which is so much more comfortable are no fun!
My venture into came about when my good friend, Allison, was lamenting on Facebook at how uncomfortable the she had to wear at the hospital was on her poor ears. I felt bad for her and for my husband too. I hate wearing a for my weekly or biweekly grocery shopping-I can’t even imagine having to feel that on my ears for hours on end day after day.
I’m one of those types of people where little things drive me absolutely batty. I’ve been known to search every corner of the house to stop some random buzzing thing or drip noise. So I know that rubbing on my ears would drive me crazy. There are several saving solutions out there including headbands, scarves and fabric bands. But of course, a version spoke to my heart!
Can Wearing a Make Your Ears Stick Out Permanently?
Yes. People wonder this. I did some research and the answer is “NO”. It will not permanently alter your anatomy to have over your ears. It’s more that the is uncomfortable and if it pulls too tightly on your ears, it CAN make your ears stick out a bit while you’re wearing it and really.. who wants that, right? If elastic has already rubbed your ears into an irritated mess, here’s a great article with tips to soothe sore ears.
If you are sewing your own or having one custom made for you, try making the a little bit longer–that helps some too. Or.. these quick crochet ear savers to the rescue!
 What Size Do You Make The Savers?
 What Size Do You Make The
 savers are about the easiest things to and I’ve got you covered with multiple sizes! I’ve found that an that is about 3.75″ long works really well for children.
Want a printable version PLUS a COMPLETE photo tutorial for the invisible join method? Newsletter subscribers get access to all sorts of bonus printables in a secret library! Just fill out the form and you’re in! If you’re already getting my newsletter, check the bottom of the last one for the super secret password and a link to the library!
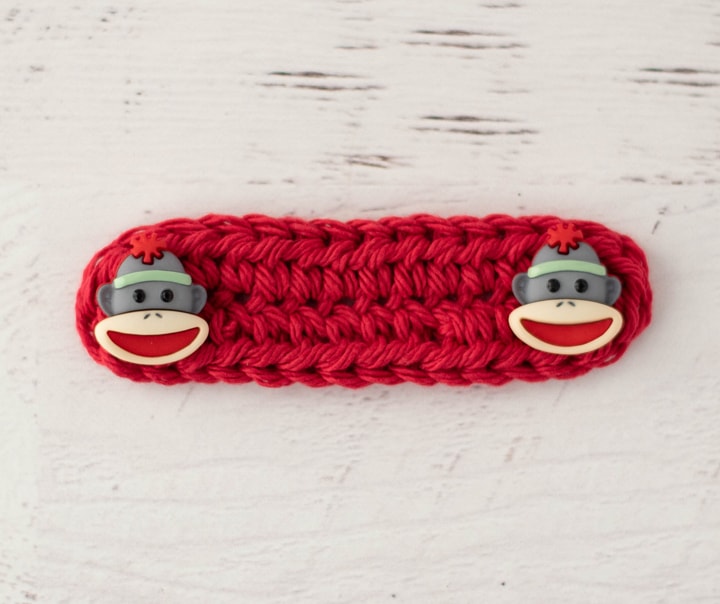
These crochet ears savers are so fast to crochet! I love using the invisible join for a seamless finish! I can crochet one in less than 15 minutes! And aren’t these fun buttons from Hobby Lobby the cutest thing ever? A fun touch for a kid or a kid at heart!
For teens and women, I recommend the medium size ! It works perfectly for me and my friend, Allison.
My husband prefers the large size. In fact, he declared the savers ‘AMAZING’ and then went on to write a Facebook post about the zebra stripe buttons on the black and some relationship to the Tiger King. Sigh. I love that guy!
I’m also secretly glad he loves the striped buttons because I found that my fun style of also trickled into my buttonstash…and I had a real hard time finding appropriately subtle and neutral looking buttons in my stash suitable for a manly !
Use the Ear Savers Pattern to make one for every member of your family.. from kids to large adults!
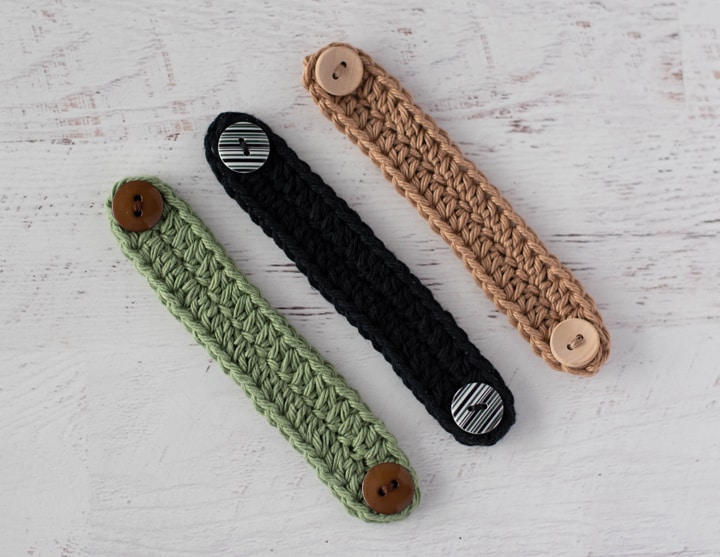
I’m also secretly glad he loves the striped buttons because I found that my fun style of crochet also trickled into my button stash…and I had a real hard time finding appropriately subtle and neutral looking buttons in my button stash suitable for a manly crochet ear saver!
How Do You Wear Savers?
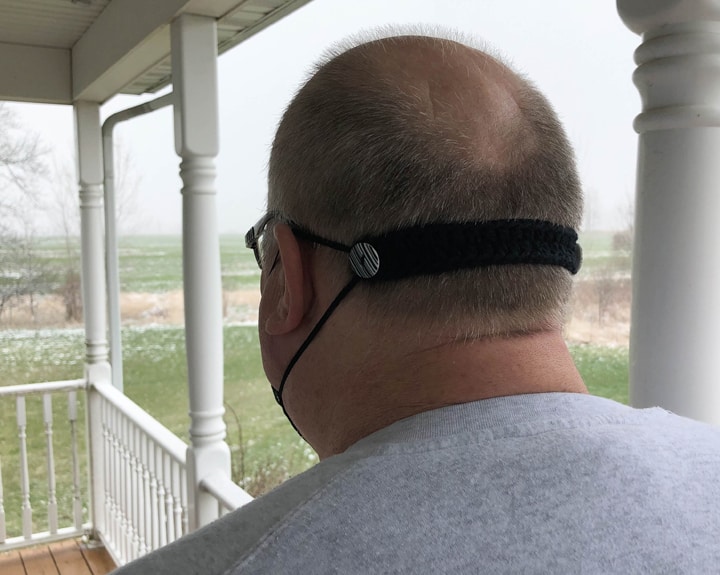
A lot of readers have asked how to wear savers (also called a ). We find it best to put the on with the over the ears. Then carefully slip the on one side off the and over the on to one side of the . Then repeat the process on the other side, slipping the on to the 2nd . Here’s how my husband’s crochet ear saver fits in real life. The still go over the ears, but then are held by a on each side, thus relieving pressure and pain on the ears. Brilliant!
For button attachment, I pulled out my embroidery floss from that time in the 90’s when I was all into cross stitching. I can’t even tell you how much I loved finding the perfect shade of embroidery floss to sew on my fun buttons. Too much fun, really. And the many layers of floss made for less stitches to makes those buttons nice and secure.
I kinda feel like mother earth, ya know? All efficient like. Dug into my stash for all those bits of worsted weight ; you only need 4-5 yards for each one. I prefer cotton for my , but you could try other yarns too. Then I had a great time digging through and coordinating embroidery floss. Sigh. Almost like everything is right with the world. And then I can bust them out speedy quick like some rock star hero. It seriously takes more time to sew on the buttons than it does to the savers pattern.
Crochet Ear Savers Pattern
Here is what you will need:
- US H8/5.00 mm crochet hook (here are my favorite crochet hooks)
- 4 (medium size) – 5 yards (large size) worsted weight cotton yarn such as Lily Sugar ‘N Cream yarn
- 2 Buttons. I prefer 5/8″ buttons but any size between 1/2″ and 1″ will work fine
- Thread or embroidery floss to sew on buttons.
- Tapestry needle, sewing needle and scissors
Resources and tutorials you may find helpful in following this pattern: Crochet Abbreviations, US to UK Crochet Conversion Chart. Find links to stitches on the “Tutorial” menu: Getting Started will show basic stitches used in many patterns and Crochet Stitch Dictionary shows our growing collection of crochet stitch tutorials.
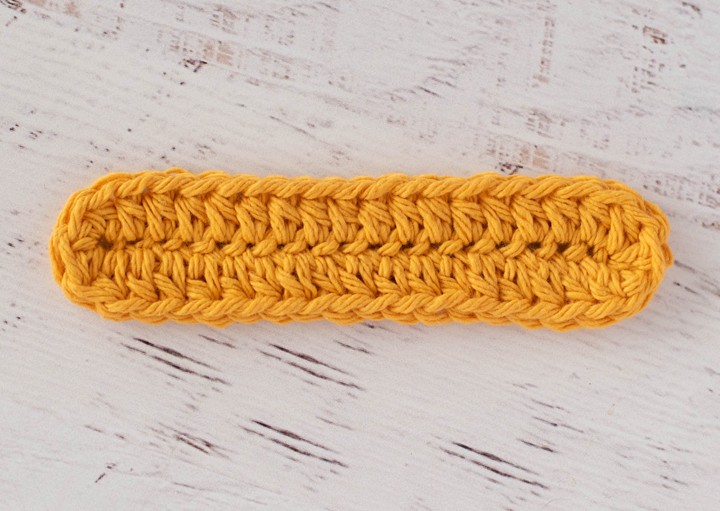
The child size ear saver is 3.75″ long, the medium size ear saver is 4.75″ long and the large size is 5.75″ long. You may adjust the size of your crochet ear saver by adding or decreasing the starting chain.
Chain 20 for size medium. For large size, chain 24. For child size, chain 16.
R1: hdc in 3rd chain from hook and in each chain across until last chain. In last chain, work 3 hdc for the 1st corner, then turn work, and work a hdc in the opposite side the chain across to the last stitch. Work 2 hdc in the last stitch. Fasten off and join with an invisible join which you can learn about here. This creates a seamless, continuous stitch like so:
Weave in ends. Then sew a button at each end with thread or embroidery floss.

Ear Protector Button Options
Since originally publishing this ear savers pattern, I’ve heard a lot of concerns about buttons. What size buttons? Can I use a different size button? Oh NO, I’m OUT of buttons, what now? Can I crochet a button? Here are my best suggestions:
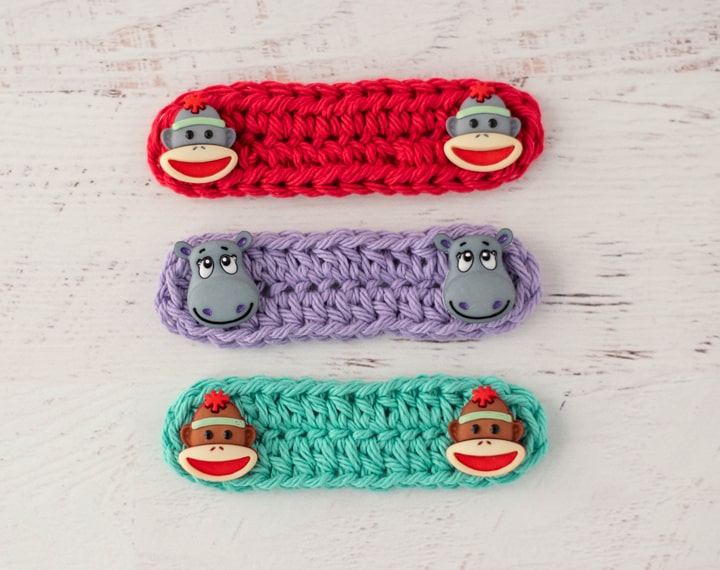
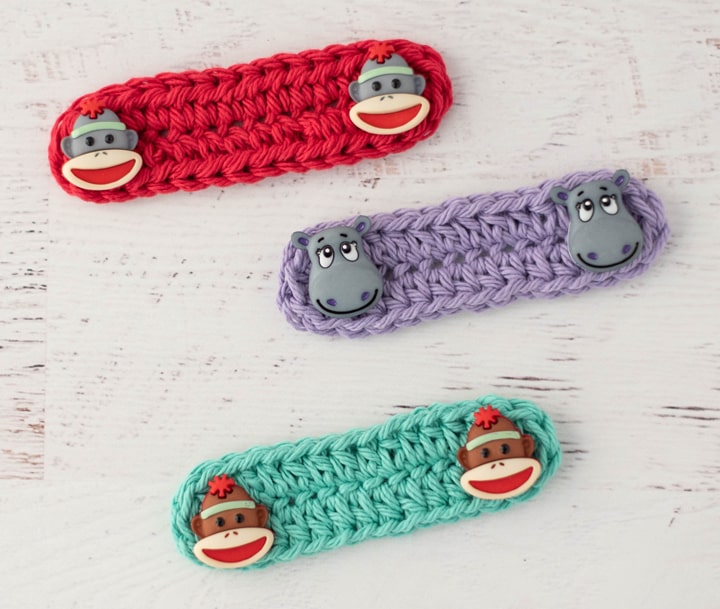
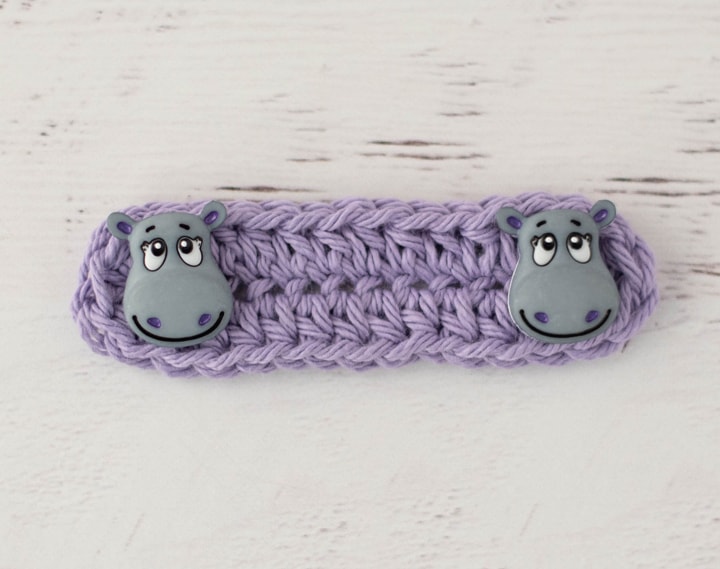
At the time I originally wrote this post, we were under stay at home orders in our state and our craft stores were closed. I was stuck with what was in my stash or what I could create from what I had. If you are able to go to a craft store or are adventurous with online searching, there are some adorable buttons to be had! These monkey and hippo buttons were purchased from Hobby Lobby in later months.
But what can you do if you can’t or aren’t able to go out to buy the perfect buttons? Get creative! You’re a crocheter, after all! Raid your own stash if you can. I like the 5/8″ buttons. Other patterns recommend 1″ buttons. I think you could go down to a 1/2″ button and that would work too. You could also steal them off of garments that have seen better days and repurpose them.
You can put a shout out on your own personal Facebook page asking for button donations and then do a porch drop or pick up to get them from your friends or family. Many, many people keep buttons and would be more than happy to seem them put to good use.
You can also try crocheting a button and see if the elastic will hold in place. My suggestion is to try one first and make sure it will work before mass producing them. My Scrap Yarn Wine Cozy has an crochet appliqué button you could try. You could also try a 3 round button, working 6 sc into a magic loop in the first round; then increasing into every stitch in the 2nd round; then decreasing into every stitch for the last round and then closing that up with an amigurumi finish. Squish flat and sew on.
I’ve also seen a similar button with a tiny bit of stuffing inside so that the button is like a little ball. OR you could try crocheting around a washer. If you try any of these and find one is a great solution, let me know in the comments!
More Free Crochet Patterns
If you love the crocheted ear savers pattern, you might also like to check out these other crochet wearable patterns:
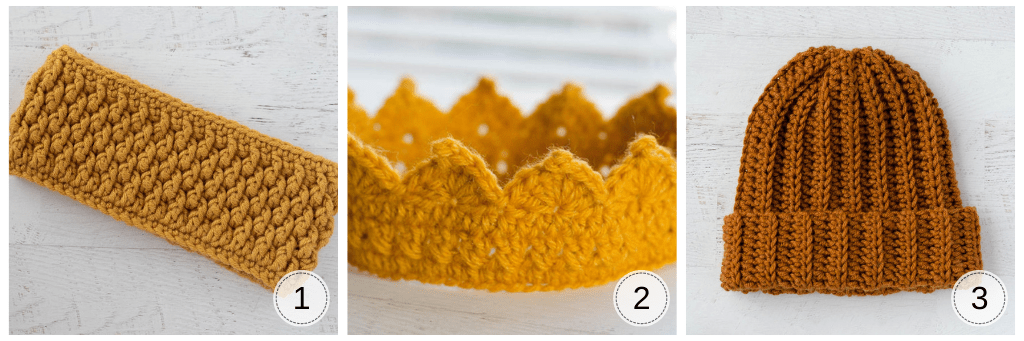
1. Alpine Crochet Headband // 2. Crochet Crown // 3. Ribbed Wonder Easy Crochet Hat
Don’t forget subscribers can get a free printable version of the crochet ear saver pattern right in my vault! Sign up here:
Want to Know How to Sew a Mask?
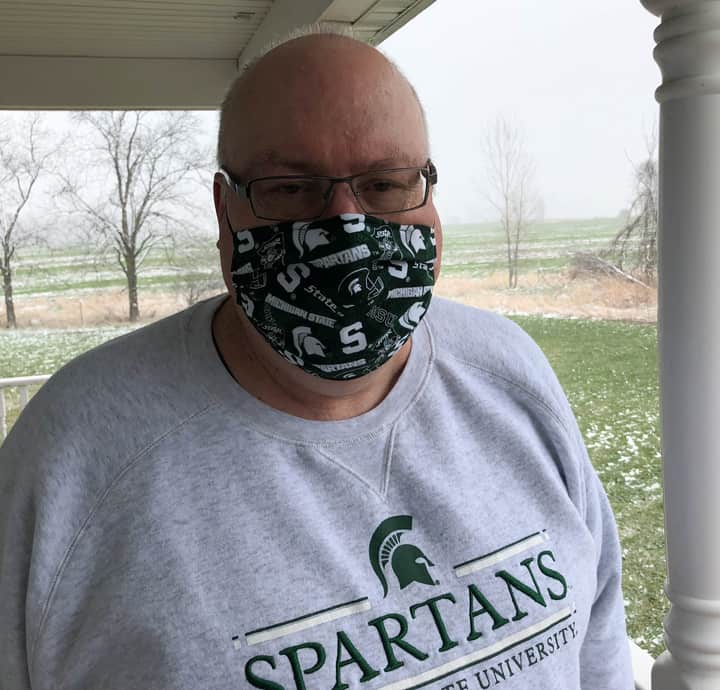
Here’s my husband modeling the mask I made him. I ended up going a little rogue and in my own direction to create the perfect mask. Don’t you love how he rocks the Michigan State Spartans even in a health crisis?
I love seeing your finished projects! If you enjoyed making the Crochet Ear Savers I’d love to see yours on Instagram, be sure to tag me @crochet365knittoo. If you are on Facebook, stop over to the Crochet 365 Knit Too Facebook page or pop over to the Crochet365KnitToo Club and share a photo! I’d love to see your work!
Pin Now Crochet Later ⇨
Cheryl,
Great pattern. Trying to make those too! I used Loops and Threads Softy & Soft medium 4 and used a #5 hook.
Now THAT is a fabulous idea!
This ear saver pattern is wonderful! I made one for my husband last night and he wore it to the grocery store this morning and said it made all the difference. He had been complaining that the elastic loops on the face mask I made him were bothering his ears so when I saw your pattern, I knew I had to give it a try. So simple and quick and ingenious! Thank you SO much!
I’m glad you like it! I’m making one for myself because I feel the same as your husband… I came home feeling like my glasses were hurting my ear–and then realized it was the elastic!
Been in touch with my local hospital via email asking if they could use some of these and while never imagining they would actually get back in touch was stunned to see late last evening someone responded back saying YES they did. Got plenty of stash yarn to use but now for some button hunting………….
Walmart sells packs of buttons in various colors. You may need to dig through for matching buttons but they’ll be the same color.
Hi Cheryl. Thank you to your husband for being your model so we could get a real feel/see for how they work.
I don’t usually comment but since I am here, I want to tell you how much your email subscription stories have entertained me and just made me smile. The “Winston” stories are hilarious. I think Winston just might need his own vlog!
Continued health and wellness to you and your entire family. Keep on keeping on, my dear.
Haha! Everyone just LOVES my Winston pup! Thanks for your kind words and for being a newsletter subscriber! I always feel like we’re on my front porch chatting together!
Where is the pattern – [email protected]
The pattern is available to read for free right in the post. Subscribers to my newsletter can get an ad-free printable version in the vault. If you already subscribe, the link is at the bottom of every newsletter.
Can a private person buy these? If so how do we buy them
I don’t sell finished items. You could try searching on Etsy though. I bet you could find some there.
Great Idea my son, daughter-in-law and daughter are all in the Medical profession and they wear masks all the time, thanks for sharing, I will make them one tonight. Buy the way I made your Boho Boss Bag and love the way it turned out. Just waiting on the handles to arrive to finish it.
Awesome! Glad you like the Boho Boss Bag too! One of my faves!
I made some of these ear savers with fleece that were requested from our local hospital. When I ran out of buttons I used the pull tabs from a soda can. I saw this idea on Facebook and it worked nicely. I will try your crochet version . Thanks for your post!
Thank you so much for sharing, easy to crochet.
This is going to be great for those of us (me) that wear hearing aids! Hard to deal with mask elastic and aids at the same time! Oh and glasses!??♀️
Yes, i’ve been complaining about the limited storage space behind my ears, glasses, & hearing aids, then mask elastic, THEN if you put sun glasses over … yeah, one flip and the aids go flying acrss the car!!!, glasses come of the nose and mask is hanging woonky! perfect solution, thanks
thanks Cheryl for the ear saver pattern, I am making masks for anyone that needs them, no charge, I think I have made about 300, I love helping people as you do and am so thankful I can do it. I know what you mean about feeling the weather change, I live in ny ,lol, I hope you are feeling well by now. thanks again for your beautiful patterns.
Hi!
Love yr pattern, especially since you have sized one for men as well. Love the colours you chose & love the buttons. May I ask where you got the buttons – these are awesome & really make the ear savers stand out & look great. I have trouble finding buttons online that are really nice & the ones you have are fantastic. Where did you buy them from? Any help you can give would be appreciated. Thank you for sharing your patterns & your talent – much appreciate it. Stay safe! Health & happiness to you and your family!
My buttons were in my stash but I believe most were from Hobby Lobby.
Hi there! When I started running low on buttons, my husband bought dowels and broom handles. Sales them into buttons and drilled 2 holes for sewing. Pretty cool I must say! ?
How creative!
Where do you find all your cute buttons? I don’t want to spend $2 per button if I’m going to make a bunch to give away. I see packages of cute wood buttons but I don’t think they would work well being washed often.
My buttons were in my stash, but the cute wood ones were from Hobby Lobby. I don’t even know why I picked them up, but it was nice to have them when we were unable to go to the stores!
Made them and it was super Easy. Thanks. I also subscribe to your newsletter. Ty
How do I access printable?
The information is right in the post. The printable version is available for free to newsletter subscribers. If you’re not a member yet, you can fill out the form in the post and you’re in! If you’re already getting my newsletter, check the bottom of the last one for the super secret password and a link to the library!
Thank you for the Ear Saver pattern. I have made a bunch for our heroes where I live in Indiana.
My 5th grade class is making these (a version of them) for our school community as we’re doing in-person learning!Thanks for the idea!
A late Thank-You for this pattern. I have made many, given many. I admire all the people who are making them for give-away. Blessings to all.