
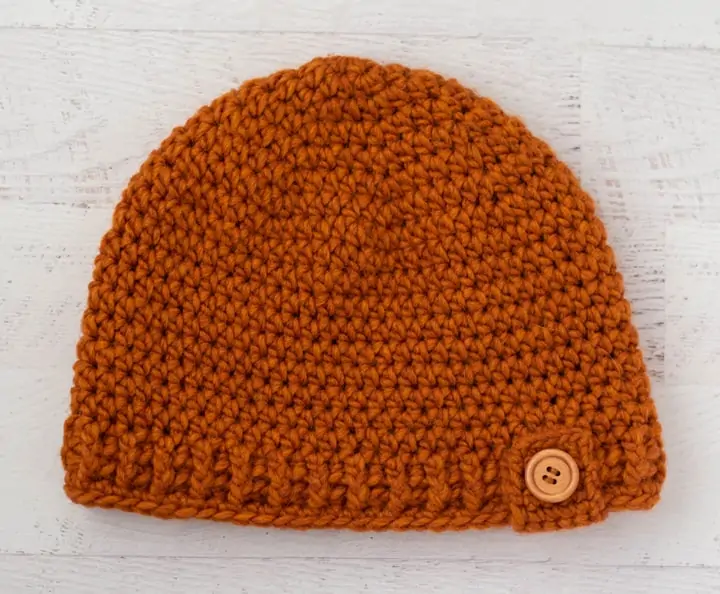
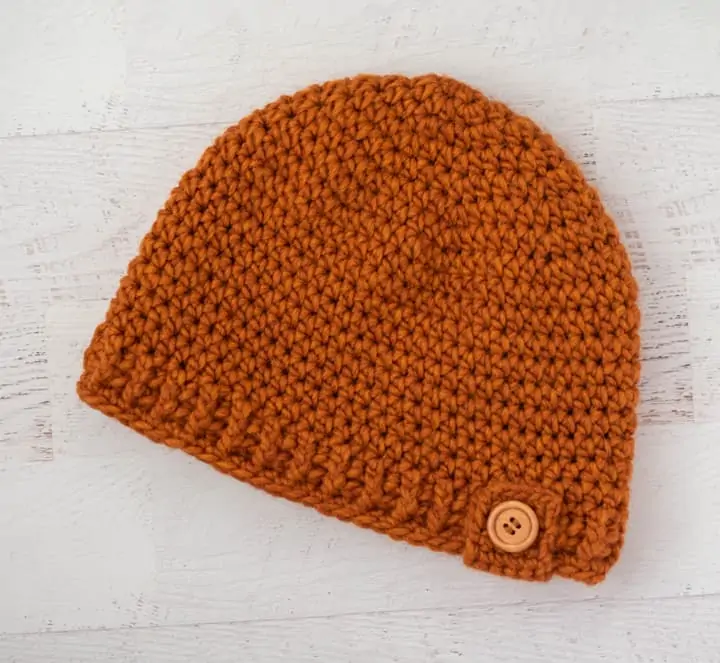
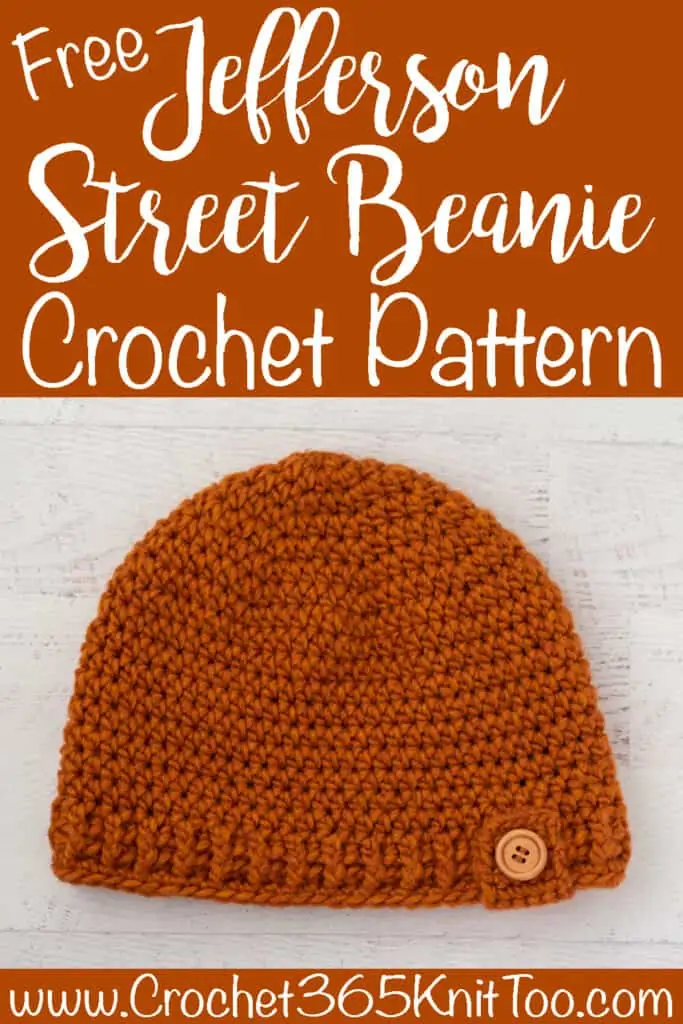
Jefferson Street Beanie
This post may contain referral/affiliate links. Please read my disclosure for more info.
Jefferson Street is where I fell in love. With a town. With a boy. With a life. And this cozy Jefferson Street Beanie celebrates all that.
Before we moved to our lovely house in the country, we lived in a quiet, quaint little town. But before all that… I met a boy for lunch on a fine summer day. And maybe that’s where our love story really began. Eating sandwiches from a small town deli. Sitting out front on the sidewalk, looking at the courthouse and watching the cars drive by.

My hubs is a quiet man. And on that day, the start of many, I slowed down just a little. I felt my body relax a teeny tiny bit, just letting go of all the things that didn’t matter at all and taking in all the things that really did. The sun on my face. The good food in my tummy. The sound of people laughing. The noise.. and yet.. at the same time.. the quiet. “See…” the man said “… it’s like Mayberry.”
And I DID see. All of it. And I knew right then and there that THIS was the man. And this was the town. And that maybe for once, at least in a really long time, I was home. Home in a place I had really never quite been before. In the simple, quiet, yet exquisitely beautifully ordinary. I was home.

I miss that place like nobody’s business. I suppose that’s the way it is in life… trading one thing for another. Loving what you have now, but feeling a little melancholy for what you once had. And if I’m going to 100% honest, I’m probably missing a lot of what this town represents to me: a normal, simple life. Eating, living and working in a small town where people smile at each other because if you don’t actually know them, you probably recognize them as neighbors.
I miss the old things.
I miss feeling at home in crowd gathered for a summer concert in the streets. I miss the smiles most of all. The smiles that are hidden now behind masks. I wonder.. are people still smiling under there? I like to think they are. We smile with our eyes now, I suppose. From a distance. And hope that someday soon we’ll be sitting together again watching cars go by on a summer day, without a care in the world.
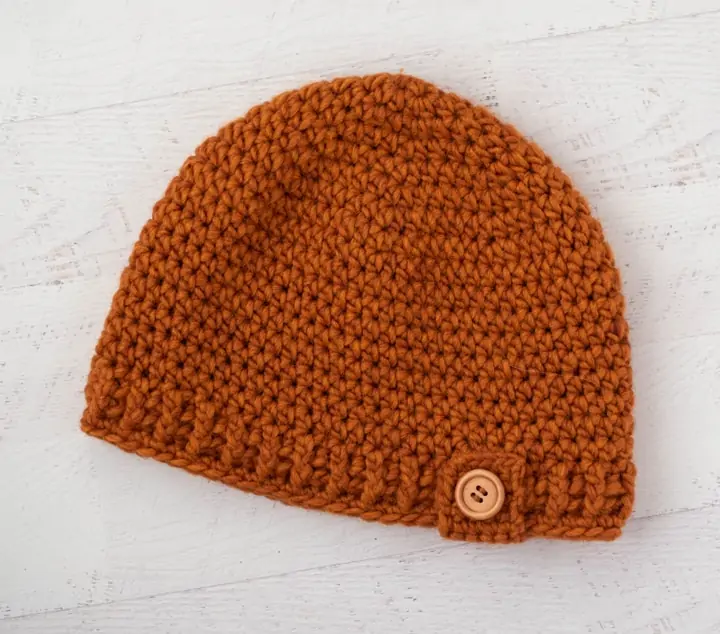
Until then… the Jefferson Street Beanie. A little sassy, a little fun, and downright cozy during the long winter days.
MORE HAT PATTERNS
If you love the Jefferson Street Beanie pattern, you might also like to check out these other crochet hat patterns:
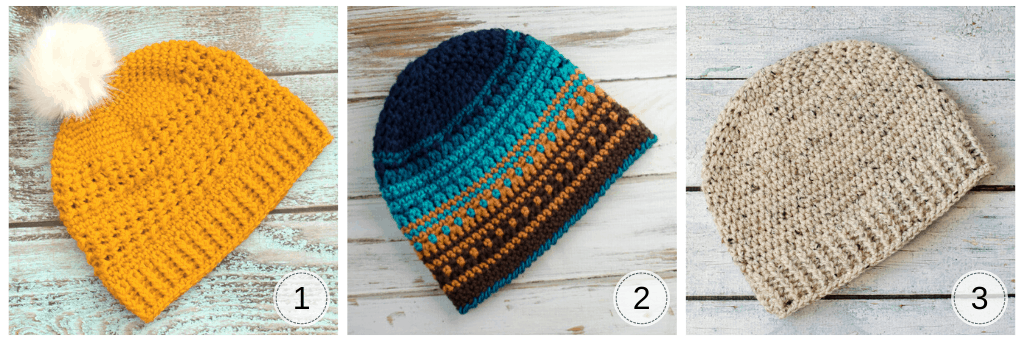
1. Great Lakes Beanie // 2. Big Bay Beanie // 3. Salt of the Earth Men’s Beanie
How To Crochet An Easy Hat for Beginners
The Jefferson Street Beanie is an easy crochet hat to make. Even though it may look like a more complicated pattern, it really is an easy crochet hat pattern. It primarily uses the Half Double Crochet Stitch which is very easy to learn. You also will need to know how to chain and slip stitch. The brim uses post stitches and while those may look difficult, it’s really about WHERE you place your hook for the half double crochet stitch.
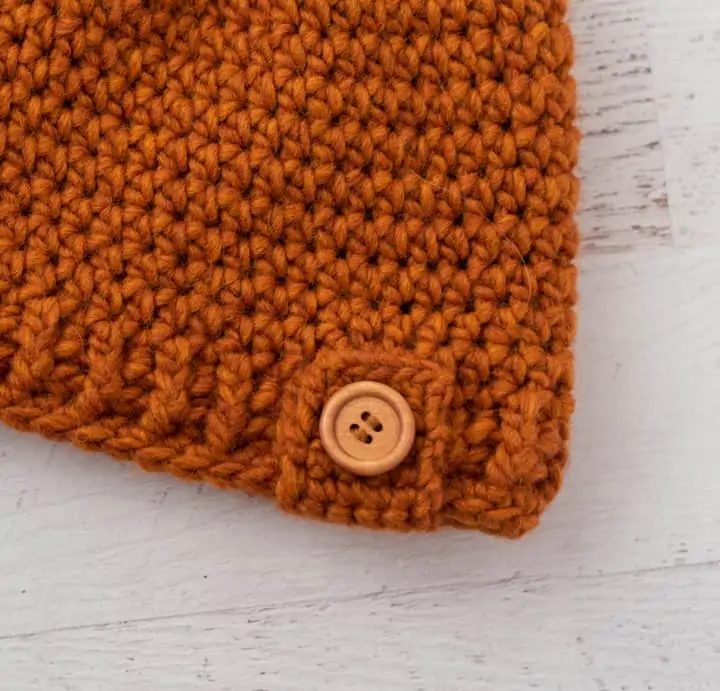
The optional button band is worked in single crochet back and forth. There is no button hole at all. Just work a little strip in single crochet, sew on a button on one end and then fold it over the edge of the hat, thread a yarn needle with some yarn and tack it down. And bam! Beautiful and EASY crochet hat!
I just love how even a beginner crocheter can make this easy crochet hat out of bulky yarn. It might be my new favorite of all my crocheted hats!
Purchase an ad-free printable version of the Jefferson Street Beanie Crochet Pattern Here
Jefferson Street Beanie
Here is what you will need:
- US J 10/6.00mm crochet hook
- 3 oz Bulky Weight Yarn: Sample used Patons Alpaca blend in Camote color
- 7/8″ button
- Tapestry needle and scissors
- Coordinating thread and sewing needle to sew on button
Resources and tutorials you may find helpful in following this pattern: Crochet Abbreviations, US to UK Crochet Conversion Chart. Find links to stitches on the “Tutorial” menu: Getting Started will show basic stitches used in many patterns and Crochet Stitch Dictionary shows our growing collection of crochet stitch tutorials.
Fits an average sized adult. Finished size: About 21″ around by 8.5″ long.
Crochet Beanie:
Note: Hat is worked in a continuous round from the top to the start of the ribbing. Use a stitch marker to keep track of the end of each row.
Make a Magic Ring.
R1: ch 2 (does NOT count as hdc), work 8 hdc in ring. (8 st)
R2: 2 hdc in each st. (16 st)
R3: *hdc in next st, 2 hdc in next st, repeat from * around. (24 st)
R4: *hdc in next 2 st, 2 hdc in next st, repeat from * around. (32 st)
R5: *hdc in next 3 st, 2 hdc in next st, repeat from * around. (40 st)
R6: *hdc in next 4 st, 2 hdc in next st, repeat from * around. (48 st)
R7: *hdc in next 5 st, 2 hdc in next st, repeat from * around. (56 st)
R8: *hdc in next 6 st, 2 hdc in next st, repeat from * around. (64 st)
R9-18: hdc in each stitch in row (64 st)
The next row begins the ribbing:
R19: Sl st in next st, ch 2, *front post hdc in the next stitch, back post hdc in the next. Repeat from * around, ending with a front post hdc in last stitch. Join with slip stitch to top of starting chain 2. (64 st)
R20: Ch 2, *front post hdc in the next stitch, back post hdc in the next. Repeat from * around, ending with a front post hdc in last stitch. Join with slip stitch to top of starting chain 2. (64 st)
R21: Ch 1, sc across row. Join with first sc in row. Fasten off and weave in ends. (64 st).
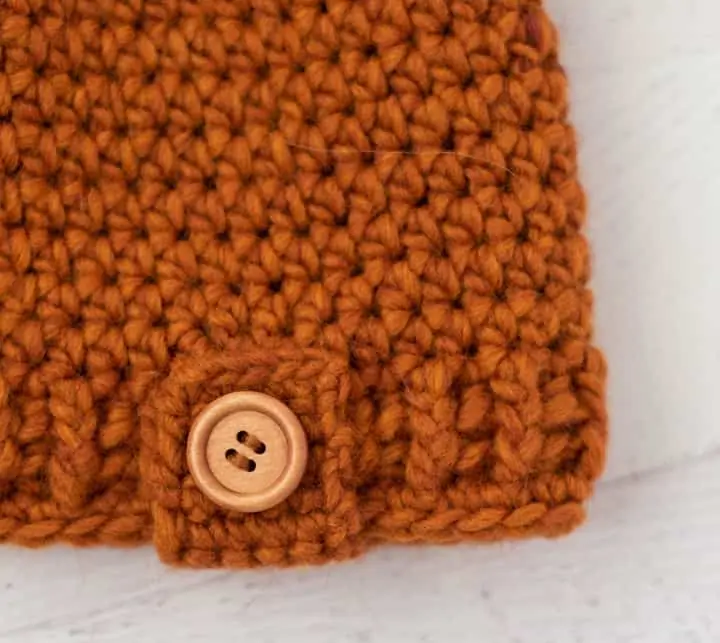
Button Band
The button band is decorative. First make the button band. Sew the button on the band and then sew the band on the hat.
Chain 6
R1: Sc in 2nd ch from hook and in each stitch across row. Turn work (5 st)
R2-14: Ch 1, sc in each stitch across row. Turn work (5 st) And end of 14th row, fasten off and weave in ends.
Sew button to one end of band with coordinating thread. Then fold band over brim of hat and carefully sew each end of band on the hat. Weave in any remaining ends
Can I add a Pom Pom?
The best part of an easy crochet hat pattern is that you can make small changes with a big impact. You certainly can add a pom pom. You could crochet a faux fur pom pom, make a pom pom out of yarn or even buy a fur pom pom and attach it to the crochet hat. I would definitely audition any pom pom with and without the button band to see what look you prefer!
Can This Be Made Using 4 Weight Yarn Instead of 5?
The Jefferson Beanie is made with a #5 weight yarn, which is a bulky weight. A worsted weight #4 weight yarn is thinner and so there are more stitches needed for the crochet hat to fit properly. You will also need a smaller crochet hook and it will take more time to crochet a similar looking hat. But you’re in luck! The Salt of The Earth Beanie is a very similar hat pattern worked in a #4 weight yarn. You can crochet a similar band–just experiment with the starting chain and number of rows to get a similar looking band. For more yarn details, read my post on yarn weights.
And there you go! A perfect, easy to crochet hat! Make one for yourself or for your favorite family member!

Purchase an ad-free printable version of the Jefferson Street Beanie Crochet Pattern Here
I love seeing your finished projects! If you enjoyed making this Jefferson Street Beanie I’d love to see yours on Instagram, be sure to tag me @crochet365knittoo. If you are on Facebook, stop over to the Crochet 365 Knit Too Facebook page or pop over to the Crochet365KnitToo Club and share a photo! I’d love to see your work!
Pin Now Crochet Later ⇨
Love your hat patterns. I’m always looking for new ones since I donate hats to many organizations. I always especially on the look out for cute kids hat patterns.