
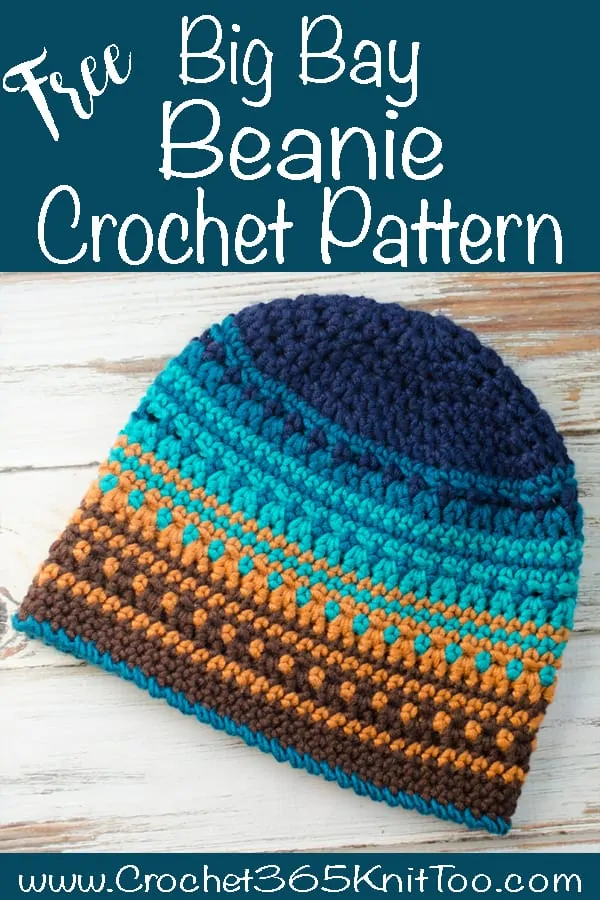
Crochet Big Bay Beanie
This post may contain referral/affiliate links. Please read my disclosure for more info.
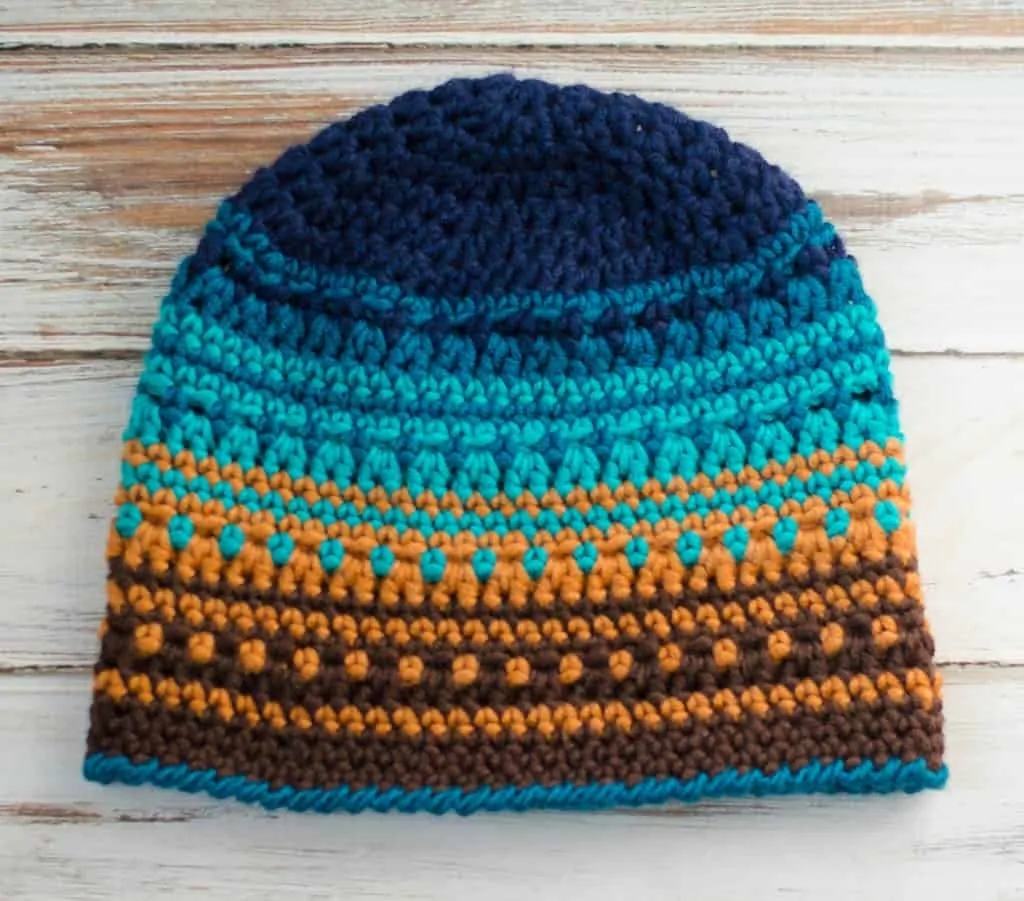
I have an absolute LOVE-HATE relationship with this Crochet Big Bay Beanie. On the one hand.. I love the transition of deep, rich color that’s going on. I love how simple stitches, strategically placed completely “make” this hat.
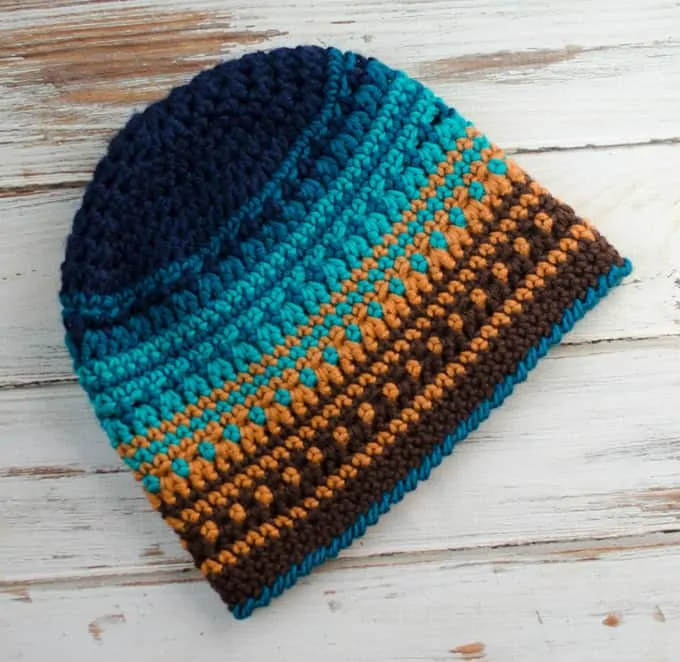 This Big Bay Beanie is made with Caron X Pantone (a chunky weight yarn) in “Moody Pumpkins” color way. If you’re like me, maybe you’ve seen these color coordinated little “braids” of yarn at Michaels stores. Maybe one even jumped into your cart. The idea of color coordinated yarn for a small project appealed to me and I figured with the blues and browns, this would make a great hat for my husband (though honestly it could be worn by a man or woman).
Yes. The man gets a lot of my hats. As someone who got married late in life, there are some simple pleasures that my guy really enjoys. My cooking. That’s huge. And anything I make for him.. he just gets this little smile on his face and acts all nonchalant on the outside. But I’m pretty sure on the inside..there’s a little boy jumping up and down with Christmas morning type excitement. And when I make him happy…well that makes me happy.
The blues and browns of this Crochet Big Bay Beanie remind me of my “Mitten State” of Michigan, where we are surrounded by the Great Lakes and her beautiful shorelines. The shades of blues and browns remind me of water lapping up on the shore and if I close my eyes, I can almost hear the rhythm of the waves that always seems to soothe my soul. And in a way, I think the shades of blue in the Big Bay Beanie sort of lap over the shades of browns, just like waves of water on a sandy shore.
As many do here, we love to vacation “up north” in Michigan’s Upper Peninsula where it feels like a whole different world. As you drive north, the landscape changes. The trees, the remoteness. The quiet. And when you’ve driven north just about as far as you can go up the middle of the U.P., you’ll run into one of the most beautiful places on the planet.
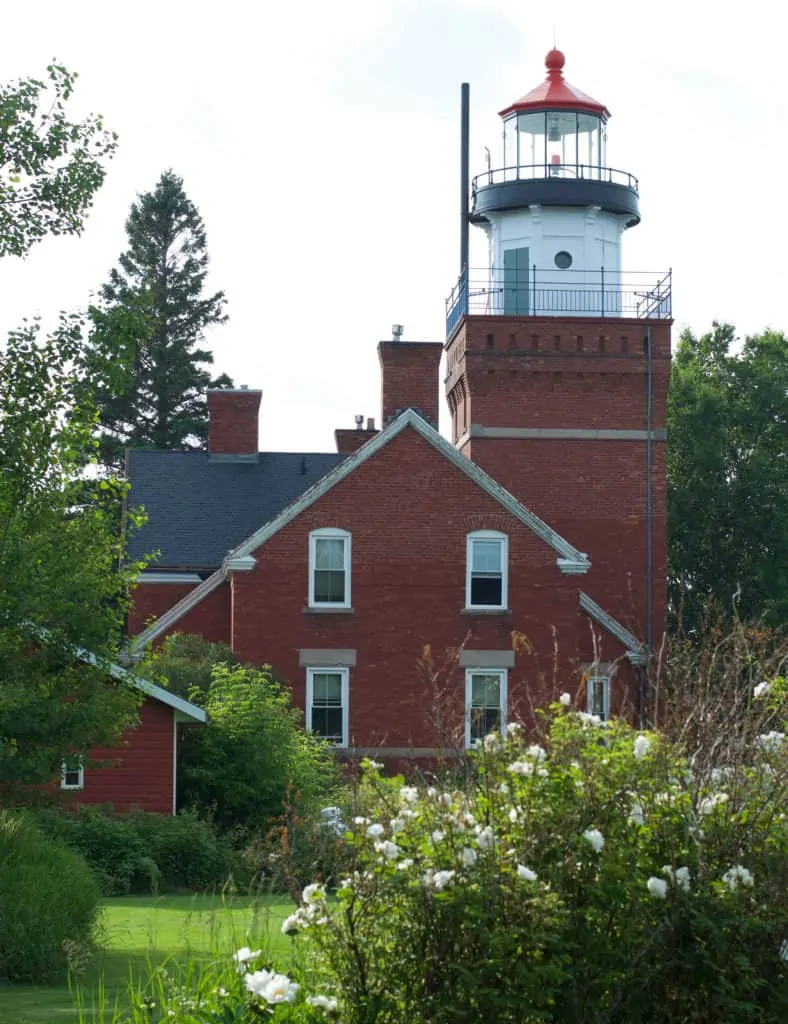
Big Bay Point Lighthouse (the namesake for this Big Bay Beanie) is located on a cliff overlooking Lake Superior. The Lighthouse also just so happens to be quaint bed and breakfast. And in one of my best vacation ideas ever, I booked us a room this past summer for a night in their nicest room.
Seriously, friends, if you ever want an experience like no other..spend the night in a lighthouse!
Doesn’t this look so peaceful? Nick, the new owner of this magnificent lighthouse was our host. He is extremely knowledgeable on all things ‘lighthouse’ and has grand plans to make this amazing lighthouse even more authentic to the original. We love that.
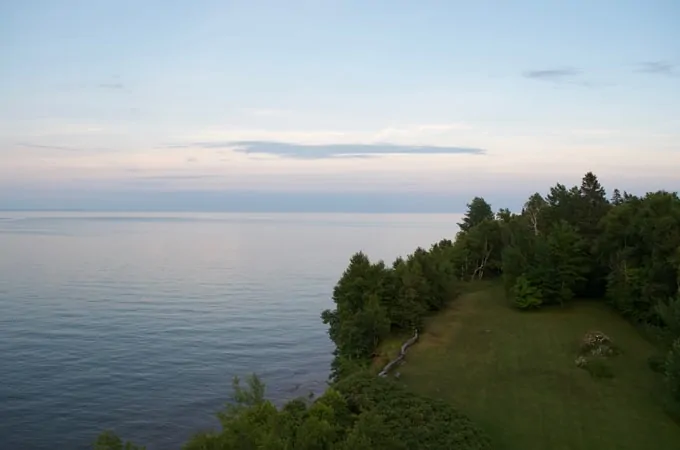
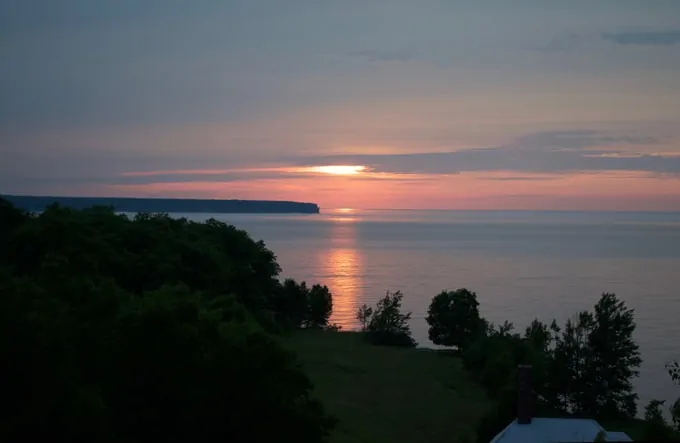
The entire “house” is delightful. Lots of architectural and nautical details make it feel like you’re actually living in a working lighthouse. Plus, at least during our visit, we had free access to the lighthouse tower and it’s amazing view over Lake Superior. The sunset over Lake Superior from the tower was amazing. It struck me how in life sometimes you share an incredible moment in time like this with complete strangers. A lot of the guests that night were at the tower too. Enjoying the quiet beauty of a Michigan summer night.
Ahhh… and now…
I’m at the point in this story where I come back to reality and tell you my little bit of “hate” for this dear Big Bay Beanie. Sigh. I almost hate to “go there” because I really, really love this hat. But I need to tell you about this little frustration, so that you can make the best decision when you make this amazing hat for yourself.
If you’ve taken a look at the Caron X Pantone line it is a “braid” of 5 small skeins of yarn. That means it has a precise amount of yarn. And, well…the Big Bay Beanie involves a bit of “yarn chicken”. In other words.. the yardage is really tight. In designing this project, I ripped it out numerous times and re-worked it so that the rows would work with the colors. And I did NOT run out of any color. But there were a few rows where I felt that little bit of panic wondering if I would make it to the end.
We all crochet just a little bit differently. You could make this hat and it would work out perfectly, just like it did for me. BUT you also COULD run out of a color before you finish a row, if your gauge is slightly different than mine. I KNOW!! Who needs this kind of stress with crochet, right?
So here are a few ideas for your Big Bay Beanie:
- Buy TWO braids in the same color way. That way you are guaranteed not to run out of yarn. Personally I don’t like this option because it’s already on the expensive side of things and then to buy TWO of them?
- Go with the flow and just continue with the pattern rows as written, but change yarn EARLIER or LATER as you run out of yarn.
- I did the last row with the yarn that had the most leftover at the end. You could eliminate this row altogether or end the hat a row sooner and it will still work well
Purchase an ad-free printable version of this pattern
Crochet Big Bay Beanie
Here is what you will need:
- US J10/6 mm crochet hook (Did you know you can purchase my go-to hooks on Amazon?)
- 1 Caron X Pantone, I used “Moody Pumpkins” color way. (This is a chunky weight yarn and about 127 yards in total) *See Note*
- tapestry needle and scissors
Fits a medium sized adult. Finished size: About 20″ around by 8.5″ long.
Note: This hat was made with a long transition variegated yarn that has since been discontinued. The yardage was based on that particular yarn. To adjust with different yarn, choose multiple colors in a chunky weight yarn.
Resources and tutorials you may find helpful in following this pattern: Crochet Abbreviations, US to UK Crochet Conversion Chart. Find links to stitches on the “Tutorial” menu: Getting Started will show basic stitches used in many patterns and Crochet Stitch Dictionary shows our growing collection of crochet stitch tutorials.
Arrange colors from your Caron X Pantone in a way that pleases you. For ease of reference, I’ve listed the colors in my own words, with the number provided with the product in parenthesis.
- Color A: Navy (19-4024)
- Color B: Dark Turquoise (19-4340)
- Color C: Light Turquoise (19-5034)
- Color D: Mustard (18-1163)
- Color E: Brown (19-0915)
Using Color A (Navy), Make a magic ring
R1: 8 hdc into ring (8 sts). Work in continuous rounds through row 7.
R2: 2 hdc in ea st around (16 st)
R3: *hdc in next st, 2 hdc in next st, repeat from * around (24 st)
R4: *hdc in next 2 st, 2 hdc in next st, repeat from * around (32 st)
R5: *hdc in next 3 st, 2 hdc in next st, repeat from * around (40 st)
R6: *hdc in next 4 st, 2 hdc in next st, repeat from * around (48 st)
R7: *hdc in next 5 st, 2 hdc in next st, repeat from * around (56 st) At the end of of row, slip st to next stitch to prepare for next row (and working in joined rounds). Do NOT fasten off Color A, but join Color B (Dark Turquoise) in last stitch
**Note: Starting with row 8, rows are no longer worked in a continuous round. Instead begin each row with chain(s) and end by slip stitching to the 1st st. You will also be changing colors every round, so change to the new color in the last stitch. Drop the unused yarn to be picked up for the next row. DO NOT fasten off previous color until it is no longer in used (as indicated in the pattern)**
R8: Using B, *sc in next 6 st, 2 sc in next st, repeat from * around, change to Color A in last stitch. (64 st)
R9: Using A, ch 1 and sc in same st, ch 1, skip next stitch, *sc in next st, ch 1, skip next stitch, repeat from * around, joining with the 1st sc at the beginning of the round. Change to Color B in the last stitch. You may now fasten off color A. (64 st)
R10: Using B, sl st to next space, ch 2 (counts as 1st hdc) and hdc in same space, skip next sc, *in next space work 2 hdc, skip next sc, repeat from * around. Join with slip stitch to top of 1st hdc in row, changing to color C in last stitch. (64 st)
R11: Using C, ch 1 and sc around, joining with sl st in 1st sc, change to Color B in last stitch. (64 st)
R12: Using B, ch 1 and sc around, joining with sl st in 1st sc, change to Color C in last stitch. (64 st)
R13: Using C, ch 1 and sc around, joining with sl st in 1st sc , change to Color B in last stitch.(64 st)
R14: Using B, ch 1 and sc in same st, ch 1, skip next stitch, *sc in next st, ch 1, skip next stitch, repeat from * around, joining with the 1st sc at the beginning of the round. Change to Color C in the last stitch. You may now fasten off color B. (64 st)
R15: Using C, sl st to next space, ch 2 (counts as 1st hdc) and hdc in space, skip next sc, *in next space work 2 hdc, skip next sc, repeat from * around. Join with slip stitch to top of 1st hdc in row, changing to color D in last stitch. (64 st)
R16: Using D, ch 1 and sc around, joining with sl st in 1st sc, change to Color C in last stitch. (64 st)
R17: Using C, ch 1 and sc around, joining with sl st in 1st sc, change to Color D in last stitch. (64 st)
R18: Using D, ch 1 and sc around, joining with sl st in 1st sc, change to Color C in last stitch. (64 st)
R19: Using C, ch 1 and sc in same st, ch 1, skip next stitch, *sc in next st, ch 1, skip next stitch, repeat from * around, joining with the 1st sc at the beginning of the round, changing to color D in last stitch. You may now fasten off color C. (64 st)
R20: Using D, sl st to next space, ch 2 (counts as 1st hdc) and hdc in space, skip next sc, *in next space work 2 hdc, skip next sc, repeat from * around. Join with slip stitch to top of 1st hdc in row, changing to color E in last stitch. (64 st)
R21: Using E, ch 1 and sc around, joining with sl st in 1st sc, change to Color D in last stitch. (64 st)
R22: Using D, ch 1 and sc around, joining with sl st in 1st sc , change to Color E in last stitch. (64 st)
R23: Using E, ch 1 and sc around, joining with sl st in 1st sc, change to Color D in last stitch. (64 st)
R24: Using D, ch 1 and sc in same st, ch 1, skip next stitch, *sc in next st, ch 1, skip next stitch, repeat from * around, joining with the 1st sc at the beginning of the round, change to Color E in last stitch. (64 st)
R25: Using E, sl st to next space, ch 2 (counts as 1st hdc) and hdc in space, skip next sc, *in next space work 2 hdc, skip next sc, repeat from * around. Join with slip stitch to top of 1st hdc in row, changing to color D in last stitch. (64 st)
R26: Using D, ch 1 and sc around, joining with sl st in 1st sc, change to Color E in last stitch. You may now fasten off Color D. (64 st)
R27-28: Using E, ch 1 and sc around, joining with sl st in 1st sc, change to Color B in last stitch. (64 st)
R29: Using Color B, reverse single crochet around. Join at end of round and weave in ends. (64 st)
Looking for more men’s hat patterns? Click here for more free mens patterns!
Purchase an ad-free printable version of the Crochet Big Bay Beanie pattern
I love seeing your finished projects! If you enjoyed making one of my patterns I’d love to see yours on Instagram, be sure to tag me @crochet365knittoo. If you are on Facebook, stop over to the Crochet 365 Knit Too Facebook page or pop over to the Crochet365KnitToo Club and share a photo! I’d love to see your work!
Trying to make this for a last minute Christmas gift.
On the non-continuous rounds, are you turning the work after the slip stitch, or continuing in the same direction? Thanks
The right side is always towards you. So slip stitch to join and chain as indicated in the pattern for the next row.
Thank you for a wonderful pattern. I had some #4 worsted weight yarn in similar colors. I went down a hook size. I love how it turned out.
Thank you for this lovely pattern! I love the little beads of color from the chain, skip, single crochet rows. So striking! And thanks also to Karen for mentioning that she was able to use worsted weight yarn and go down a hook size. I also have similar colored yarns in worsted weight I can use.
LOVE this pattern. It made my hard-to-please son so happy. U wush I could post the picture. I will post it on my Facebook page, Vibrant Daze Creations. I had fun cutting up a cake to get the right color changes. Thanks for sharing this!
So glad you love it and what a great idea to use a yarn cake for the various color changes! The best place to share photos is in our Crochet 365 Knit Too Club. You can click on the link to get there!
Hi Cheryl, I love your work but I am a “visual” learner and I am wondering if you have a video for people like me…thank you so much!
I don’t do very many videos (as in currently.. I’ve done ONE). I try to include as many photos as I can. You might try looking at the various stitch tutorials I have on the blog (you can search or access through the menu). It also helps to take each row of the pattern phrase by phrase. A lot of people like my post on how to read a crochet pattern. If I ever do venture more into videos, I will definitely keep this post in mind.
Thank you for this beautiful pattern. If I wanted to make it bigger, would I just add more stitches into the magic loop and then increase the rows by multiples of the number of stitches in the magic loop?
It is best to add another increase row after row 7. If you add too many stitches in the magic ring it can make the hat ripple a bit. Hope that helps!
I’ve made this a few times and always loose at yarn chicken on the D color (with the pantone). To fix this, I just did a sc, ch1 around on the last D row, and haven’t had any problems. I had bought several of the caron pantone sets when they were on clearance, and love this pattern. I plan on using other yarns to make it, and I don’t think I will have a problem with yarn chicken. Thanks!
Nice crafting skills there!
Love, love, love this pattern and color combination! On another note, we are in the Roscommon area in Michigan and love our corner of paradise and would not move back down again. Where are you located when you don’t come *up north*?
We are smack dab in the middle of the mitten! Roscommon is a lovely area!
The yarn is not found @ Michaels!
I believe it’s been discontinued since I posted the pattern. You can achieve the same effect by substituting a different yarn of the same weight.
I use Vanna’s Choice from JoAnn. It is a 4 weight, but it is on the thick side. I buy 5 skeins in harmonious colors and it works up nicely. Bonus, that will usually make 5-6 hats
Dear Cheryl, Thank you for your generous sharing of your designs. I donate hats and I like your patterns use – they are simple and can be accomplished in a pretty short time.
Besides patttern, I also enjoy your writings – your writing skills are exceptional, beautifully done, and I always take time to read them. Crochet Hugs!