
Faux Braid Join
This post may contain referral/affiliate links. Please read my disclosure for more info.
My friends, meet your new best friend for crochet joining purposes: The Faux Braid Join. This joining method offers the best of everything: It is quick. It is easy. It looks amazing.
This Faux Braid Join is great for afghans but I also love it on crochet bags like this Daisy Crochet Bag! The Faux braid join looks somewhat similar to the very popular Flat Braid Join, however it is much easier to execute. It might just be your new favorite thing too!
Prepare for Faux Braid Join
You need to work an extra round on your square in preparation for the Faux Braid Join with a series of chain 3 spaces and single crochet stitches. As an example, here is the very last round of the Daisy Square for the Crochet Daisy Bag:
Last Round: ch 1 and sc in same space as joining. *Ch 3, (sc, ch 2, sc) (1stcorner made), [ch 3, sc in next space] 3 times. Repeat from * around, working a sc and chain 3 in each space (formed between the 3 stitch clusters from the previous round) along the sides, as well as the following sequence in each corner: (sc, ch 2, sc). Join with sl st to start of round. Fasten off.

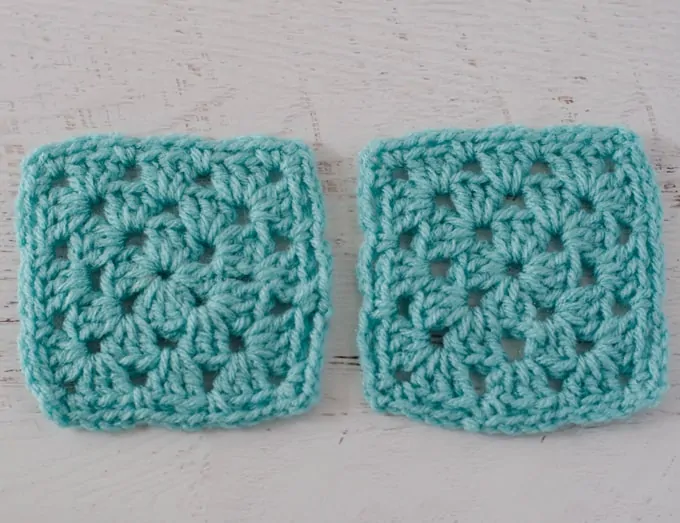
You can similarly work the sequence on chains and single crochet stitches on a different granny square or even a square motif. In this example, I’ve added that final row to a regular granny square:
Joining Squares
To start, hold two afghan squares, right sides together. In this example I’m using a contrasting color for the join to make it easier to see, but you will be working the join in the same color as the last round of crochet on your square.
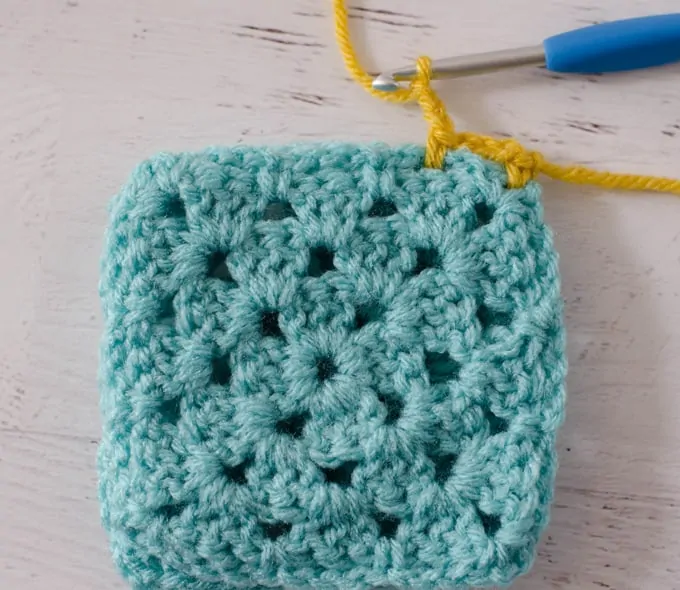
Step 1
Start by holding two squares right side together. Then using a standing single crochet, attach in a corner space. *Chain 3 and single crochet in the next chained space. Repeat from * across row.
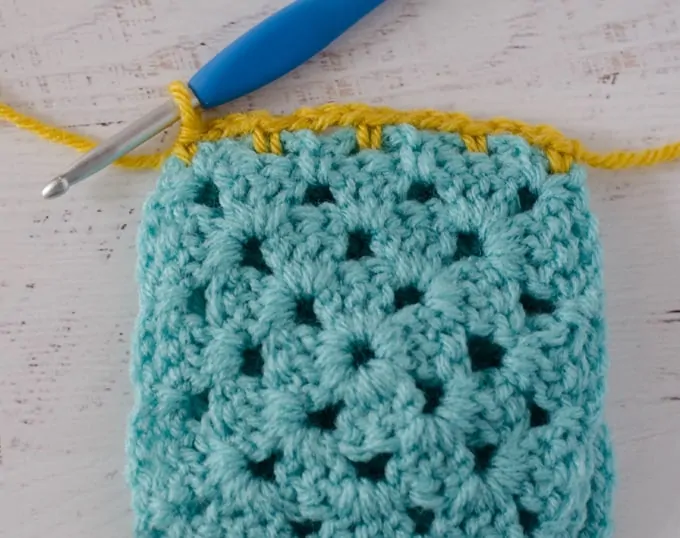
Step 2
At the end of the row, make sure there is a single crochet in the corner space. At this point, you have options. You can join as many squares together at a time as you wish. I find it easiest to look at a diagram of the afghan or purse I want to make and to join a complete row of 2 squares at a time.
Don’t forget the corner will have a sc. So take the next 2 squares, right sides together and without cutting the yarn, start over in step 1. Continue to work through the project, connecting all the open ends, following the diagram below (scroll down).
But first.. a few more photos of the Faux Braid Join:
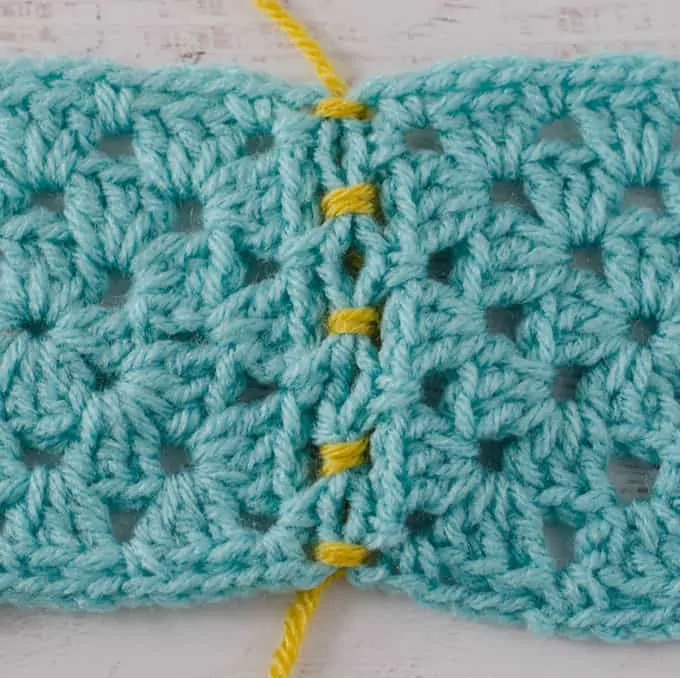
Here is the right side of the Faux Braid Join in a contrast color.
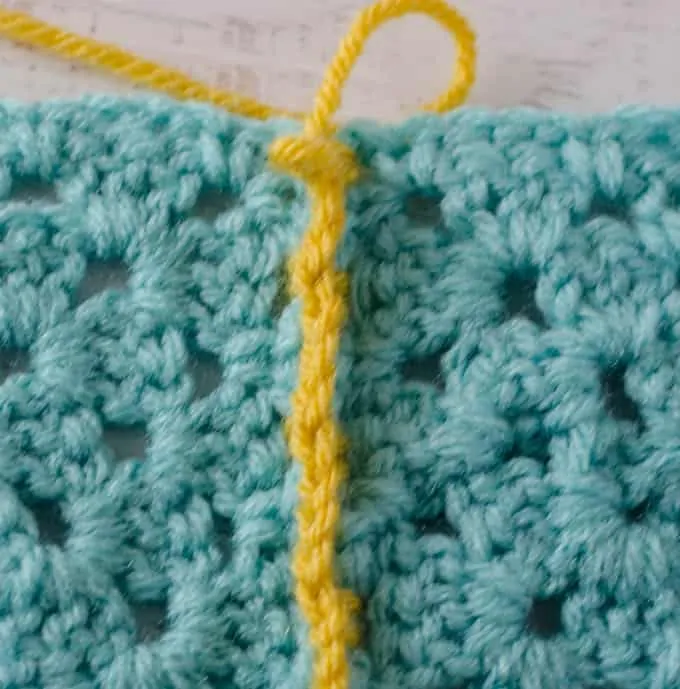
Here is the faux braid join on the wrong side from the top. Notice that it forms a small ridge on the wrong side of the work. You may or may not like that ridge. Personally, I think this is a perfect join for the bag with a purse lining because the ridges will be hidden inside the purse.
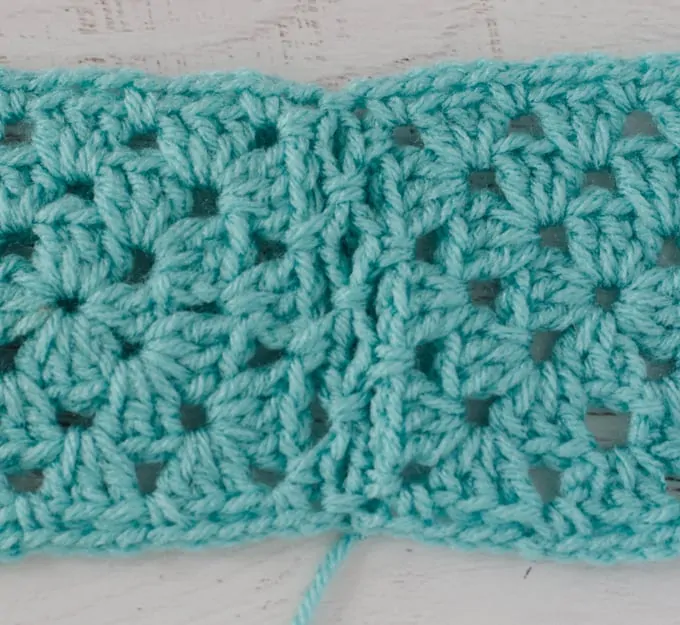
Here is the Faux Braid Join worked in the same color on the granny square example. See how it blends in nicely and really looks like a braid?
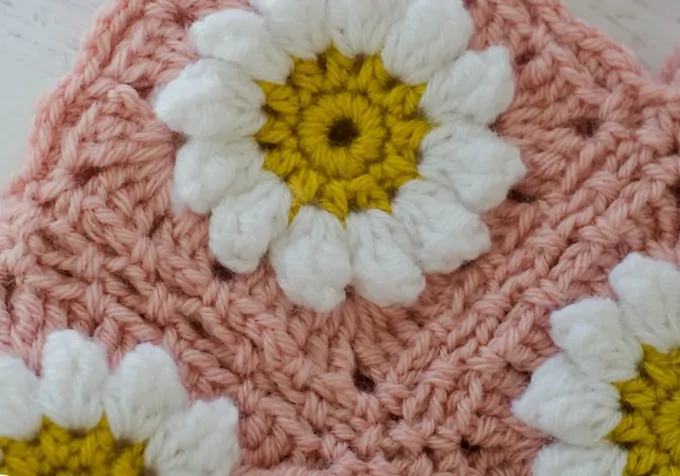
And here is a close up of the Faux Braid Join on the Daisy Mae Bag.
The ad-free version of the Daisy Mae Bag includes a tutorial with photos for the faux braid join, the crochet spiral handles, as well as a tutorial sewing a lining:
print & stitch
Purchase the Beautifully Crafted AD-FREE PDF Download Today
Do you just want to relax and crochet? This nicely formatted pattern features clear instructions and perfectly sized photos for a more enjoyable crochet experience.
Get the free pattern here or purchase an ad-free pattern on Etsy or Ravelry
I love seeing your finished projects! If you enjoyed making one of my patterns I’d love to see yours on Instagram, be sure to tag me @crochet365knittoo. If you are on Facebook, stop over to the Crochet 365 Knit Too Facebook page or pop over to the Crochet365KnitToo Club and share a photo! I’d love to see your work!