
Join Crochet Squares Together
This post may contain referral/affiliate links. Please read my disclosure for more info.
Up next in the Boho Boss Bag Crochet Along: How to Join Crochet Squares Together! Get ready for instant gratification, my friends! This is such a fun step in our crochet along!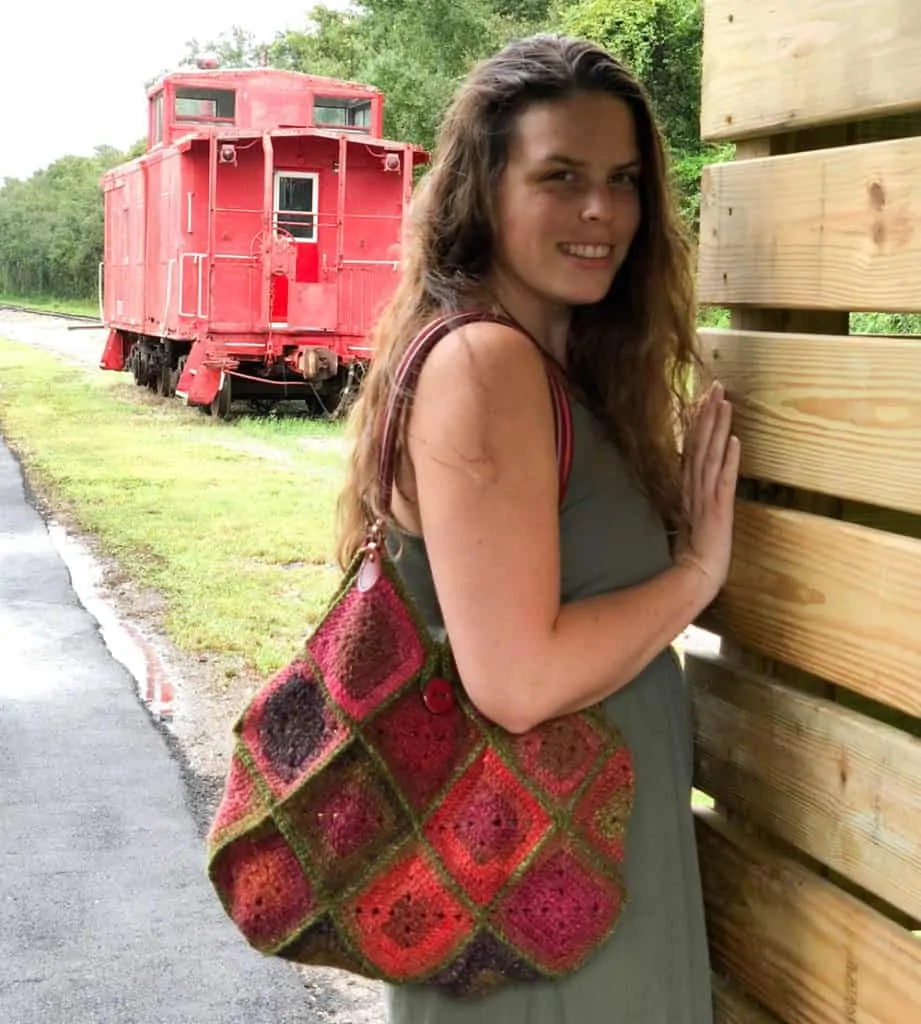 I don’t know why, but I find the process of joining these squares together to be immensely satisfying. It’s the step where a stack of squares actually turn into something and I can finally get a taste for how the whole bag is going to come together.
This week is also a great time to catch up because learning how to join crochet squares together is really easy and once you get started it goes quickly! So it’s a great week to finish any squares you haven’t got to yet–or hey..you can even START the project and bust out the squares and joining in one week!
Let’s get started learning how to join crochet squares together:
Purchase an ad-free printable version of this pattern
If you are using Noro Silk Garden yarn, you will notice that there can be drastic differences in colors from square to square. (To see what you need for this project, click here.) If you are using a different yarn, this may or may not be the same for you. If you’re looking for the other parts to this crochet along, you’ll find Part One here and Part Three here.
If you DO have squares with different shades of color, be mindful of this and think about how the squares will look in your finished bag. In my bag, for instance, I really liked the pink and red hues and wasn’t as crazy about the darker toned greens and tans. So you’ll notice that I put those squares on the bottom of the bag where they are not as prominently displayed.
Crochet Squares Together Overview
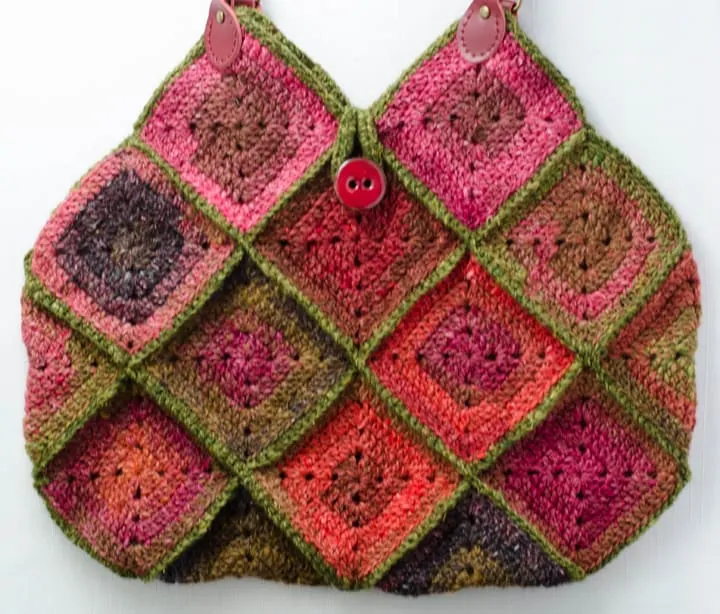
The squares are joined by single crochet. Review the diagram first. Then follow the instructions for how to single crochet the squares together. This diagram shows how the squares are connected in the finished bag, oriented in such a way that you can “envision” the finished bag with handles.

If we rotate the above diagram, it is easier to see square placement by row. Find a large work space and lay out your squares to resemble the square layout. If you’d like the directions for crocheting this bag together including a large image of the above diagram PLUS a rotated diagram to make this step easier, be sure to head to The Vault. The Vault is a password protected library of all sorts of free goodies JUST for my newsletter subscribers!
If you are already a newsletter subscriber, be sure to check your inbox. The current password is included in every email.
To join crochet squares together, you will be single crocheting the squares together. First by crocheting all the rows. Then crocheting all the columns. Finally you will fold the piece together and crochet the squares that make up the sides of the bag.
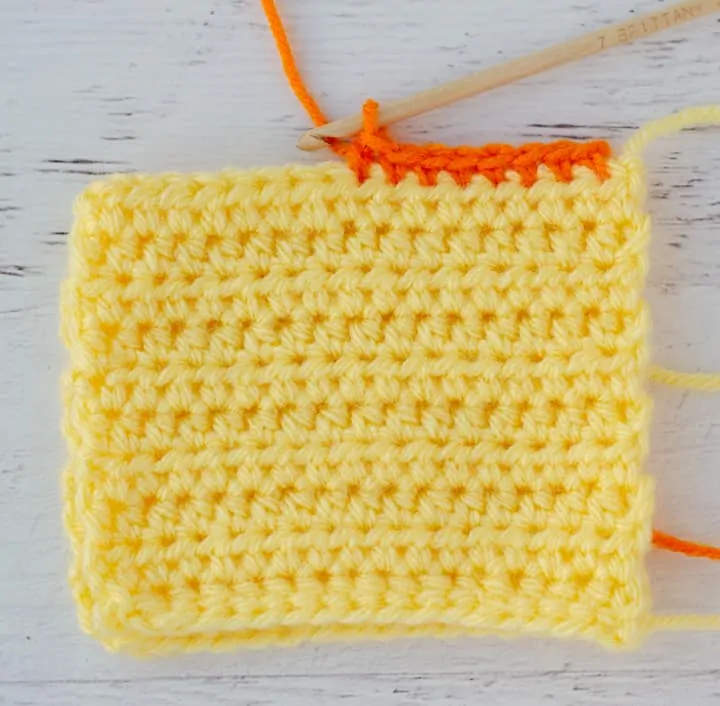
Start each row with a standing single crochet and then crochet the squares together working through the back loops only. The photo below shows the single crochet worked through both loops of both pieces (which you can also do if you prefer the look).
Here’s how to crochet the squares together:
Single crochet the squares together, following the diagram. First assemble the rows across. Working with 2 squares at a time, single crochet in the back loops of both squares. When you come to the end of those 2 squares, pick up the next 2 squares and continue single crocheting. Continue across until all the squares for those 2 rows are joined. This will leave the sides loose for now.
Continue to single crochet the next row, square by square to the 2 rows you just completed. Continue on to attach all the rows
When you are finished, lay out the squares and make sure they still form the same pattern as the diagram. It is surprisingly easy to mess up this step and get a block in the wrong row. So take a moment to make sure every square is where it should be and rip out and correct if you’ve made a mistake.
Then repeat the process to crochet the columns together. I find stitch markers can help with this step.
Finally look at the first diagram and follow the arrows to crochet the sides of the bag together. The dotted lines represent the two squares that fold in half on the sides of the finished bag.
I found it easiest to pin those pieces together (or fasten with stitch holders), and refer to the diagram a few times to make sure I was crocheting the appropriate squares together.
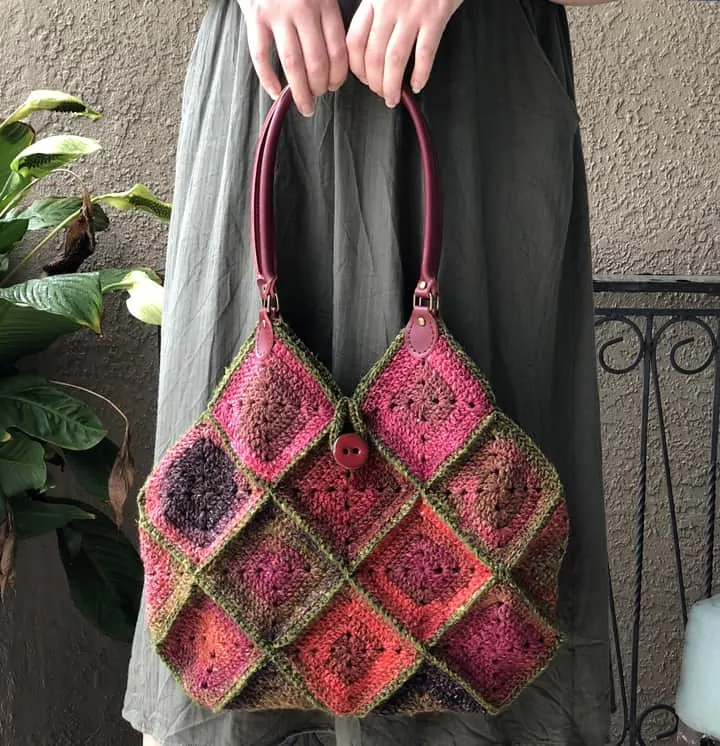
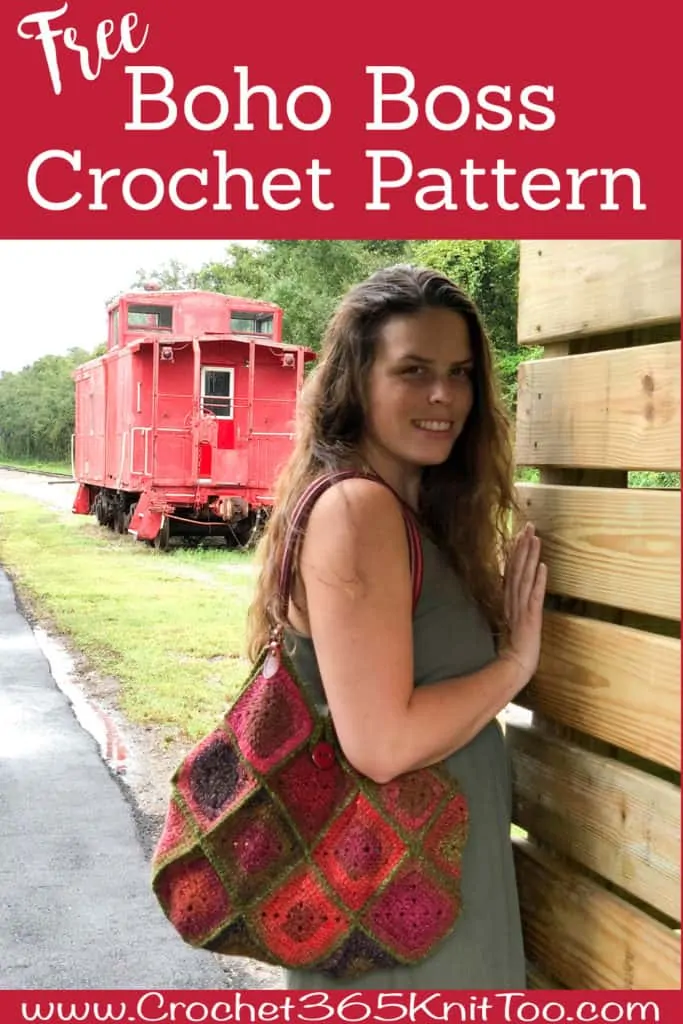
Here is the finished bag to show the squares sewn together. Note that on each side, the top 2 squares form a “M” shape. The top edges of these squares (that form the “M”) are not crocheted together. This will enable you to open the finished bag easily.
Remember..to get a complete printable, including both diagrams on how to join crochet squares together for your Boho Boss bag, be sure to sign up for my newsletter. That gives you access to a free resource library of printables, including the Boho Boss Bag Square Joining Instructions. You also get a Free Crochet Journal which you can learn about here.
Purchase an ad-free printable version of this pattern
I love seeing your finished projects! If you enjoyed making one of my patterns I’d love to see yours on Instagram, be sure to tag me @crochet365knittoo. If you are on Facebook, stop over to the Crochet 365 Knit Too Facebook page or pop over to the Crochet365KnitToo Club and share a photo! I’d love to see your work!
I’m currently making this bag and I love it so much! 💜