Crochet Bag Finishing ~ Boho Boss Bag Part 3
This post may contain referral/affiliate links. Please read my disclosure for more info.
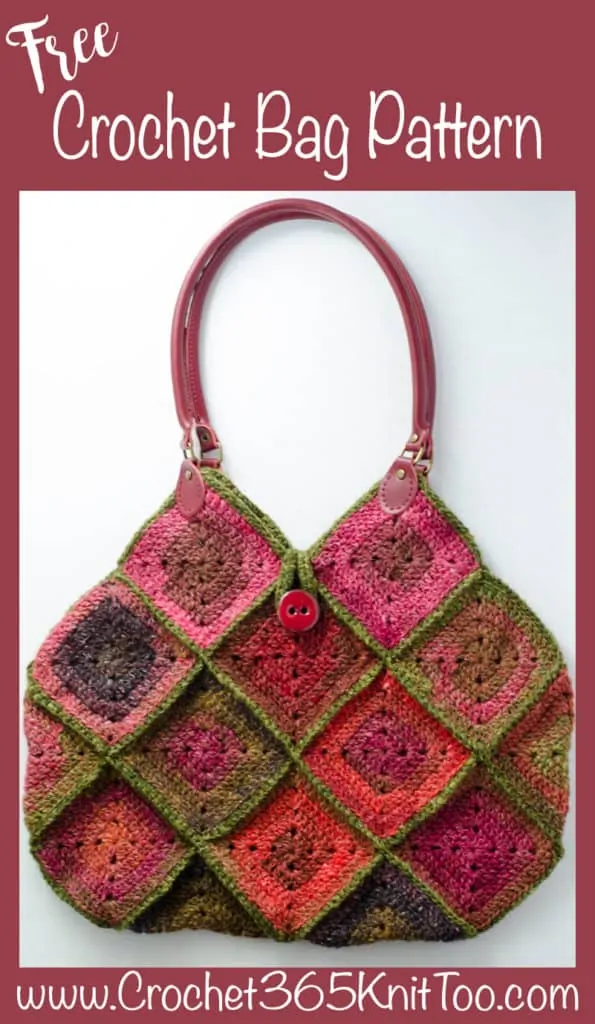
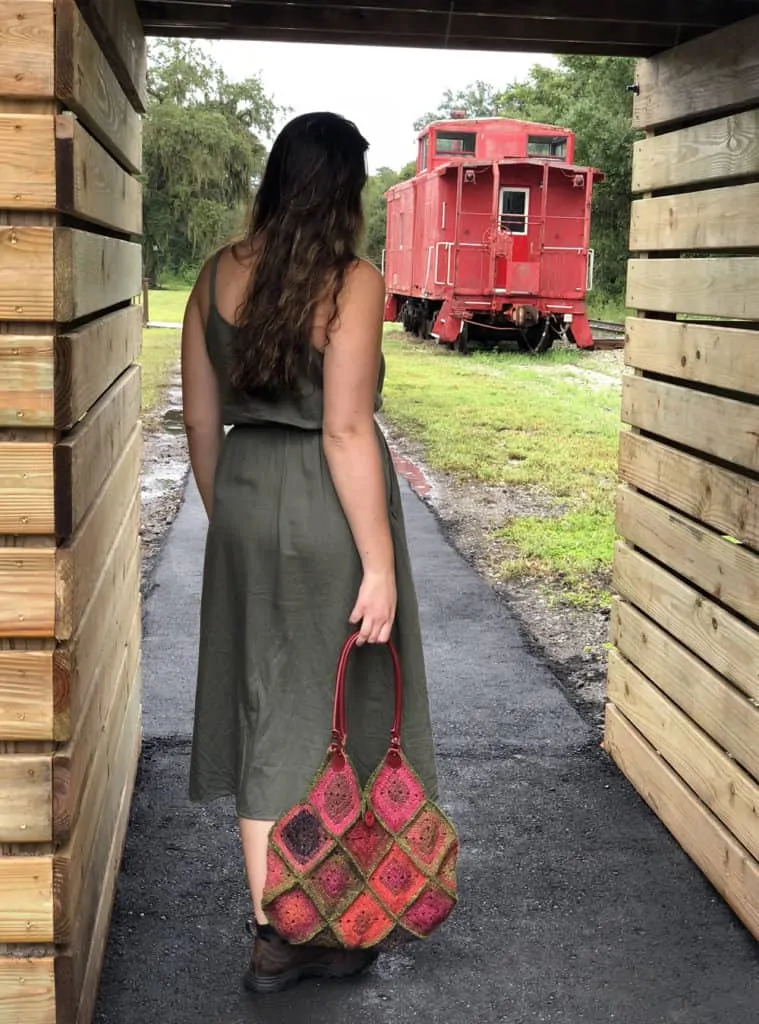
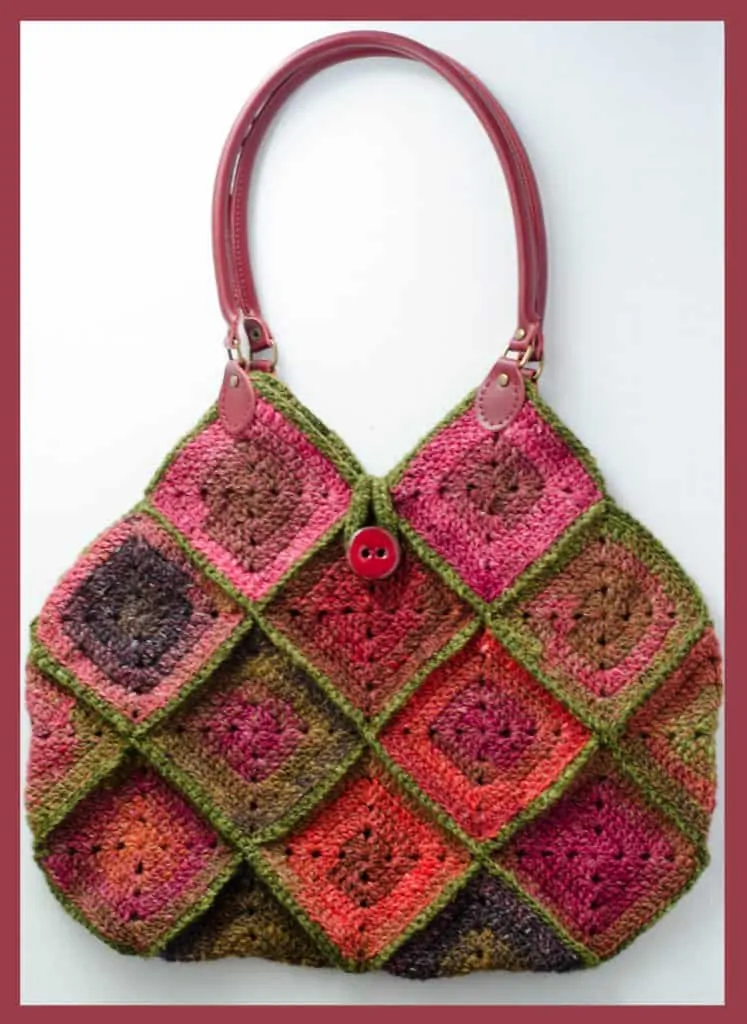
Can you even believe it? We are to the end of this fabulous Boho Boss Bag crochet along. Today we’re all about crochet bag finishing techniques!
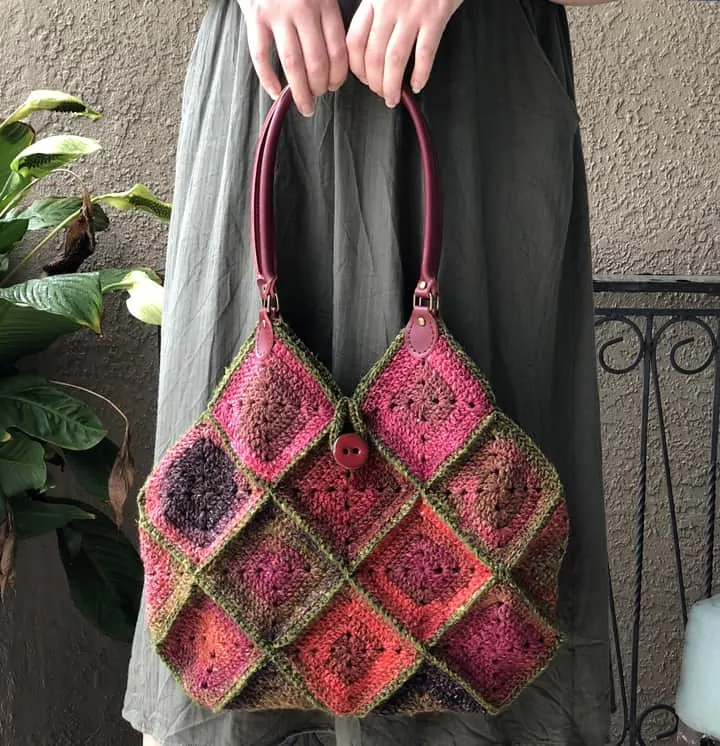
Sigh. I love this bag. Those beautiful pink hues make my heart sing. I don’t know about you, but I can’t WAIT to carry this bag everywhere I go! Are you ready to learn about crochet bag finishing?
If you’re just joining in, check out the introductory post here to find everything you need to make the Boho Boss Bag. In Part 1, we learned how to crochet solid granny squares. Then in Part 2, we crocheted our squares together. Now in part 3 we are going to finish this baby up!
Purchase an ad-free printable version of this pattern
Crochet the Top Edging
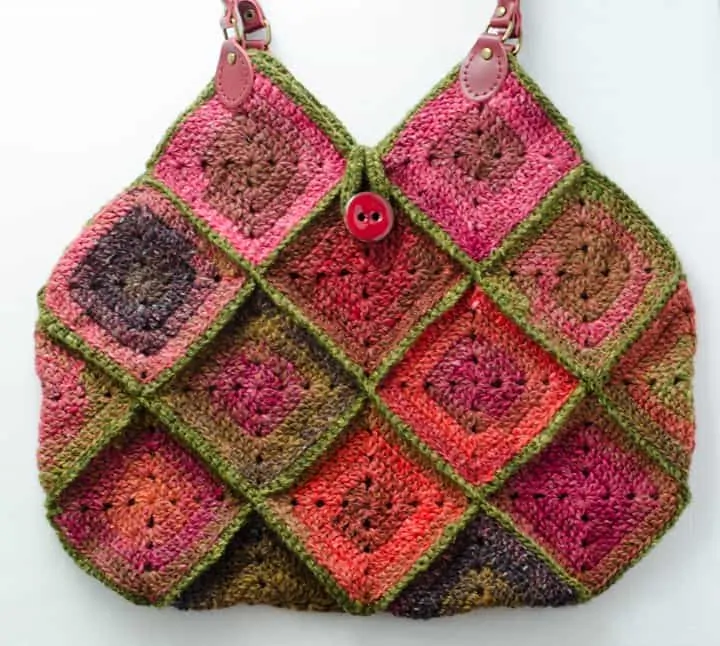
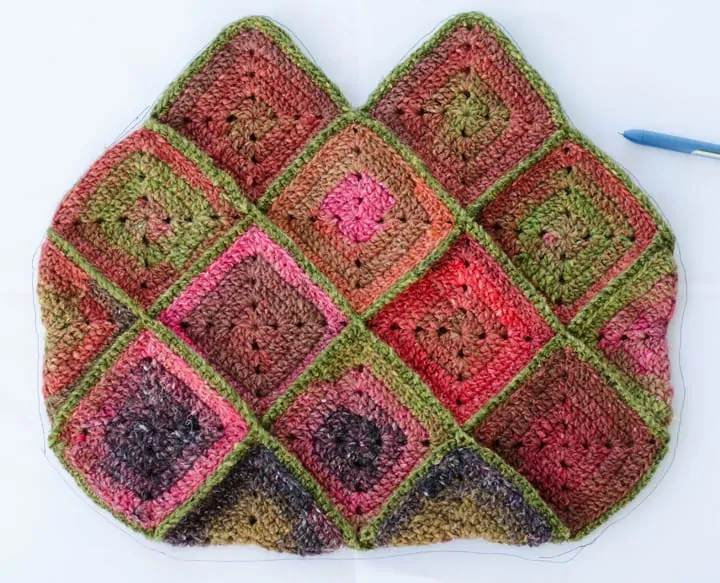
The edging is worked over the open top half of the 4 squares at the top of the bag. If you look at the photo above, you will see that there are 2 squares at the top of the bag on both the front side and two on the back side. The top half of those squares (in a ‘M’ shape on each side) form the opening of the bag. The edging is worked in single crochet all along this opening.
I like to think of these squares as having peaks and valleys. The peaks are the points at the top of the bag (where the handles will be joined later). The valleys are the low points where the squares join the rest of the bag. There are valleys on each side of the bag, one in the center front and one in the back. You will be single crocheting along this edge. When you come to a valley, single crochet 2 stitches together, working part of a stitch on each square that meets up there. When you come to a peak, work 3 single crochet in the top corner.
Decide which side of the bag you would like to be the front of the bag. Using the same contrasting yarn used for joining the squares together, start by joining with a single crochet a few stitches before a side valley on the back side of the bag, . When you come to the low point on the side, single crochet 2 together. Then continue to single crochet along the edge of the next square (now on the front of the bag) until you come to the peak. Work 3 single crochet in the peak. Continue to single crochet down the rest of that square until you come to the center front valley and single crochet 2 together.
Continue to work up and down the peaks and valleys until you come to the center back valley. Here is where the button loop is worked. Stop one stitch before the valley. Instead of single crocheting 2 together, you will work the loop for the button. I like to crochet the loop for the button first and then when I am done working the edging, I go back and actually sew the button in place. That way if I’ve crocheted tighter or looser than I planned, it gives me the option of repositioning the button not a more appropriate spot.
Crochet the Loop for the Button
One stitch before that center back valley, chain enough stitches to go around the button. I chained about 20 chains. Then slip stitch to the 1st chain. This makes a loop. Take a few minutes to see if this loop will fit over the button that will be sewn on the front.
Now reinforce that loop by working several single crochet stitches over the chain you just worked. To do this, continue past the slip stitch you just made (as though you were working in a circle) and work single crochets around the chain loop until you get all the way around the chain to the beginning of the loop again. I worked about 25 single crochets into the loop. When the loop is covered in single crochets you are back in position to finish the edging on the rest of the bag. Skip 2 stitches at the bottom valley (this is instead of crocheting them together). Then continue single crocheting along the rest of the bag as previously described. At the end of the row, slip stitch to the first stitch and fasten off.
Sew on the Button
Lay the bag flat with the back facing down. Position the button on the front so that the loop will fit nicely over the button . Once satisfied with the position of the button, using sewing needle and thread to sew the button in place.
Optional: Sew a Lining
Take your crochet bag finishing up a notch and sew a lining (completely optional). If you are making a lining, I suggest waiting to sew the handles on until after you’ve made and sewn in the lining. I prefer to sew the handles right through the crochet AND lining. However you could just sew the handles on to the bag itself.
Here is What You Will Need For the Lining
- 1/2 yard of fabric (this is enough to do single layer of fabric lining plus pocket)
- 1-1/4 yard of fusible woven interfacing (Pellon Shapeflex SF101)
How to Make Lining Pattern
- Tape together 4 sheets of 8.5 x 11 paper or lay out enough paper to trace out your purse.
- Lay purse on paper and use a pencil to trace around purse.

- When you take the purse off the piece of paper you have something that looks like the above photo. NOW you need to “fix” the drawing before cutting it out to use as a pattern. First, fold the paper in half so that the fold is along the center of the bag top to bottom. Draw a 2nd line about 1/2 inch from the original line This new line is going to be the cutting line for the pattern.

- Cut out the paper pattern. Unfold the paper and both sides will match in size. Don’t worry about any imperfections (it is ok if the 1/2 inch marking on the opposite side doesn’t exactly line up). You are creating a custom pattern to your own purse.

Prepare Fabric
Iron fabric. Then following manufacturer instructions, iron on the interfacing. I find it is easiest to do this prior to cutting out the bag. If you want to conserve interfacing, you might want to cut out all the pieces of the bag and pocket out of fabric and then the same pieces out of interfacing and fuse them afterward.
Lay pattern on a double thickness of fabric, pin and cut out two purse pieces (a front and a back)
From remaining fabric, cut (2) 8″ x 7″ squares for the pocket, if desired. I personally like having an inside pocket to hold my cell phone. Prior to sewing, both the front and back of the bag should have interfacing, as well as both sides of the pocket.
Sew the Pocket
Using a 1/2″ seam allowance, pin right sides of pocket together. Sew the pocket together on 3 sides, starting with a short side, working across a long side and then down the other short side. Leave the bottom open. Clip corners, turn pocket and iron flat. Top stitch about 1/8″ away from the top folded edge, if desired. Then center the pocket on one of the bag sides, lining up the unfinished edge with the bottom edge of the bag and pin. The unfinished edge of the pocket will be encased in the lining seam when you sew the front and back of the lining together. Sew the 3 sides of the pocket down.
Sew the Sides and Bottom of the Lining
Put right sides of bag together and sew the sides and bottom, using a 5/8″ seam allowance. (Yes, I do know that you allowed for only 1/2″ extra in your pattern; trust me, you need to sew at 5/8″ for the lining to fit properly inside). Sew the sides and bottom of the bag, encasing the bottom of the pocket into the bottom seam. Leave the top edges open (just like the crochet bag).
I like to cut close to the seam edge so it lays better in the finished bag. Next, use an iron and fold down the top seam allowances on the open edge of your bag lining to the wrong side, pressing as you go.
Pin the lining inside the crochet bag and carefully hand sew into place. The wrong side of the lining will be against the wrong side of the crochet bag.
Sewing on The Handles
The final step in our crochet bag finishing is to sew on the handles. I used these 23.6″ leather handles by Wento that come with pre-punched holes for sewing. I used strong thread, doubled over a few times and a sewing needle to carefully go through the holes in the leather handles to secure it on to the crochet bag.
If you lined your bag, work through all the layers. Take your time and be patient. It can be a bit tricky to get the needle through the pre-punched holes in the leather, but it is worth the little bit of extra effort. If you find it hard to work the needle through, a pair of pliers can help to grip the needle.
Ta Da! Your Boho Boss Bag is done!
Purchase an ad-free printable version of this pattern
I love seeing your finished projects! If you enjoyed making one of my patterns I’d love to see yours on Instagram, be sure to tag me @crochet365knittoo. If you are on Facebook, stop over to the Crochet 365 Knit Too Facebook page or pop over to the Crochet365KnitToo Club and share a photo! I’d love to see your work!