
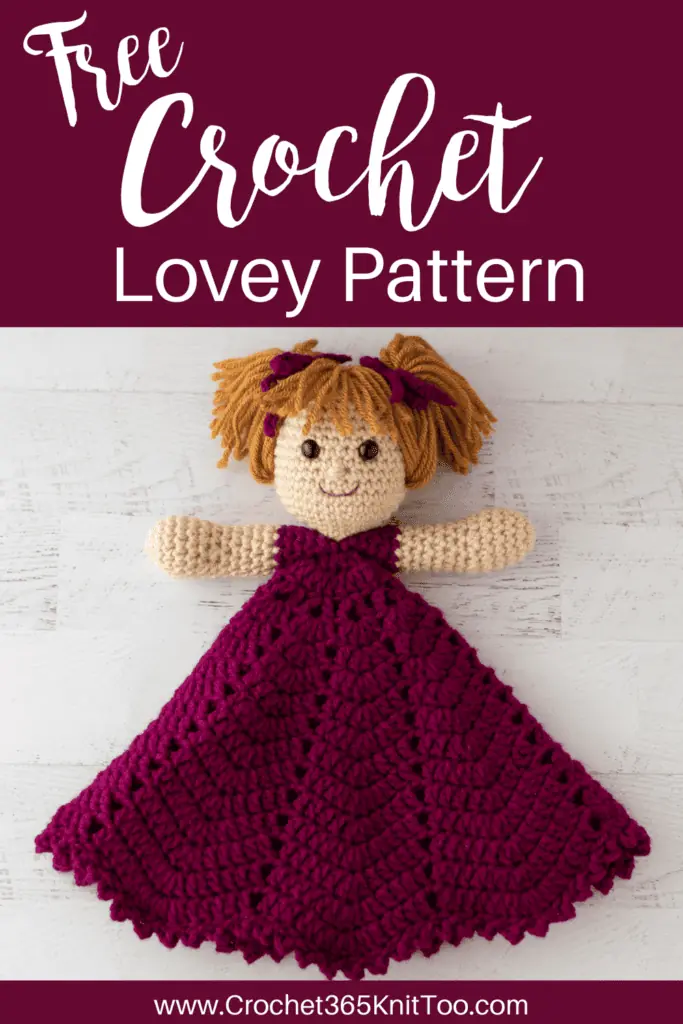
Emily: Crochet Princess Lovey
This post may contain referral/affiliate links. Please read my disclosure for more info.
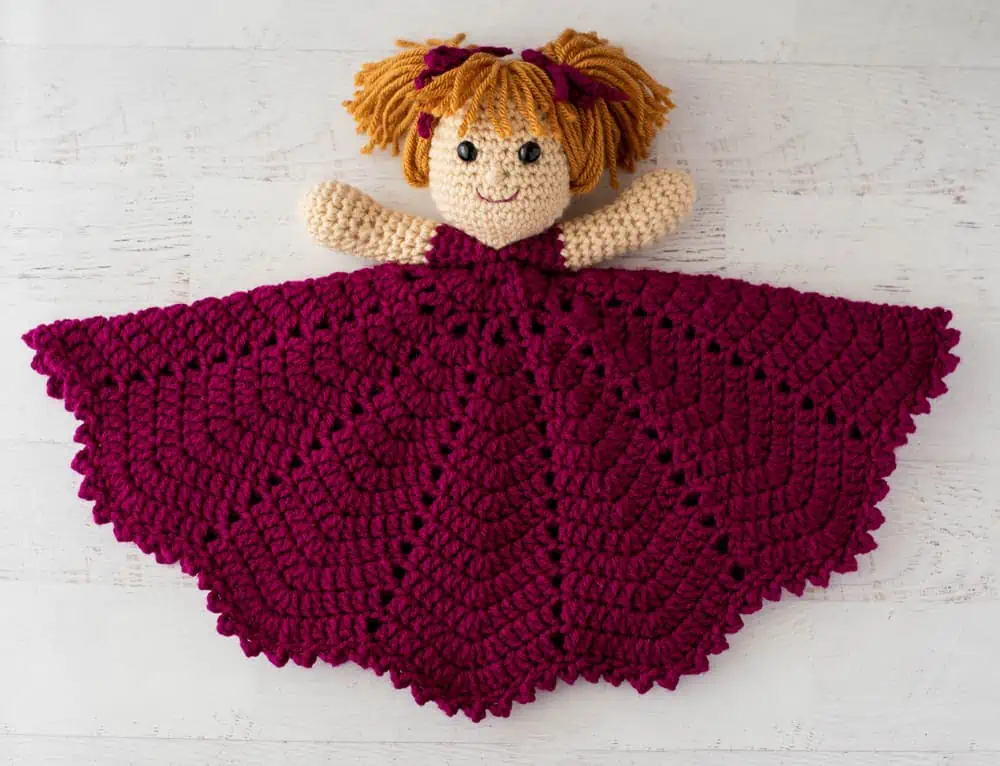
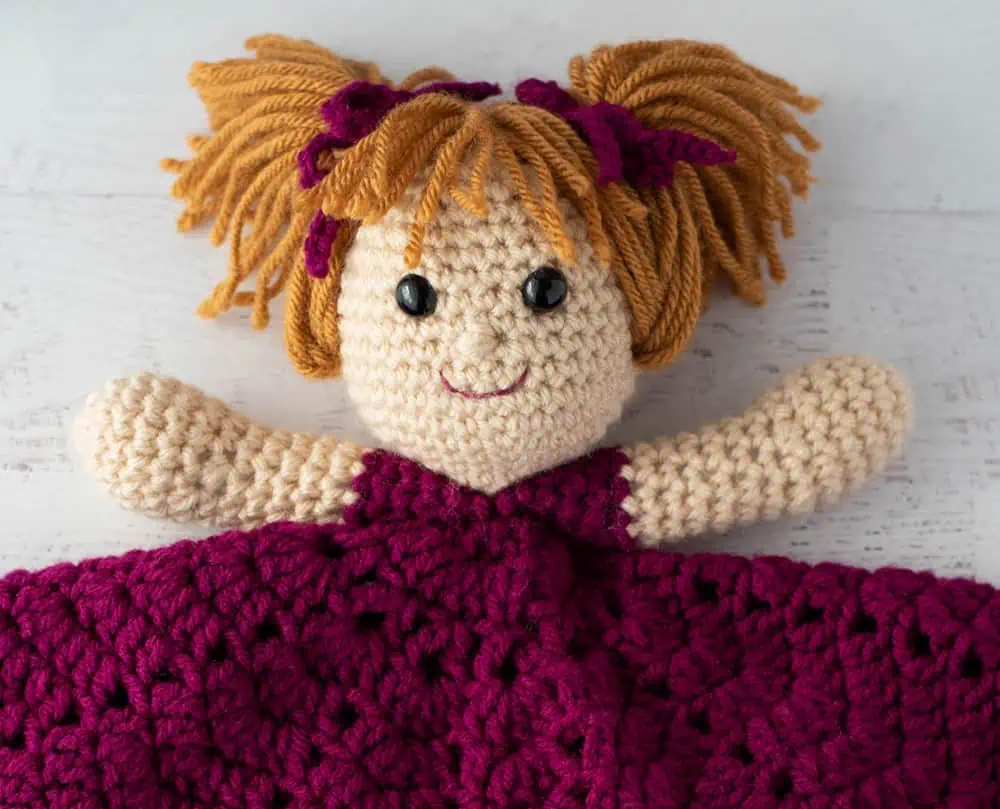
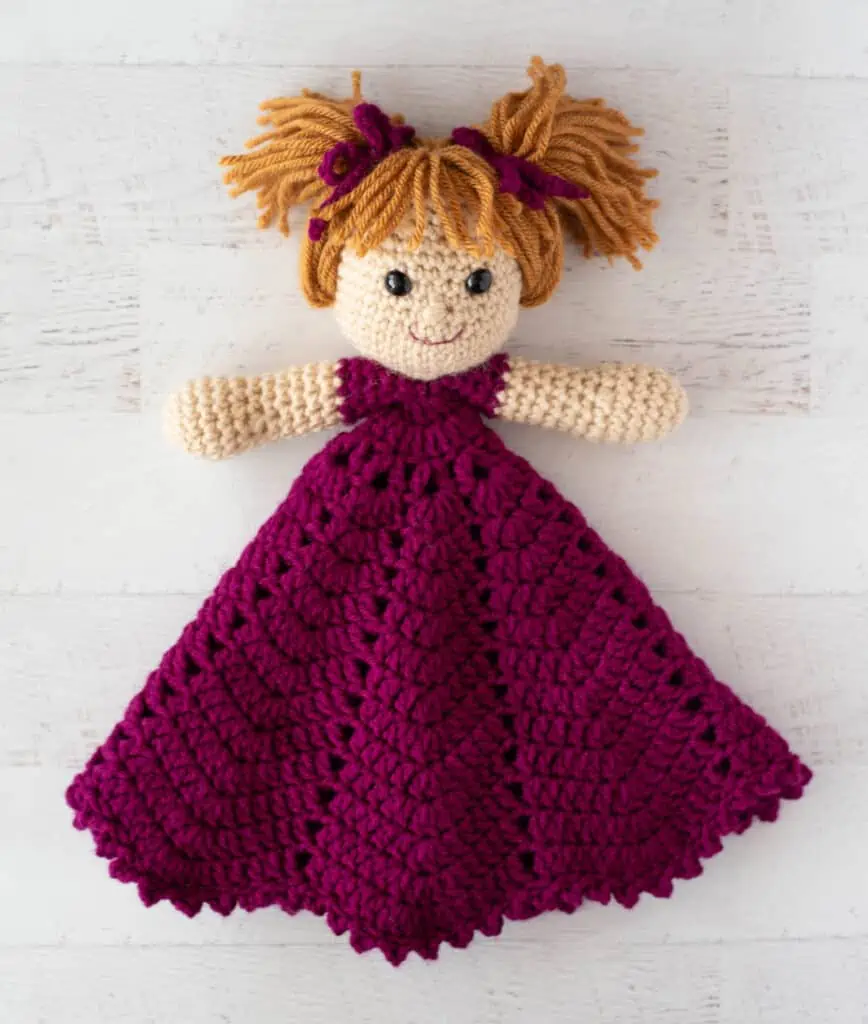
What’s cute, fun to make and perfect for your favorite little in the world? Why this adorable Crochet Princess Lovey, of course!
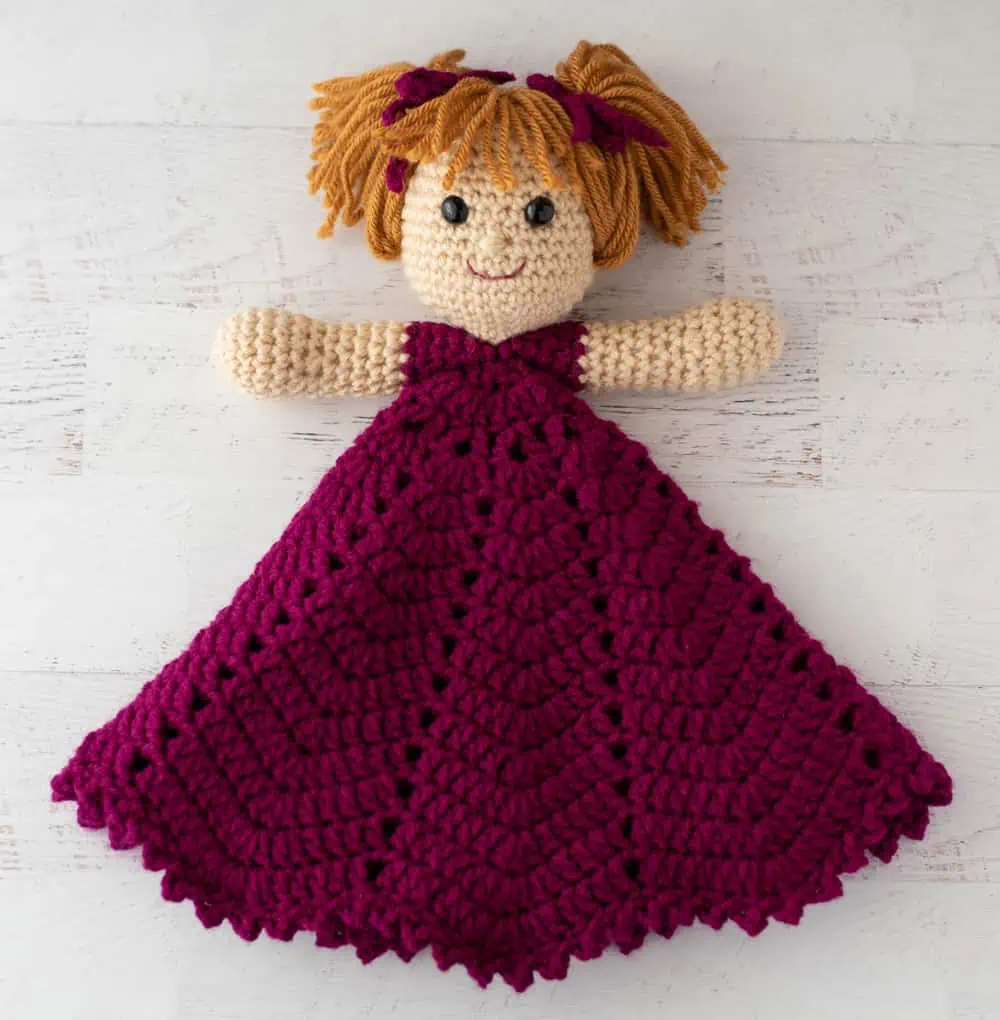
Meet Emily, this ever so cute lovey. I can’t decide what I love best. Her absolutely fun hair style or her beautiful, fun to crochet dress! Sigh!
This little sweetie pie has been hanging out in my pattern shops as a sort of unsung hero. She is a bit more of an intermediate project, mostly because of her untraditional hair construction (more on that in a bit). She’s a nice project if you’ve made an amigurumi or two and are looking to expand your skills a bit.
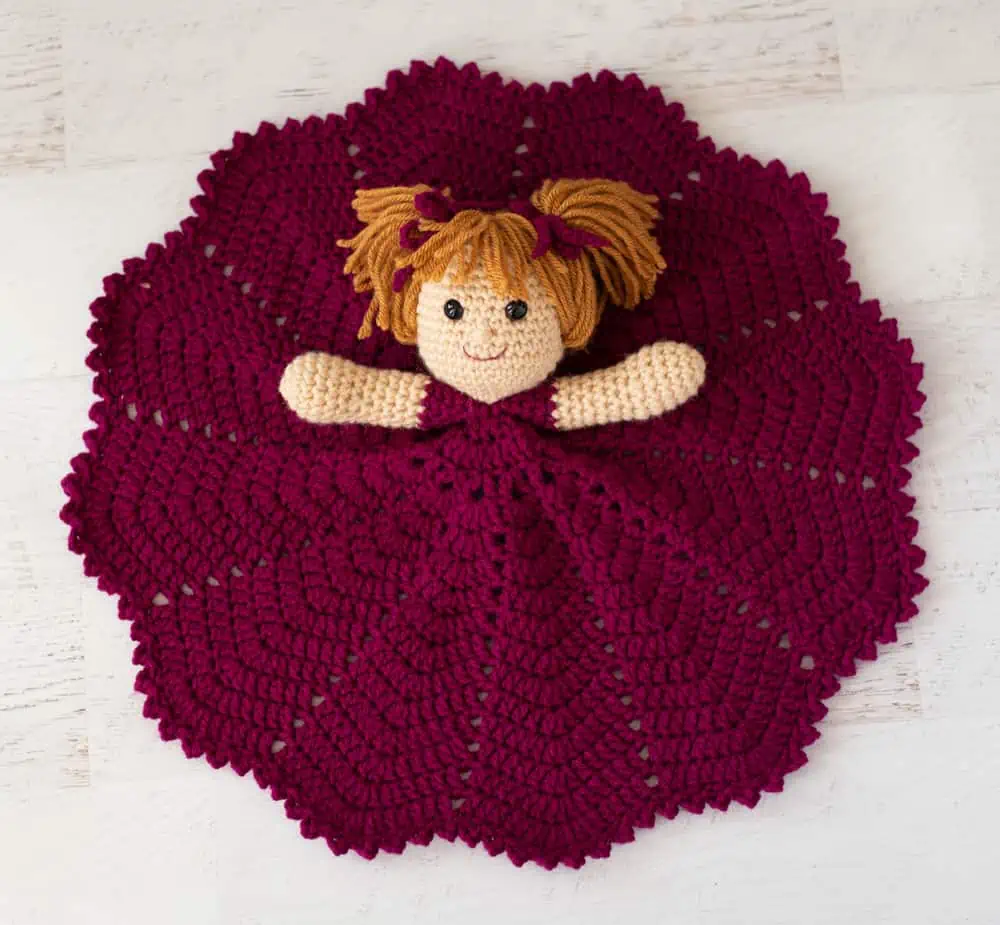
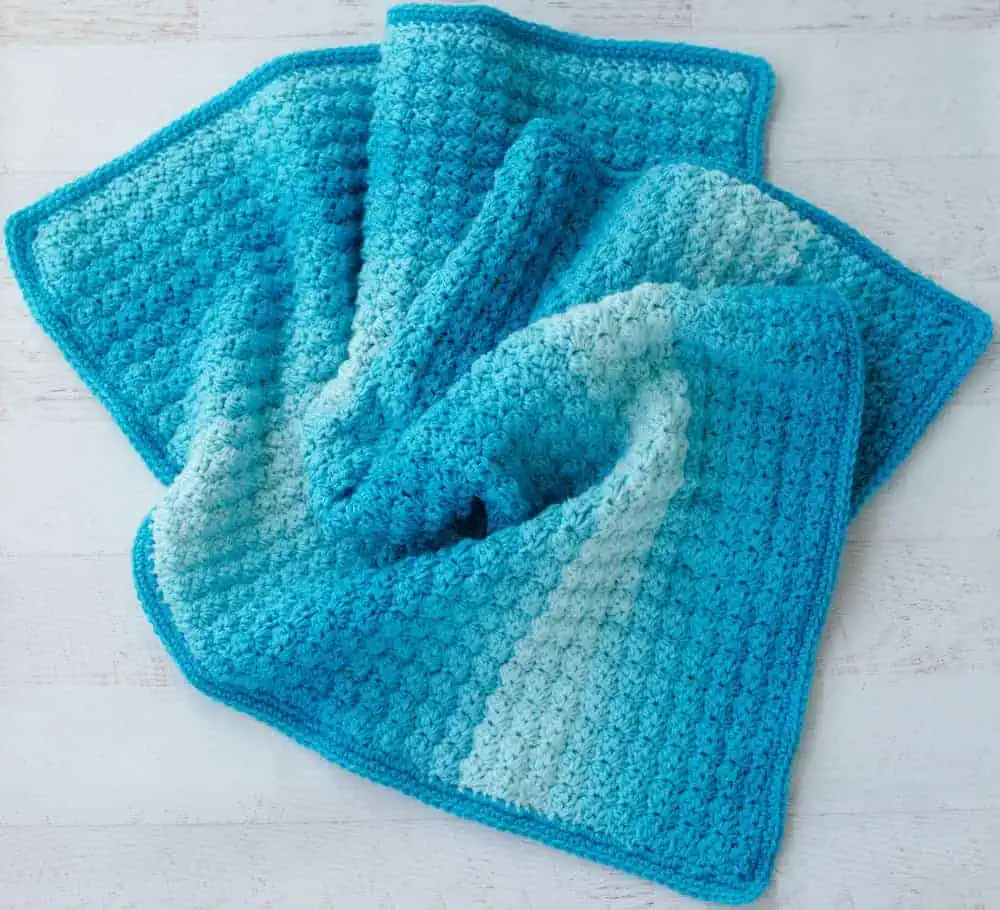
The blanket portion of this lovey is a bit different than my oh so popular bunny crochet lovey blanket pattern and the Spider Lovey, but still in that chevron style that is so fun to crochet. It works up quickly with a picot finish at the end. Any one of my crochet loveys would be the perfect baby shower gift idea.
Remember, if you’re looking to learn how to make the best amigurumi, be sure to check out my Amigurumi: A Beginner’s Guide. It’s a massive 165 page ebook of detailed tutorials, tips and tricks (plus exclusive patterns). You’ll learn everything you can think of from the magic ring and working in continuous rounds to invisible decreases and other pro tips. .

The hair on this crochet princess lovey is unique and different from the usual wig cap. The head is worked from the bottom up, inserting the eyes and stuffing as you go. After the final row, you’ll gather up the last 6 stitches, but instead of closing off, you’ll insert hair bundles.
The hair has 6 bundles which you will knot at one end. Then the knotted ends of all 6 bundles are inserted INTO the hole at the top of the head and then the head is cinched up, securing the little hair bundles into place.
Then the hair is tacked down in various places and trimmed for the adorable look you see in the photos. It may sound untraditional and complicated, but it’s actually really fun to see it all come together.
Be sure to scroll down and look at the photos so you can understand the assembly before you dive in!
A word about safety eyes.. if you are making this for an infant or young child, do not use safety eyes. Embroider eyes instead. The directions below give some guidance on embroidering and placement of facial features.
What Do You Need To Crochet A Princess Lovey?
Baby loveys are so fun to crochet! I love working mine in a #4 worsted weight acrylic yarn. You can easily use scrap yarn for the hair and skin tone and then just pick a color yarn of choice for the dress blanket portion of the pattern. You can pick a color that goes with a nursery color scheme or pick something from your stash.
The head and arms of this little princess lovey is worked in single crochet continuous rounds. The sweet security blanket is worked in double crochets that are joined each round.
The blanket portion is not just for princess blankets. It can also form the base for other crochet lovey patterns. You could, for instance, make the blanket in all white and then use it with the head and arms on my bunny lovey pattern.
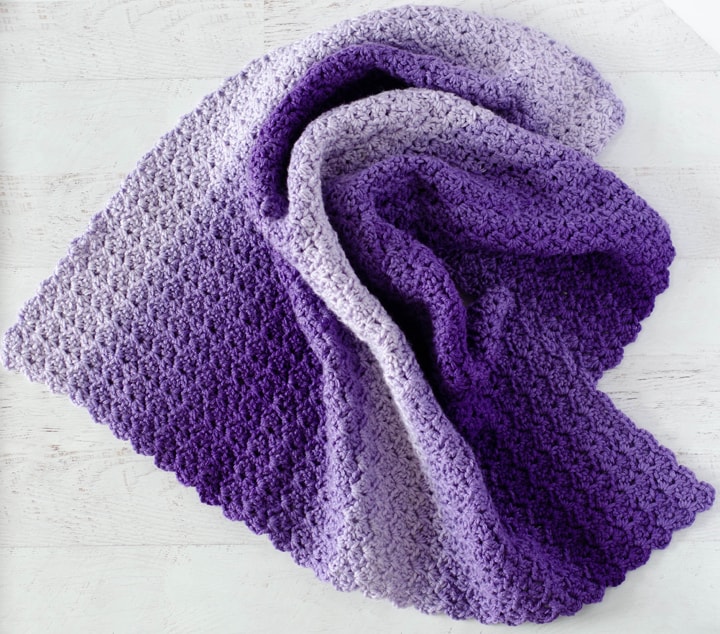
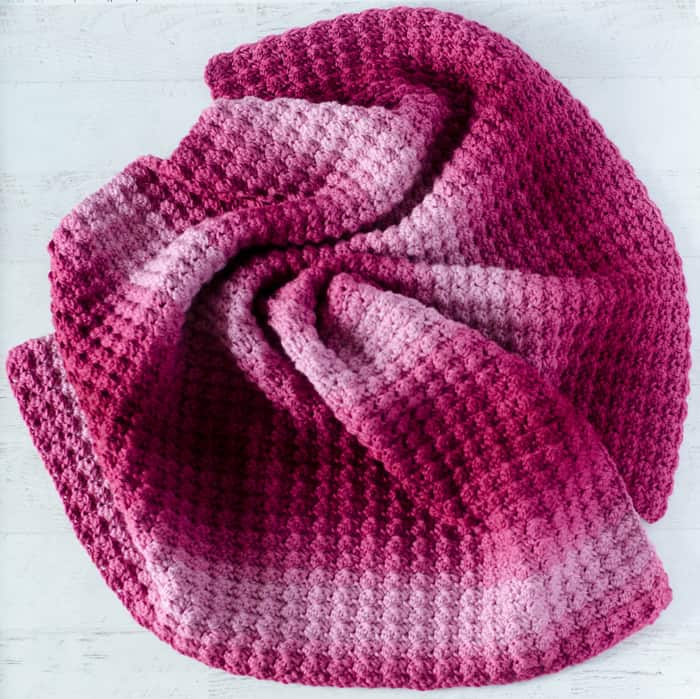
More Crochet Patterns
If you love this crochet lovey, you might also like to check out these beautiful crochet blanket patterns:
Let’s dive into this darling lovey free pattern. She just might make the perfect gift for your favorite princess and is sure to be an inseparable friend for her own fairy tale!
Princess Lovey Crochet Pattern
Here is what you will need:
- US G H/5.00 mm crochet hook (these are my absolute favorite crochet hooks I recommend to everyone!).
- Worsted weight #4 yarn:
- 150 yards beige (or other skin tone), sample used Vanna’s Choice in beige
- 4.5 oz Berry, sample used Red Heart with Love in Boysenberry
- 50 yards Gold, sample used Vanna’s Choice in Honey
- 12mm Black Safety Eyes
- Small amount of embroidery floss or lightweight yarn for embroidered features
- Fiberfill Stuffing
- Stitch Marker to keep track of rows, if desired
- Tapestry needle and scissors
Gauge:
Gauge is not important in this pattern. You may use other weights of yarn. Adjust hook size to fit your needs.
Resources and crochet tutorials you may find helpful in following this pattern: Crochet Abbreviations, US to UK Crochet Conversion Chart. Find links to stitches and basic crochet skills on the “Tutorial” menu: Getting Started will show basic crochet stitches such as the slip stitch, single crochet, double crochet and chain stitch used in many patterns and Crochet Stitch Dictionary shows our growing collection of crochet stitch tutorials.
Crochet Abbreviations:
- ch(s) = chain(s)
- dc = double crochet
- sc = single crochet
- sl st = slip stitch
- sp(s) = space(s)
- st = stitch(es)
Finished Crochet Lovey Size
Lovey shown measures about 14-1/2” when folded. Blanket is approximately 19” across at widest point.
Lovey Blanket
R1: With Berry color, ch 4, join to form ring, ch 3 (counts as 1st dc here and throughout), 11 dc in ring, join w/sl st to top of beginning ch 3 (12 st)
R2: Ch 3, 1 dc in same st, 2 dc in ea st around, join. (24 st)
R3: Ch 3, *skip next st (1 dc, ch 2, 1 dc) in next st, repeat from * around. End row with a dc in base of ch 3, ch 2, join. (24 dc and 12 ch-2 spaces)
R4: Sl st into ch 2 sp, (ch 3, 4 dc) in same space, *skip 2 dc, 5 dc in next space, repeat from * around. Join, (60 st)
R5: Sl st in next st, ch 3, 3 dc in next st, dc in next st, skip 2 st, *dc in next st, 3 dc in next st, dc in next st, skip 2 st*, repeat * to * around. Join. (60 st)
R6: Sl st in next st, ch 3, dc in same st, 3 dc in next st, 2 dc in next st, skip 2 st, *2 dc in next st, 3 dc in next st, 2 dc in next st, skip 2 st *, repeat * to * around. Join. (84 st)
R7: Sl st in next st, ch 3, dc in next st, 3 dc in next st, dc in next 2 st, skip 2 st, *dc in next 2 st, 3 dc in next st, dc in next 2 st, skip 2 st *, repeat * to * around. Join. (84 st)
R8: Sl st in next st, ch 3, 2 dc in next st, 3 dc in next st, 2 dc in next st, dc in next st, skip 2 st, *dc in next st, 2 dc in next st, 3 dc in next st, 2 dc in next st, dc in next st, skip 2 st*, repeat * to * around. Join. (108 st)
R9: Sl st in next st, ch 3, dc in next 2 st, 3 dc in next st, dc in next 3 st, skip 2 st, *dc in next 3 st, 3 dc in next st, dc in next 3 st, skip 2 st *, repeat * to * around. Join. (108 st)
R10: Sl st in next st, ch 3, dc in next st, 2 dc in next st, 3 dc in next st, 2 dc in next st, dc in next 2 st, skip 2 st, *dc in next 2 st, 2 dc in next st, 3 dc in next st, 2 dc in next st, dc in next 2 st, skip 2 st*, repeat * to * around. Join. (132 st)
R11: Sl st in next st, ch 3, dc in next 3 st, 3 dc in next st, dc in next 4 st, skip 2 st, *dc in next 4 st, 3 dc in next st, dc in next 4 st, skip 2 st *, repeat * to * around. Join. (132 st)
R12: Sl st in next st, ch 3, dc in next 2 st, 2 dc in next st, 3 dc in next st, 2 dc in next st, dc in next 3 st, skip 2 st, *dc in next 3 st, 2 dc in next st, 3 dc in next st, 2 dc in next st, dc in next 3 st, skip 2 st*, repeat * to * around. Join. (156 st)
R13: Sl st in next st, ch 3, dc in next 4 st, 3 dc in next st, dc in next 5 st, skip 2 st, *dc in next 5 st, 3 dc in next st, dc in next 5 st, skip 2 st *, repeat * to * around. Join. (156 st)
R14: Sl st in next st, ch 3, dc in next 3 st, 2 dc in next st, 3 dc in next st, 2 dc in next st, dc in next 4 st, skip 2 st, *dc in next 4 st, 2 dc in next st, 3 dc in next st, 2 dc in next st, dc in next 4 st, skip 2 st*, repeat * to * around. Join. (180 st)
R15: Sl st in next st, ch 3, dc in next 5 st, 3 dc in next st, dc in next 6 st, skip 2 st, *dc in next 6 st, 3 dc in next st, dc in next 6 st, skip 2 st *, repeat * to * around. Join. (180 st)
R16: (Picot round) *ch 3, sl st in 3rd ch from hook, skip next st, sl st in next st*, repeat * to * around. Fasten off and weave in ends.
Arms (make 2)
With beige yarn, make a magic ring
R1: 5 sc in ring. (5 st) Work in rounds
R2: 2 sc in ea st (10 st)
R3: *sc in next st, 2 sc in next st. Repeat from * around (15 st)
R4-6: sc around (15 st)
R7: *sc in next st, sc next 2 st together. Repeat from * around. (10 st).
R8-13: sc around (10 st). After last st, sl st to next st and then change to Berry color yarn in last st. (This minimizes the “jog” when changing color)
R14-18: Using Berry color yarn, sc around (10 st)
Sl st to next sc and fasten off leaving a long strand for finishing. Stuff firmly, leaving the top ½” unstuffed.
Head
With beige yarn, make a magic ring
R1: 6 sc into ring (6 sts). Work in rounds.
R2: 2 sc in ea st (12 st)
R3: *sc in next st, 2 sc in next. Repeat from * around. (18 st)
R4: *sc in next 2 st, 2 sc in next. Repeat from * around. (24 st)
R5: *sc in next 3 st, 2 sc in next. Repeat from * around. (30 st)
R6: *sc in next 4 st, 2 sc in next. Repeat from * around. (36 st)
R7-14: sc around. (36 st)
R15: *sc in next 4 st, sc next 2 st together. Repeat from * around (30)
R16: *sc in next 3 st, sc next 2 st together. Repeat from * around (24)
If using safety eyes, insert now between rows 11 & 12, leaving approximately 5 stitches between the eyes.
R17: *sc in next 2 st, sc next 2 st together. Repeat from * around (18) Stuff.
R18: *sc in next st, sc next 2 st together. Repeat from * around (12)
R19: sc next 2 st together 6 times (6). Fasten off, leaving tail for closing (top of head)
Weave the yarn through the opening to gather, but do not close off; hair is added to the “hole” before it is tightly closed. Before inserting hair, make sure head is stuffed firmly, allowing a little room for the hair. See hair instructions.
Hair
The hair is comprised of 6 bundles of yarn (5 long and 1 short bundle for bangs) that are inserted into the hole left in the top of the head. When done, you will tighten the yarn, gathering the hole with the knots secured inside and it will hold the hair in place.
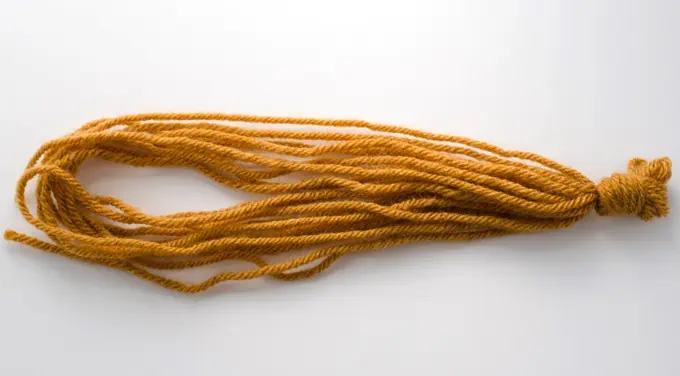
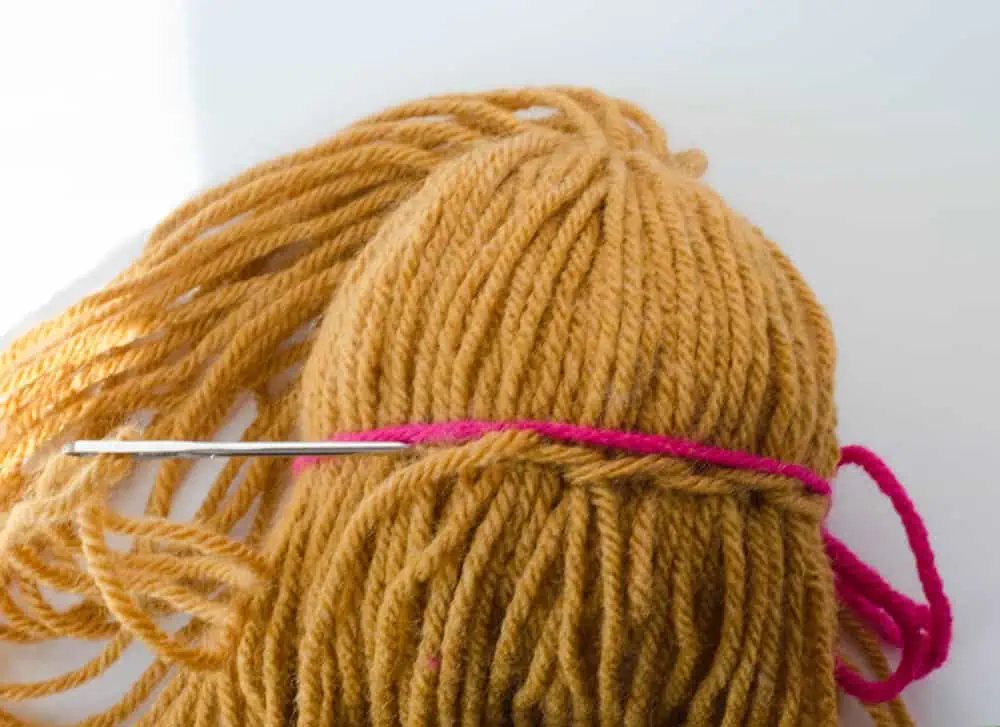
Use a stiff card (or another flat object) about 14” long. For each bundle, wind the yarn 10 times around the card and remove it. This will make 20 strands of hair. Tie a knot close as close as you can to one end.
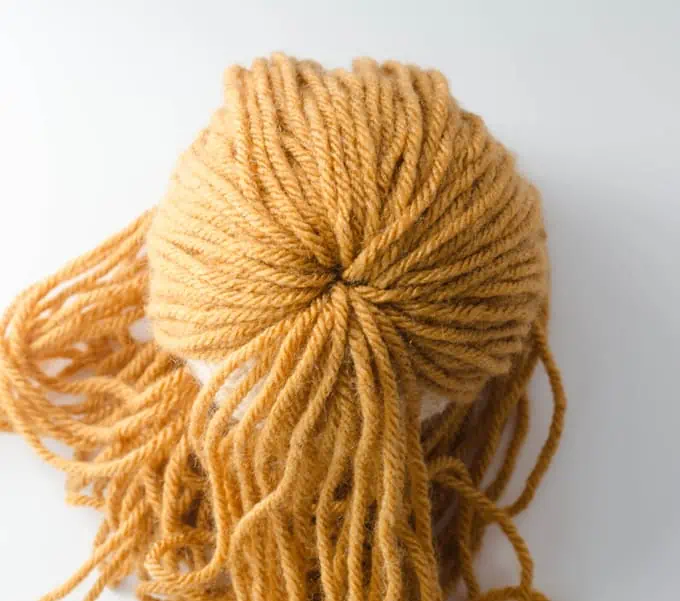
Position the knotted bundle in the opening at the top of the doll’s head. Make 4 more bundles and position them in the opening as well. The 6th bundle is for the bangs and half as long and has 16 strands of hair. (If you wind the yarn 4 times around, then fold it in half before tying the knot, you should have 16 strands about 7” long.)
Now, flip the doll over and pull the yarn that is gathering up the opening. Knot and secure.
Styling: Let the hair hang down, neatly covering the doll’s head. Back stitch the long pieces in a line across the bottom. The easiest way to do this is to use a scrap piece of yarn to tie around the head so you can adjust the hair before back stitching. The scrap piece is removed after this step.
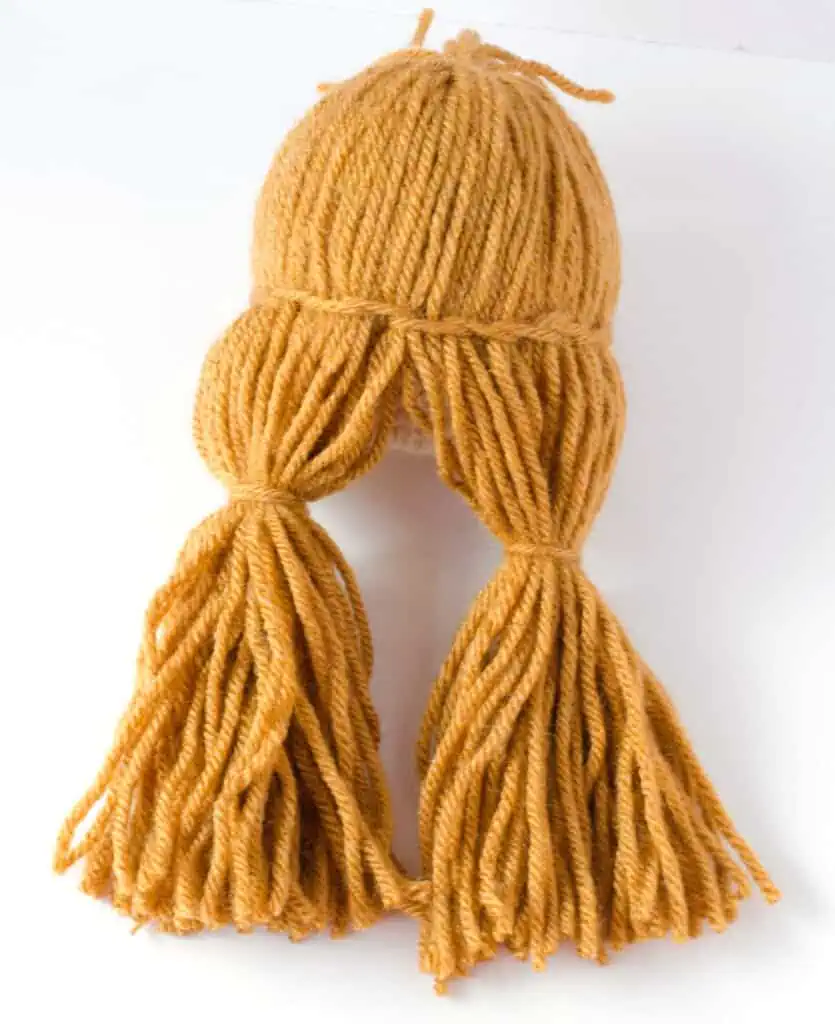
Divide the hair into 2 equal bundles and lift each bundle up towards the top of the head. Tie each bundle and then stitch to the head.
Let the hair fall into position and trim as needed.
Hair Ties (Make 2)
Chain 50. Fasten off, knot end, pull tight and cut off close. Tie hair ties on pigtails.
Facial Features
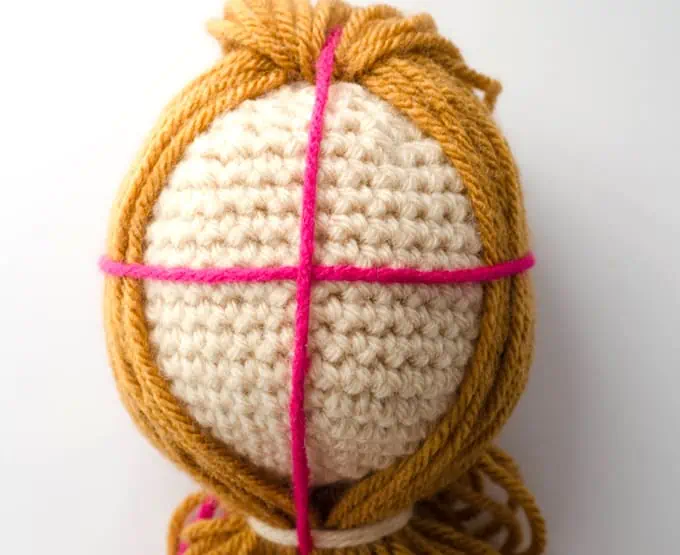
If using optional safety eyes, the eyes will already be in place at this step. Photos show how to place embroidered eyes as well as the embroidered nose and mouth.
To determine placement of eyes, nose and mouth, tie a scrap piece of yarn halfway around the head horizontally and vertically as shown. The eyes go just above the horizontal line, equal distant from the vertical line.
Lovey in the main photos are shown with black safety eyes. Alternatively, if making for a very young child, embroider the eyes instead with French Knots. Here’s how:
Thread 3 strands of brown embroidery floss on to needle. Knot an end and bring needle from under hair to the spot for first eye (the knotted end is buried under the hair and into the head of stuffing). Make a French knot as follows: Insert needle as if to take a small stitch, but do not pull needle through.
Wrap the floss around the needle 6 times. Pull wraps tight against the needle and carefully draw the needle through the 6 loops. Pull tight. Insert the needle back into the eye to secure knot, going into the head and coming out at the point where the 2nd eye is to be located.
Make another French knot for the 2nd eye. When inserting needle for the last time, go out the head in the hair. Knot off and hide the ending knot under the hair and/or in the head. Fasten off.
The nose starts at the point the 2 yarns form a cross. Use the same yarn color as the face and make 3-4 small stitches for the nose so that it makes a small bump.
The center bottom of the mouth is approximately 3 rows below bottom of nose. The sides of the mouth go up 1 row. I use pins to test out the mouth before embroidering. Use 3 strands of embroidery floss, back stitch the mouth.
Assemble Crochet Lovey
Position arms so that tops of arms touch in center of blanket to form a straight line to opposing points on the blanket. Using Berry Color yarn, sew arms down where they join (shoulder/armpit area) to the blanket, leave the rest of the arms free. Sew head on top of arms. Sew through arms and blanket to secure. Weave in ends.
I love seeing your finished projects! If you enjoyed making this Crochet Princess Lovey or any of my crochet patterns, I’d love to see yours on Instagram, be sure to tag me @crochet365knittoo. If you are on Facebook, stop over to the Crochet 365 Knit Too Facebook page or pop over to the Crochet365KnitToo Club and share a photo! I’d love to see your work!
I love her!! Thank you!
She is beautiful!! I want to make her as soon as I can.