
Crochet Christmas Tree Coasters
This post may contain referral/affiliate links. Please read my disclosure for more info.
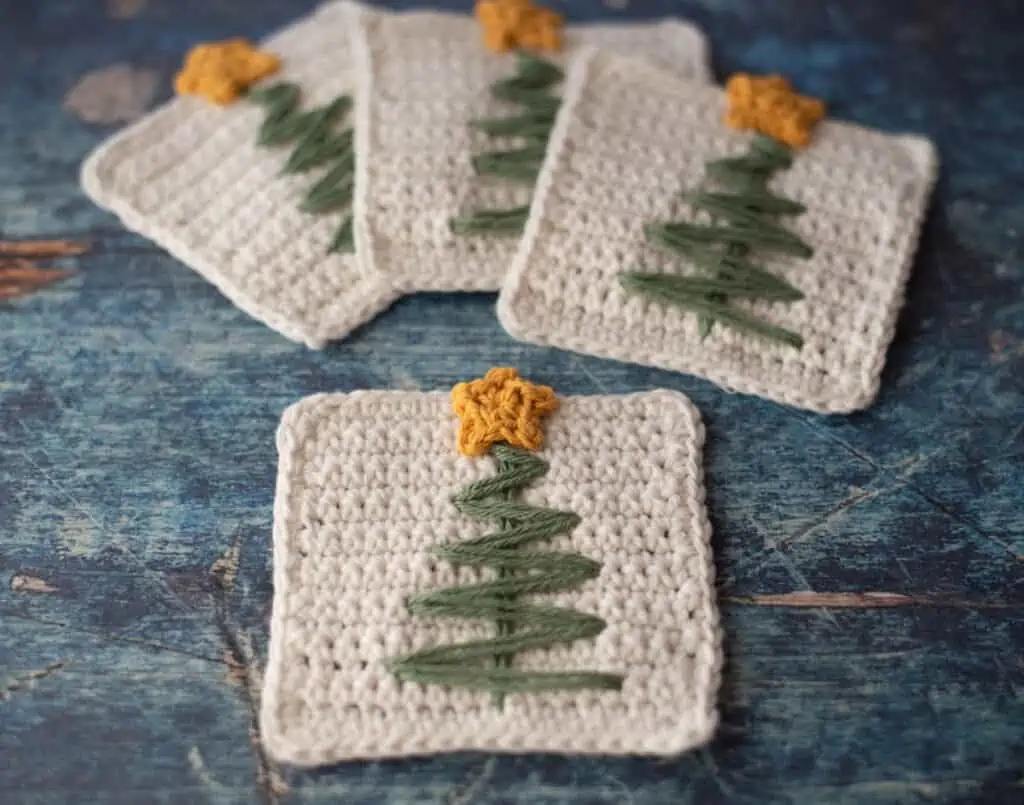
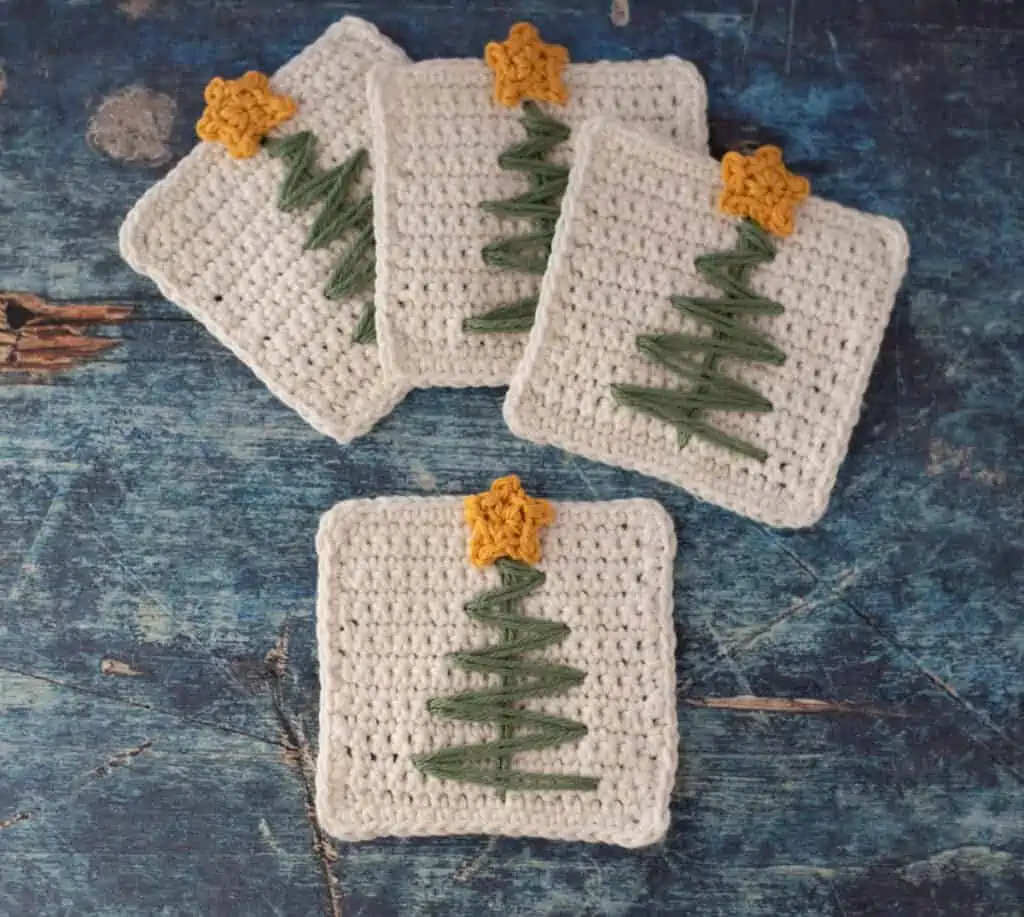
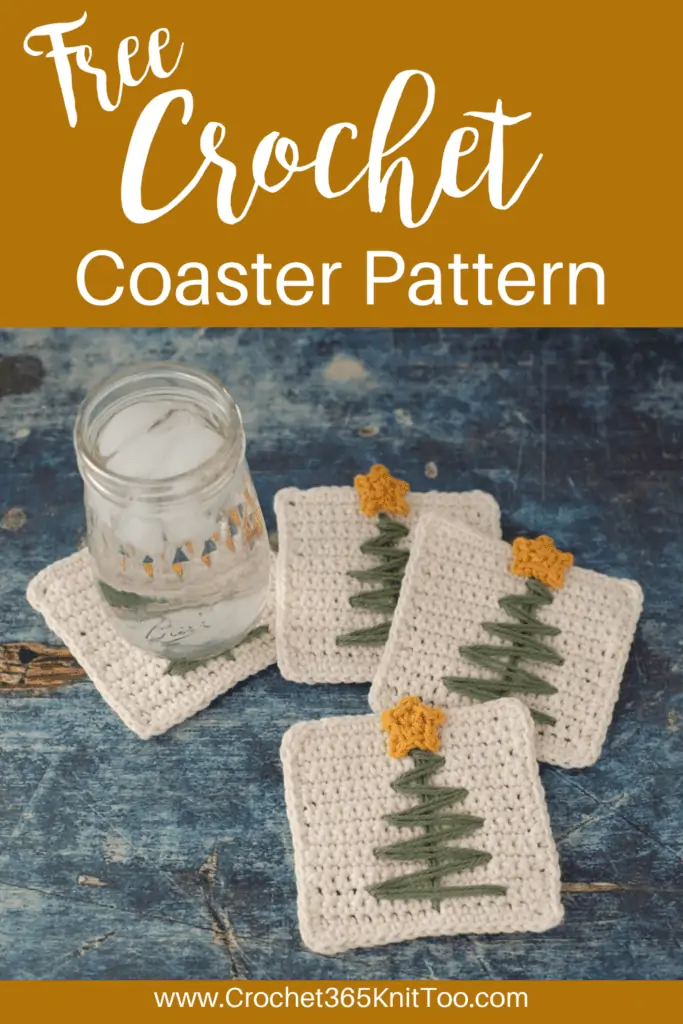
Behold a thing of beauty: An absolutely darling Crochet Christmas Coaster Set!

There’s something magical about a simple Christmas Tree with a glorious gold star on top. It’s a reminder that despite all the hustle and bustle around the holidays, the reason for the season is much simpler.
And of course, don’t you really just NEED a gorgeous set of crochet Christmas coasters in your living room?
I know I do.
This beautiful crochet coaster pattern uses basic crochet stitches, making it easy to make as holiday gifts or keep them for your own home. They look equally great in your living room decor or on your dining table!
I’m in love with every bit of these Christmas Tree Coasters. I love the beautiful cotton white yarn of the base. If it looks familiar, it’s the same beautiful white I used in my Crochet Snowman Coasters.
I love the vibe of a zig zag tree made out of yarn. It feels like a sketch. Simple, carefree, yet planned at the same time. So perfect for this holiday season.
But I might just love the tiny little star most of all. Making a tiny star out of worsted yarn is a challenge. It easily become cumbersome.. too big… too lumpy.. decidedly not right. But I played around until I got the perfect mix of shape and size. It is just the perfect pop of color for this crochet mug coaster!
It’s placed on the top of the coaster so that it overhangs the top a bit. This is intentional to allow more space for glass to rest below it on the coaster. It’s also why I designed these cute coasters about 1/2″ bigger than my other coasters. I wanted this crochet Christmas coaster to be fully functional as well as a thing of beauty!
These Christmas Crochet Coasters are also a great gift idea.. even better.. a great last minute gift idea. Maybe you need a little extra something for someone, or you forgot to pick up a gift for someone on your list.
If you’ve got worsted weight cotton yarn in your stash, you likely have some green and gold scrap yarn perfect for this project. Match that up with a white cotton yarn or another contrasting color and you have all you need to make these cuties!
The coasters themselves and the stars work up very quickly. Be sure to allow a little extra time to fuss around with the tree stitching. It is not hard. But it’s important to take your time to get the stitch placement the way you like. You also want to be sure to make sure every stitch lays perfectly.
I worked with the right side facing me and carefully adjusted each stitch, making sure that the strands of yarn laid side-by-side (because they want to twist up). I also wanted to make sure that I didn’t pull the stitches too tight. No one wants a puckering Christmas Tree Coaster, right?!
In other words, this is a great last minute gift, but be sure to allow time to fuss with the tree embroidery part. I’m talking to you middle of the night before Christmas frantic crocheters out there. Or.. you know.. live on the edge.. because these crochet Christmas coasters are totally worth the effort!
Christmas Tree Coasters
Here is what you will need:
- US G 6/4.00 mm crochet hook (these are my absolute favorite hooks I recommend to everyone!)
- Worsted Weight Cotton Yarn
- Main (white): 1-1/2 oz, sample used Paintbox Cotton Aran in Light Champagne (Col 603)
- Gold: 1/8 oz, sample used Peaches & Creme in Gold
- Green: 10 yards, sample used Sugar & Cream in Sage Green
- Tapestry needle and scissors
Resources and tutorials you may find helpful in following this pattern: Crochet Abbreviations, US to UK Crochet Conversion Chart. Find links to stitches on the “Tutorial” menu: Getting Started will show basic stitches such as chain stitch, single crochet and slip stitch used in this pattern and Crochet Stitch Dictionary shows our growing collection of crochet stitch tutorials.
Crochet Christmas Coaster Size:
Each finished coaster measures approximately 4.5″ across, excluding star
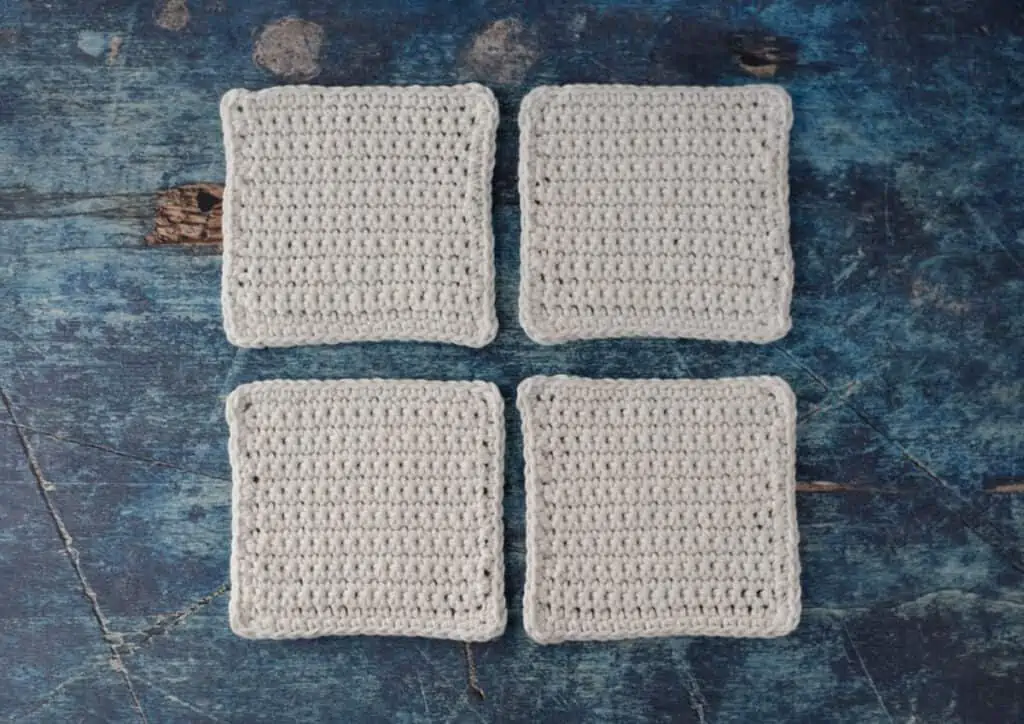
Tree Coasters (Make 4):
With White Color yarn, chain 17
Note: The first row of the coaster is worked in the back bump of the chain. If you prefer, you can work the first row into the chain as normal.
R1: Working in the back bump, sc in 2nd ch from hook and across row. Turn. (16 st)
R2: Ch 1, sc into each stitch across row. Turn. (16 st).
R3-17: Repeat Row 2
Do not fasten off, continue to work border.
Coaster Border
Without turning work, chain 1 and rotate work, single crochet evenly around the coaster, working 3 sc in each corner. At end of round join with an invisible join to the first sc.
Fasten off and weave in ends.
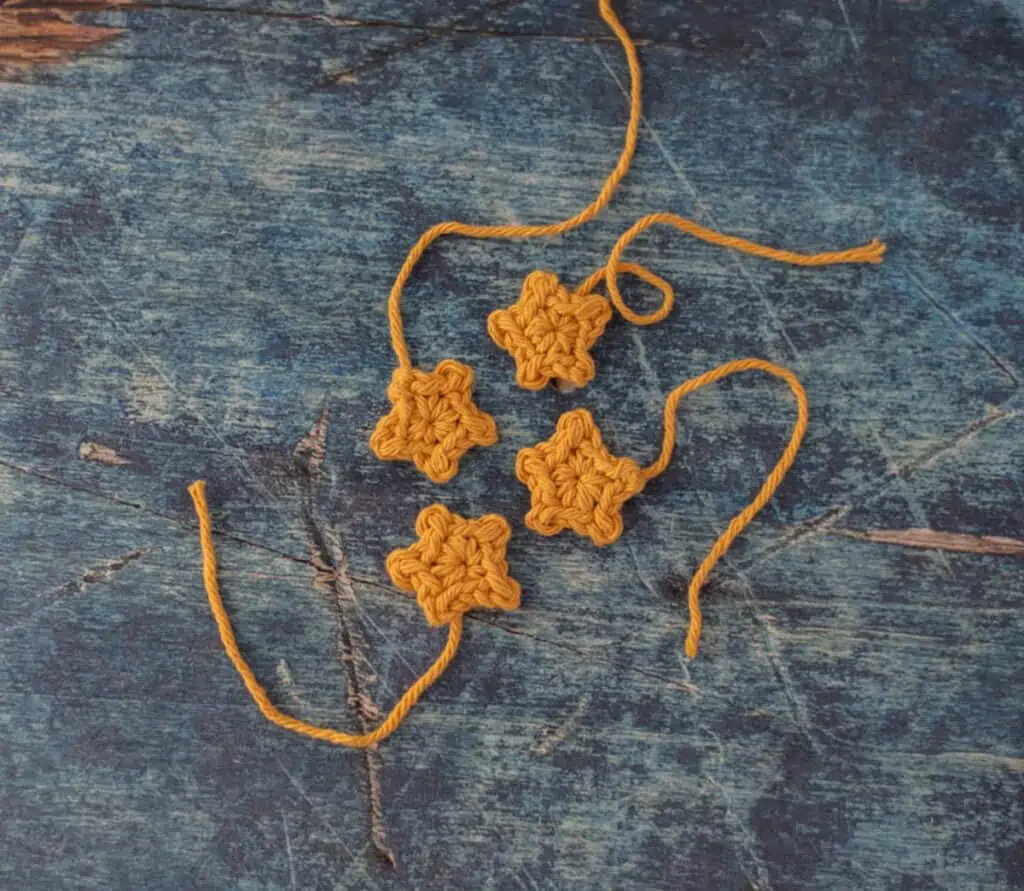
Crochet Stars (Make 4):
With Gold yarn, chain 2
R1: In 2nd ch from hook, work a 5 star points (all in the same chain) as follows: *(sc, ch 2, sl st in 2nd ch from hook), star point made. Repeat from * four more times. At end of round, sl st to top of 1st sc.
Fasten off, leaving a long strand for joining.
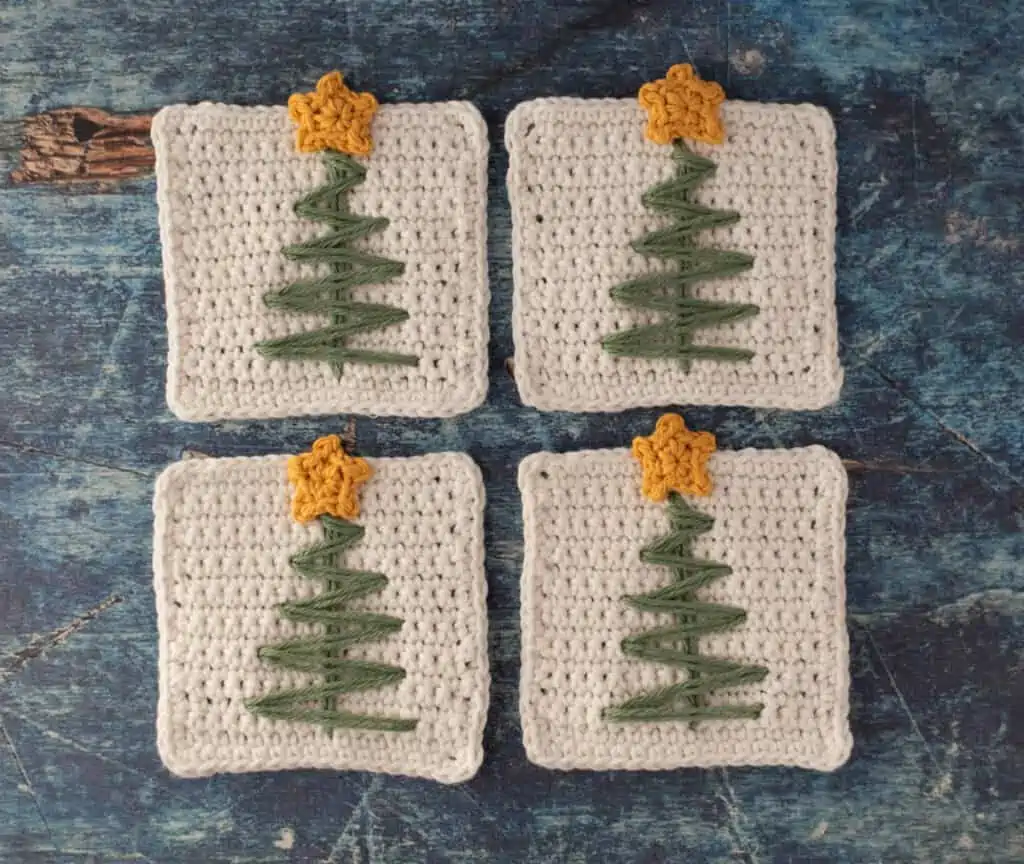
Embroider the Tree:
Thread tapestry needle with 2.5 yards of green yarn. Determine placement of tree trunk in center of coaster (refer to photo). The tree is worked with 2 strands of yarn, so pull yarn through needle so it is halfway on the strand and yarn is doubled.
Insert yarn from the back up through the coaster at the center bottom. Pull yarn through leaving about 6 inches at back of coaster to weave in later.
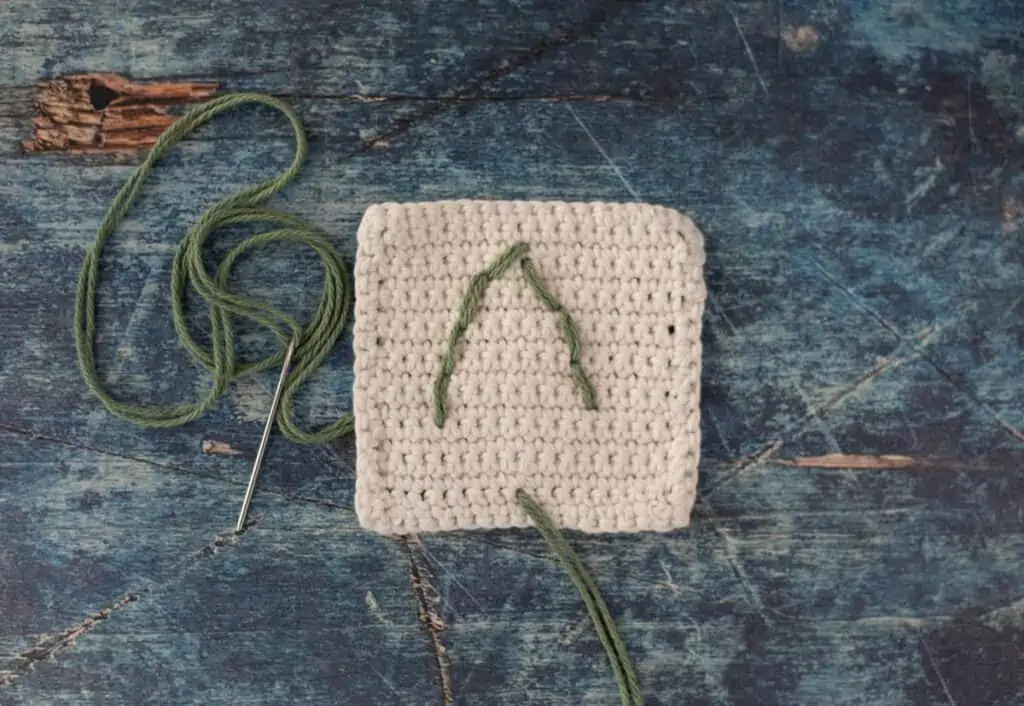
From the right side, insert needle through top center of coaster and pull through to back to form tree trunk. Take time to make sure that the double strand of yarn lays smooth.
Work branches with right side of coaster facing you and take time to make sure stitches lay smooth and even after each stitch.
Begin working in a zig zag fashion, starting to the right of the top of the tree to form the branches, referring to the photo for placement.
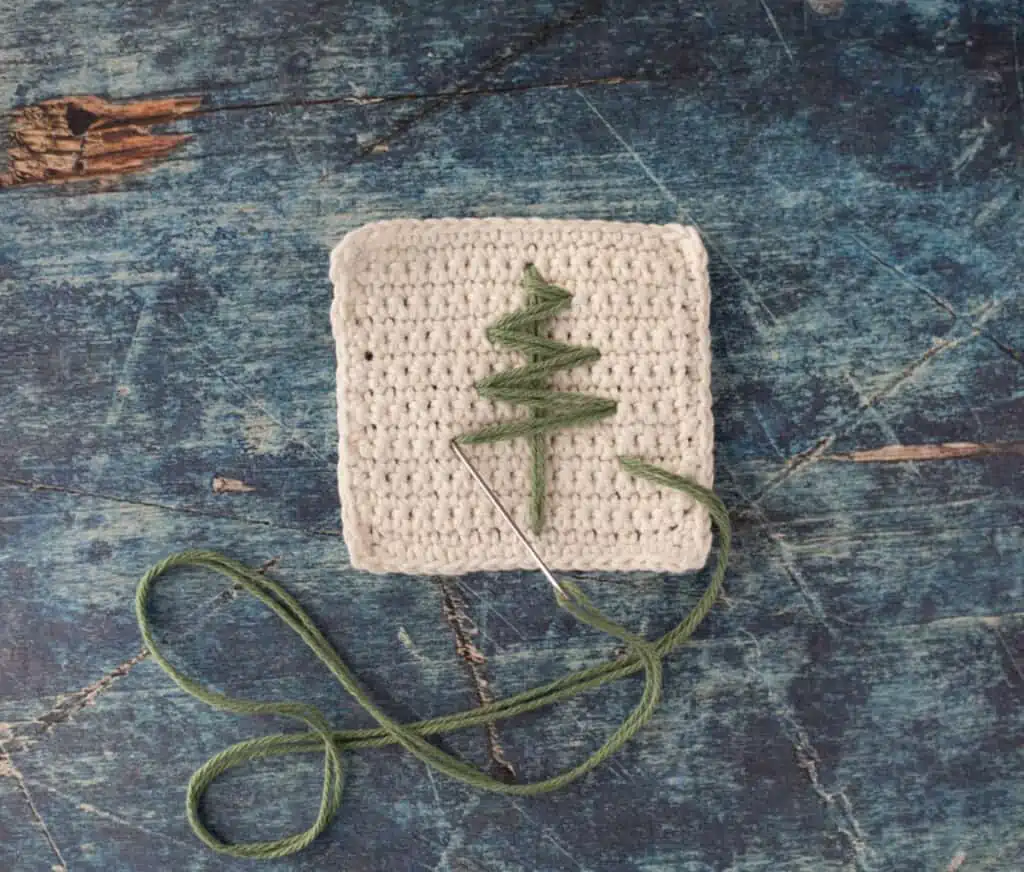
Note that the next stitch for a branch is always started on the same side where you just completed the previous stich. The needle goes back up through the coaster into a space about ½” below where the last stitch ended (see above photo). This saves yarn and helps the coaster to lie flatter.
On the back of the work, this technique creates a line of outline type stitches.
Continue to work branch stitches, referring to the photos, and making sure that the double strand of yarn lies neatly on the front of the coaster after each stitch.
When complete, carefully weave in all the ends.
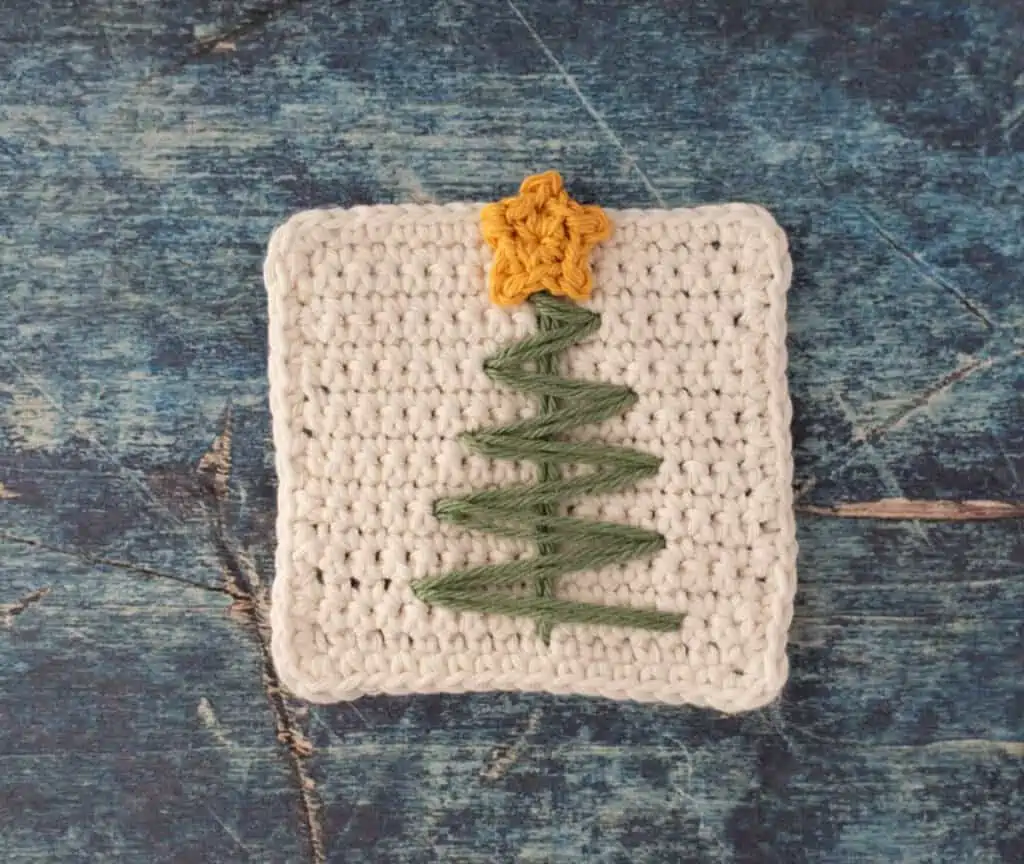
Crochet Christmas Coaster Finishing
Using the yarn strands from the stars, carefully sew each star applique to the top of the tree. Be sure the top of the star overhangs the top of the coaster. This creates more surface area for a glass to rest on the coaster.
Fasten off and weave in ends.
I love seeing your finished projects! If you enjoyed making the Crochet Christmas Coaster Pattern, I’d love to see yours on Instagram, be sure to tag me @crochet365knittoo. If you are on Facebook, stop over to the Crochet 365 Knit Too Facebook page or pop over to the Crochet365KnitToo Club and share a photo! I’d love to see your work!
I liked making these but making stitches tight did not help me. It was a little curved so I ironed them with starch, which helped a little. If I did it over again, I would make stitches looser somehow. Was cute though.
I found that I needed to slow down and take time to make the stitches just so as I went along. So often when we “sew” we are pulling things tight, so making a conscious effort not to do that helps!
I am struggling with the embroider part. Can you help with that?
My best suggestion is just to leave a long strand for weaving in later when you start and to just look at the photo and take it slow, ripping out if you need to. It does take a bit of fussing, but it gets better as you go along. Hope that helps!