
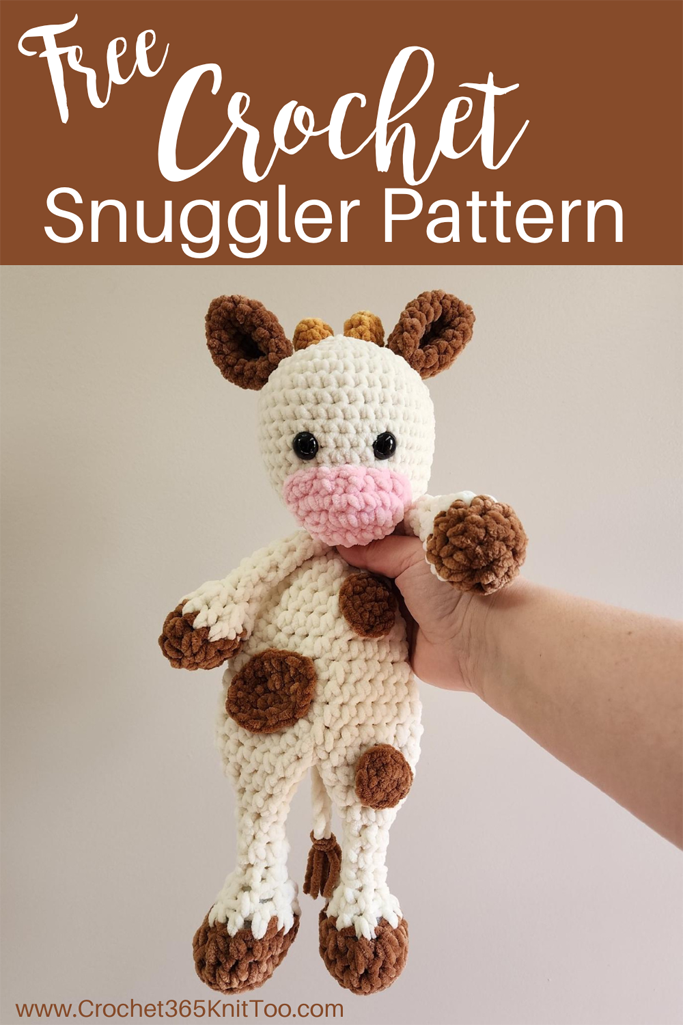
Rosie Sweet Moo: A Cow Crochet Snuggler
This post may contain referral/affiliate links. Please read my disclosure for more info.
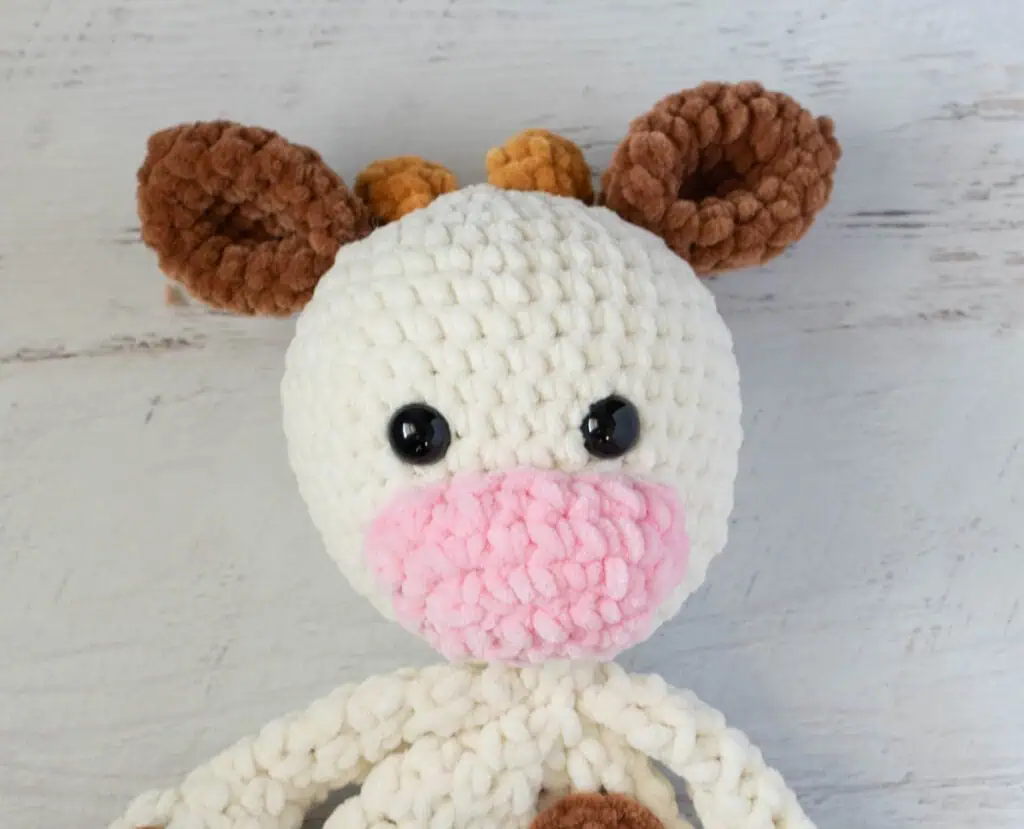
Don’t you just wish you could just reach right through this photo and squish this darling cow crochet snuggler?
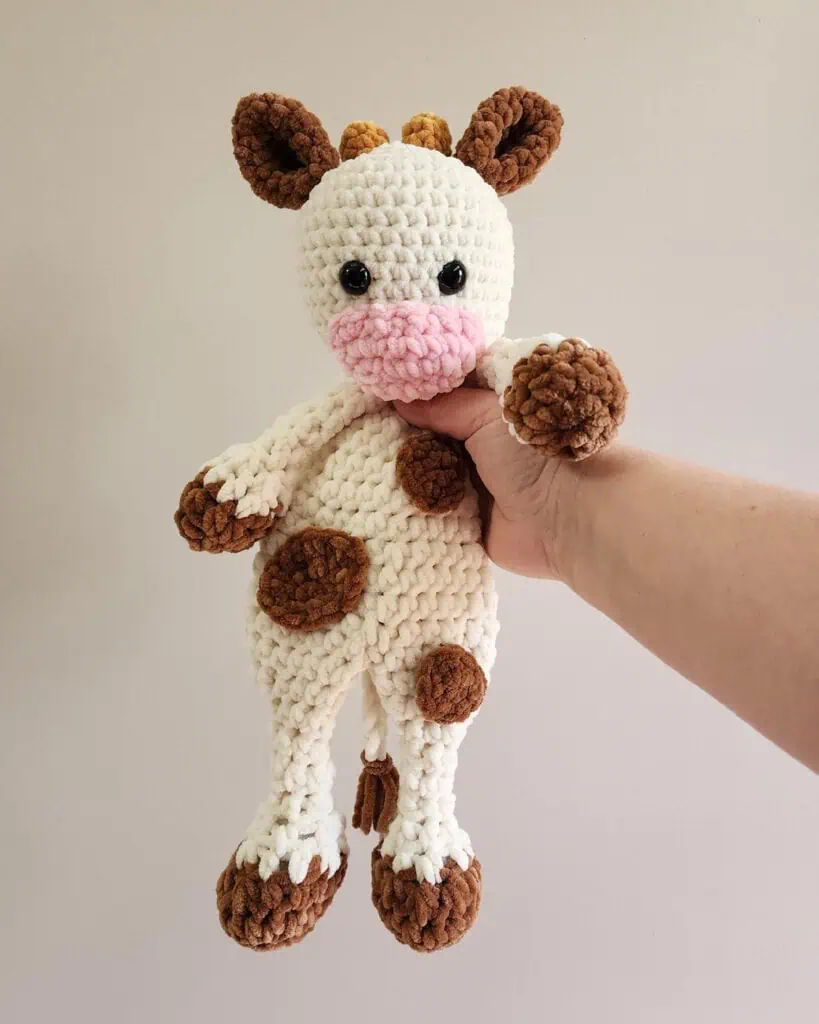
Meet Rosie Sweet Moo. This little miss is the coziest, most darling crochet cow you’ll ever have on your hook. And yes.. I am completely smitten.
Last year, before our kitchen remodel (which took an eternity, by the way), I designed a whole collection of crochet snugglers. In part because they are just so fun to crochet. You make one and just can’t help but think of how to change some little element to make another.
I may have also gone down a crazy road … you know … like a full crochet apocalypse moment thinking that the main floor construction zone might just end crochet life as I knew it. And the solution, of course, was to crochet more.
Which, when you think about it, isn’t a bad way to solve life’s problems. Just crochet. It will be ok.
I brought the Bunny Crochet Snuggler to the blog pretty quickly followed by the Crochet Bear Snuggler. But then my notes and the rest of the snuggly bunch just sort of sat in a pile in my office and never quite made it to their final destination, out in the world as a darling free crochet pattern.
Rosie Sweet Moo changes all that.
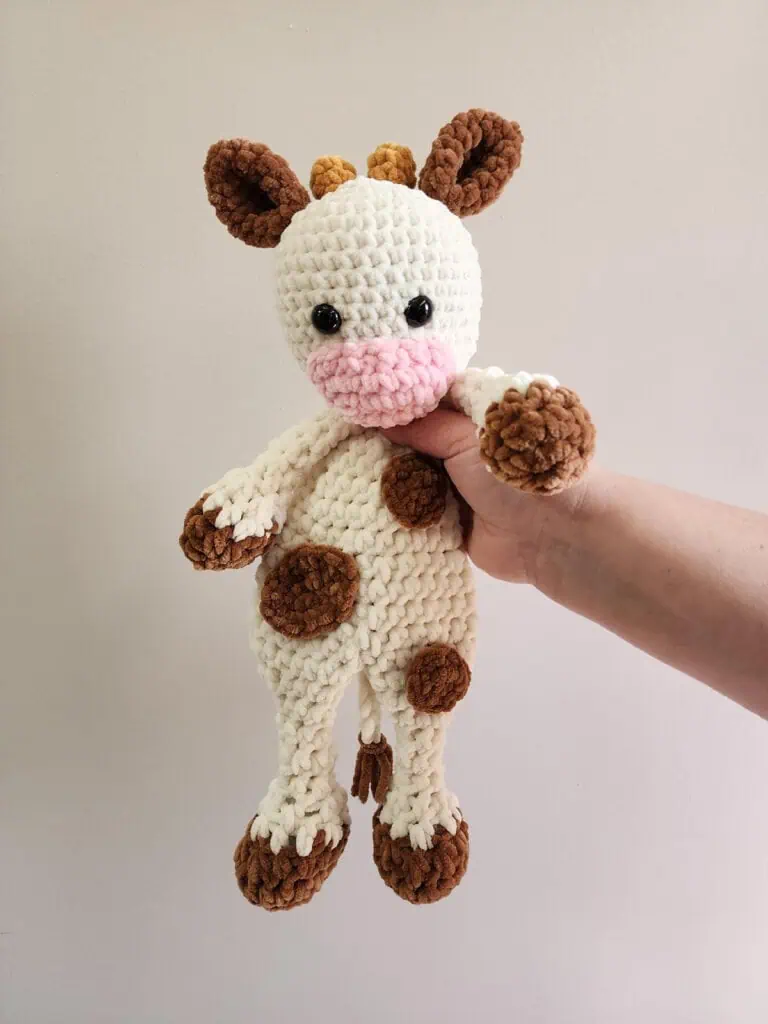
Isn’t she the absolute cutest thing you’ve seen today?
Like my other crochet snuggler patterns, this crochet cow uses Premier Parfait Chunky chenille yarn. Premier Parfait Chunky is a #6 super bulky weight yarn which means quick projects and unbelievable squishy goodness.
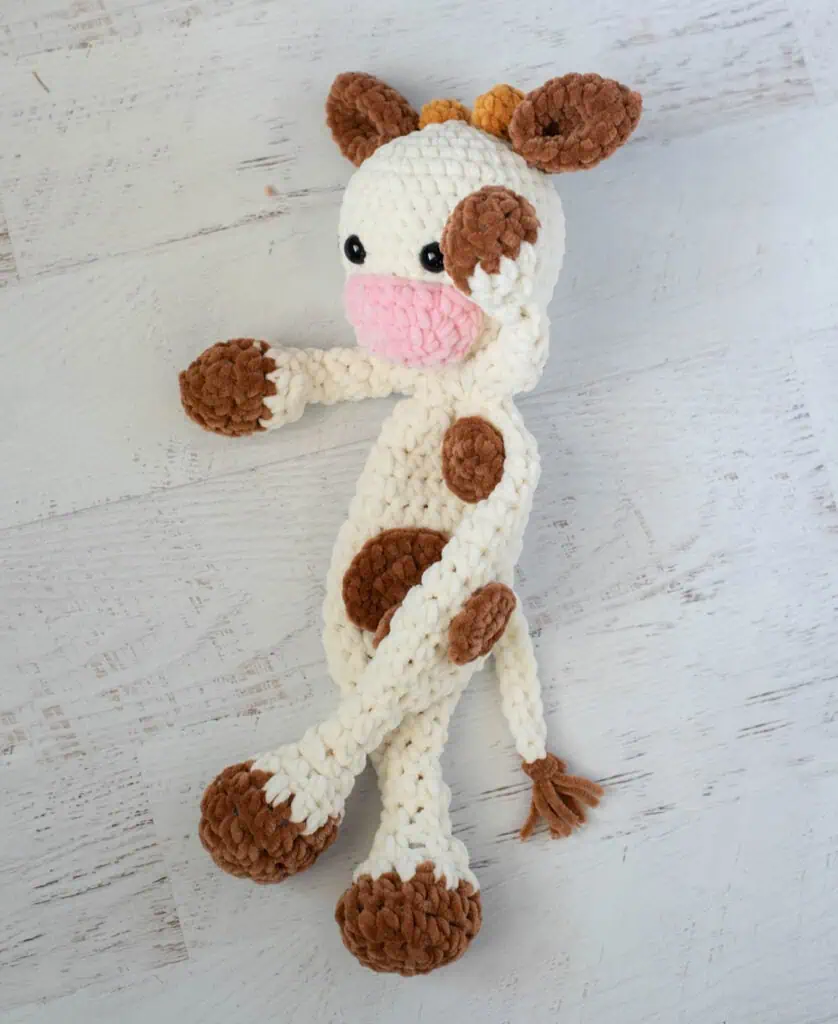
Are you asking yourself .. what exactly IS a snuggler?! A crochet snuggler is part amigurumi and part lovey. Typically the head, feet and hands are stuffed, but the rest of the Snuggler remains unstuffed.
I love using the chenille bulky weight yarn because the project goes fast and you have a velvety snuggle friend in an evening or two! You could try a different chunky yarn but I’ve found that gauge really does change a lot when you switch yarns. Bernat blanket yarn, for instance is much thicker.
My crochet snuggler patterns use 2 different hooks and 2 different main stitches. To get the perfect snuggler, be sure to pay close attention to which hook and stitch is used for each section.
An 8.0 mm larger crochet hook is used for the arms, legs and body. These pieces are mostly worked in Half Double Crochet Stitches. A smaller 6.5 mm crochet hook is used for the head, snout, ears, horns and tail and the single crochet stitch is main stitch used.
A few of you sometimes miss this important part of the pattern and then end up with a long, oblong head from not working the head in the correct single crochet stitch. So make sure to take those few extra minutes to make sure you have the right crochet hook and stitch in mind!
Grab your crochet hooks and your squishy yarn and let’s dive into this fun pattern!
print & stitch
Purchase the Beautifully Crafted AD-FREE PDF Download Today
Do you just want to relax and crochet? This nicely formatted pattern features clear instructions and perfectly sized photos for a more enjoyable crochet experience.
Get the free pattern below or purchase an ad-free pattern on Etsy or Ravelry
Cow Crochet Snuggler
Materials
- Super Bulky Weight #6 yarn, sample used Premier Parfait Chunky
- Main: 90 yards Cream
- Brown Accents: 55 yards Teddy Bear
- Snout and horns: 6 yards each Ballet Pink and Mustard
- Crochet Hook Sizes:
- L/8.00 mm for legs, arms and body
- K/6.50 mm for head, ears, snout, horns, tail and spots
- 15mm safety eyes. NOTE: if making for a baby or young child, embroider eyes instead
- Stitch markers to keep track of rows and to mark the center top of foot
- Polyester Fiberfill
- Tapestry needle and scissors
Gauge: Using the smaller, 6.50 mm hook, my gauge is 5.5 sc to 2 inches. However, gauge is not important in this pattern. You may use other weights of yarn. Adjust hook size to fit your needs.
Note: Use a stitch marker to mark the last stitch of each round as you work, moving the stitch marker as you work each round.
Resources and tutorials you may find helpful in following this pattern: Crochet Abbreviations, US to UK Crochet Conversion Chart. Find links to stitches on the “Tutorial” menu: Getting Started will show basic stitches such as the single crochet, double crochet and chain stitch used in many patterns and Crochet Stitch Dictionary shows our growing collection of crochet stitch tutorials.
Crochet Abbreviations:
Special Stitches:
Half Double Crochet 2 Together (hdc 2 tog): I use a modified half double crochet decrease in this pattern. Complete the stitch as follows: Yarn over, insert hook into next stitch and pull up a loop, insert hook into next stitch and pull up a loop, Yarn over and pull through all 4 loops on hook. Half double crochet decrease made.
Finished Crochet Snuggler Size
Cow Crochet Snuggler shown measures 16-1/2” from bottom of feet to top of head (excluding ears and horns)
If you’re looking to learn how to make the best amigurumi, be sure to check out my Amigurumi: A Beginner’s Guide. It’s a massive 165 page ebook of detailed tutorials, tips and tricks (plus exclusive patterns). You’ll learn everything you can think of from the magic ring and working in continuous rounds to invisible decreases and other pro tips. .

Legs (make 2):
Using brown yarn and the larger (L/8.00 mm) hook, make a magic ring.
R1: 6 sc into ring (6 sts). Do not join; work in rounds.
R2: *2hdc in ea st, repeat from * around (12 st)
R3: *hdc in next 3 st, 2 hdc in next st, repeat from * around (15 st)
R4: hdc in next 5 st, (hdc 2 tog) three times, hdc in last 4 st, changing to cream color yarn in last stitch (12 st)
Note: Use an additional stitch marker to mark around the 2nd decrease (to identify the top center of the foot)
R5: With cream color yarn, *hdc in next 2 st, (hdc 2 tog) repeat from * around (9 st)
R6: *hdc in next st, (hdc 2 tog), repeat from * around (6 st)
Stuff feet only, leaving rest of leg and body unstuffed.
R7-10: hdc around (6 st)
R11: *hdc in next st, 2 hdc in next st, repeat from * around (9 st)
R12: *hdc in next 2 st, 2 hdc in next, repeat from * around (12 st)
R13: *hdc in next 3 st, 2 hdc in next st, repeat from * around (15 st)
For first leg, at end of last round, single crochet into next stitch, slip into next stitch, then fasten off, leaving a long strand for sewing.
Repeat for 2nd leg, but do not fasten off.
Body
In the next row, the legs are crocheted together and form the bottom of the body. Position the legs so that they are in the correct position with both feet facing forward, using the stitch markers in the top center of each foot to assist in alignment. Use an additional stitch marker to mark where the two legs meet in the middle. This stitch marker holds the center stitch from each leg to each other. Make sure that you also have a stitch marker in the last stitch worked in the leg just completed. This stitch will be the last stitch worked in this row.
R1: Continuing to work in cream color yarn, hdc in the next stitch of the leg just worked. Continue to half double crochet in each stitch until you reach the marker holding the 2 legs together. Work a half double crochet in the next stitch (which is the stitch holding the legs together). THEN work a half double crochet in the matching stitch on the OTHER leg. You can remove the stitch marker if you’d like. Continue to half double crochet all the way around the other leg (15 stitches on that leg). You are now at the middle of the doll on the opposite side. Half double crochet in the remaining unworked stitches on the first leg worked in this row, finishing in the stitch you marked as the end of the row. Count your stitches for this row. There should be 30 stitches in the row. If you have more or less than this, take a look at the stitches worked at the joining points and see if you’ve missed or worked an extra stitch here.
R2-4: hdc around (30 st)
R5: *hdc in next 3 st, (hdc 2 tog), repeat from * around (24 st)
Pause your work and sew up the hole between the 2 legs with the fastened off yarn left from one of the legs. Weave in ends, then continue with remainder of body as follows:
R6-7: hdc around (24 st)
R8: *hdc in next 2 st, (hdc 2 tog), repeat from * around (18 st)
R9: hdc around (18 st)
R10: *hdc in next st, (hdc 2 tog), repeat from * around (12 st)
R11: (hdc 2 tog) around (6 st)
R12: working in BLO, sc around (6 st), cut long strand, weave through ends to close.
Head:
Using cream yarn and the smaller (K/6.5mm) hook, make a magic ring.
R1: 6 sc into ring (6 sts). Do not join; work in rounds
R2: 2 sc in ea st (12 st)
R3: *sc in next st, 2 sc in next. Repeat from * around. (18 st)
R4: *sc in next 2 st, 2 sc in next. Repeat from * around. (24 st)
R5: sc in next st, 2 sc in next *sc in next 3 st, 2 sc in next. Repeat from * around until last 2 stitches, then sc in the next 2 st. (30 st)
R6: *sc in next 4 st, 2 sc in next. Repeat from * around. (36 st)
R7-14: sc around. (36 st)
R15: *sc in next 4 st, sc next 2 st together. Repeat from * around (30 st)
R16: *sc in next 3 st, sc next 2 st together. Repeat from * around (24 st)
R17: *sc in next 2 st, sc next 2 st together. Repeat from * around (18 st)
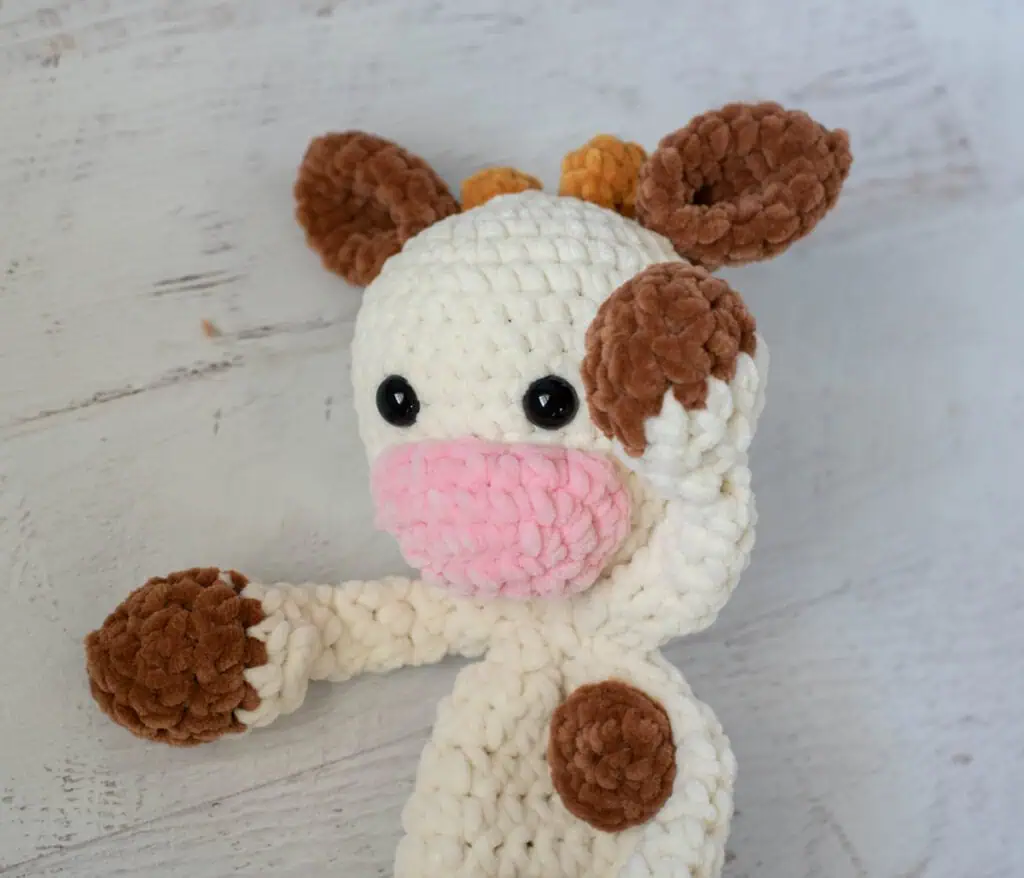
Insert safety eyes between rows 11 & 12, leaving 5 stitches in between them. Begin stuffing.
R18: *sc in next st, sc next 2 st together. Repeat from * around (12 st)
R19: *sc next 2 st together. Repeat from * around (6 st). Fasten off, leaving a long strand for finishing.
Snout:
Using the smaller (K/6.5mm) hook and pink yarn, chain 6. Stitches are worked on both sides of the starting chain.
R1: sc in the 2nd ch from hook, sc in the next 3 st, 3 sc in the last st, rotate work to work on opposite side of chain, sc in next 3 st, 2 sc in last st. (12 st) Do not join; work in rounds.
R2: 2 sc in next st, sc in next 3 st, 2 sc in next 3 st, sc in next 3 st, 2sc in next 2 st (18 st).
R3: 2 sc in next 2 st, sc in next 5 st, 2 sc in next 4 st, sc in next 5 st, 2sc in next 2 st (26 st).
Stuff snout very lightly and sew below eyes over rows 13-17 as shown in photo.
Ears (make 2):
Using the smaller (K/6.5mm) hook and brown yarn, make a magic ring.
R1: 6 sc into ring (6 sts). Do not join; work in rounds.
R2: *sc in next st, 2 sc in next st, repeat from * around (9 st)
R3: *sc in next 2 st, 2 sc in next st, repeat from * around (12 st)
R4: *sc in next 3 st, 2 sc in next st, repeat from * around (15 st)
R5-8: sc around (15 st).
Fasten off, leaving a long strand for sewing. Fold each ear in half, stitch together then stitch to either side of head on an angle between row 4 and 5.
Horns (make 2):
Using the smaller (K/6.5mm) hook and mustard color yarn, make a magic ring.
R1: 6 sc into ring (6 sts). (Do not join, worked in rounds)
R2: sc around (6 st).
R3: sc around (6 st). Slip stitch to next stitch and fasten off, leaving a long tail for joining.
Sew on head in between the ears.
Arms (make 2):
Using the larger (L/8.00 mm) hook and brown yarn, make a magic ring.
R1: 5 sc into ring (5 sts). Do not join; work in rounds.
R2: 2 hdc in ea st (10 st)
R3: hdc around, changing to cream yarn in last stitch (10 st)
R4: With cream yarn, hdc around (10 st)
R5: (hdc 2 tog) around (5 st)
R6-12: hdc around (5)
Sc in next st, sl st to next st and fasten off leaving a long strand for finishing. Stuff hand only, leaving rest of arm unstuffed.
Tail:
Using 6.5mm hook and cream yarn, chain 11
R1: Working in back bump, sc in 2nd ch from hook and in each chain across. (10 st) [Note: Alternatively, you can work the sc stitches into the chain normally if you are unfamiliar with working in the back bump.] Fasten off yarn, leaving a long strand for joining.
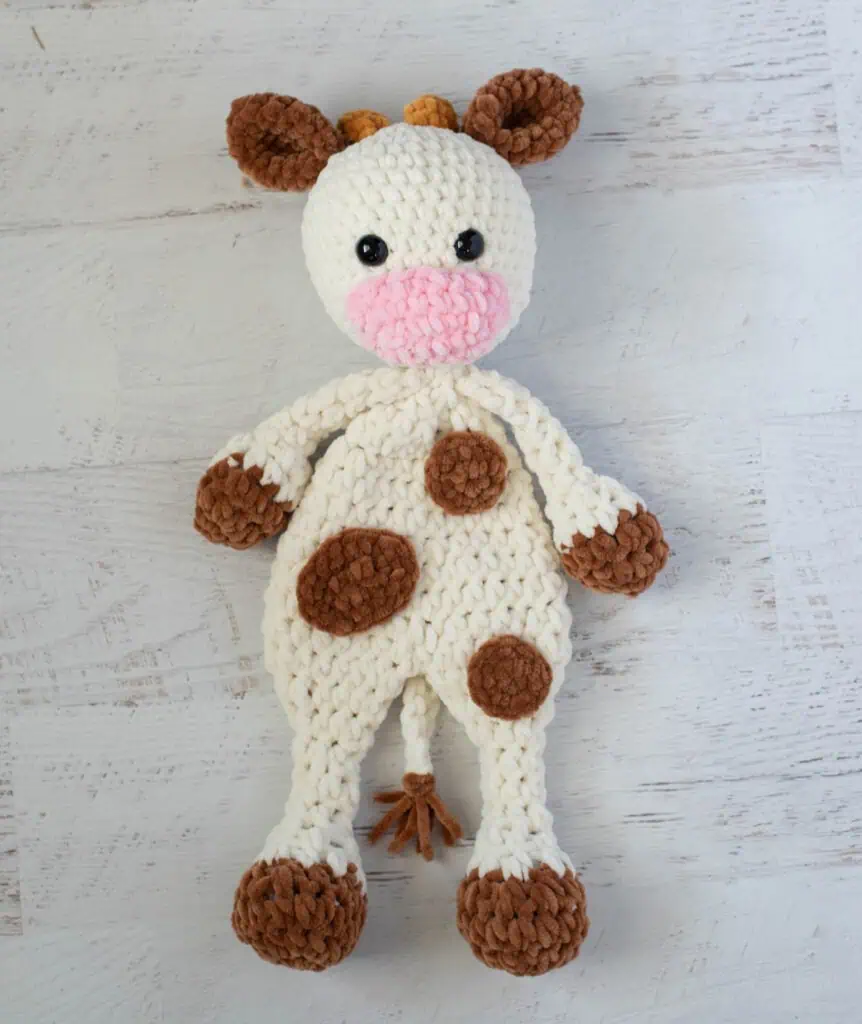
Cut 4 pieces of brown yarn 5 inches long. Fold the yarn strands in half. Then use the crochet hook to make a large slip knot to attach the strands to the bottom of the tail, forming a tassel. Adjust and tighten the slip stitch to look pleasing, then trim the tail tassel to a pleasing length.
Use the fastened off ends to attach the tail to the back end of the cow, centering and sewing it between rows 3 and 4 of the body.

Round Spots (Make 3):
Using the smaller (K/6.5mm) hook and brown yarn, make a magic ring.
R1: 6 sc into ring (6 st). Do not join, worked in rounds
R2: 2 sc in ea st around (12 st) Fasten off and join with an invisible join (or slip stitch to the next stitch).
Oval Spots (Make 2):
Using the smaller (K/6.5mm) hook and brown yarn, ch 5.
R1: sc in 2nd ch from hook, sc in next 2 ch, 3 sc in last ch, rotate work and work on opposite side of foundation ch, sc in next 2 st, 2 sc in next ch (10 st)
R2: 2 sc in next st, 1 sc in next 2 st ,2sc in next 3 st, 1 sc in next 2 st, 2 sc in next 2 st (16 st). ) Fasten off and join with an invisible join (or slip stitch to the next stitch).
Snuggler Assembly
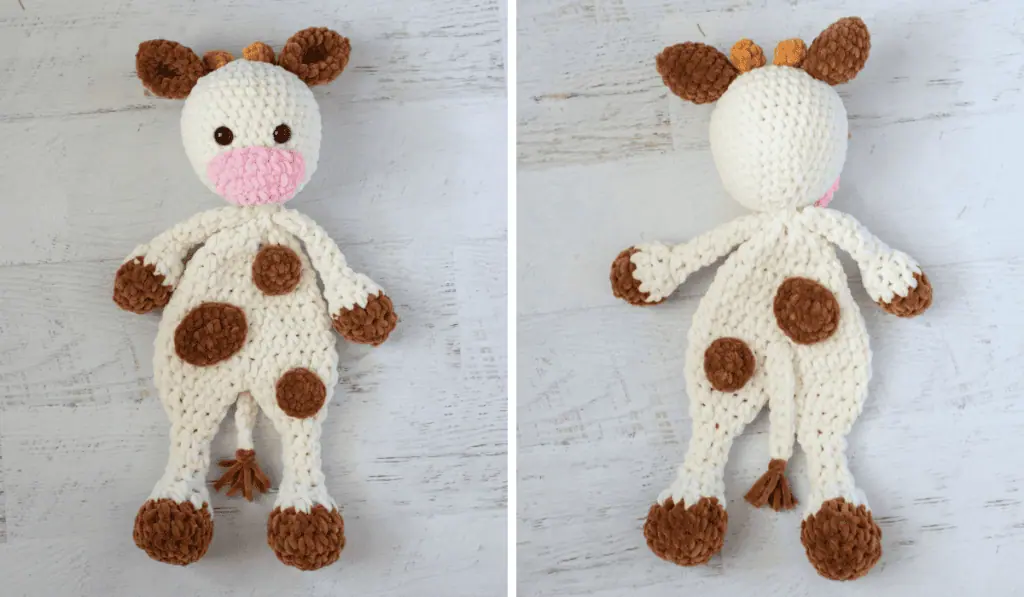
Using strand of yarn from head, position on body so that head is facing the front. Attach last row of head to the free front loops from the last round of the body. Go around the head a second time, working through all layers to sew it firmly on the body. Then fasten off and weave in ends.
Flatten the top of the arms and whip stitch closed, then fasten the arms on either side of the body near the head.
Sew spots on the front and back of body of cow, referring to photos.
Weave in any loose ends.
Look for more crochet snuggler plushie toys patterns coming your way soon! These crochet kid patterns make an adorable gift and they are so fun to crochet you might just want to keep one for yourself too!
I love seeing your finished projects! If you enjoyed making this Crochet Snuggler Cow or any of my crochet patterns, I’d love to see yours on Instagram, be sure to tag me @crochet365knittoo. If you are on Facebook, stop over to the Crochet 365 Knit Too Facebook page or pop over to the Crochet365KnitToo Club and share a photo! I’d love to see your work!
Please explain how to make a magic ring.. I learned from my Grandmother a very long time ago to crochet.But I knit and crochet is new.
You can find my magic ring tutorial here.