
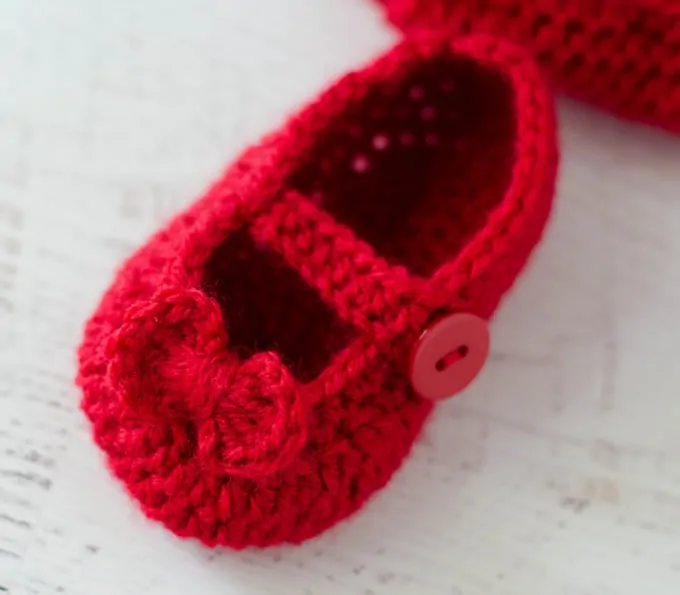
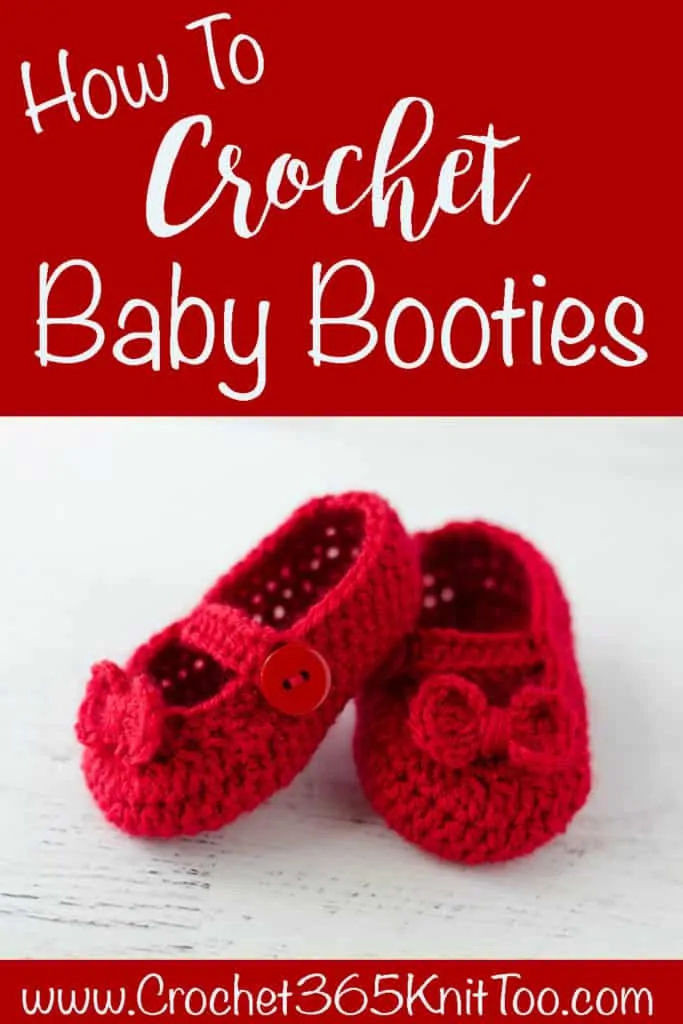
Mary Jane Crochet Baby Booties
This post may contain referral/affiliate links. Please read my disclosure for more info.
In some ways, it all started here. This blog. This crochet designing gig. It started with these sweet Mary Jane crochet baby booties. And yet.. here they are.. making their debut on the blog, so many years since their beginning.
Let’s go back in time a bit. After I found myself suddenly single after 18 years of marriage, I went back to school. I worked full time, was a single mom and squeezed in a bachelor’s degree into whatever time I could find. It was hard. Challenging. And yet one of my greatest accomplishments.
But I sacrificed a lot. I stopped reading for fun–which was one of my favorite hobbies at the time. And I stopped crocheting. Sometimes you have to give up what you want now for what you want most. And so I did what I had to do. When I finished college 9 years ago, I got right back into crocheting.
You know, people always say you should make money doing what you love. And what I’ve always loved was to crochet. But I couldn’t see how I could good money crocheting. It would take me some time to make an item and I just couldn’t sell it for enough to pay for my time. Plus I’m not the type who can crochet multiples of the same item. I bore easily and always like to try new things.
But then one day when I was online, I stumbled upon other crocheters selling digital crochet patterns. And a light bulb went off. If I could create something ONCE and sell it over and over and over again without hardly any effort–well THAT would be a great way to make money with my crochet hobby! If you want to learn how to rank high and be found on Etsy search, check out this article here.
The jump to crochet designer came really easy to me. I learned to crochet from my Slovak Grandmother and I often had to translate patterns for her. You can read more about that story here and here. When crocheting from patterns, often I liked to do things “my own way” and so I would re-write those patterns to suit myself. So it was a natural progression to write my own pattern.
These crochet baby booties were my first design. They haven’t been available for 6-8 years but I thought I would bring them back and offer them here just for you. I tweaked and redesigned the pattern a bit and crocheted a new sample pair for a sweet little girl.
To figure the right size, crochet the sole of the size you desire and then measure the length. Compare this to the size chart to see where your crochet style fits. If it is too small, go up to the next size or increase your hook size. Do the opposite if it is too big. Easy peasy, right?
Purchase an ad-free printable version of this pattern
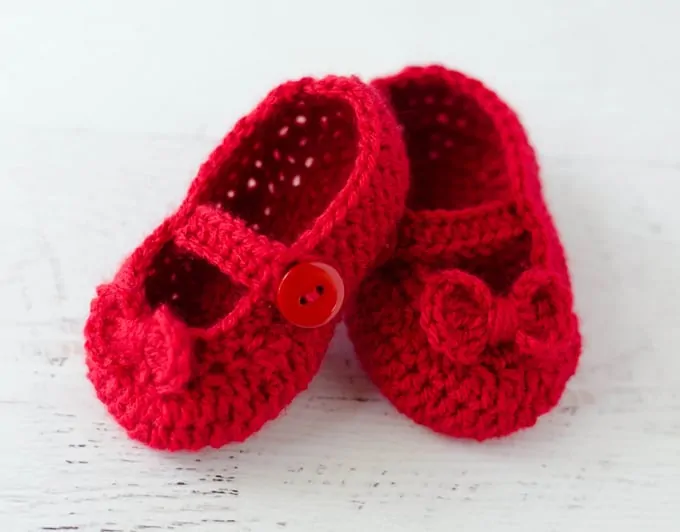
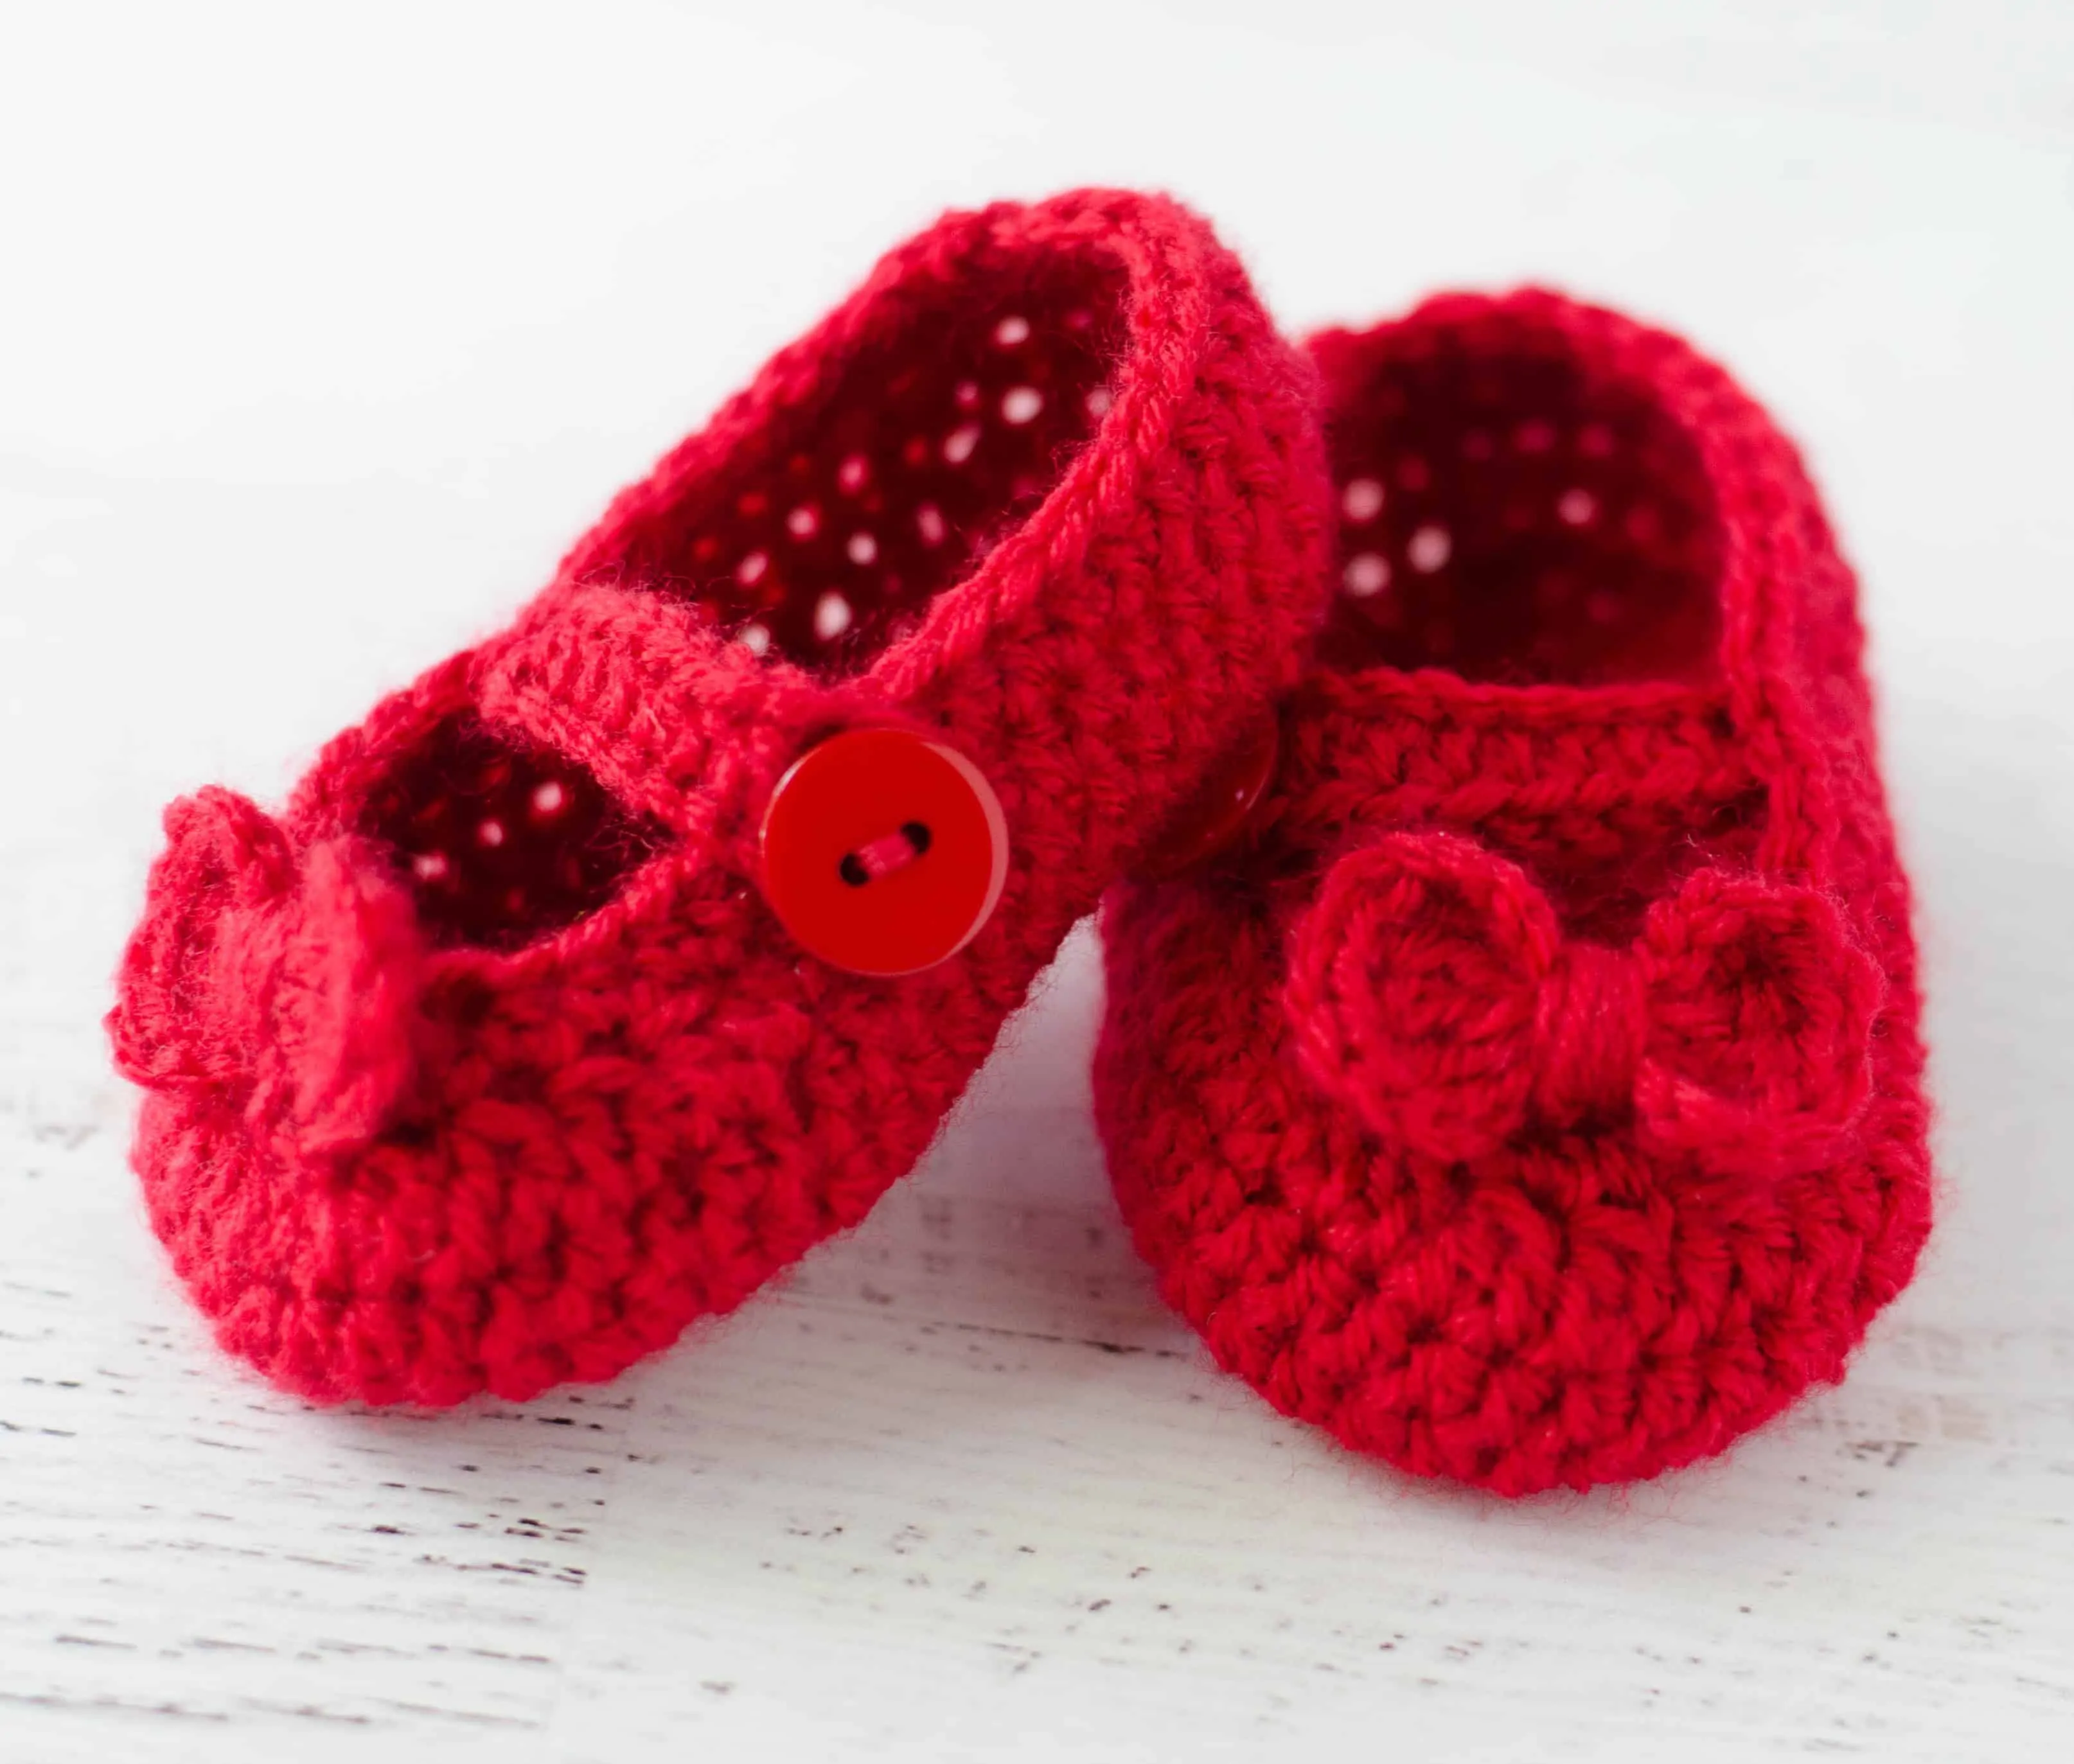
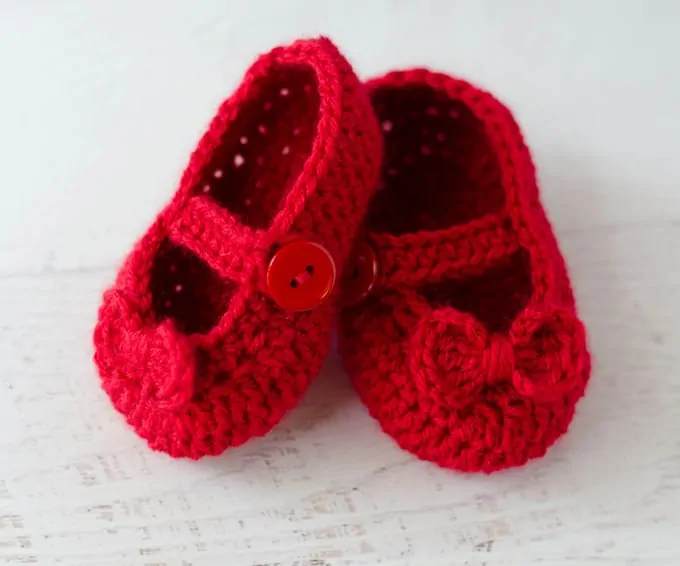
Crochet Baby Booties
Here is what you will need:
- US D3/3.25mm crochet hook (Did you know you can purchase my go-to hooks on Amazon?)
- 1/2 oz sport weight yarn (sample used Hobby Lobby’s I Love This Yarn Sport weight in 40/Red)
- 2) Small buttons
- tapestry needle and scissors
- Sewing needle and thread for sewing on buttons
Sizes
- Newborn: approx 3.25” long
- 0‐6 Mos: approx 3.5” long
- 6‐12 Mos: approx 4” long
- 12‐18 Mos: approx 4.5” long
Sole
Sole is worked in continuous rounds. Work sole in the appropriate side, then follow instructions for the upper part of the bootie.
Newborn:
R1: Ch 9, 3sc in 2nd ch from hook, sc in each of the next 3 ch, hdc in next ch, 1 dc in next, 2dc in next ch, 5 dc in last chain, working on the opposite side of the foundation ch, 2 dc in next ch, 1 dc in next ch, 1 hdc in next chain, 1 sc in each of the next 3 ch. (22 sts).
R2: 2 sc in each of the next 3 sts, sc in each of the next 7 st, 2 sc in each of the next 5 sts, 1 sc in next 7 st. (30 sts)
R3: [Sc in the next st, 2 sc in next st] 3 times, sc in the next 7 st, 5 times, 1 sc in next 7 st (38 sts)
R4: Sc in next 2 st, 2 sc in next st, sc in next 4 st, 2 sc in next, sc 30. (40 st) Slip stitch to next stitch and fasten off.
0-6 Months:
R1: Ch 11, 3sc in 2nd ch from hook, sc in each of the next 5 ch, hdc in next ch, 1 dc in next, 2dc in next ch, 5 dc in last chain, working on the opposite side of the foundation ch, 2 dc in next ch, 1 dc in next ch, 1 hdc in next chain, 1 sc in each of the next 5ch. (26 sts).
R2: 2 sc in each of the next 3 sts, sc in each of the next 9 st, 2 sc in each of the next 5 sts, 1 sc in next 9 st. (34 sts)
R3: [Sc in next st, 2 sc in next st] 3 times, sc in the next 9 st, [Sc in next st , 2 sc in next] 5 times, 1 sc in next 9 st (42 sts)
R4: Sc in next 2 st, 2 sc in next st, sc in next 4 st, 2 sc in next, sc 34 . (44 st) Slip stitch to next stitch and fasten off.
Size 6‐12 mos:
R1: Ch 12, 3sc in 2nd ch from hook, sc in each of the next 6 ch, hdc in next ch, 1 dc in next, 2dc in next ch, 5 dc in last chain, working on the opposite side of the foundation ch, 2 dc in next ch, 1 dc in next ch, 1 hdc in next chain, 1 sc in each of the next 6 ch. (28 sts).
R2: 2 sc in each of the next 3 sts, sc in the next 10 st, 2 sc in each of the next 5 sts, 1 sc in next 10 st. (36 sts)
R3: [Hdc in next st, 2 hdc in next st] 3 times, hdc in the next 10 st, [hdc in next st, 2 hdc in the next st ] 5 times, 1 hdc in next 10 st. (44 sts)
R4: [Sc in next 2 st, 2 sc in next st] 3 times, sc in next 13 st, 2 sc in next st, [Sc in next 3 st, 2 sc in next st] 2 times, sc in next 13 st. (50 st) Slip stitch to next stitch and fasten off.
Size 12-18 mos:
R1: Ch 14, 3sc in 2nd ch from hook, sc in each of the next 8 ch, hdc in next ch, 1 dc in next, 2dc in next ch, 5 dc in last chain, working on the opposite side of the foundation ch, 2 dc in next ch, 1 dc in next ch, 1 hdc in next chain, 1 sc in each of the next 8 ch. (32 sts).
R2: 2 hdc in each of the next 3 sts, hdc in each of the next 12 sts, 2 hdc in each of the next 5 sts, 1 sc in next 12 sts. (40 sts)
R3: [Hdc in next st, 2 hdc in next st] 3 times, hdc in the next 12 st, [hdc in next st , 2 hdc in next st ] 5 times, 1 hdc in next 12 st. (48 sts)
R4: [Hdc in next 2 st, 2 hdc in next st] 3 times, hdc in next 15 st, 2 hdc in next st, [hdc in next 3 st, 2 hdc in next st] 2 times, hdc in next 15 st. (54 st) Slip stitch to next stitch and fasten off.
Upper (all sizes):
Attach yarn to back of heel. Work in joined rounds. The chain 2 at the start of round counts as a stitch.
R1‐2: Ch 2, hdc in ea st, . Join with sl st to 1st hdc. Mark center 18 stitches at toe.
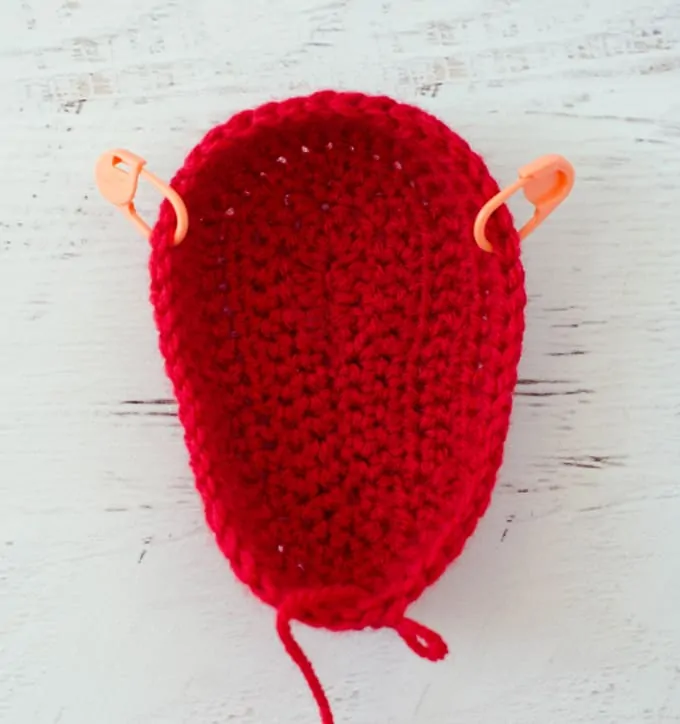
R3: Ch 2, hdc in each stitch until coming to the to 1st marked st, (dc 2 tog) 9 times over center sts, hdc in each st of the round. Join with sl st to 1st st.
Now mark center 3 stitches at toe.
Row 4: Ch 2, dc 2 tog, hdc in each stitch until coming to the 1st marked st, (dc 3 st together), hdc in each stitch until the to last 3 st, (dc 2 tog), hdc in last stitch. Join with sl st to 1st st. Fasten off.
Strap (make 2):
Chain 13. Hdc in 6th chain from hook (forms buttonhole), hdc in remaining chains across.
Fasten off.
Position strap as desired and sew in place. Button placement is on the outside of each shoe.
Sew on button on opposite side of bootie.
Bow (make 2):
Make a magic ring. Work the following into the ring: ch 4, 4 tr, ch 4, sl st, ch4, 4 tr, ch 4, sl st. Pull tight and wrap end around center of bow 7 times. Fasten off and tie securely. Sew bow on to each bootie.
Purchase an ad-free printable version of this pattern
I love seeing your finished projects! If you enjoyed making one of my patterns I’d love to see yours on Instagram, be sure to tag me @crochet365knittoo. If you are on Facebook, stop over to the Crochet 365 Knit Too Facebook page or pop over to the Crochet365KnitToo Club and share a photo! I’d love to see your work!
Oh, this baby booties are very nice and lovely. I will make it too, for friends. Thank you, cheryl for this Crochet patterns.
The baby booties are adorable. Once I learn how to make them ( my life ) will be complete (; BUT I’m just learning to crochet ( the right way) I have crocheted all my life because I love it. I was never taught how just told briefly and there were times someone would teach me a new stitch . My attempt for blankets failed miserable. One good thing came out of my blankets gone wrong ! I plenty of yarn. I would love to know is there a dictionary that explains the terminology in a pattern. So the beginner can understand. So far I just watched U-tube so now I know how to turn the yarn back and forth to keep it flat. And also the difference in OVER and UNDER crochetting . I’m sure that I still hold the needle wrong, but its is comfortable for me. So my reply to the booties I said somewhere up further into this ! letter but I still had a question there too. Thanks for listneing or reading (:
Welcome to the world of crochet! I love this hobby and hope you do too! The best resources I have for beginners are in the tutorial section (you can get to it in the “menu” at the top of the blog). I designed this with step by step photos so you can see exactly how to hold and place the yarn for each stitch.
Hello 🙂 it looks like for sizes newborn and 0-6 months there is missing instructions from row 3. The portion that states (1 sc in 9 st, 5 times , 1 sc in 9 st)
Thanks
That’s because the newborn size has less stitches around than the 0-6 month size. Row 3 of the newborn ends with 38 stitches, while the 0-6 month size ends with 42. Hope this helps!
Hi! I am currently working on this project. I tried doing the 0-6 Months, R3: [Sc in next st, 2 sc in next st] 3 times, sc in the next 9 st, 5 times, 1 sc in next 9 st (42 sts)
From this pattern, what stitch needs to be done for 5 times? I believe something is missing here… I am a little confused. Thanks for the help~
The pattern in the post reads as follows: [Sc in next st, 2 sc in next st] 3 times, sc in the next 9 st, [sc in next st , 2 sc in next ] 5 times,1 sc in next 9 st
So you repeat the (sc in the next st, 2 sc in the next) five times. I hope that makes sense!
What does 4tc mean in knitting?
This is a crochet pattern. 4tc is 4 triple crochet. Hope this helps!
Hello, these are lovely.
I have just done the first sole and notice it is a clear right foot. So is it reasonable to just do a second one the same, then flip it over for adding the top of the bootie?
I am very new to following patterns and its all getting me a bit confused lol
There is not a right or a left foot. I’m wondering if you might have gotten your increases in the wrong area? You could try seeing if my post on reading crochet patterns helps.. you can read that here. If you’re on Facebook, you might like to post a photo in our Facebook group and perhaps I or someone in the club can pinpoint the issue. A link to the club is here.
What does Sr mean?
Little typo. It should be “st” short for “stitch”. I’ve fixed it in the post. Thanks for the catch!
On the upper what does Now mark center 3 stitches at toe Mean please
It means to identify the center 3 stitches in the toe area so you can properly work the rest of the pattern. I hope that makes sense.
These are adorable booties … however there are several instructions missing. Finishing the sole you don’t really have to fasten off before Moving on to the uppers, right? Upper Row 4 is all the way around, or just the toe??????? I think I have to fasten off to get to the toe area to complete it.
The instructions are correct. Be sure to read the part in between the brackets and the number of times to repeat that part. As far as fastening off, since the starting chain and join is more visible, I like to re-join at the heel–other wise it would show on the side of the bootie. I reworded this part slightly to be more clear. Hope that helps!
0-6 months. Not understanding rnd 3. What is supposed to be done 5 times?
With brackets you do what is in the brackets the number of times specified then move to the next step. The easiest way to understand row 3 is to think of it in 4 segments. First you work a sc in the first stitch and 2 sc in the next. You do this 3 times. Then you sc in the next 9 stitches. Then you move on to the next set of instructions and so on. You can also read my post on How To Read A crochet Pattern to help navigate tricky directions in patterns.
loved the adorable booties. Thanks for the pattern.
Love these! Not sure how to leave a pic, but I just made a pair for my granddaughters Christening. I started the top in fl only and added picots every second stitch on the back loops.
That sounds like a pretty way to finish it off! I bet they were beautiful for her Christening!
I found yarn at Joann’s yesterday and can not wait to start on this cutie. I also printed the bunny pattern but will save that until later. Thanks so much for making these available. I have been following you for some time and think you are very talented.