
Introducing Bitty Bumbles: A Crochet Pig
This post may contain referral/affiliate links. Please read my disclosure for more info.
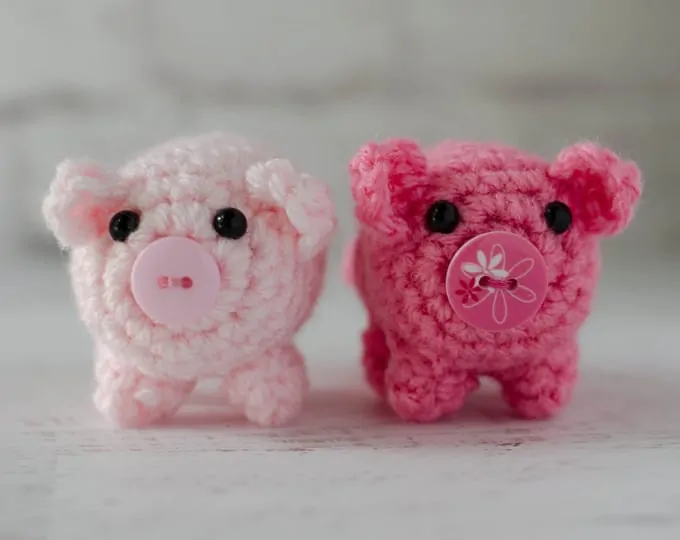
Ever need a little bit of cuteness to brighten up your day? Your home? Your office? Meet the first in the Bitty Bumble series: A Crochet Pig.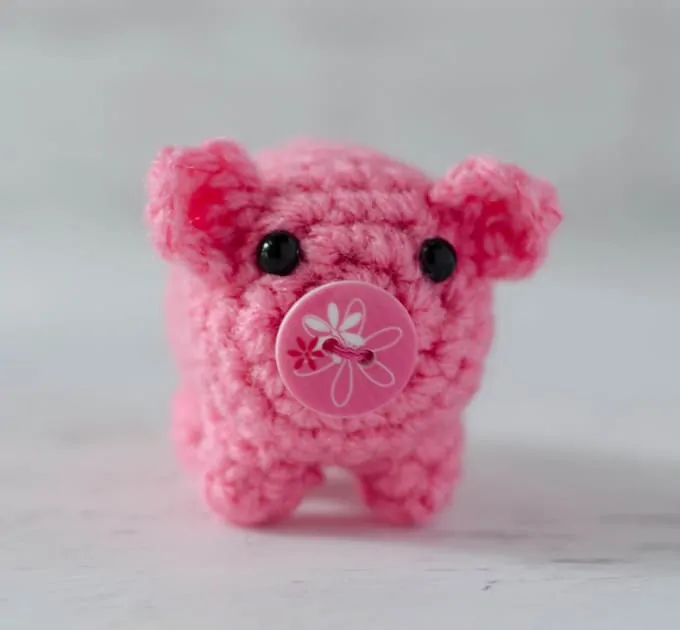 Remember when I made the bitty bumble bee? Well. It got me thinking. Wouldn’t it be fun to make a whole bunch of little stuffed pieces of crochet goodness? And wouldn’t it be fun to give the whole series a fun name… like ‘Bitty Bumble’? And then I found this cutie patootie button and I was a goner.
So I’d like you to meet the first in the Bitty Bumbles Series: A Crochet Pig.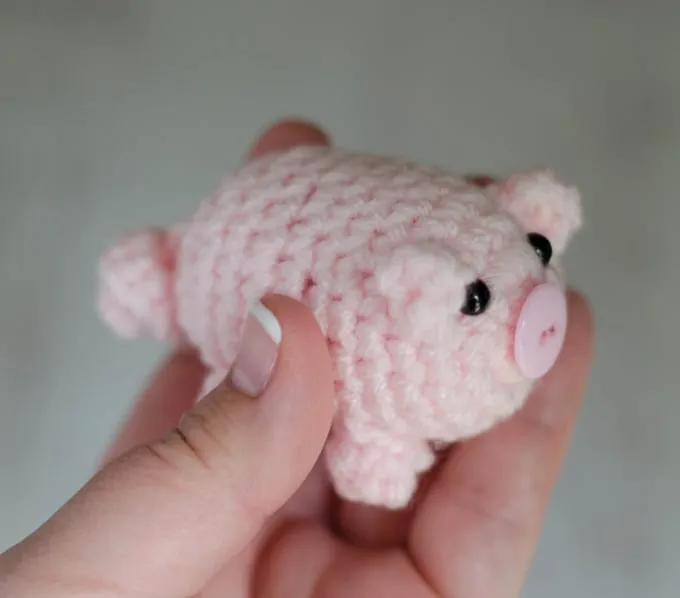
This is a small little amigurumi that I’m calling Bitty Bumbles. You can make them and collect them for yourself or give them away. Brighten up your desk space at work. Stuff someone Christmas stocking. Make them for young or old alike.
Easy. Fun. And cute as can be! Ready to make a crochet pig?
Crochet Pig – Bitty Bumble #1
Here is what you will need:
Materials:
- US G6/4mm crochet hook (These are my recommended hooks)
- 1/2 oz of Worsted Weight Yarn in Pink
- 6mm safety eyes (could also embroider them on)
- 1/2″ button (I used this cute Sewology button for the bright pink pig)
- Small amount of polyfil stuffing (I used this)
- Sewing needle and matching thread (for sewing on the button)
- Tapestry needle and scissors
For other great products I recommend, be sure to check out my special store on Amazon here!
Resources and tutorials you may find helpful in following this pattern: Crochet Abbreviations, US to UK Crochet Conversion Chart. Find links to stitches on the “Tutorial” menu: Getting Started will show basic stitches used in many patterns and Crochet Stitch Dictionary shows our growing collection of crochet stitch tutorials.
To make the decreases less noticeable, use the invisible decrease method.
Size:
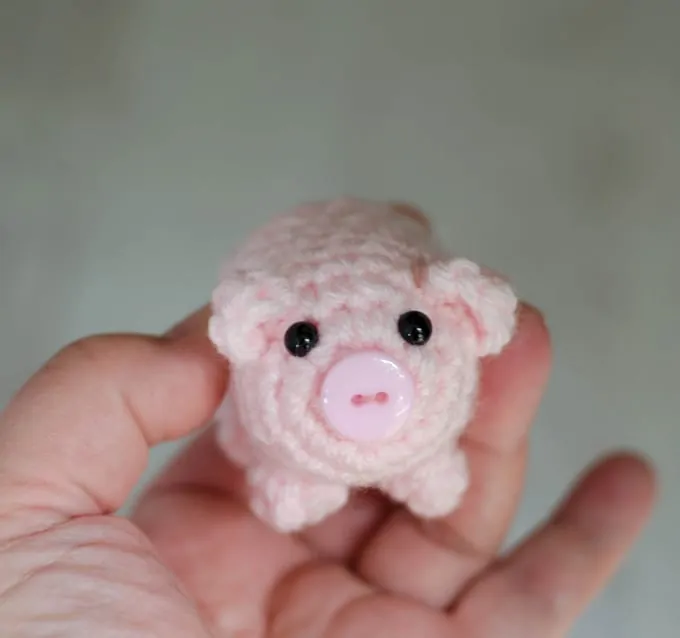
Crochet Pig Bitty Bumble is about 2.5″ long (not including his wee little tail)
 Purchase an ad-free printable version of the pig pattern here
Body
With pink yarn, make a magic ring
R1: 6 sc into ring (6 sts).
R2: 2 sc in ea st around (12 st)
R3: *sc in next st, 2 sc in next st, repeat from * around (18 st)
R4-12: sc around (18 st)
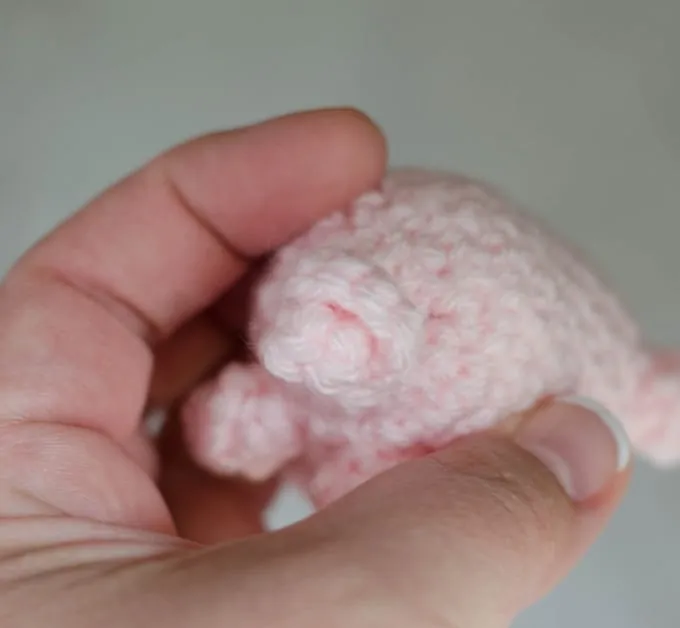
Take time out to insert safety eyes. The safety eyes go between rounds 2 & 3. Refer to photo for placement. Stuff and continue stuffing as you finish up the body.
R13: *sc in next st, sc next 2 st together. Repeat from * around (12)
R14: sc next 2 st together (6).
Now without cutting yarn, continue as follows to work the tail:
ch 5, work 3 sc in 2nd ch from hook and in each of the next 3 chains. Fasten off yarn.
Make sure pig is firmly stuffed, then thread the yarn end onto the tapestry needle. Weave opening closed. Fasten off and weave in end.

Ears (Make 2)
With pink yarn, ch 4
R1: sc in 2nd ch from hook, dc in next ch, ch 2, sl st to last ch. Fasten off leaving a long strand for sewing.
Position ears so that the starting chain is resting against head and sew an ear on each side of the head.
Nose
Sew a coordinating button below eyes, using needle and sewing thread.
Legs (Make 4)
With pink, make a magic ring.
R1: 6 sc into ring (6 sts).
R2: sc in ea st around (6 st). For a nice finish, use the Invisible Seamless Join technique. Leave a long strand for sewing.
Position front legs between rows 5-7 and back legs between rows 10-12 on bottom of pig (or wherever looks best to you) and sew down. Note: Legs are not stuffed.
 Purchase an ad-free printable version of the pig pattern here
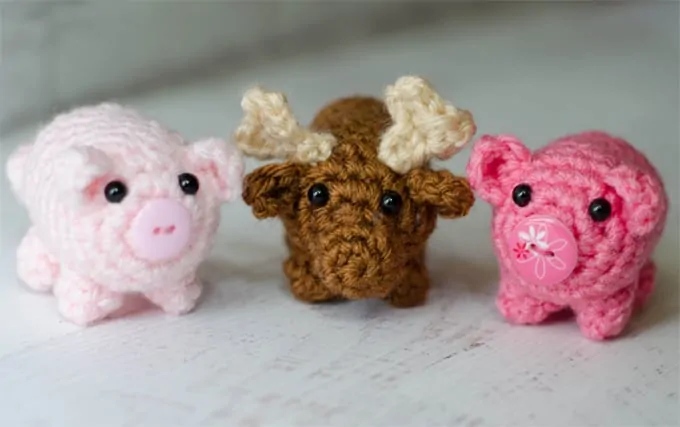
Looking for the adorable moose in this photo? Head to the Moose Pattern for all the details!
I love seeing your finished projects! If you enjoyed making one of my patterns I’d love to see yours on Instagram, be sure to tag me @crochet365knittoo. If you are on Facebook, stop over to the Crochet 365 Knit Too Facebook page or pop over to the Crochet365KnitToo Club and share a photo! I’d love to see your work!
Thus is so cute! Thank you for sharing. I can’t wait to make this cute pig.
Attach a ribbon and you have cute christmas ornaments or package decorations. They are so stinkin cute!!
Can you tell me what you used to stuff this cute piggy?
I used polyfil stuffing (and I just updated the post to show the type I used).
These ideas Are Very Impressive thanks for helpful ideas I am very very happy to see this because you give me creative ideas.
I’m excited to try and make my first AMIGURUMI animal. I’m kinda new to making the stuffed adorable animals. All I’ve made is blankets. Time to move on to bigger and funner things! Thank you!
So cute! I made your moose for a friend and just finished the pig. I used some blue yarn for eyes and made a round of four for the snout. I love it!
Wish I could post a picture of it!