
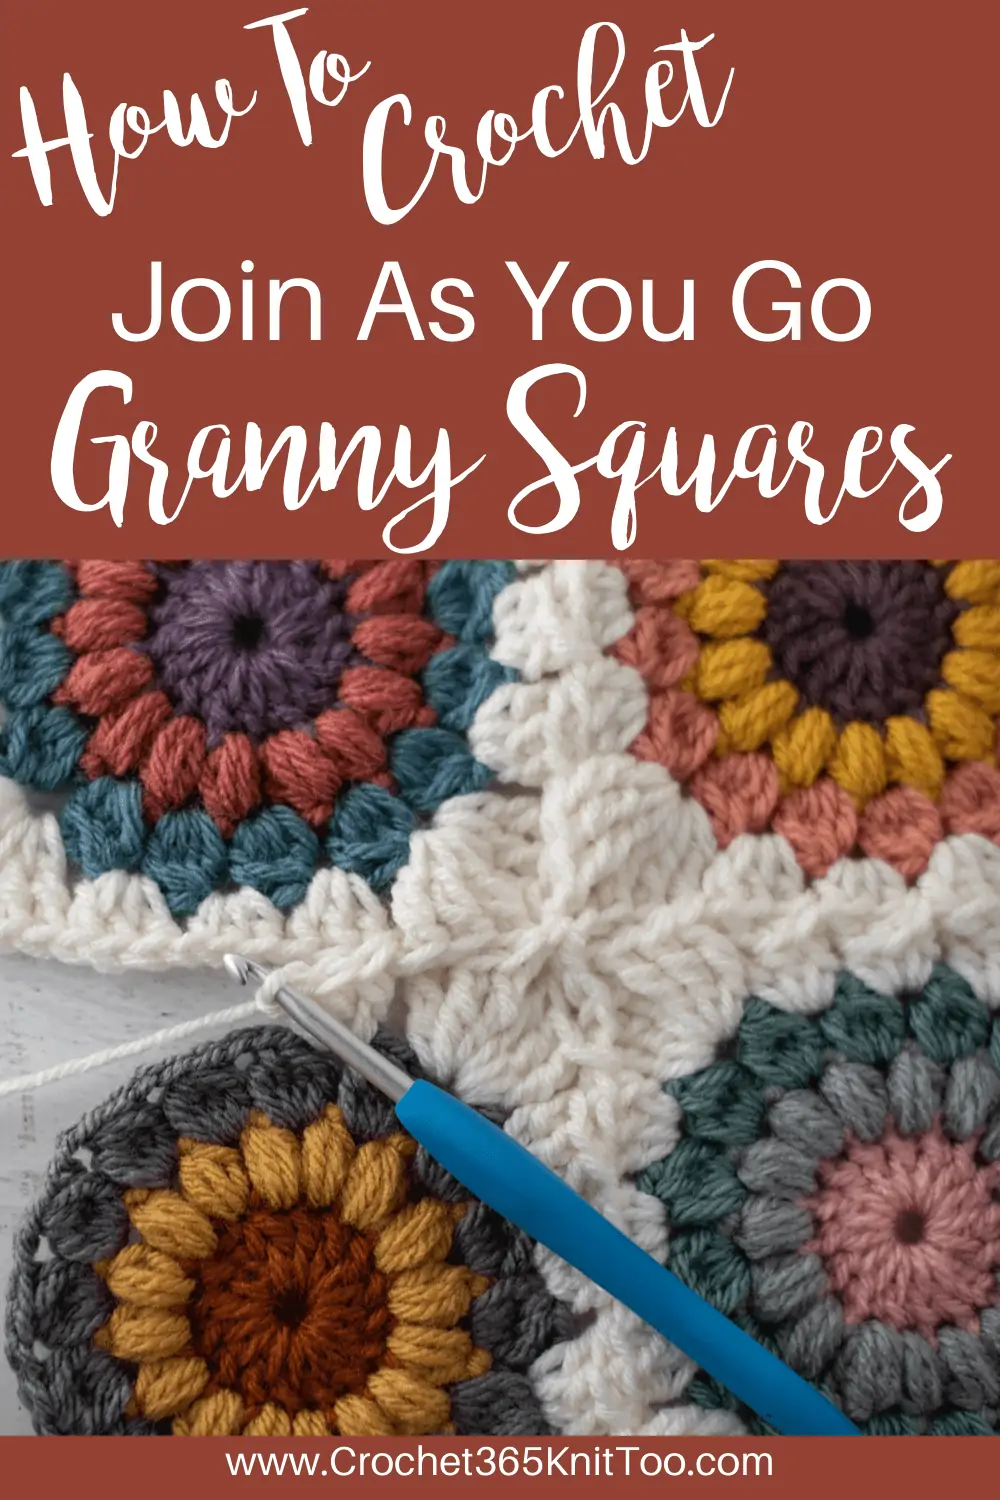
Join As You Go Granny Squares
This post may contain referral/affiliate links. Please read my disclosure for more info.
Join as you go granny squares. Seriously where has this technique been all my life? Or rather.. why did I wait until now to learn this fabulous technique?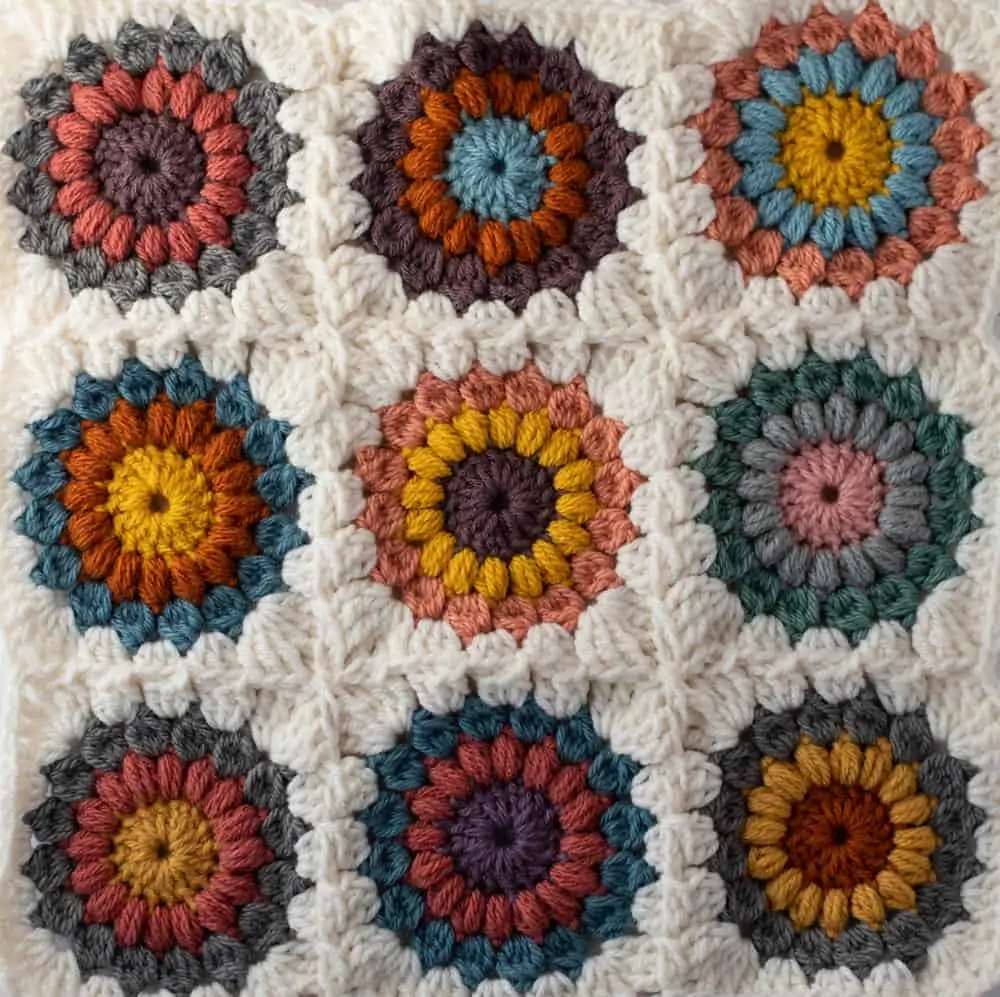
If you’re like me, there are two things I really don’t love about crochet: weaving in ends and sewing afghan squares together. A join as you go technique makes both these tasks so much easier. And .. let’s be honest.. FUN!
In Join As You Go, you work crochet granny squares to the row BEFORE the last row. Then you crochet the last row and join the squares all at the same time! There is no starting and stopping so the last row/joining combo goes pretty quickly and the only weaving is when you run out of yarn!
Join As You Go (also abbreviated JAYGO or pronounced “Jay Go”) is typically used to join granny squares. The joining point is in the spaces between the crochet clusters in the final row. If you are working a traditional granny square, it would between the clusters of 3 double crochet stitches.
However, the technique also works when the final row of the square is worked in different stitch heights such as when we turn a round motif into a Sunburst Granny Square. When following the directions for Join As You Go Granny Squares remember the proper stitches for the final row of the granny square and be sure to work those stitches.
Let’s go over how to use Join As You Go for a sunburst granny. To start make the appropriate number of sunburst granny squares, stopping after row 3. (Note: If you’re working a different granny square pattern, work to just before the last row before joining granny squares with this technique).
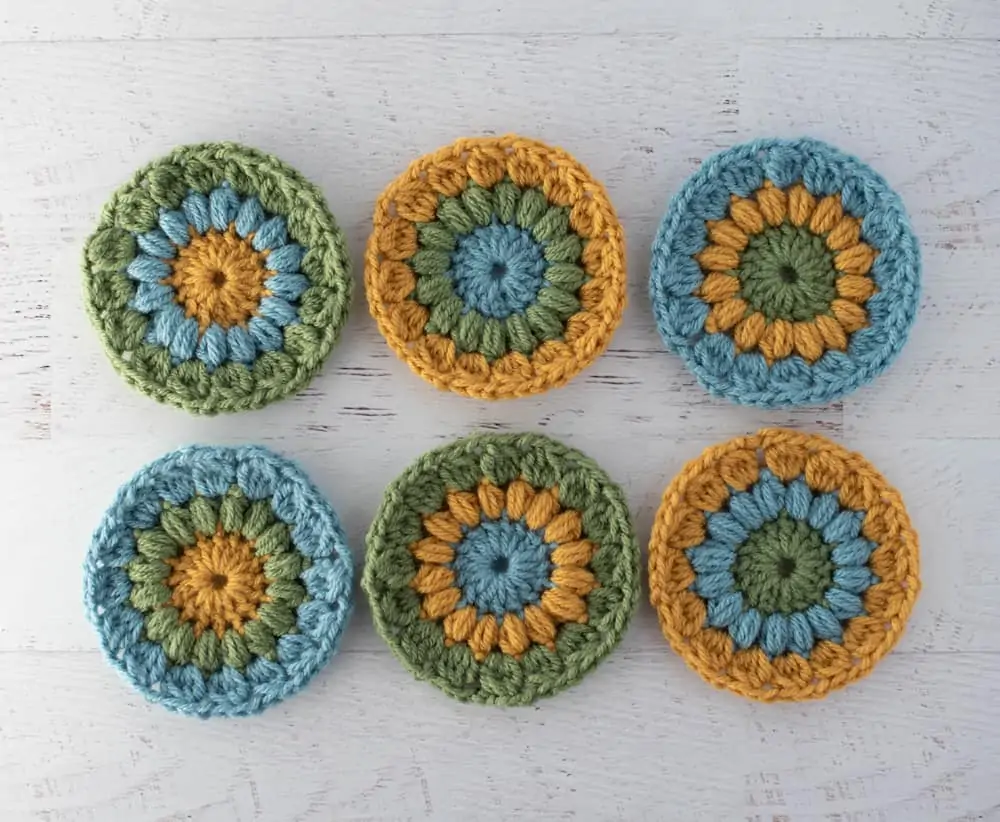
I find it easiest to make all the motifs for the afghan at all once and to weave in the ends for each motif before starting the join:
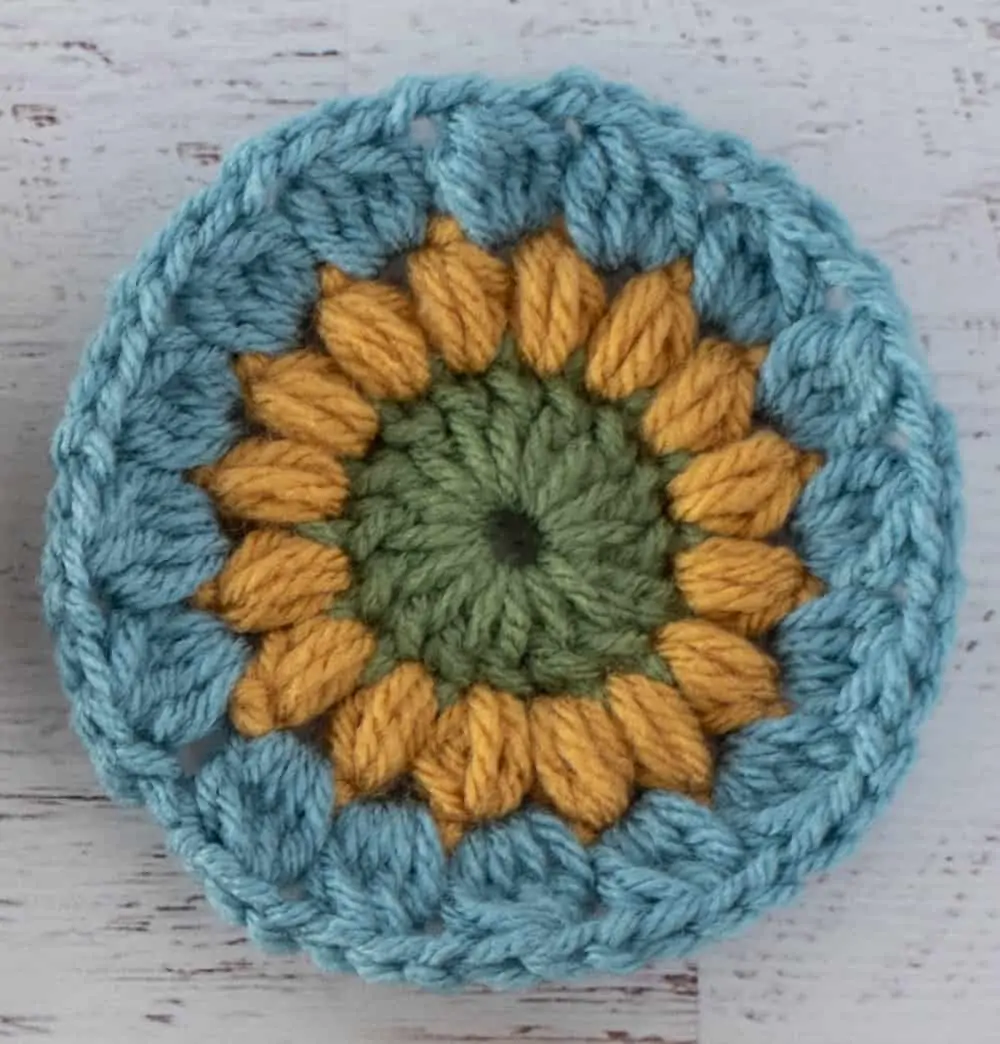
Basic Sunburst Granny
It’s important to understand the normal working of the final row of the particular granny square you are working before starting the join. A sunburst granny square turns a circle motif into a square in the final row: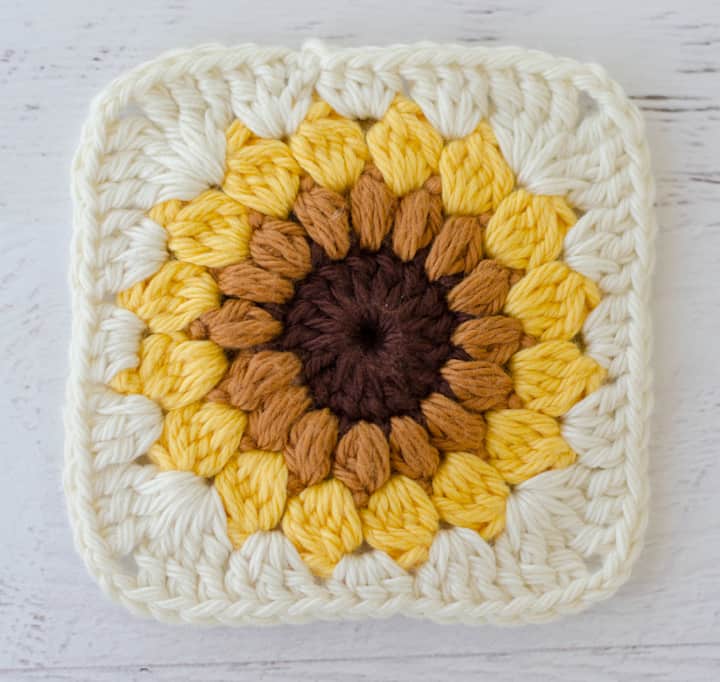
Note that to make the circle into a square, the clusters are worked at different heights. Two groups of treble crochets (separated by a chain 2) are in each corner. A set of double crochets are next to the corner stitches and a set of 3 half double crochet stitches are in the center of each side:
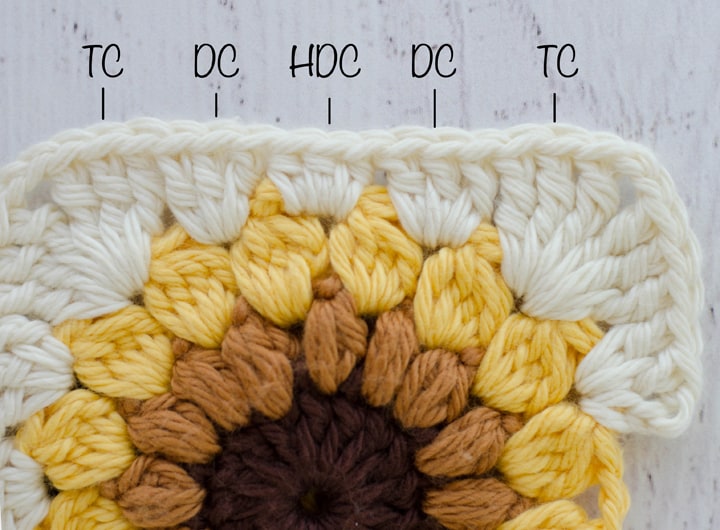
It is really important to remember WHAT stitches comprise the final row as you work. The instructions below will not tell you what cluster stitches to work and instead focus on the joining aspect, so that the directions can be followed for any type of granny square. If you find your work is puckering or cupping, make sure you remembered to work the correct stitch height for the afghan square when joining the final row.
Getting Started
Before joining blocks, it is a good idea to have an understanding of the path you will be working. This is a sample diagram of 9 squares, but the concept is the same for joining an afghan of any number of squares.
This is a continuous join, which means, you can join the entire afghan with very minimal weaving in of ends! To do this, you start in the top right corner of the first block. Here is a mini diagram of how this works:
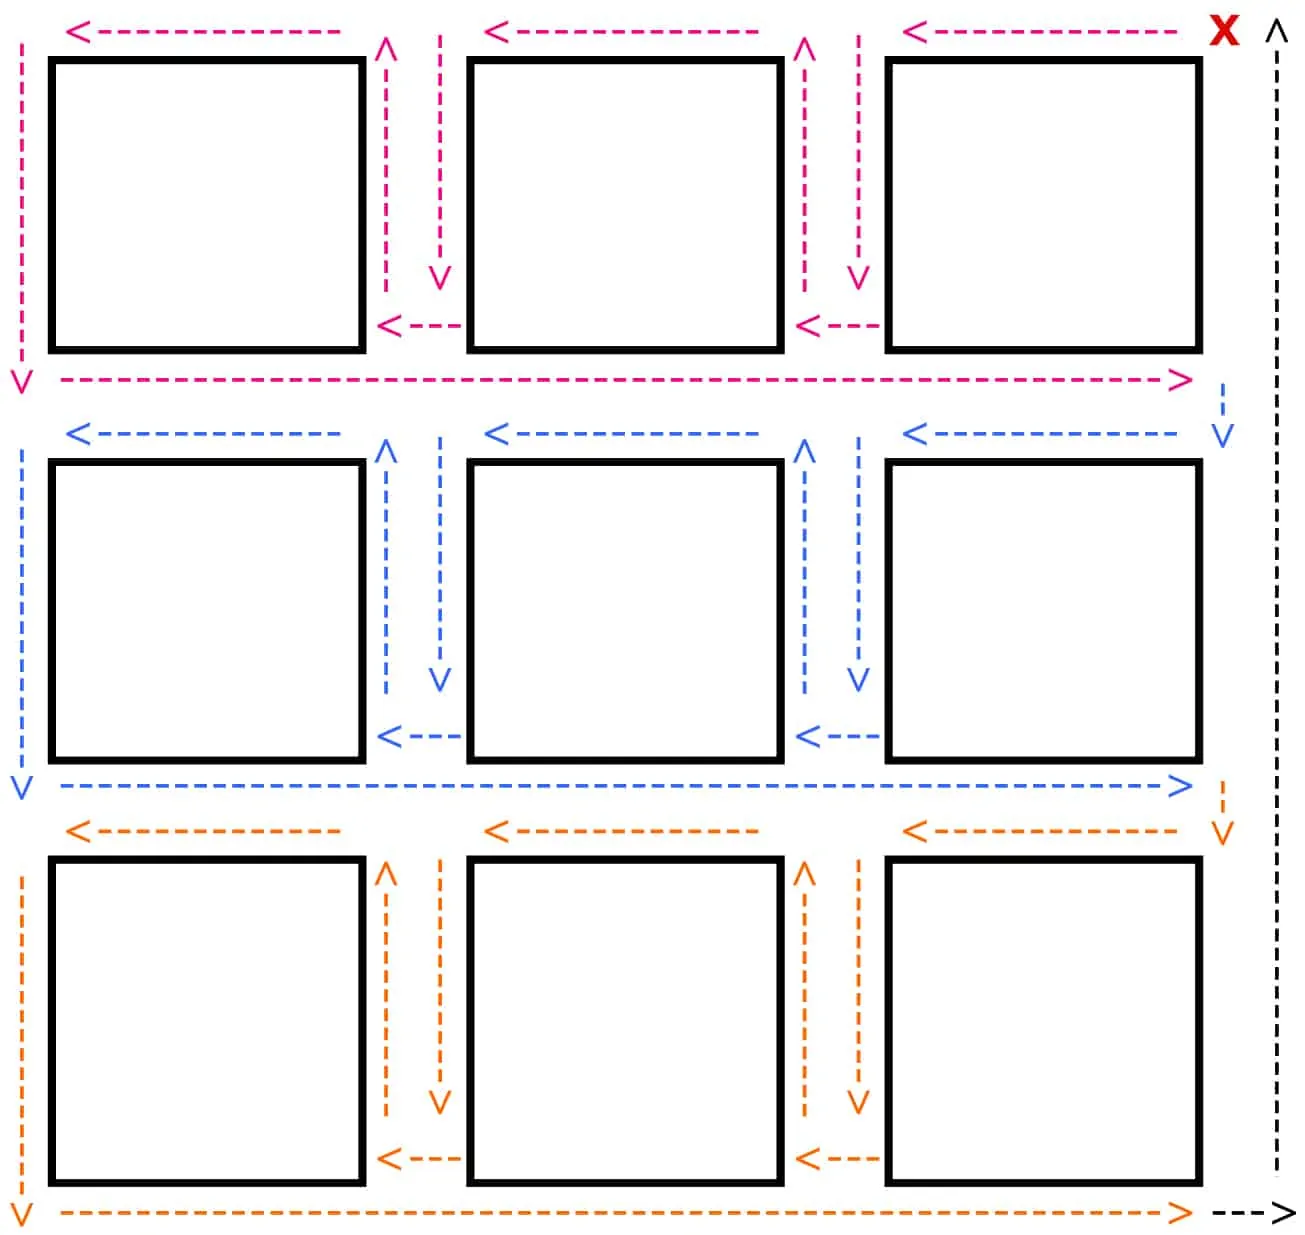
The diagram shows a 3×3 block set up. If working an afghan that is 9 squares wide by 11 squares tall, row 1 (in red) would continue until all 9 blocks of the first row are joined, then the bottom of the first row is worked. Then row 2 (in blue) is worked, adding 9 more blocks, then the bottom of that row is worked.
As you follow the path of the arrows, you will be turning your work. I find it best to understand the technique by identifying each “new” situation and then working through the steps to “solve” that area. So, for example, as you crochet, you might come up to a point where 3 corners join… pause and think “how do I join 3 corners?” and then do that.
These instructions take you step by step through the process.
Step 1: Working the First Block
Join yarn in the corner of the starting block (I used a standing stitch to start my corner). Work the 3 cluster stitches that comprise the corner. In this case, I worked 3 treble crochets, but if you working a standard granny square, you would work 3 double crochet stitches. Then work the rest of the stitches on that side, the corner stitches and stitches to the 3rd corner. Work the first cluster of stitches for the corner:
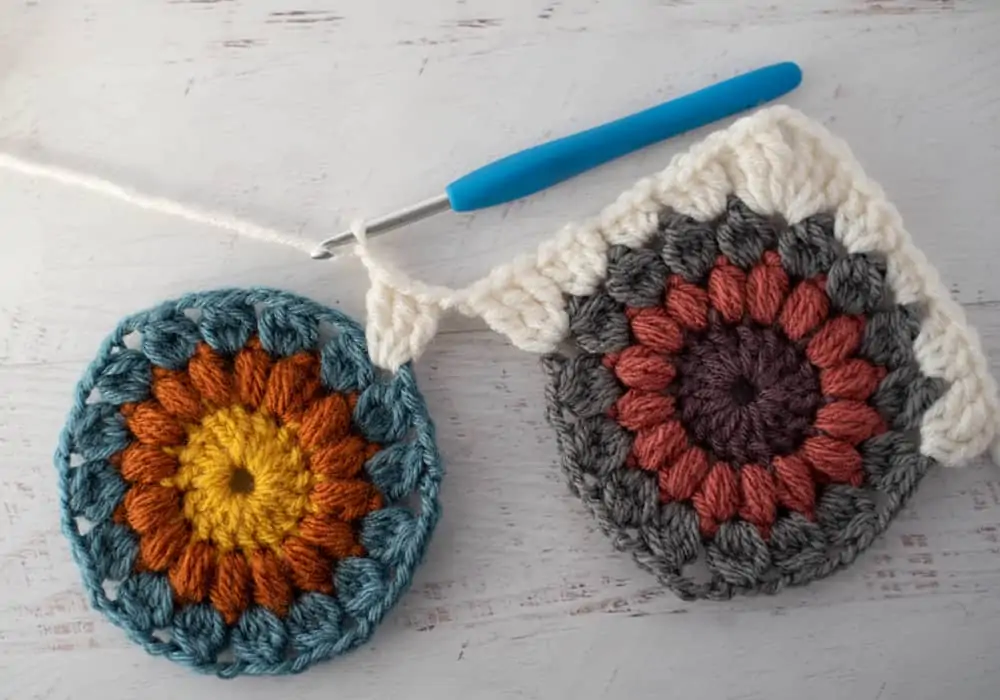
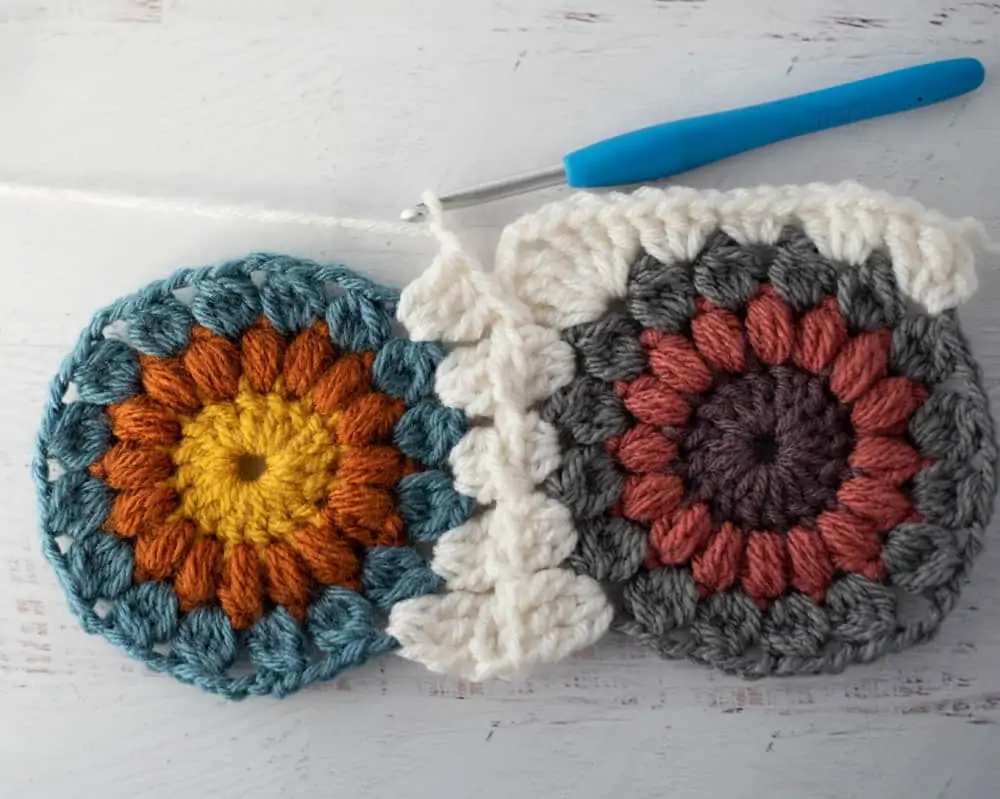
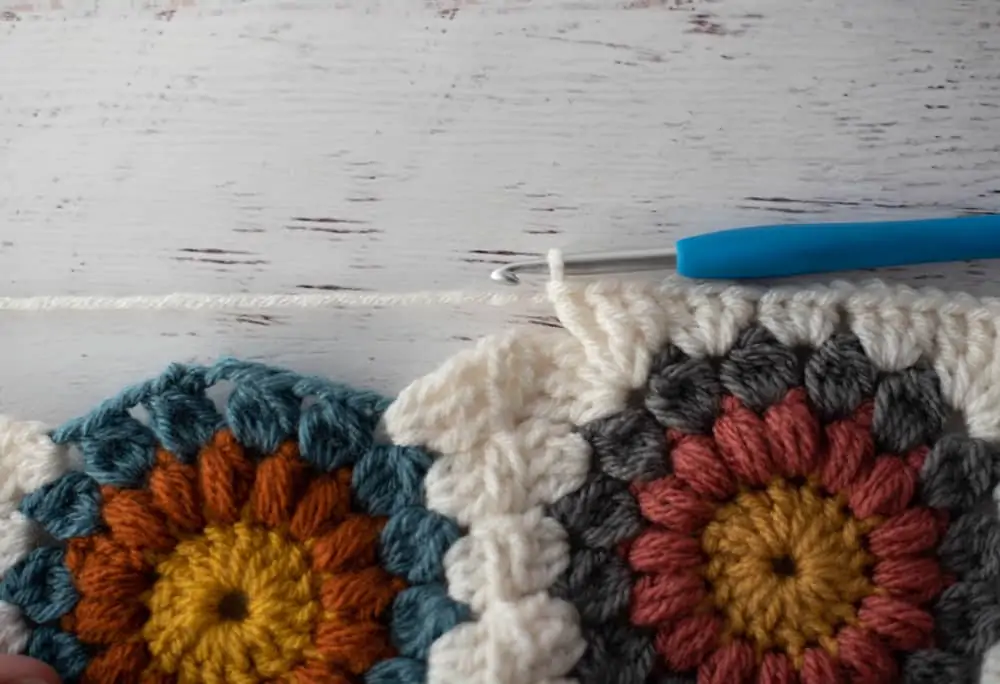
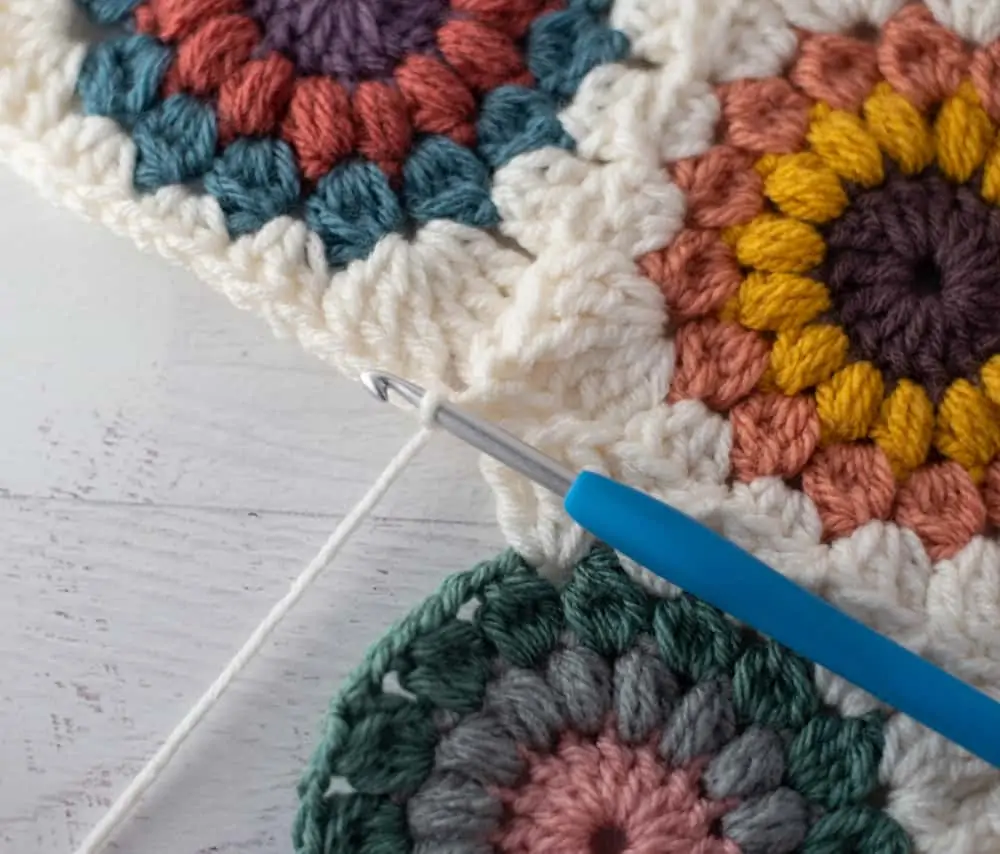
Step 2: Joining the 2nd Square
Then chain 1 and work the 3 stitches for the first half of the corner of the next motif. Note that the 2nd half of this corner won’t be worked until much later. For now the work looks like this: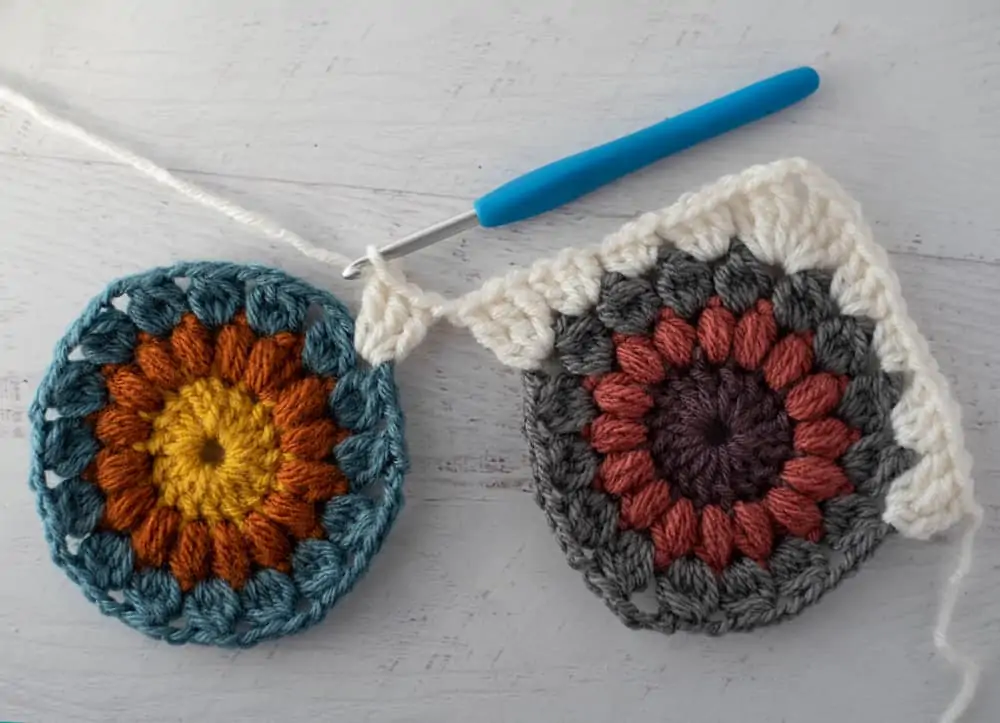
Then chain 2 to get ready to join in the next step. At this point your work looks like the below:
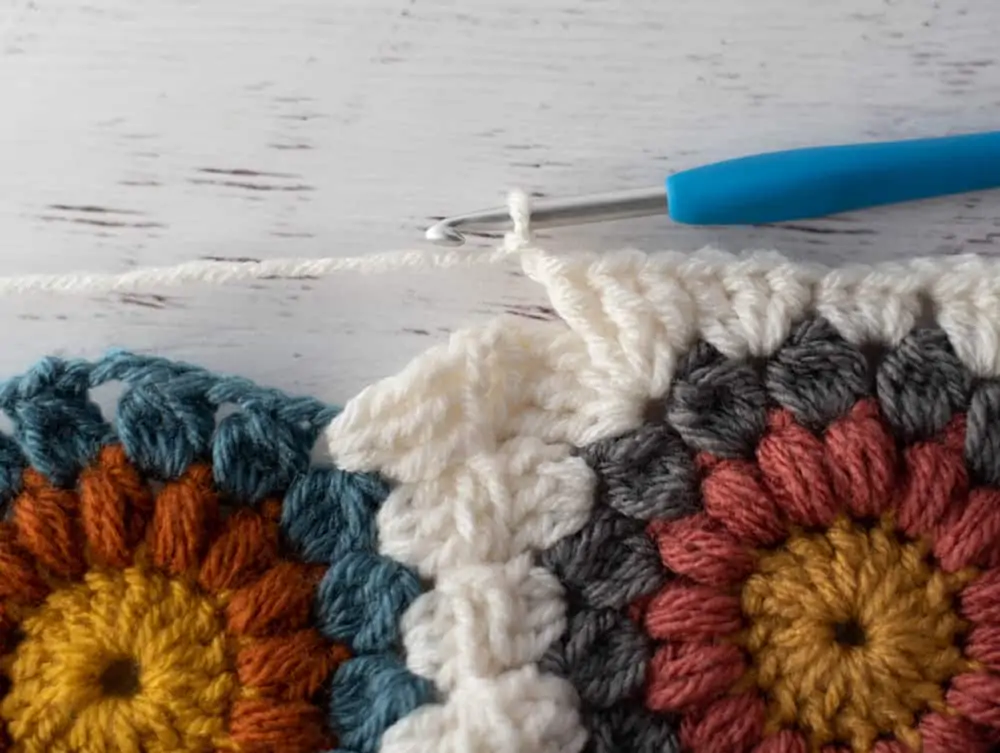
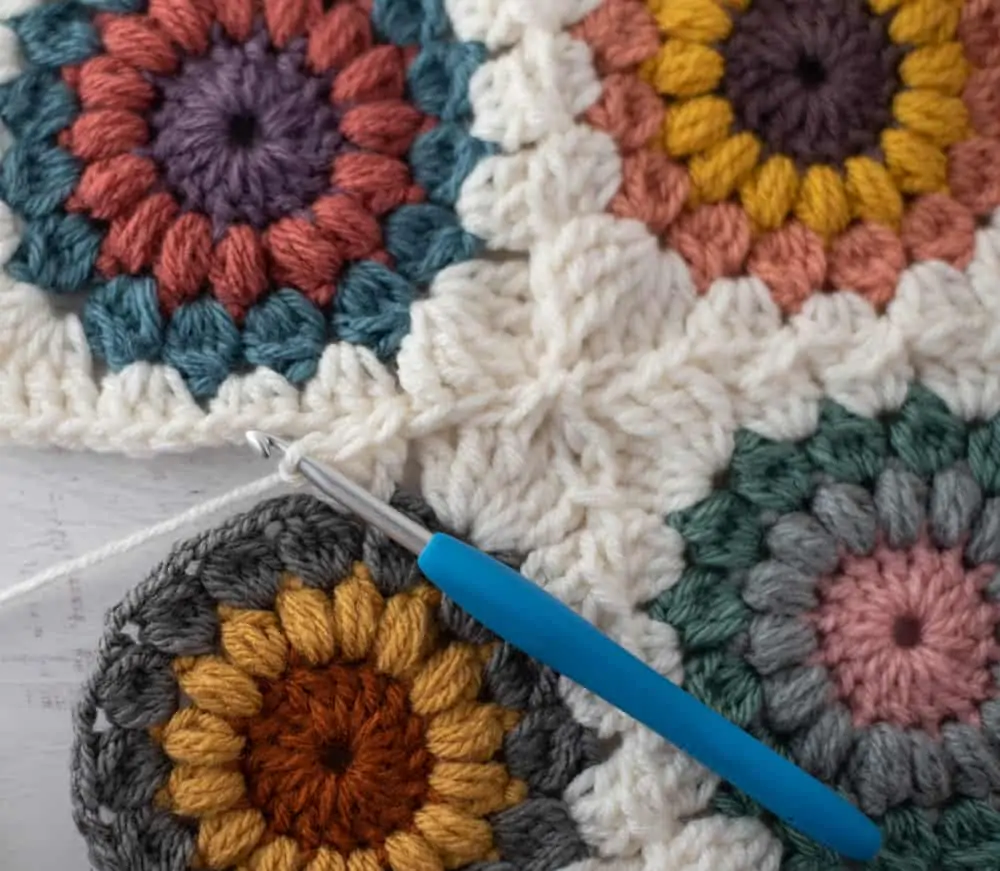
Now take your hook OUT of the work, leaving the working loop free for a second. Insert hook in the first space of the first square from the top of the square to the bottom. Use the hook to grab the loop you just dropped and pull it through. Take a moment to make sure you work looks like this:
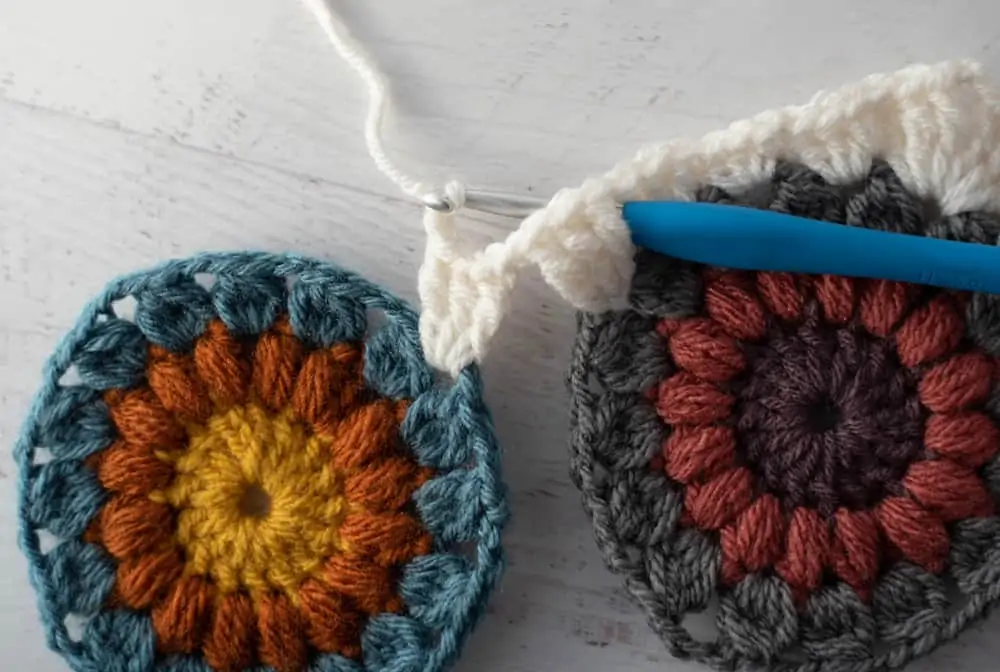
When you pull the loop all the way through it looks something like below:
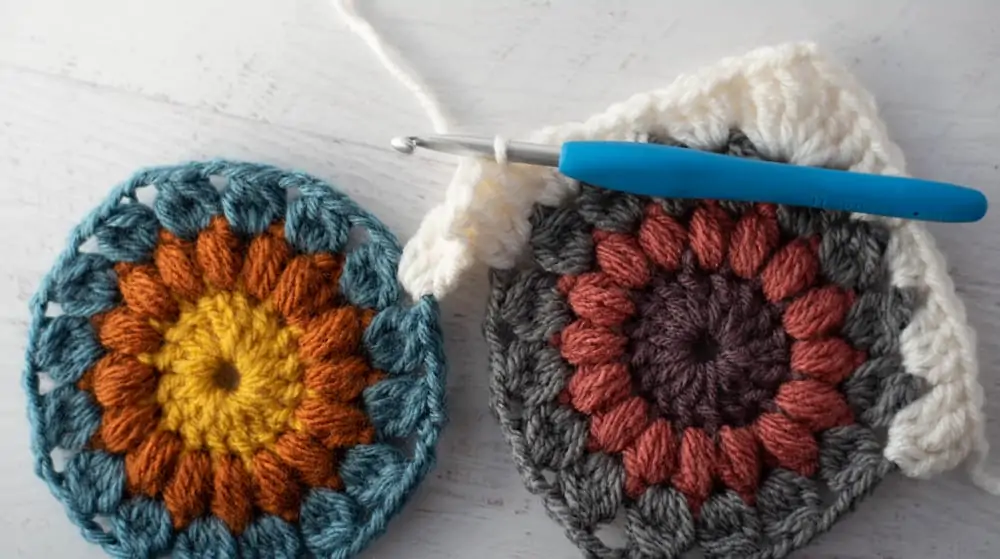
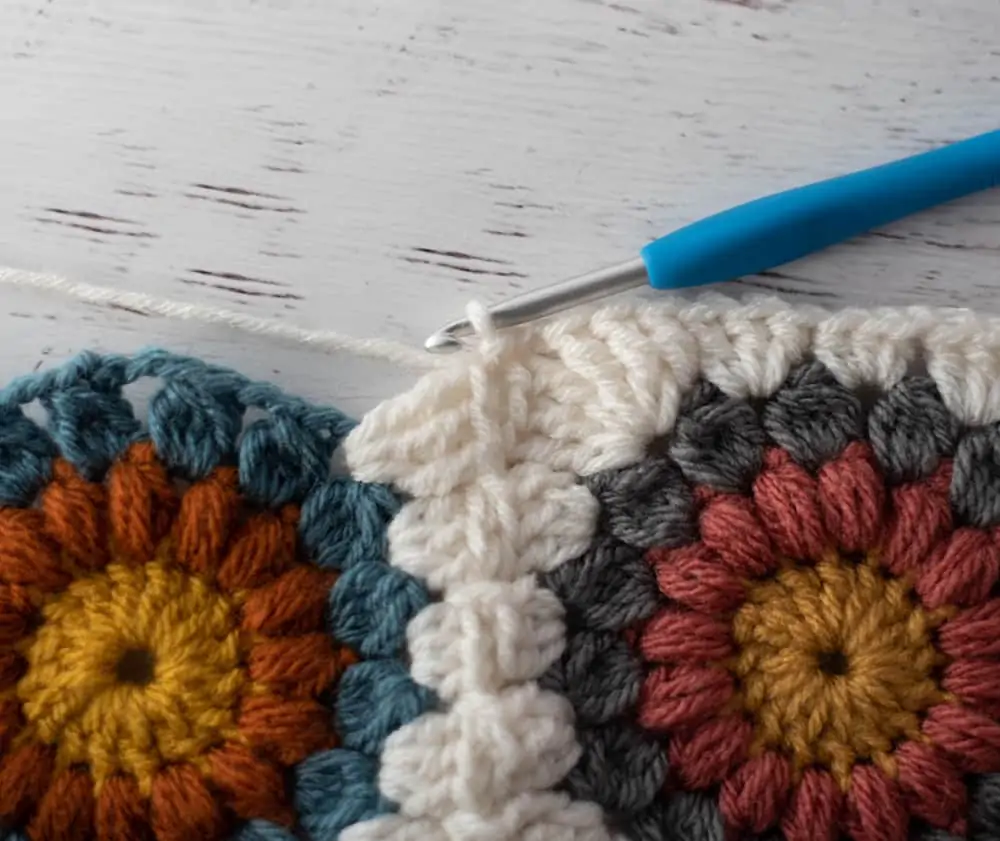
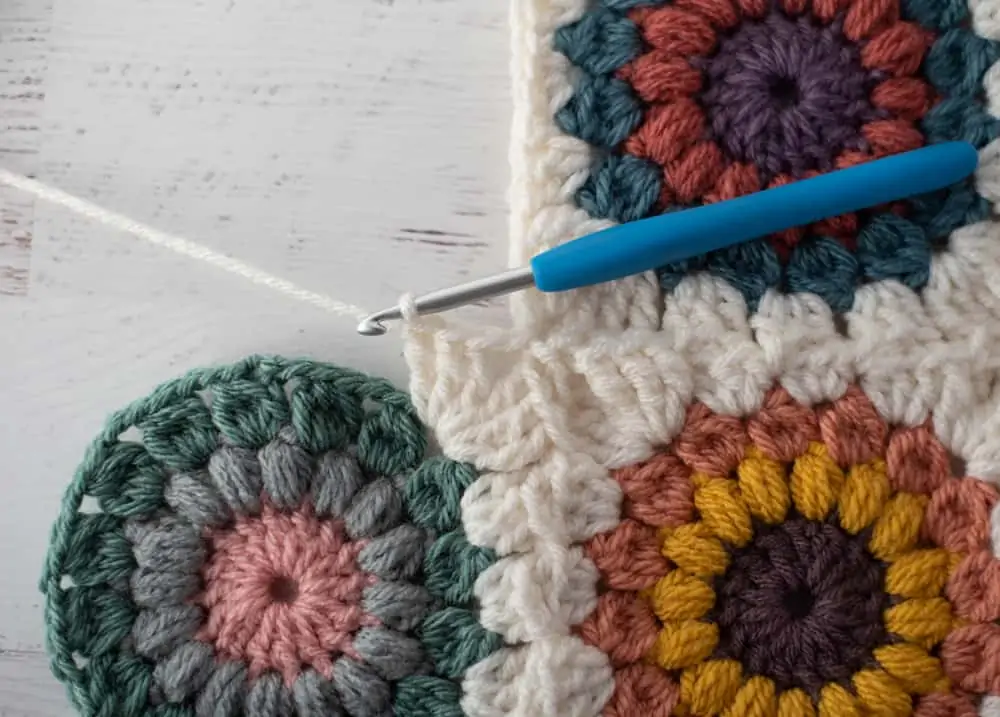
Now work the next group of stitches into the second motif. In this case, it is 3 double crochet stitches. Note that this is the group of stitches directly next to the corner stitches. The other part of the corner will be worked later.
Continue to work the stitches on the side of the second motif, connecting each space with the adjacent space on the first motif in the same way all the way up the side.
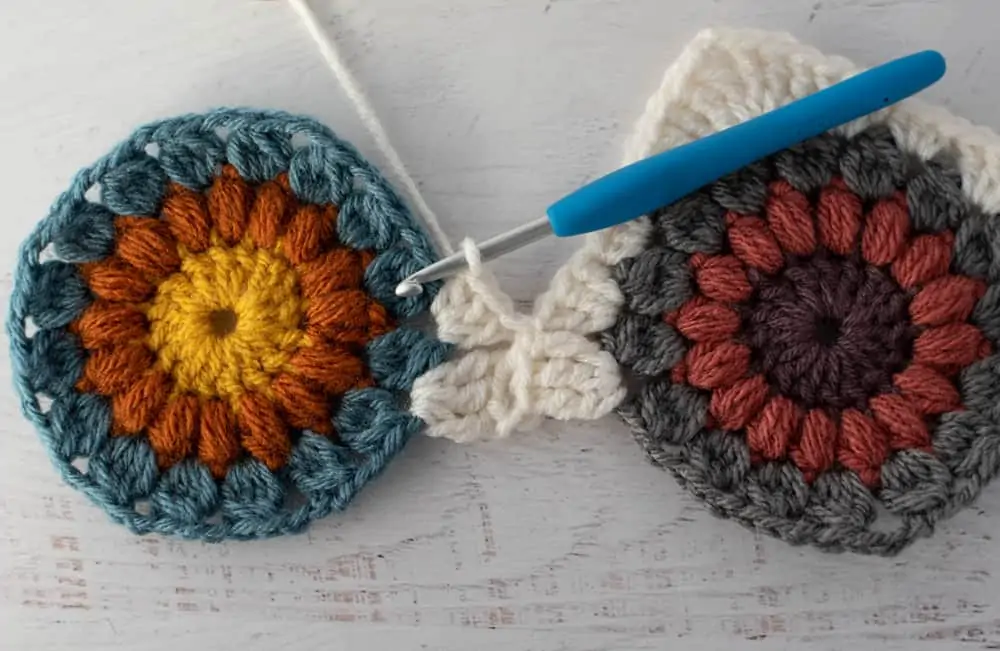
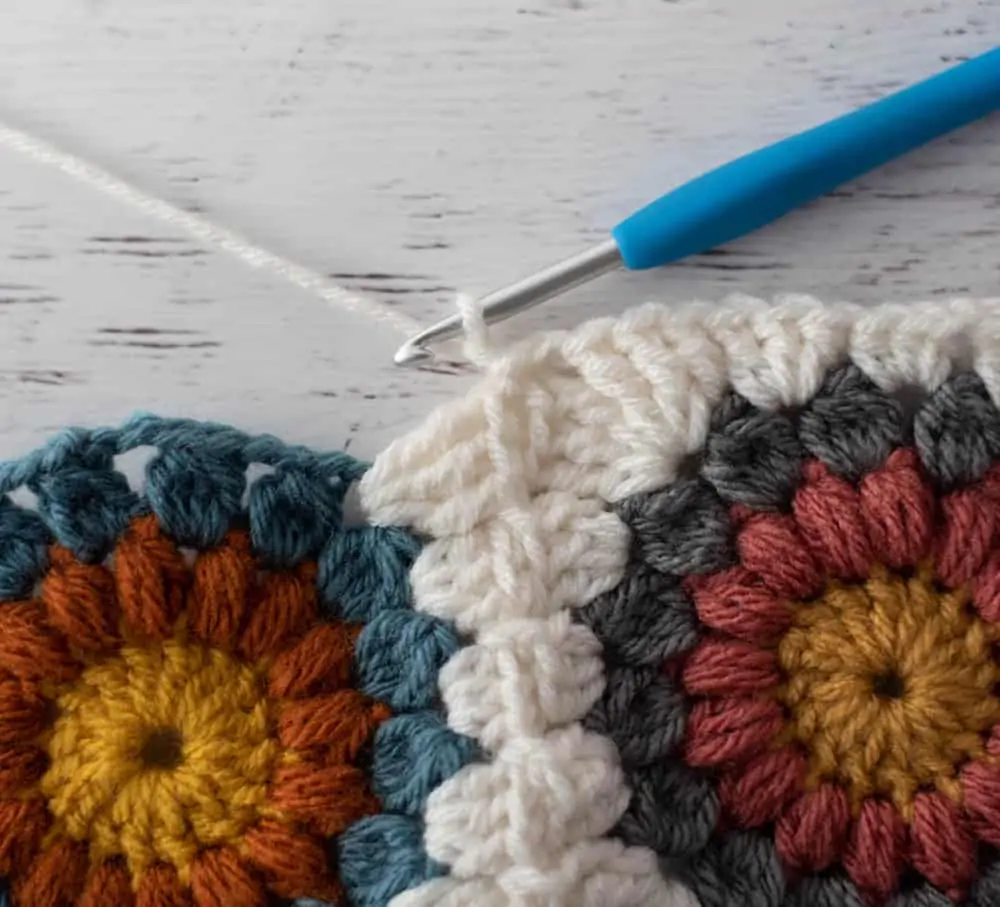
Step 3 Joining the Top Corner
In the corner of the 2nd motif, work the first half of the corner. In this case, because we are working a sunburst granny, it is 3 treble crochets. (If you are working a traditional granny square or another pattern, it maybe be a different combination of stitches.) After working the 3 stitch, chain one.
Remove the hook, leaving the loop free. Then insert the hook in the adjacent corner and pull the loop through:
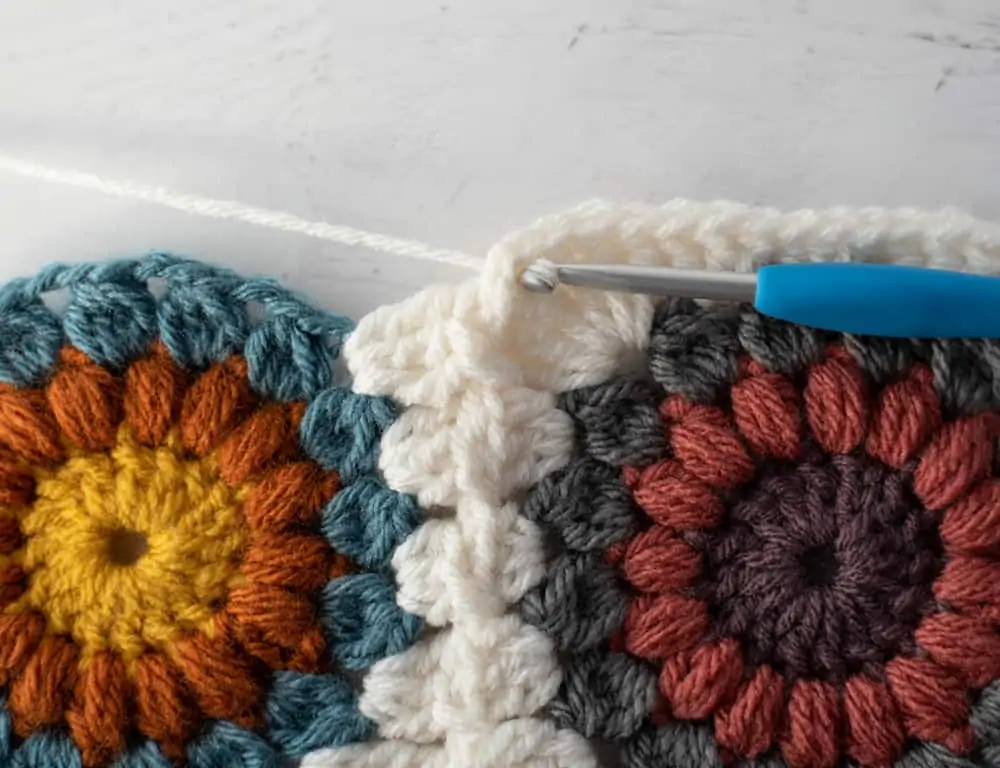
Chain 1. This completes the chains needed for the corner for the 2nd motif.

Then work the stitches for the rest of the corner (in this case 3 treble crochet stitches) as shown below:
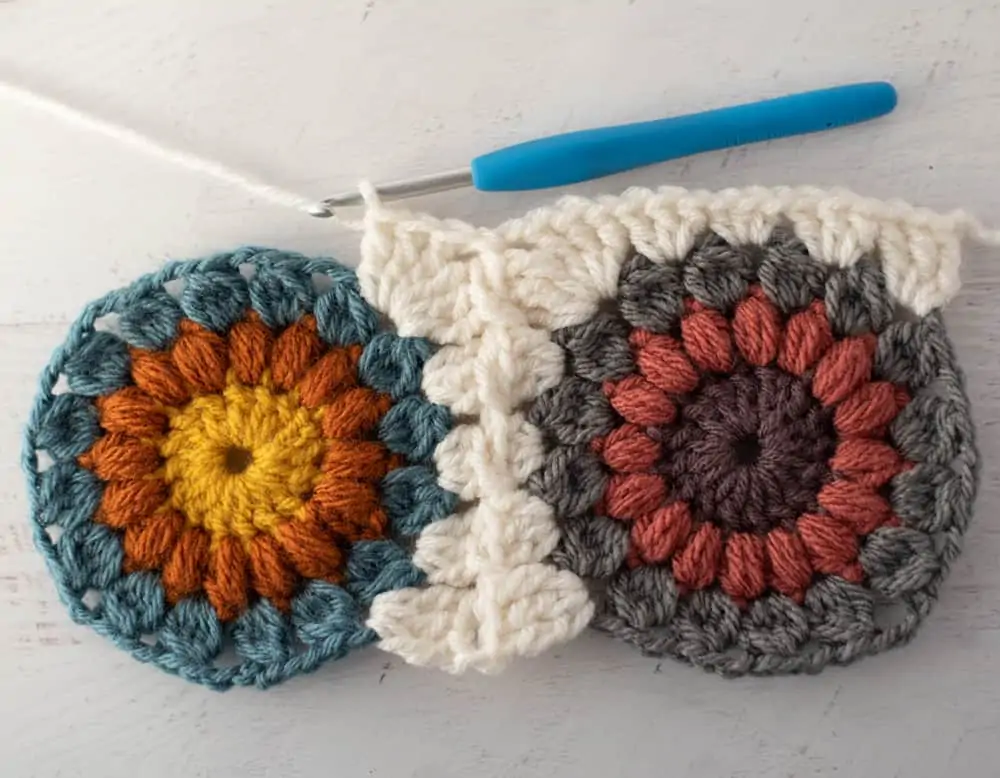
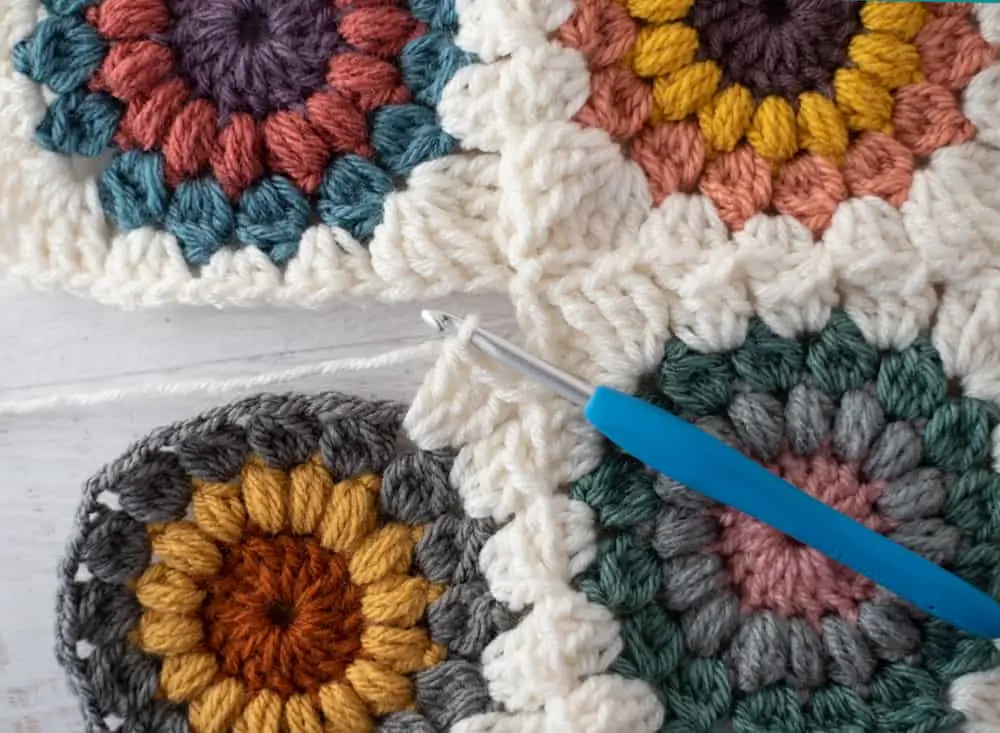
Continue joining all the squares in the first row by repeating the above steps. Work the side, corner and 3rd side of the motif. Then join the next motif and so forth until all the motifs are joined for the row.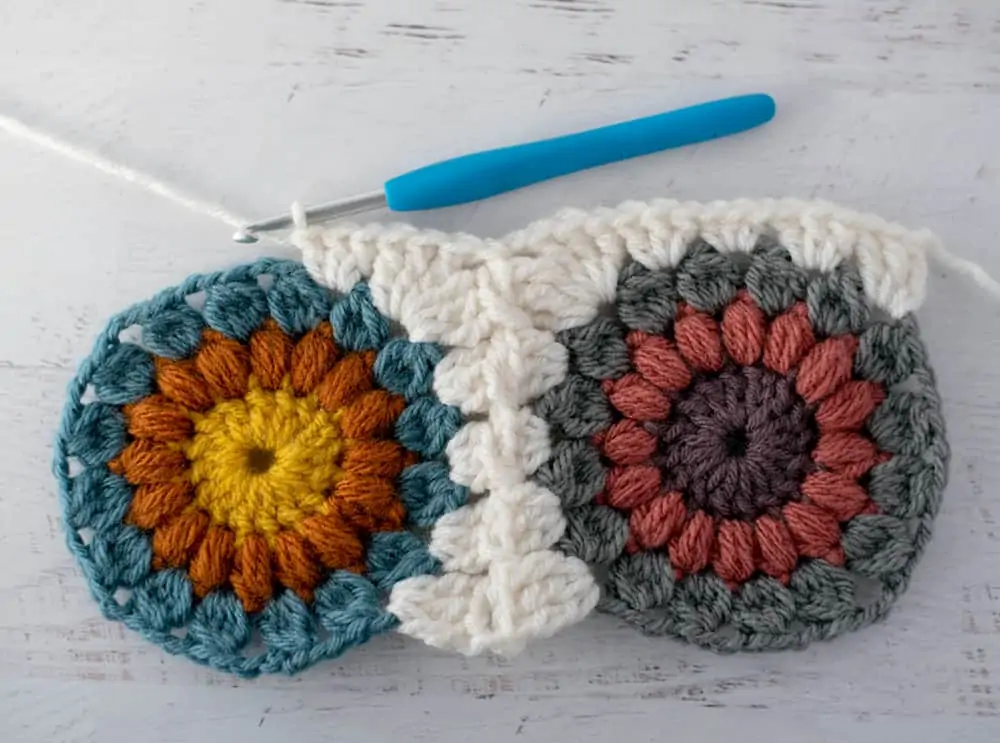
At the end of the row, turn the work and work down the side.
Step 4 Working the Bottom of the Row
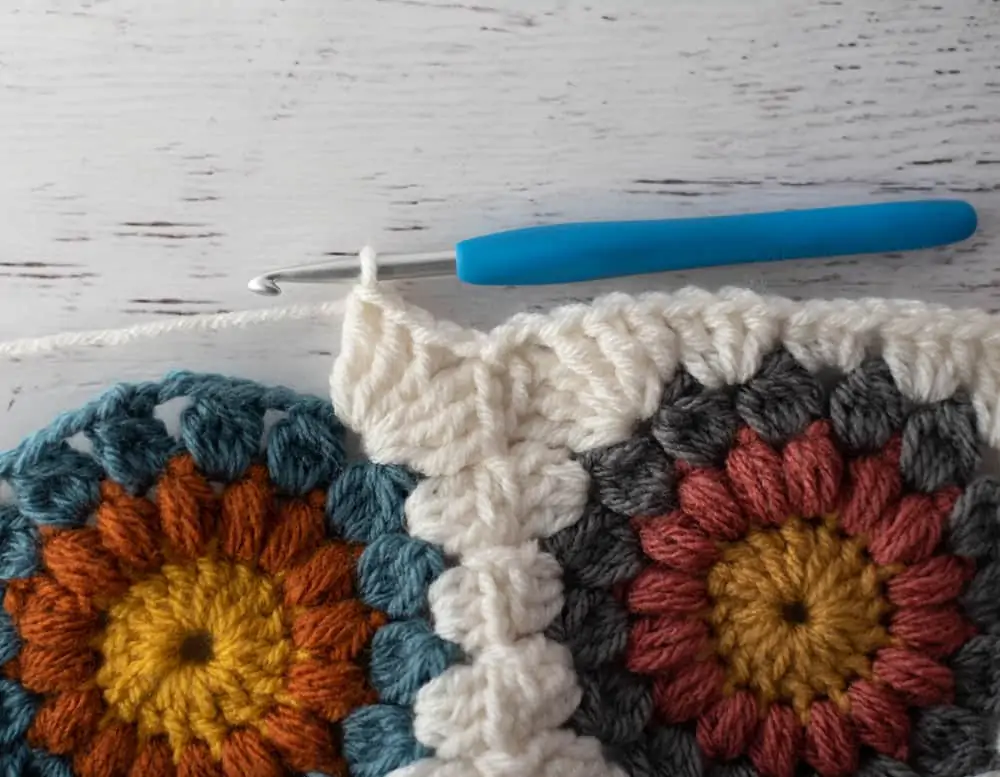
The next step is to work across the bottom of the first row. Continue to work in the pattern until you come to the corner. Work the 3 stitches of the corner. Note that you previous worked the other side of this corner. At this point it looks like the below:
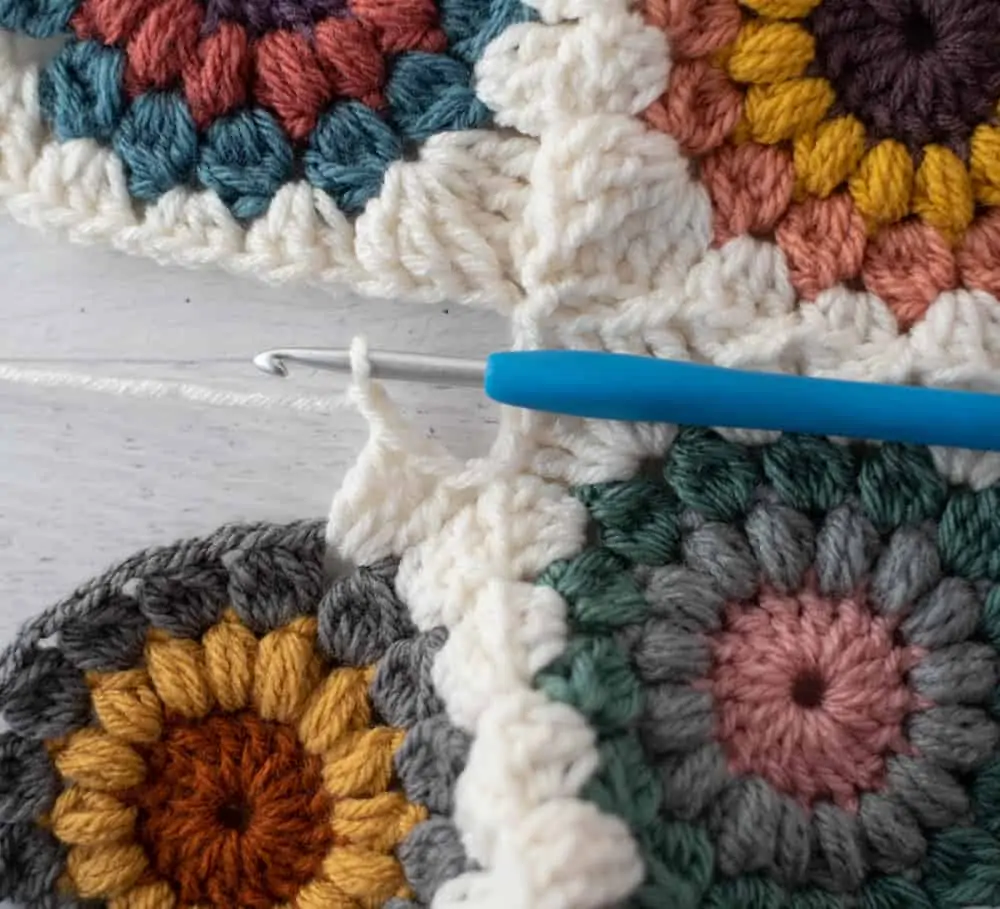
In this next step, we complete the first corner, join to the next square and complete that square’s corner. It may look and feel awkward, but it’s pretty easy. Here’s how it is done: First, chain one:
Then, without removing your hook, slip stitch into the space between the joined clusters:
Chain 1 for the corner space on the 2nd square:
Then work the remaining corner stitches for the 2nd square.
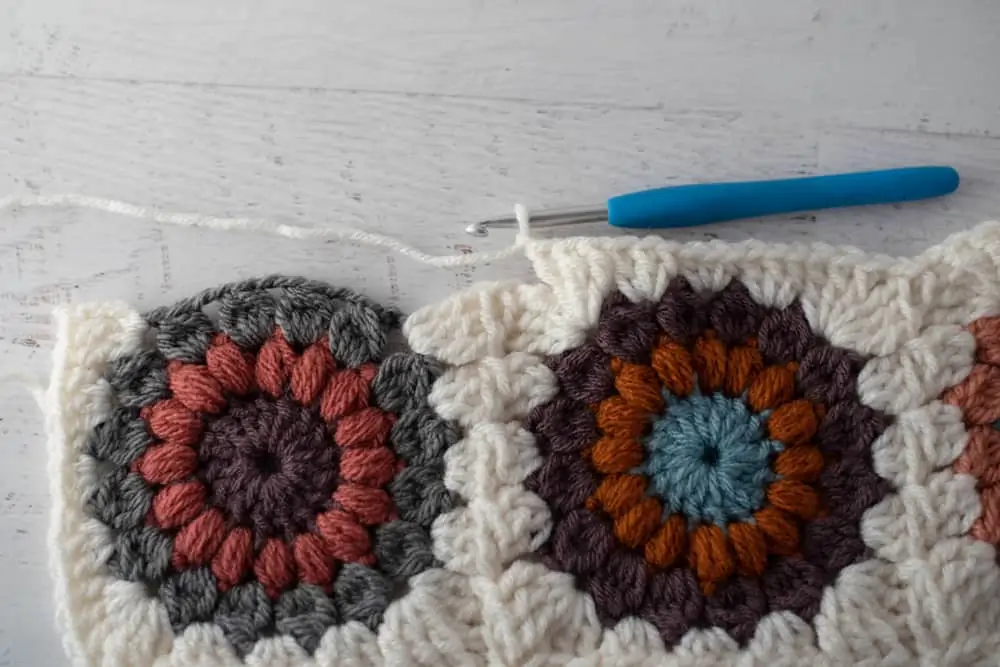
Continue to work the stitches across the bottom of the row, joining the squares together as you go. When you are done with this row, the squares of the row are complete with the final row of stitches for the square.
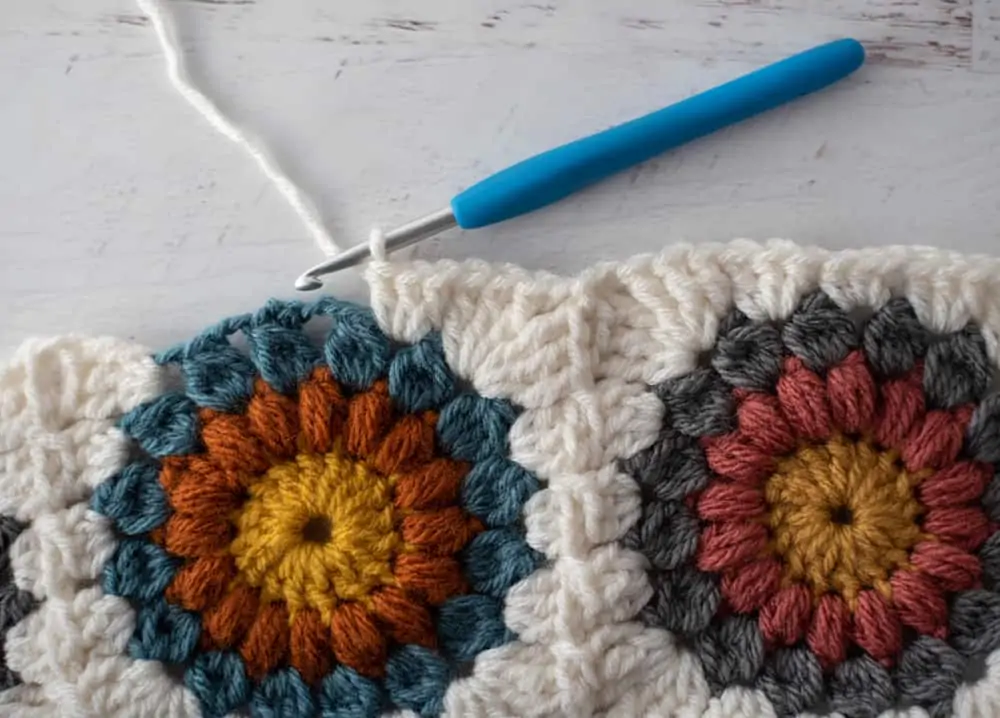
At the end of the row, it is time to crochet and join the 2nd row of squares.
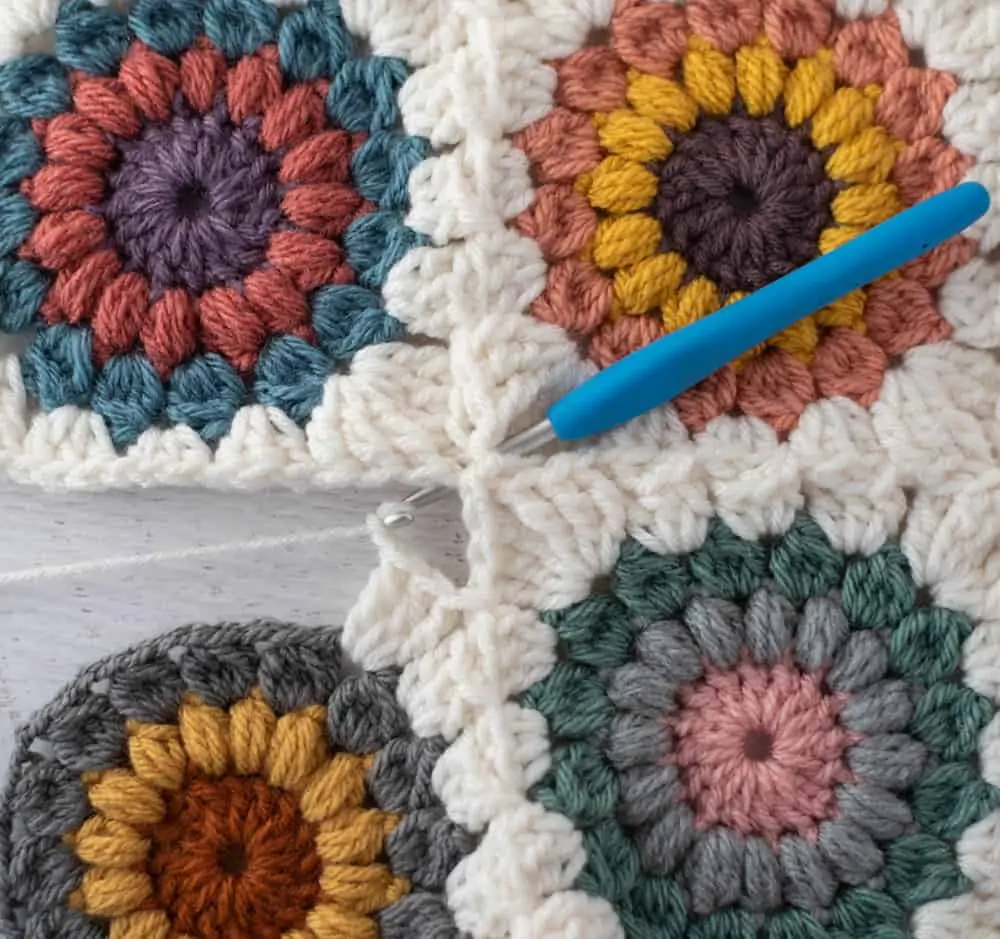
Step 5 Joining 3 Squares Together
Work the first side of the first square of the next row as you’ve done so far until you come to the point where 3 squares come together. In the new square, make sure you’ve worked the first 3 stitches of the corner (in this case, 3 treble crochet stitches).
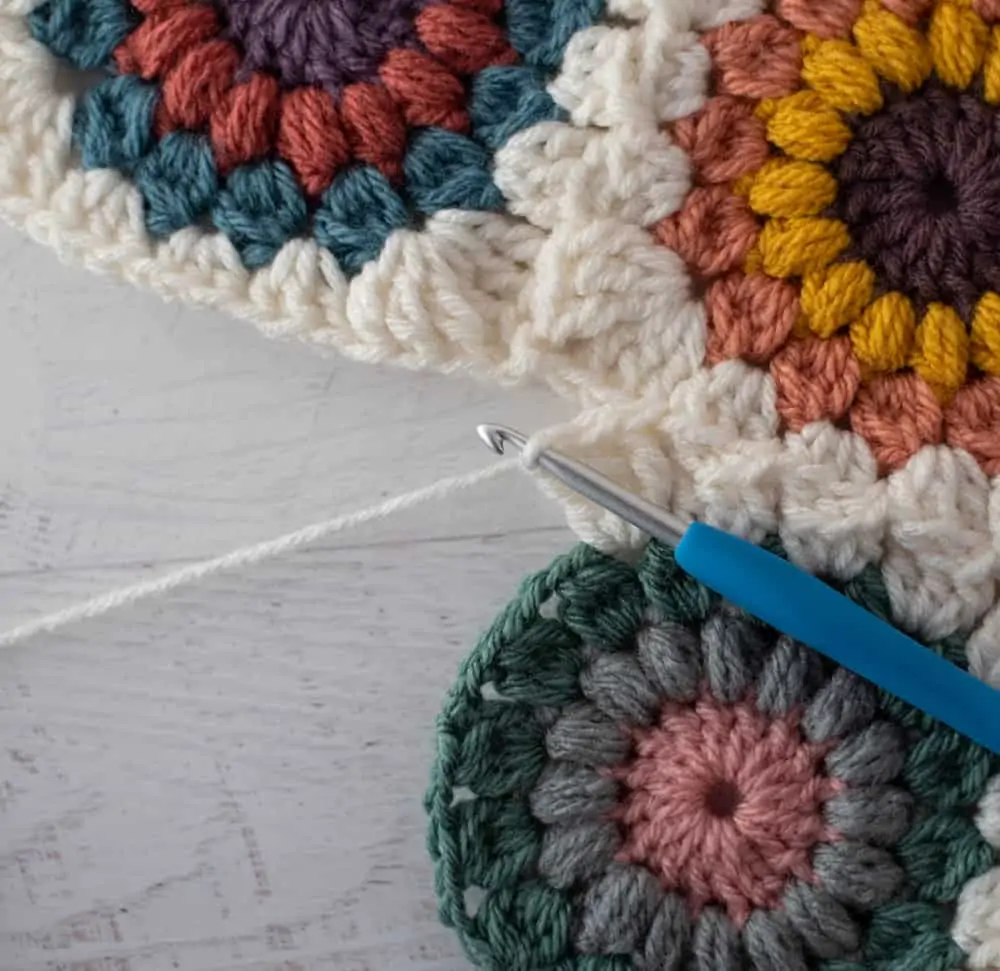
Chain 1, then remove the hook, leaving the loop free. Insert the hook into the corner of the block that is diagonal to the new square and pull the loop through. Take a moment to make sure you are joining to the correct corner like the below photo. You are joining to the square that is on an angle to the new square (and not the one right above it):
Then chain one:
Continue to work the stitches along the side of the newly joined square, continuing on the path and working as in the past.
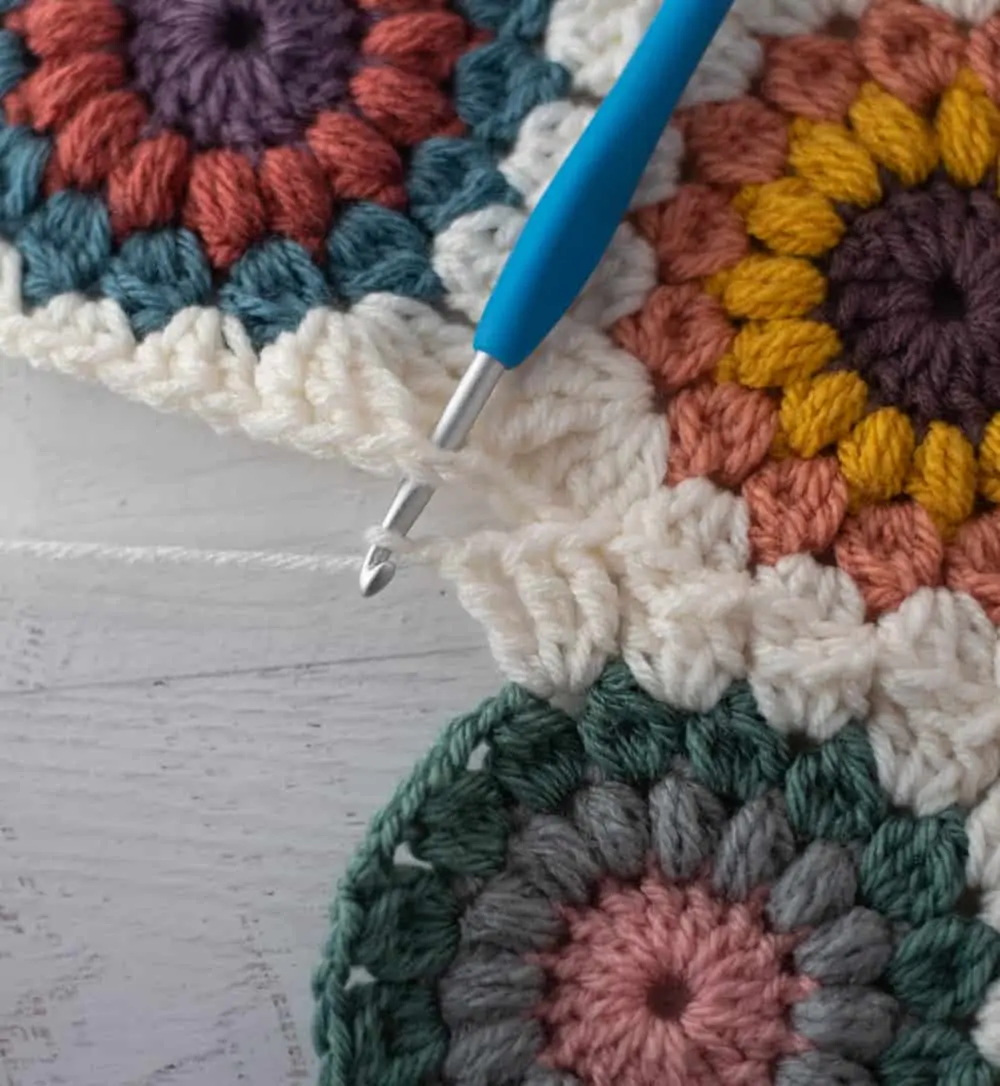
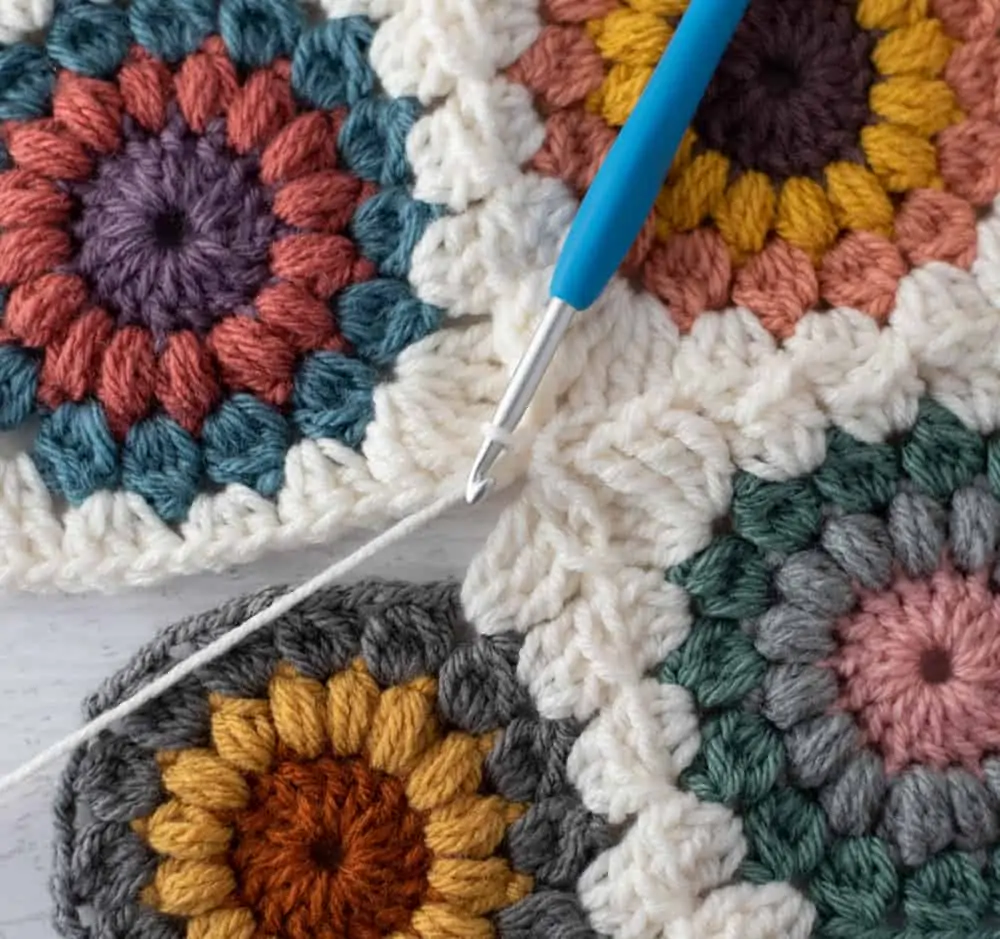
Step 6 Joining Four Squares Together
Take a deep breath, because you are in the home stretch. This is the last challenge of Join As You Go and after this next step you have everything you need to know to finish join as you go granny squares! Let’s dive in.
At this point, you’ve worked the 3 stitches of the square you are joining in (which is the first half of the corner). Your work looks like the below:
There are a few things different about this join. First, chain TWO:
Remove your hook and insert it into the corner that is diagonal from the square you are joining. This corner already has a lot going on so pause a moment and make sure you are joining in the correct corner space. Then pull the loop through:
After joining, chain 1
Then work the 3 stitches that comprise the rest of that corner.
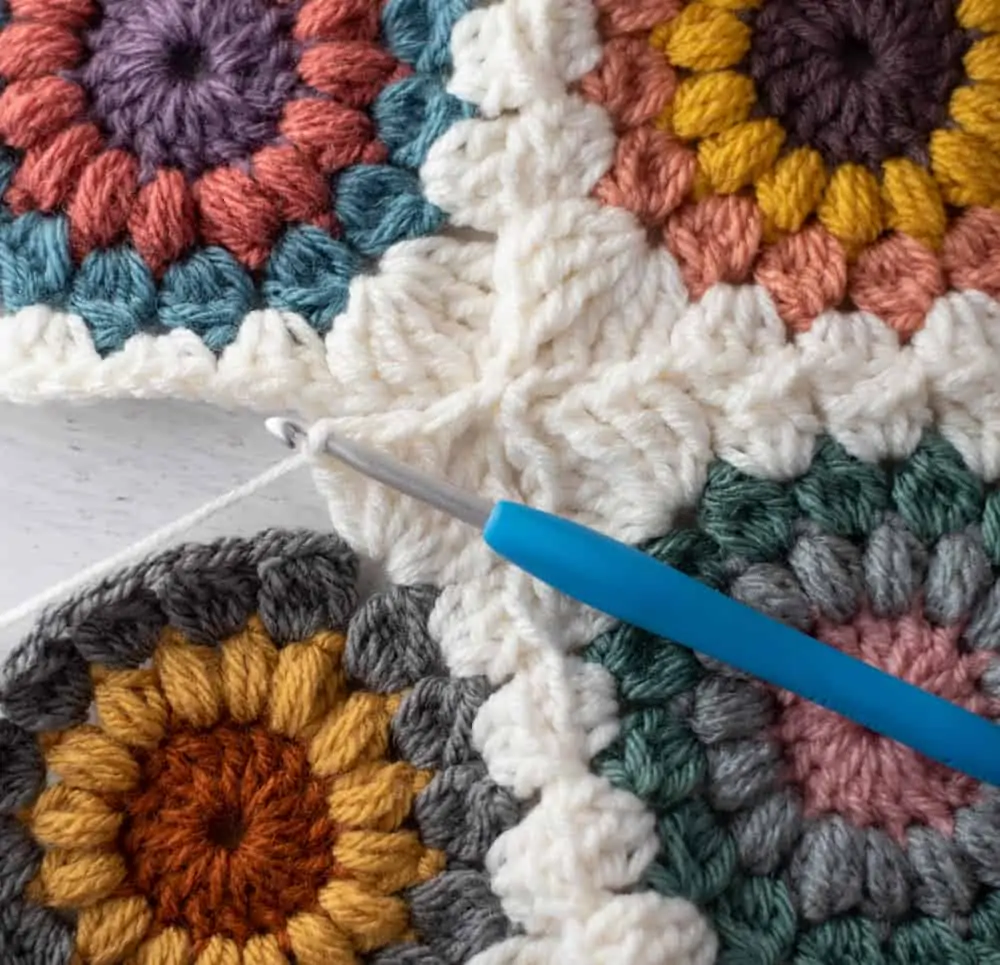
From here on out you just continue to work in the pattern. Work the next stitches on the new square:
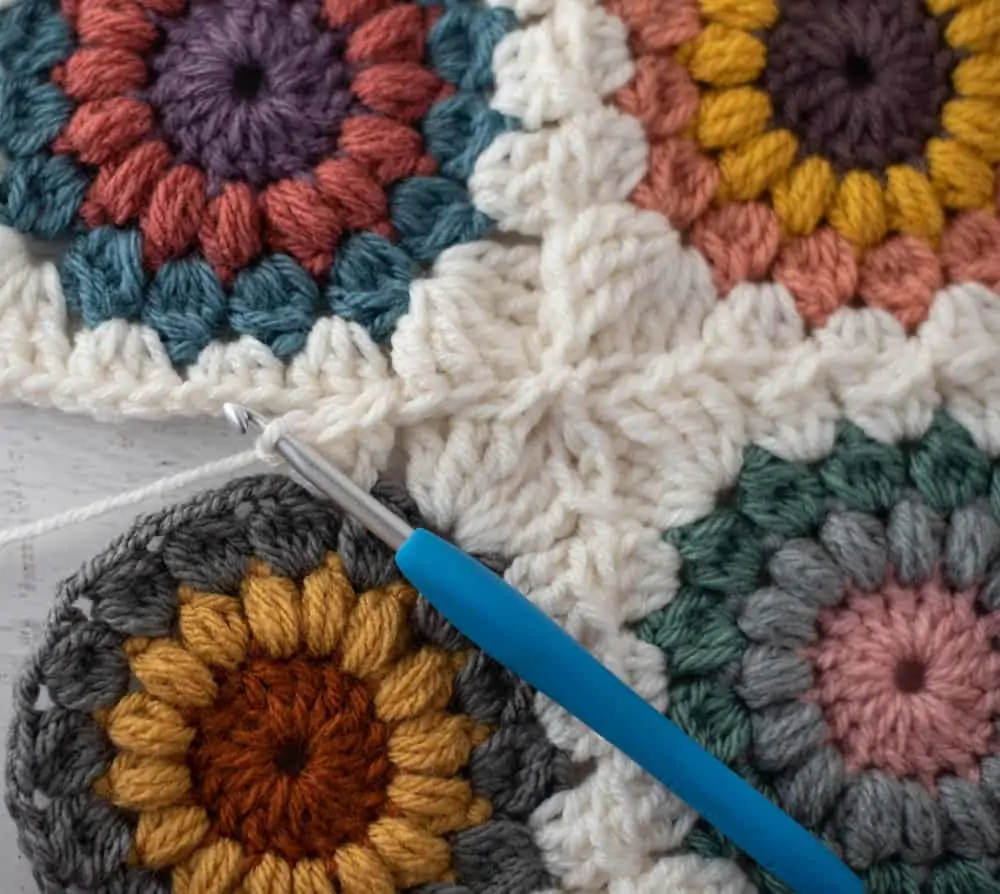
Then continue to work back forth, adding new squares and working the joins and edges as already shown.
When all the rows are joined, work up the unfinished side, using the same techniques already shown.
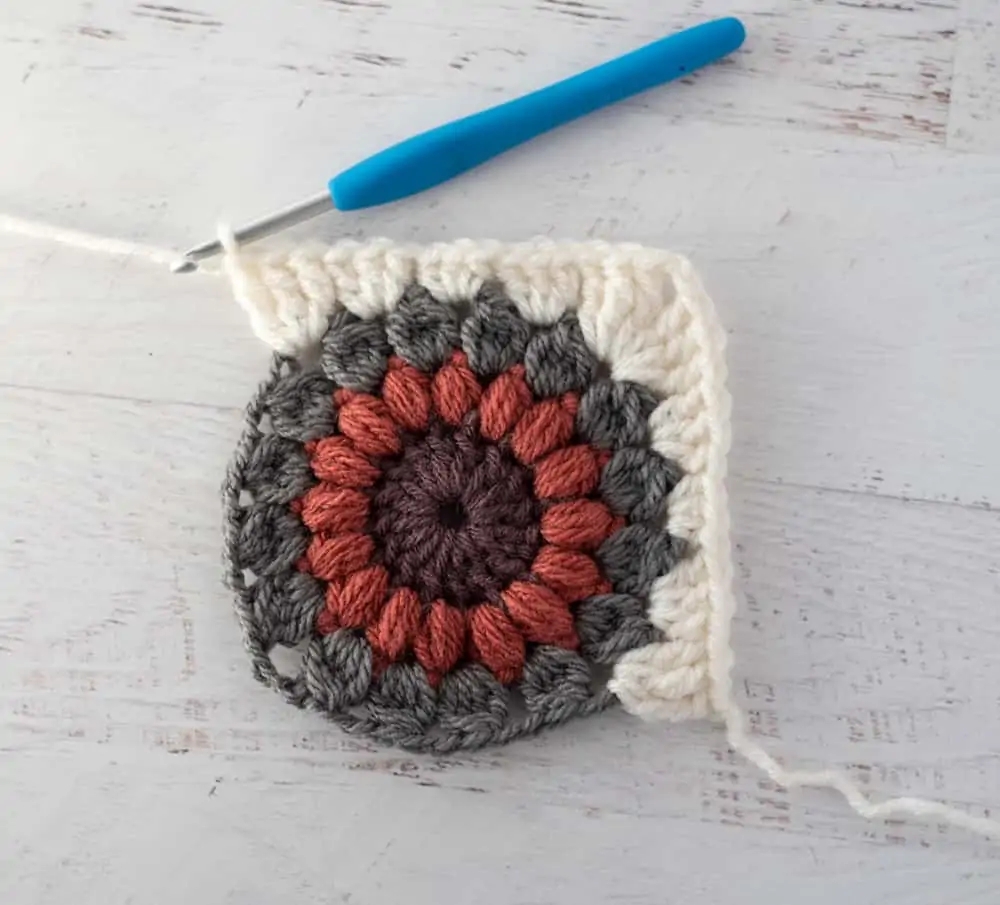
In the very last corner, complete the corner stitches by working the stitches, chain 2 and joining to the starting cluster. Weave in all the ends.
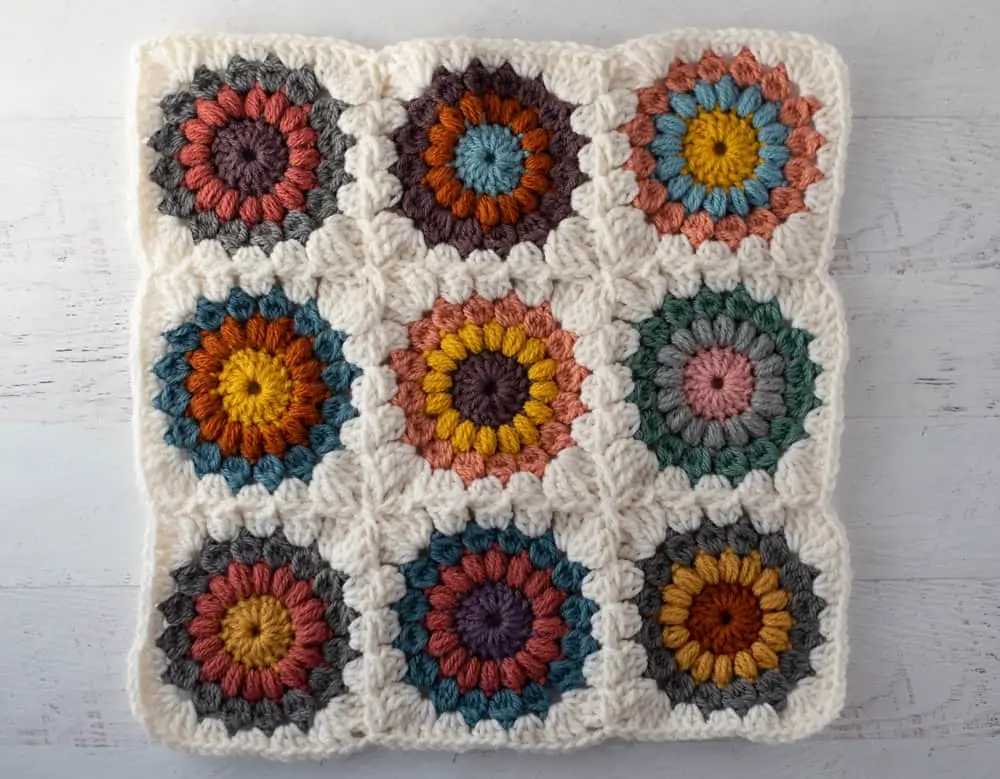
Here is an example of a finished 9 square piece. Note that the edges may not be perfectly square and straight, but will correct when the border is worked. I did not block my Sunburst Granny Scrap Afghan, but you certainly can, if you prefer.
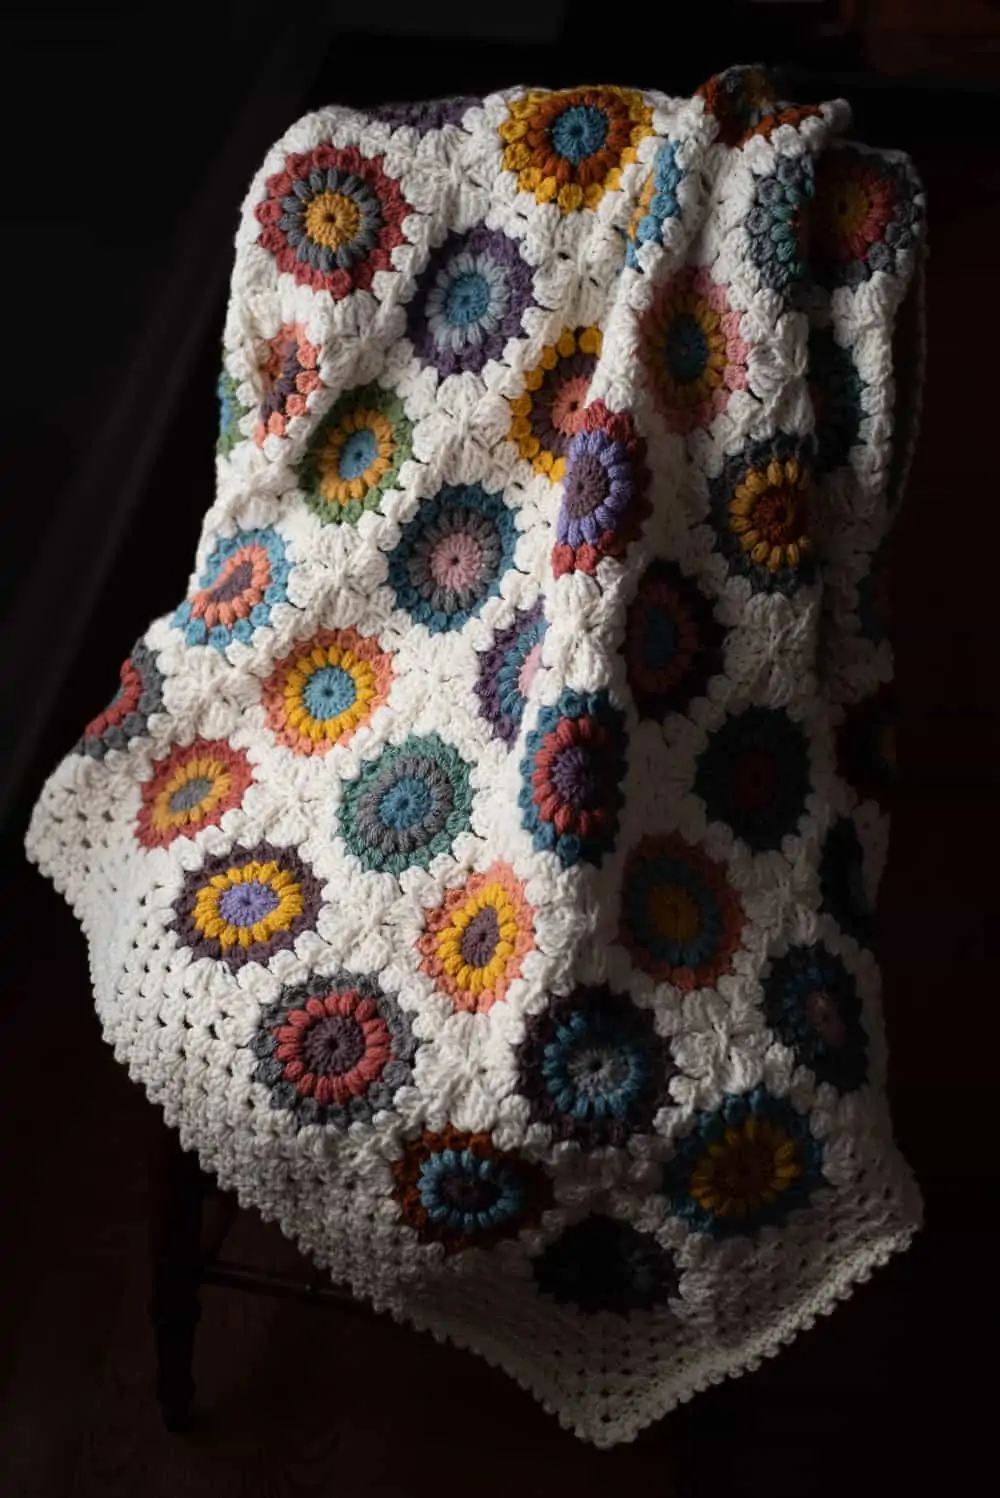
Now that the squares are joined it’s time to crochet a border! Be sure to check out the Bloom Anyway Granny Square Blanket pattern to finish off this gorgeous afghan!
I love seeing your finished projects! If you enjoyed working Join As You Go Granny Squares, I’d love to see yours on Instagram, be sure to tag me @crochet365knittoo. If you are on Facebook, stop over to the Crochet 365 Knit Too Facebook page or pop over to the Crochet365KnitToo Club and share a photo! I’d love to see your work!
Pin Now Crochet Later ⇨
So you join the first row together square 1, 2, and 3. (the top row)then you crochet across the bottom of that 1st row and then connect the 4th square? thank you
Yes. If you follow the diagram with the arrows, that’s really your best bet. That way you know where the 4th square goes.
Hi Cheryl, I love how you have photographed the finished blanket in the dark but has come out so well – can you tell me how you did it. Thanks.
I know it looks like it’s in the dark, but I really shot it next to a sunny window. The camera just picked up the light reflecting off the afghan when it exposed for the shot which then darkened up the non-afghan areas. I do like the effect though!