
Buffalo Plaid Wristlet
This post may contain referral/affiliate links. Please read my disclosure for more info.
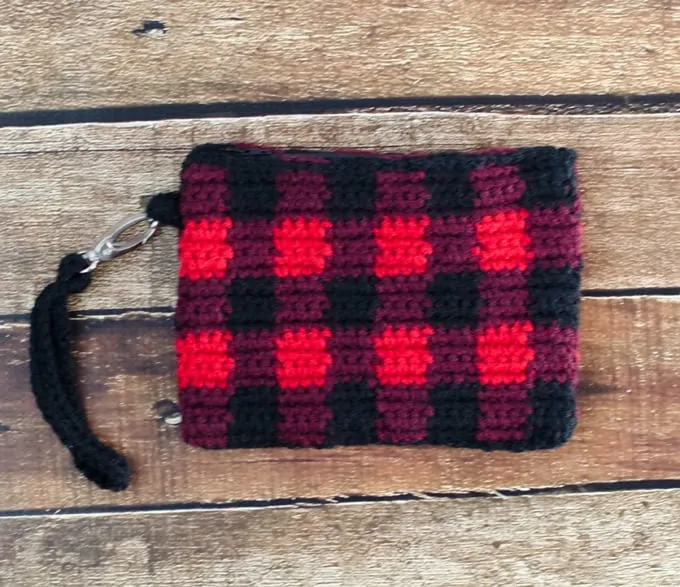
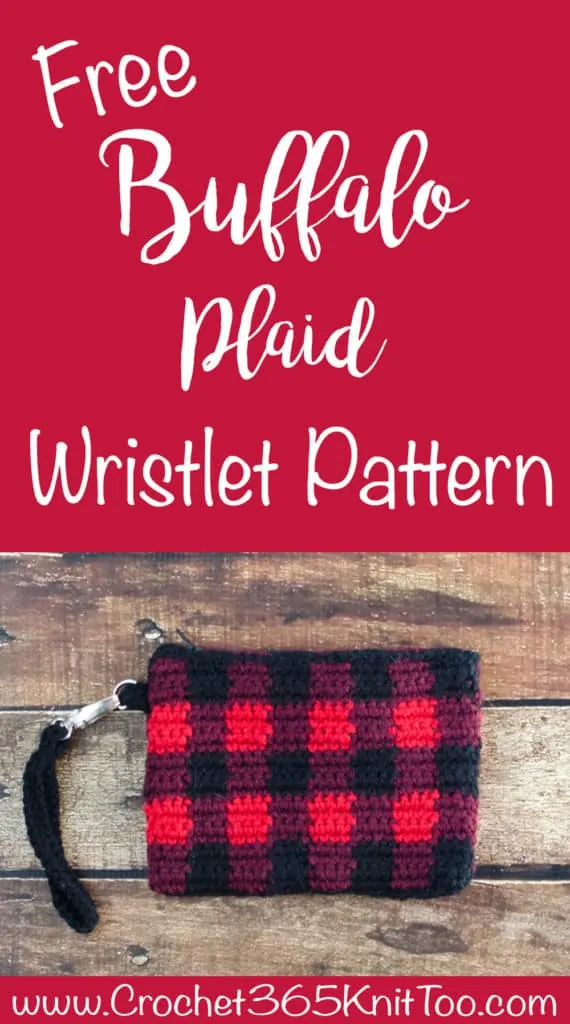
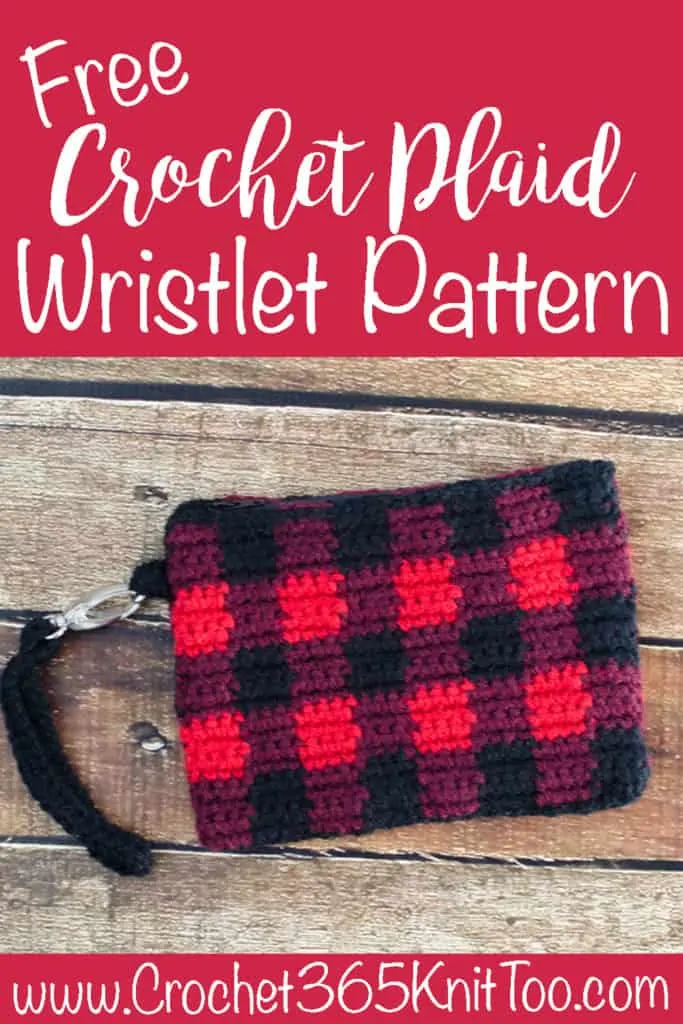
If you’re looking for a fun project that is quick to make, yet makes a fashion statement, look no further. Introducing the Buffalo Plaid Wristlet.
 Not too long ago, I stopped in my favorite coffee shop to get a Mocha (yum!) when inspiration struck! Or rather.. I saw a woman come in with a wristlet and I remembered everything I love about the lowly wristlet. It is small. It’s convenient. It holds just what you need and nothing of what you don’t. It says ‘I’m busy, I’m important, and I’m stylish’. And right then, I knew I was going to design a buffalo plaid wristlet and use amazing purse hardware. Because who doesn’t love purse hardware! It’s what gives this wristlet her sassy edge, don’t you think?
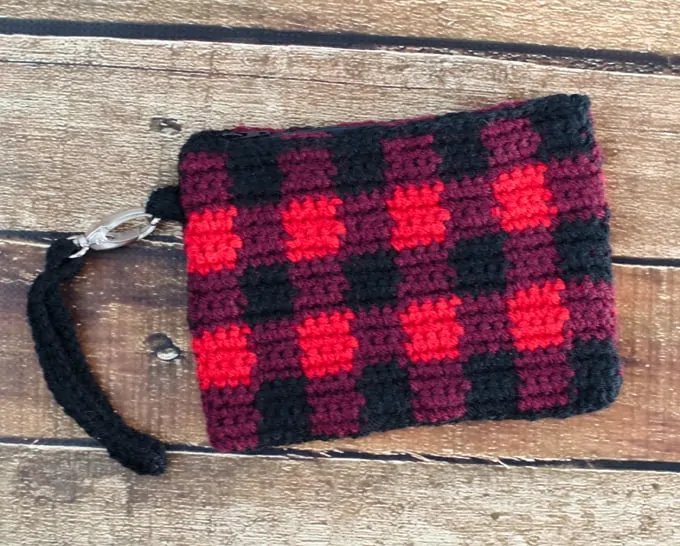
Just like the Buffalo Plaid Cup Cozy, this Buffalo plaid wristlet is worked with 3 colors: red, burgundy and black. I love this combination of Vanna’s Choice yarn in Scarlett, Black and Burgundy. If you are working off your stash or trying to find colors in a different brand, be sure to try the reds out together to make sure they are just right.
For this project, two colors are used in each row. The non working yarn is carried along and crocheted right over. Check out this post on how to tapestry crochet for everything you need to know. This project is worked back and forth in rows, through both loops. It’s worked a bit differently than the Buffalo Plaid Cup Cozy for an equally fun look.
Purchase an ad-free printable version of this pattern
Buffalo Plaid Wristlet
Thank you to Lion Brand for providing the yarn for this project!
Here is what you will need:
- Lion Brand Vanna’s Choice: Scarlett, Black and Burgundy, 1/2 oz each.
- US G6/4.00 mm crochet hook (here are my favorite crochet hooks)
- Black zipper, 7” or longer
- ½” Swivel clip and ½” D-Ring (Click the link for special reader package from Bagmaker Supply on Etsy)
- Tapestry needle and scissors
- Black thread, pins and sewing needle
Resources and tutorials you may find helpful in following this pattern: Crochet Abbreviations, US to UK Crochet Conversion Chart. Find links to stitches on the “Tutorial” menu: Getting Started will show basic stitches used in many patterns and Crochet Stitch Dictionary shows our growing collection of crochet stitch tutorials.
Be sure to read how to tapestry crochet so you understand how to change colors with this technique.
Size:
7-1/2” wide by 5-1/2” tall, Each plaid “square” is 4 sc wide by 4 rows.
Buffalo Plaid Wristlet Panels (make 2):
With black, chain 33.
R1: With black (and working over unworked burgundy yarn), sc in 2nd ch from hook, sc in next 3 st changing to burgundy in the last stitch, using burgundy, sc in next 4 st, changing to black in the last stitch. Continue to work sc across row, alternating 4 stitches in burgundy and 4 stitches in black. At the end of the row, ch 1 and turn.
R2-4: Repeat pattern, working sc across row, alternating 4 stitches in black and 4 stitches in burgundy. Ch 1 and turn at the end of each row.
R5-8: Pattern colors switch here to burgundy and red. Fasten off black yarn. Starting the row with burgundy and working over the unworked red yarn, sc in the next 4 st, changing to red in the last stitch, using red, sc in the next 4 st, changing to burgundy in the last st. Continue to work sc across row, alternating 4 stitches in red and 4 stitches in burgundy. At the end of the row, ch 1 and turn. ***Note: at the end of row 8, change to black yarn in the last st, chain 1 and turn with the new color***
Rows 1-8 establishes the Buffalo Plaid pattern. Continue to work in the pattern as follows:
R9-12: Starting with black and working over unworked burgundy, work sc across row, alternating 4 stitches in black and burgundy across row. ch 1 and turn after each row.
R13-16: Starting with burgundy and working over red, work sc across row, alternating 4 stitches in burgundy and red across row. ch 1 and turn after each row. **in the last stitch of row 20, change to black yarn, then ch 1 and turn**
R17-20: Starting with black and working over burgundy, work sc across row, alternating 4 stitches in black and burgundy across row. ch 1 and turn after each row. **in the last stitch of row 20, change to black in the last st, then turn**
R21: Continuing with black, sl st across row and fasten off, leaving a long strand for sewing.
D Ring Loop:
Before sewing the 2 Buffalo Plaid Wristlet sides together, you will need to make a short loop to hold the D-ring to the wristlet. It is crocheted as a rectangle piece, then folded together and sewn in when you sew the side seams (see assembly)
With black, chain 6. sc in 2nd ch from hook and across. Fasten off, leaving a long strand for sewing. Set aside the loop for now.
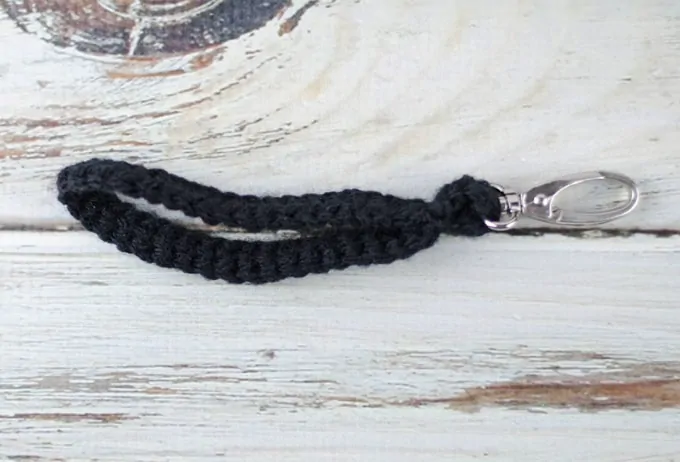
Wristlet Strap:
The strap holds the swivel clip, making the strap removable. With black, chain 45. sc in
2nd ch from hook and across. Fasten off, leaving a long strand for sewing. Holding wrong sides of strap together, slip the swivel clip on to the strap. Carefully sew the 2 short ends of the strap together on the wrong side. Go over work as if to finish, but do not cut yarn. Then, move the swivel clip down to the end just sewn. You will be sewing a running stitch seam about 1/2″ from the end, encasing the swivel clip in that end of the strap. To do this, weave the end down about 1/2″ from the end, make sure that the swivel clip is in place and then make several small stitches across the strap to secure it there.
Assembling The Wristlet:
Take the two side pieces and carefully sew in about ½” from each side, using black yarn. I used a mattress stitch for this, but you could use a different seaming method. Fasten off ends and weave them in. Now you have an open area in the middle. This is where the zipper is attached.
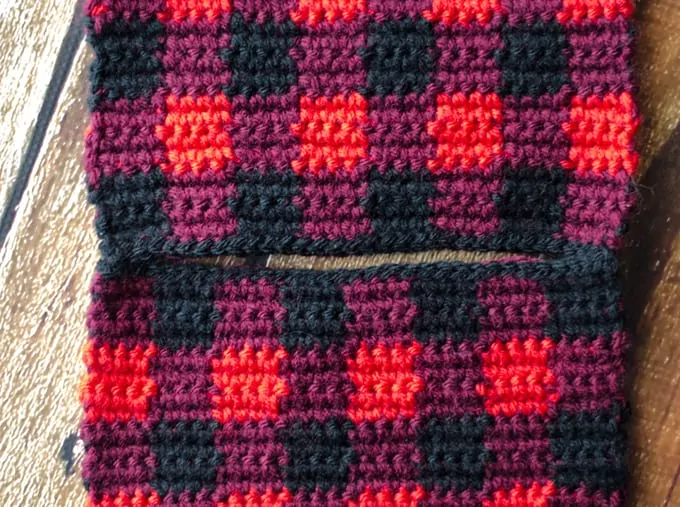
If using a longer zipper, you will cut it off after is sewn on.
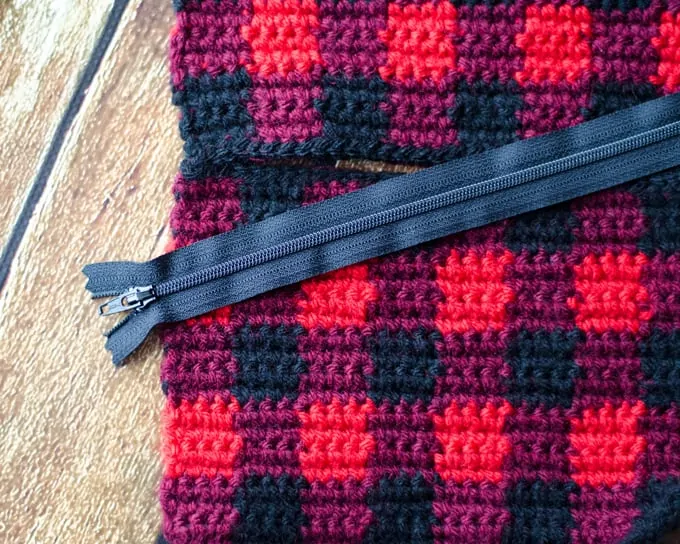
Next, pin the zipper in place, under the opening, lining up the two sides of the checkerboard pattern. Take your time to do a neat job here. The two open ends should touch.
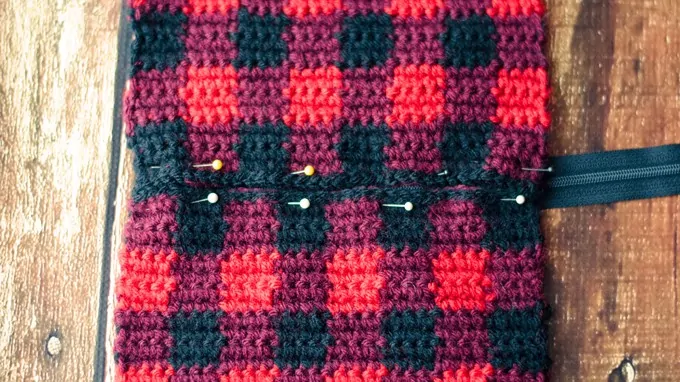
Line up the checkerboard pattern as best you can. (Note that my longer zipper extends past the right side of the wristlet; it will be cut later) Using small stitches, and a needle with black thread, sew zipper in place. Starting with 1 wristlet panel, work 1 row of stitches just under the slip stitch row. Then, working on the wrong side, whip stitch down the zipper edges, carefully sewing into the yarn underneath, so as not to show on the right side. Repeat on the other side of the zipper. When the zipper is sewn down firmly, cut off the excess zipper end.
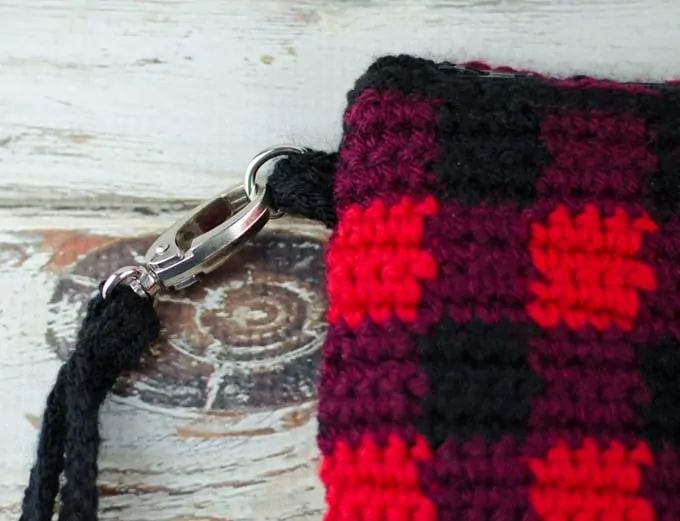
First the D-ring and loop needs to be sewn on one of the bag sides. Then the bag is sewn together. With the zipper closed and the right side facing, take a pin and mark about ¾” down from the left top edge (just under where the zipper closes) on the panel. This is where the D-ring will start.
Carefully place the D-ring on the D-ring strip loop. Holding the 2 ends of the strip, wrong sides together, place the strip with the edges lined up to the side of the front panel at the point you marked. The strip and D-ring will be resting on the front panel and the edges will be lined up with the edges of the panel. Using black yarn carefully sew the edges together with a whip stitch. Knot off ends and weave them in.
Now unzip the zipper. You will need this space open for turning after sewing the wristlet panels together. Then re-orient the two panels so that the right sides are now together and the D-ring strip is sandwiched in between. Sew around all the edges, using your preferred stitch (I used a whip stitch).
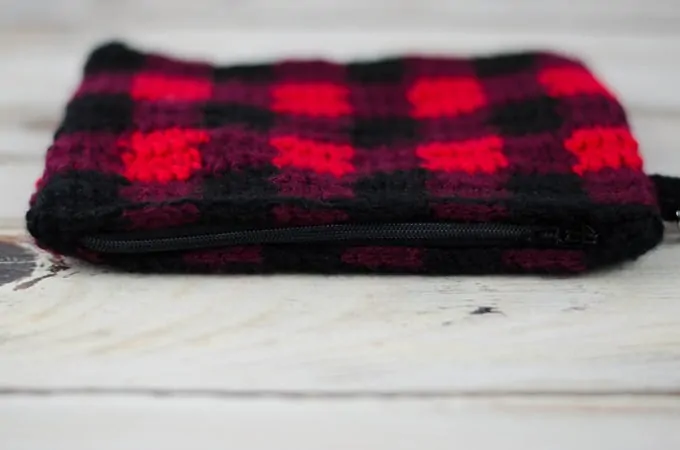
Turn the bag right side out through the zipper opening. And.. It’s done!
If you loved the buffalo plaid wristlet be sure to check out the Buffalo Plaid Cup Cozy and the Buffalo Plaid Cowl.
Purchase an ad-free printable version of this pattern
I love seeing your finished projects! If you enjoyed making one of my patterns I’d love to see yours on Instagram, be sure to tag me @crochet365knittoo. If you are on Facebook, stop over to the Crochet 365 Knit Too Facebook page or pop over to the Crochet365KnitToo Club and share a photo! I’d love to see your work!
Love both of your buffalo plaid projects! They remind me so much of Christmas time!