
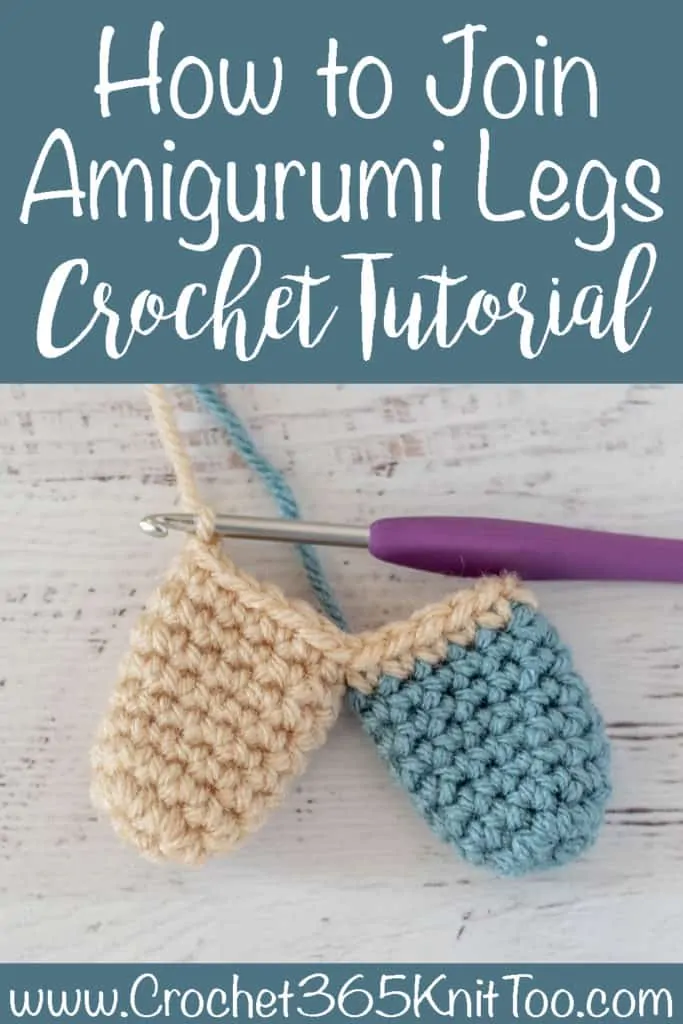
Joining Amigurumi Limbs ~ An Easy Technique
This post may contain referral/affiliate links. Please read my disclosure for more info.
If joining amigurumi limbs seems like a daunting and difficult task, sit back and relax because today you’re going to learn exactly how to join amigurumi legs together!
If you like learning new crochet techniques you are going to love learning how to easily join amigurumi limbs! You can check out all our crochet techniques here.
One of the biggest fears people face when learning how to crochet dolls (otherwise known as amigurumi) is how to attach all the pieces. It can be fussy to get arms and legs positioned correctly and to sewn on the doll body in a neat way. Joining amigurumi limbs doesn’t have to be difficult.
One of my favorite ways to solve this problem is to crochet two legs together and then continue on to work the body. I’ve worked up a couple of closed cylinders in different colors to demonstrate how this works. Let’s dive in!

How To Join Two Legs Together
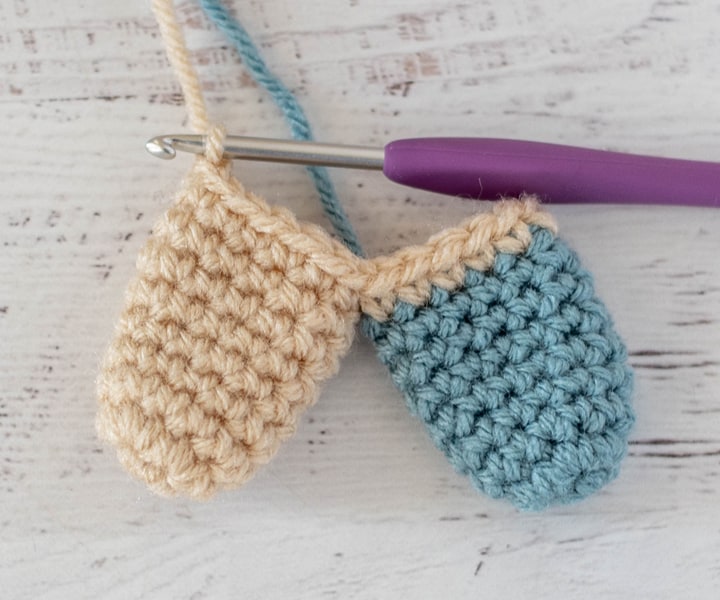
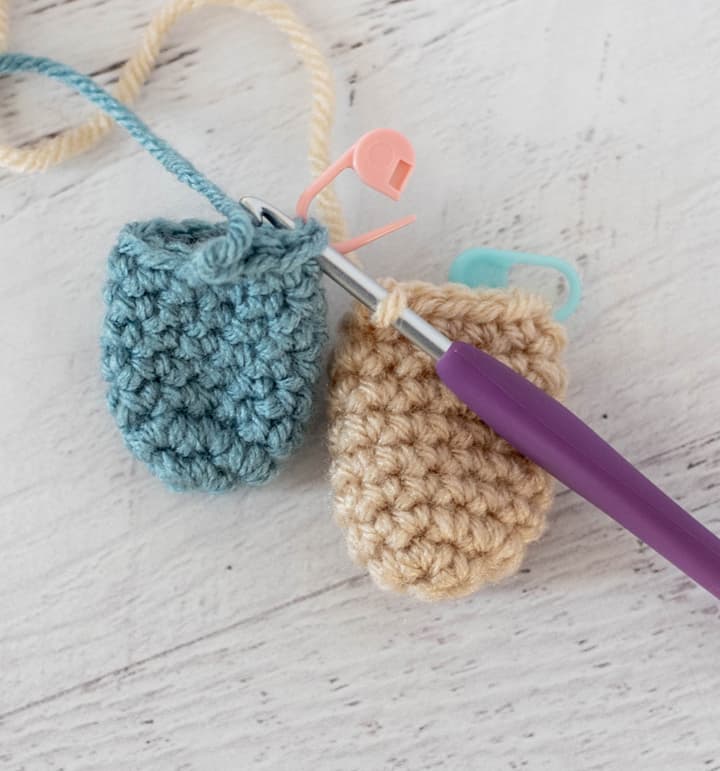
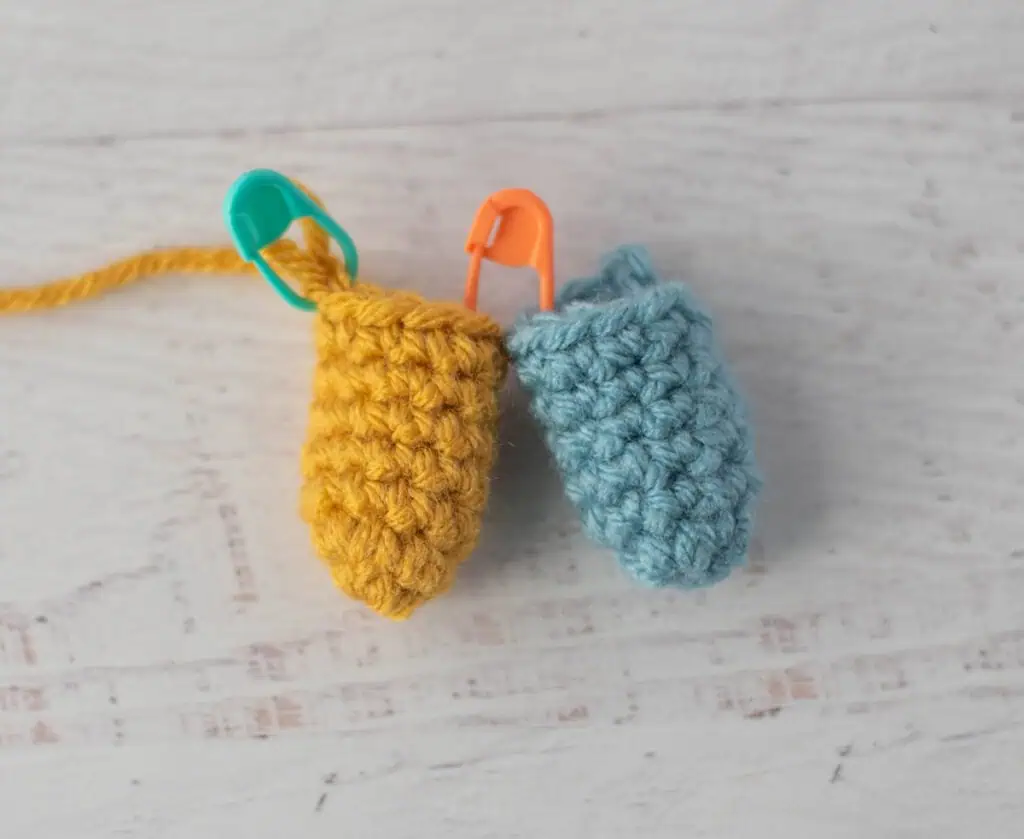
First make two “leg” pieces according to the directions. Here one ‘leg’ is made out of blue yarn and the other is out of beige yarn, just so it is easier to see how it comes together. First I worked the blue leg and fastened off the end. Then I worked the 2nd leg in beige, but did NOT fasten off the leg.
The blue stitch marker in the beige leg is on the last stitch worked on that leg. Fasten the two legs together in the middle with a stitch marker, as shown with the pink stitch marker. Note that care needs to be taken if there are feet so that the feet will be facing the same direction (or a pleasing direction). Take the time to connect the 2 limbs and then review and make sure everything is positioned correctly before proceeding.
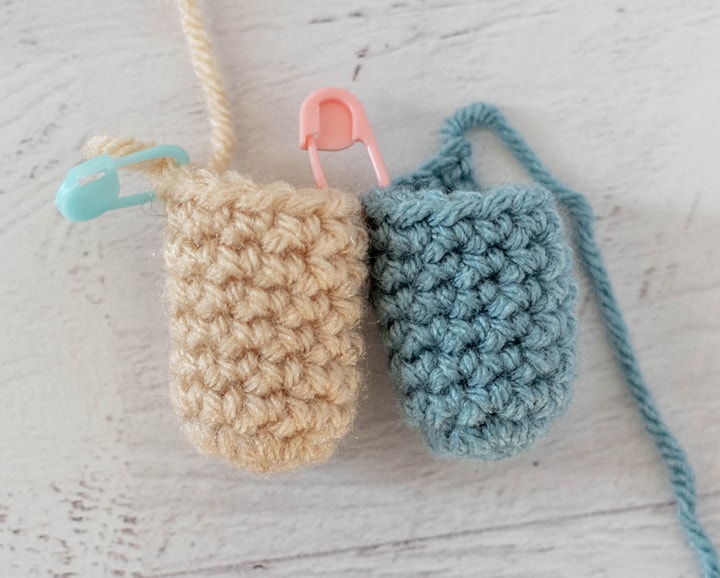
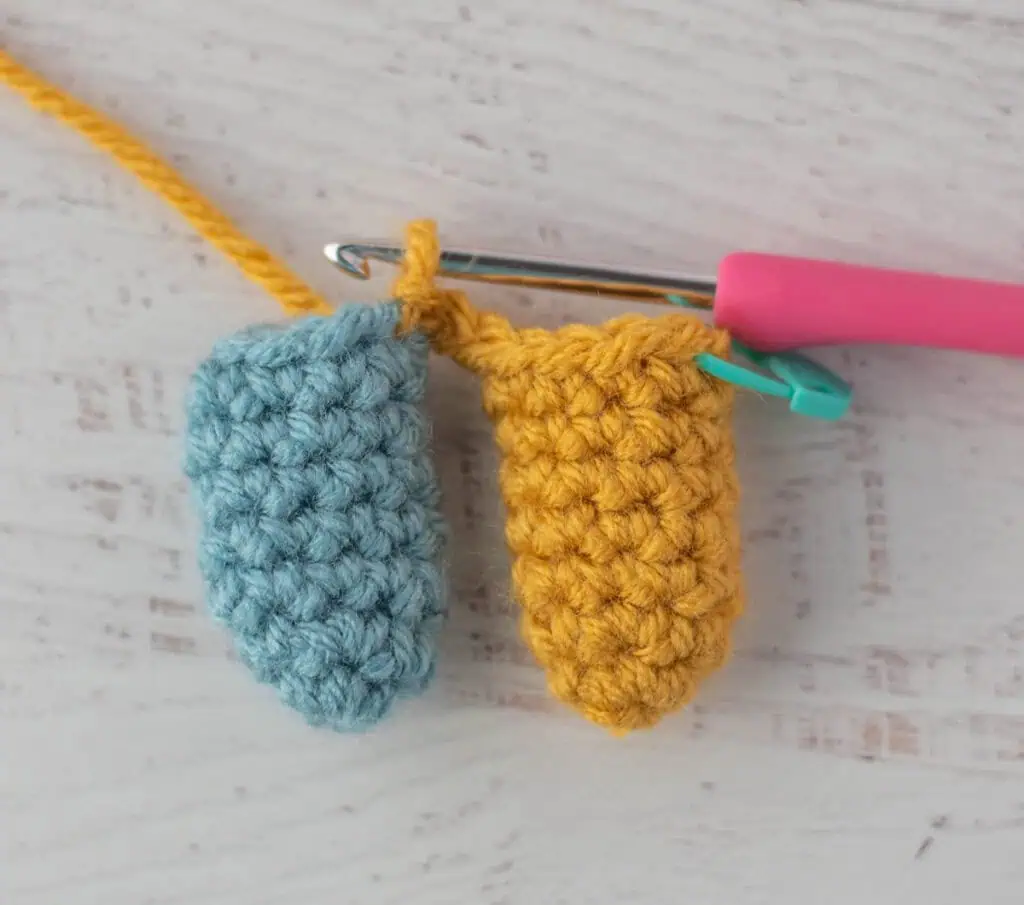
Insert hook back into the last stitch worked on the 2nd leg (the beige leg in the example). Single crochet until you reach the stitch with the pink stitch marker connecting the two limbs at the center.
Remember, the blue stitch marker remains in the last stitch work in the beige leg (it’s hiding behind the hook in the photo below).
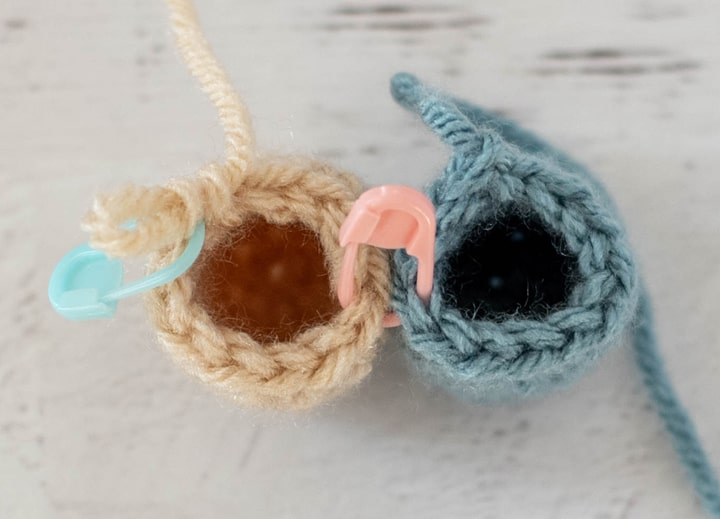
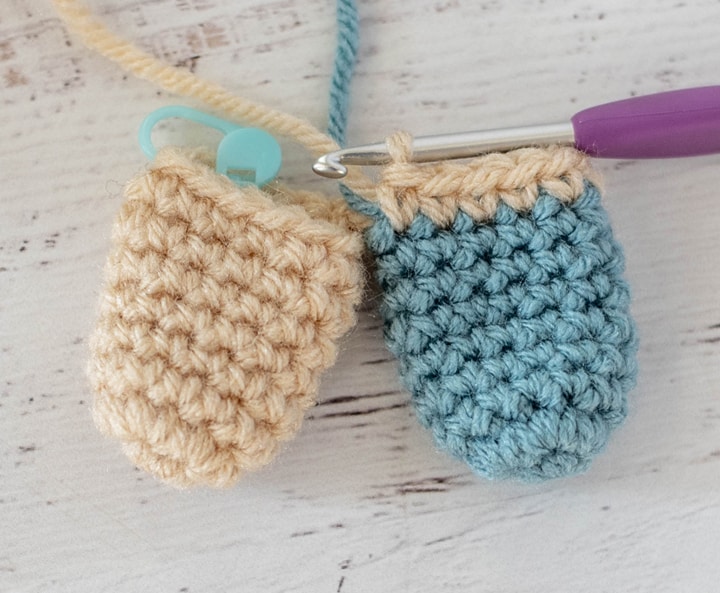
The next step is to work a single crochet into each stitch held by the center stitch marker. First single crochet into the stitch on the beige leg.
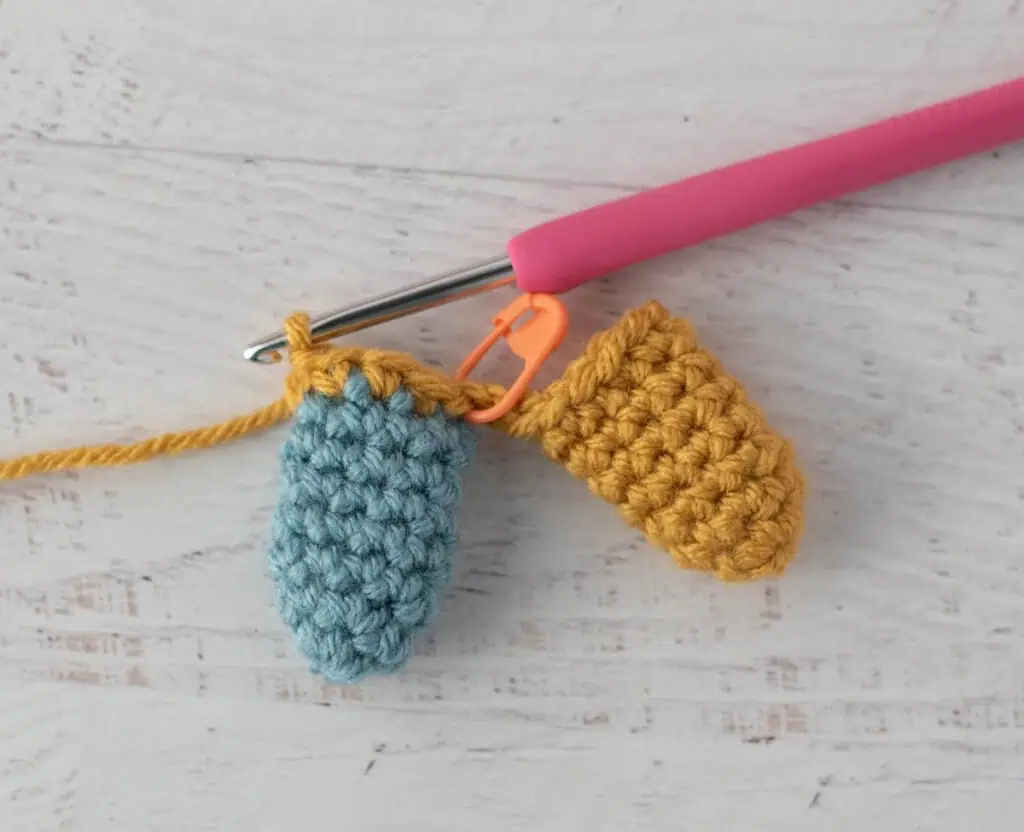
Then open up the stitch marker and single crochet into the stitch on the blue leg. You may remove the pink (center) stitch marker at any time after these two pieces are joined. At first, the two legs are barely held together, so work carefully to finish up the row.
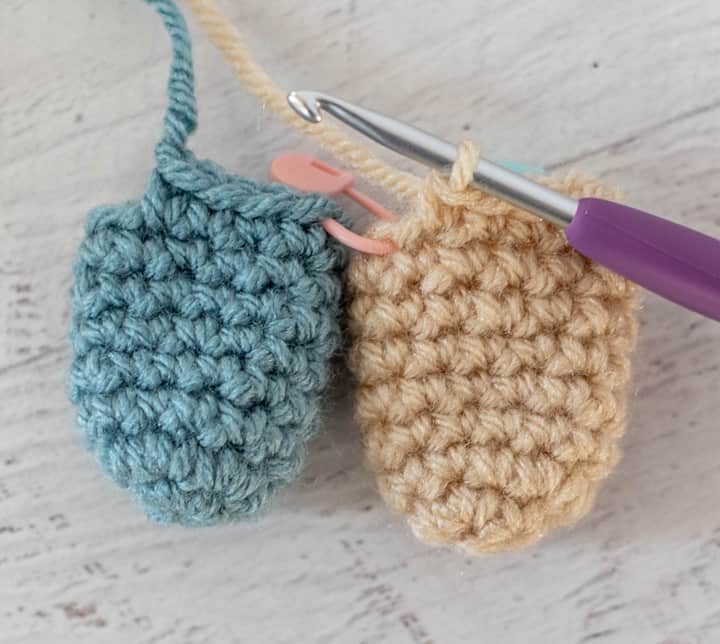
Work a single crochet in each stitch around the blue leg.

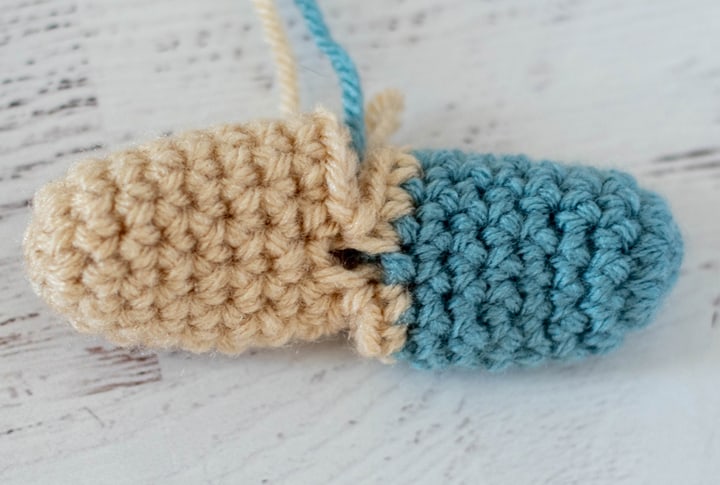
Once around the opposite side of the blue leg, continue until reaching the center stitch again.
Then continue to work until reaching the blue stitch marker, which marks the end of the row.
At this point, the legs are joined together and work can continue upward to crochet the torso. The point where the 2 legs join usually leaves a very small ‘hole’. To fix this, simply take the fastened off end from the 1st leg (blue in this instance) and carefully sew up the hole from inside for a nice finish.
And you did it! You learned how to join amigurumi legs!
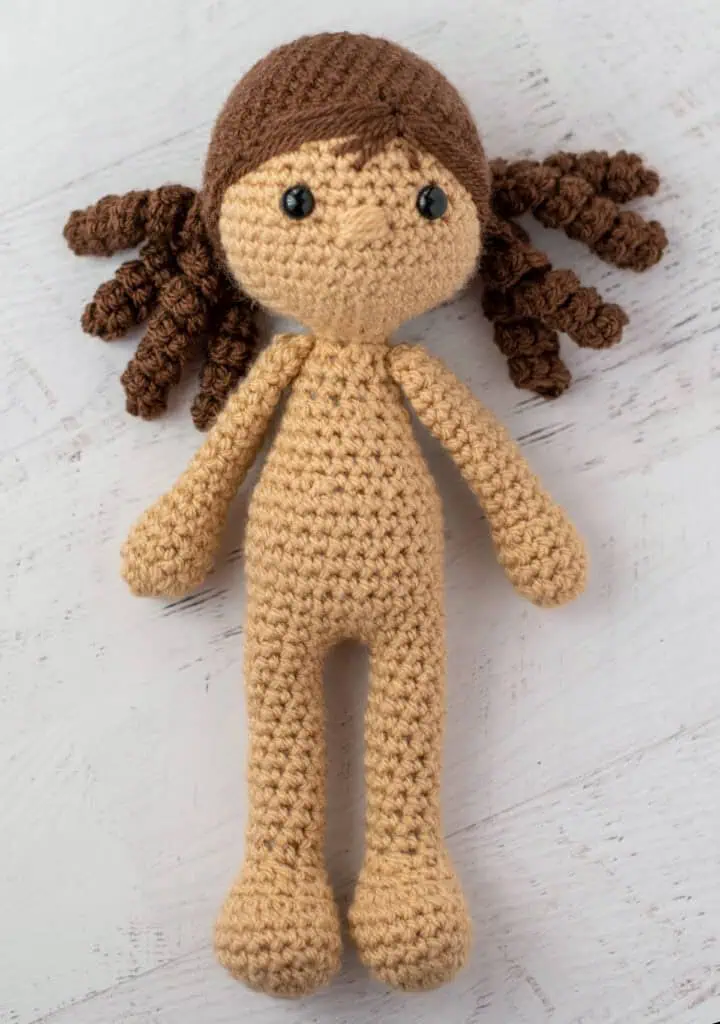
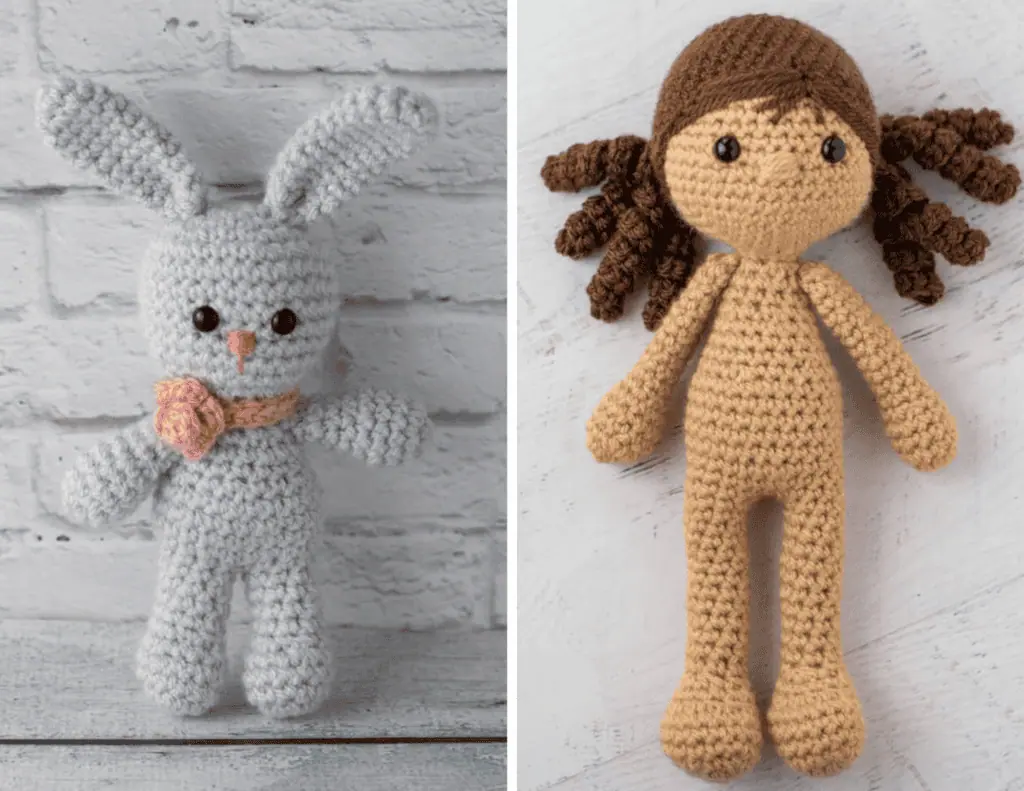
Continue on to work the amigurumi body. Perhaps your amigurumi will look something like this before assembly!
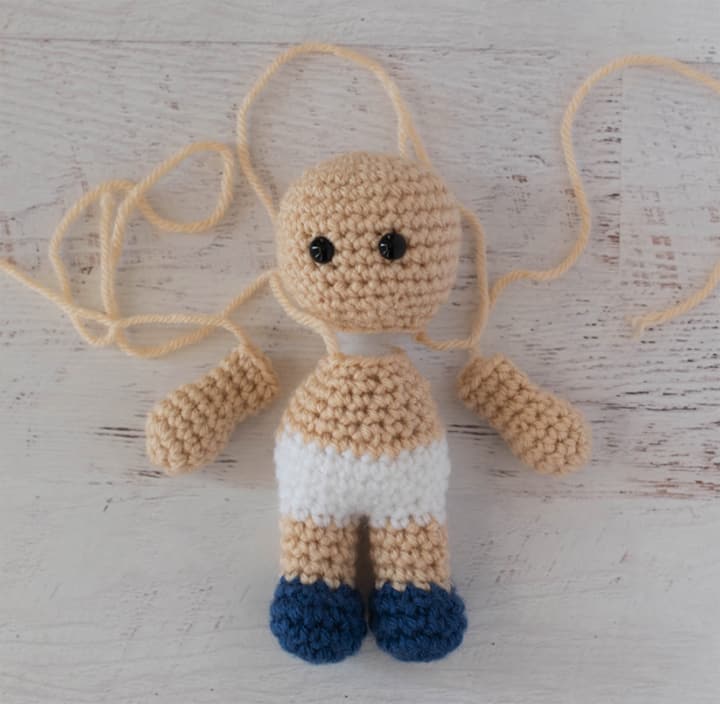
My Tamingo series of dolls feature this leg joining method.
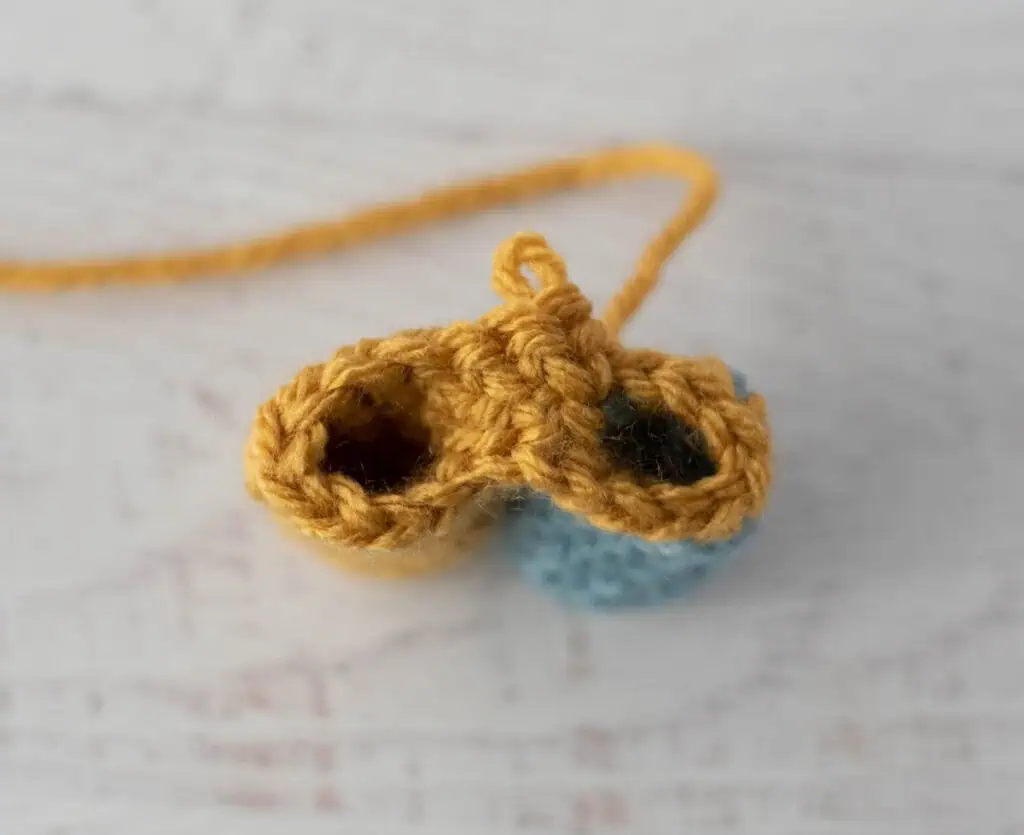
You can also add a few chains between the legs when joining for a different look. Read on for this variation.
Variation: Joining Legs With Chains in Between
In a similar way, two legs can be joined with a bit of space between them. This is accomplished by chaining at the connection point between the two legs.
Here’s how this is done:
First make two “leg” pieces according to the directions. Here one ‘leg’ is made out of blue yarn and the other is out of yellow yarn, just so it is easier to see how it comes together. First, I worked the blue leg and fastened off the end. Then I worked the 2nd leg in beige, but did NOT fasten off the leg.
The green stitch marker in the yellow leg is on the last stitch worked on that leg. Fasten the two legs together in the middle with a stitch marker, as shown with the orange stitch marker in the previous photo. Note that care needs to be taken if there are feet so that the feet will be facing the correct direction. Take the time to connect the 2 limbs and then review and make sure everything is positioned correctly before proceeding.
Sc in the next stitch of the leg just worked. Continue to single crochet in each stitch until you reach the marker holding the 2 legs together. Work a single crochet in the next stitch (which is the stitch holding the legs together). Chain 2 between the legs. THEN work a single crochet in the matching stitch on the OTHER leg.
Now remove all other markers and place a marker in the last stitch worked. This now marks the end of each row.
For the first round of the body, crochet all the way around the leg. When you come to the chain between the legs, sc into each chain, then work a single crochet in the stitches on the other leg until you come to the opposite side of the chain. Sc into the opposite side of each chain, then sc in the stitch you marked as the end of the row.
Count your stitches for this row to make sure you have the correct stitches as indicated in the pattern. If you have more or less than this, take a look at the stitches worked at the joining points and see if you’ve missed or worked an extra stitch.
Here is a comparison of the two joining techniques side by side:
I love seeing your finished projects! If you enjoyed this tutorial on joining amigurumi, I’d love to see it in action on your own crochet! On Instagram, be sure to tag me @crochet365knittoo. If you are on Facebook, stop over to the Crochet 365 Knit Too Facebook page or pop over to the Crochet365KnitToo Club and share a photo! I’d love to see your work!
I’ve made many stuffed toys and only recently did the legs first. It is a wonderful bonus as I usually make childproof toys and this insures legs are on solidly. I also never use buttons or any thing a child or small animal could pull off or chew off and swallow.
I really like this method for the same reasons you mention… plus I’m not a huge fan of sewing on the limbs later… LOL! It’s definitely a great idea to think about how the recipient will interact with your make—little ones can and do chew on everything!
Hi Cheryl, I hope this day finds you well. Can your technique for the legs be used for any Amigurumi and can this technique be use on a 4 legged amigurumi?
Yes, you can use it for other amigurumi. You can also do one or more chain stitches between the legs for a different look. It is definitely fun to experiment and see what you like best!
Thanks Cheryl, this makes it look so much easier. I haven’t tried it yet, but I sure will now!
Yes this is the best way to make a two legged amigurumi anything, dolls particularly. Muchmore secure than sewn on separately. Too bad we cannot devise similar technique for arms. Nice tutorial!