Scout the Crochet Duck
This post may contain referral/affiliate links. Please read my disclosure for more info.
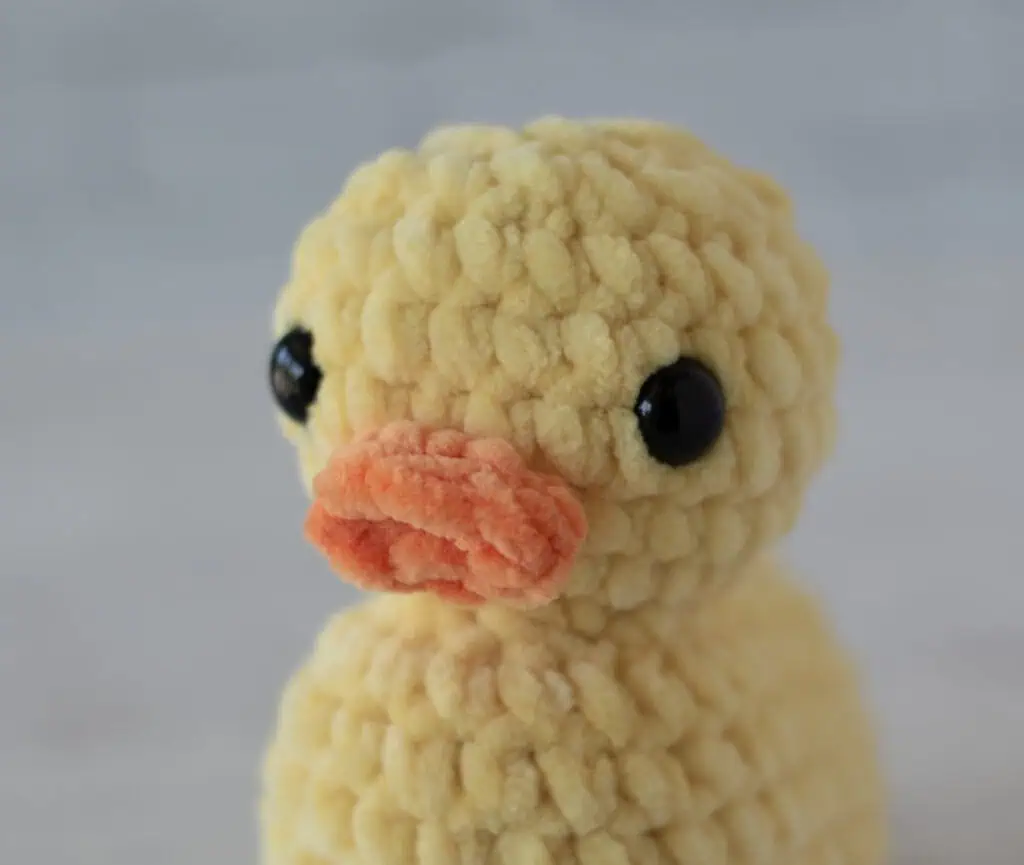
There’s something about a crochet duck that’s just ridiculously cute. Maybe it’s that adorable round little body. Maybe it’s little orange beak. Or maybe it’s the fact that a chubby yellow duck made out of soft, squishy yarn is pretty much impossible not to love.
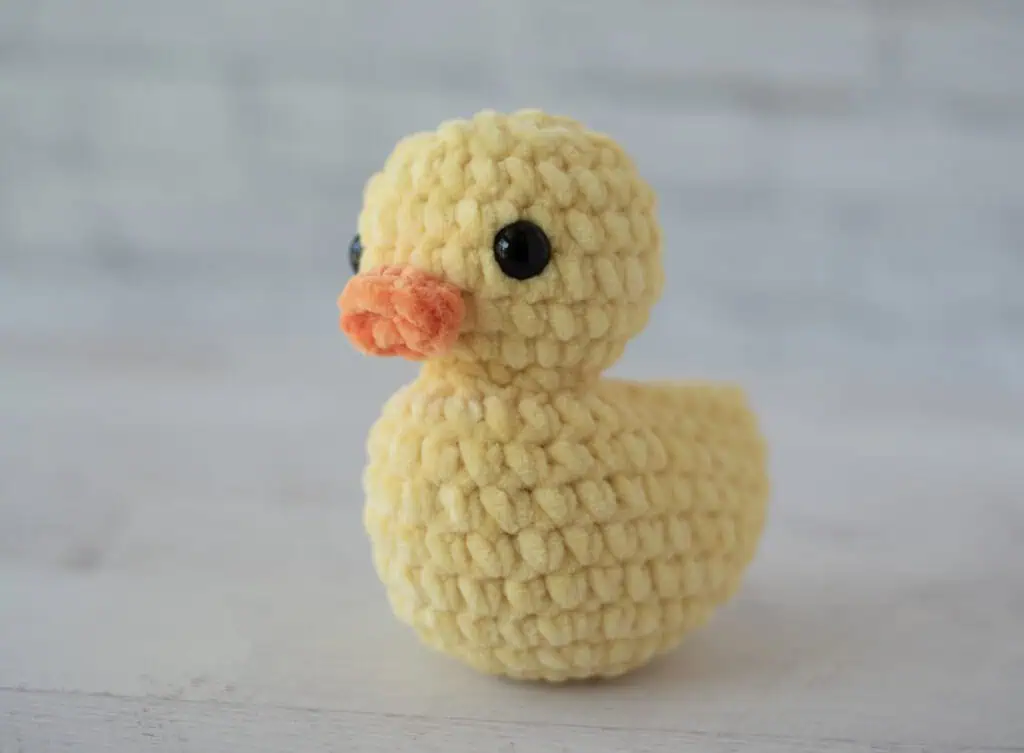
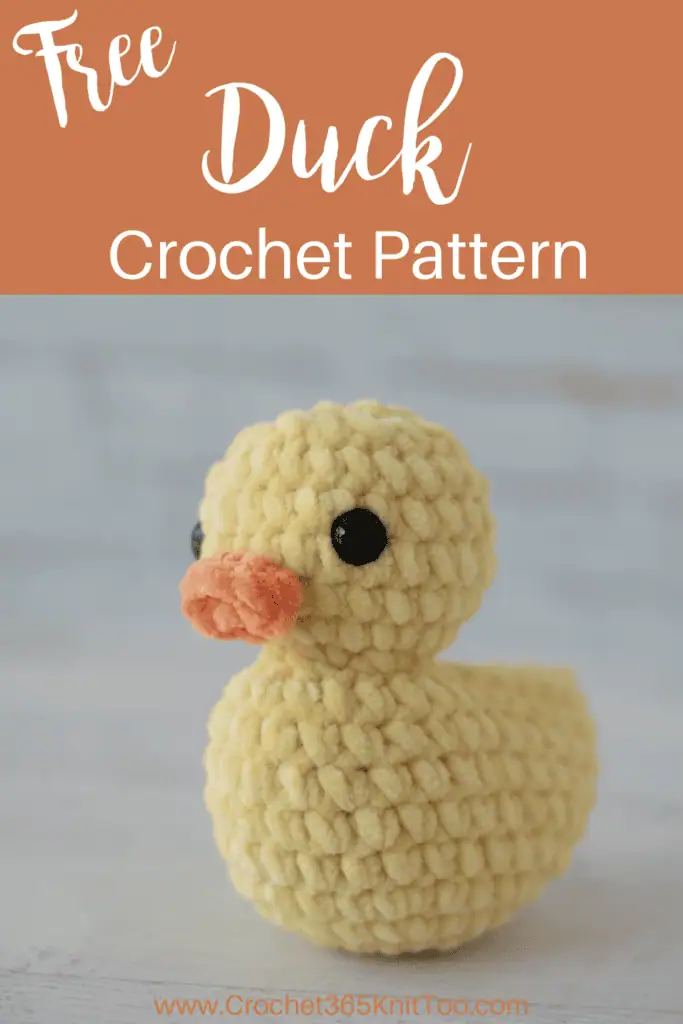
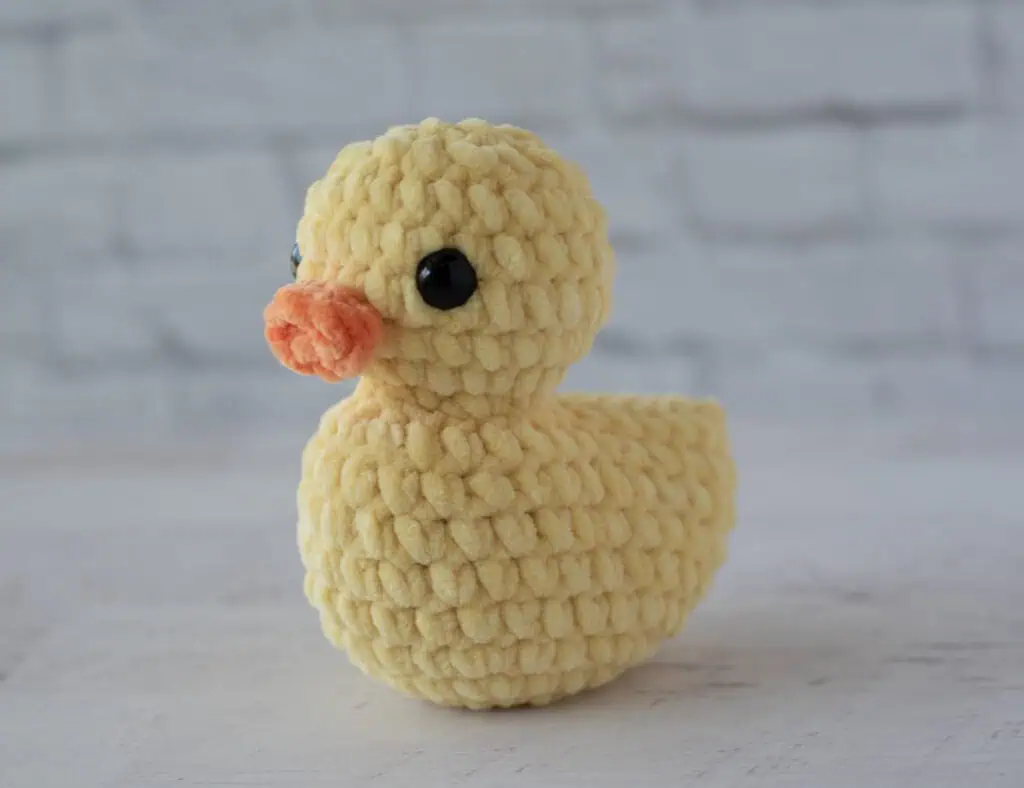
Whatever the reason, meet Scout the Crochet Duck! Scout is soft, sweet, and completely irresistible. He’s made with plush super bulky yarn, works up surprisingly fast, and has the cutest little personality.
I’m so in love with that adorable little face. Those big eyes and that squishy little beak get me every time. I wanted this crochet duck pattern to have that classic rubber duck inspired look but in an extra soft, cuddly version.
And while Scout might look simple, there’s actually a little bit of clever construction happening behind the scenes.
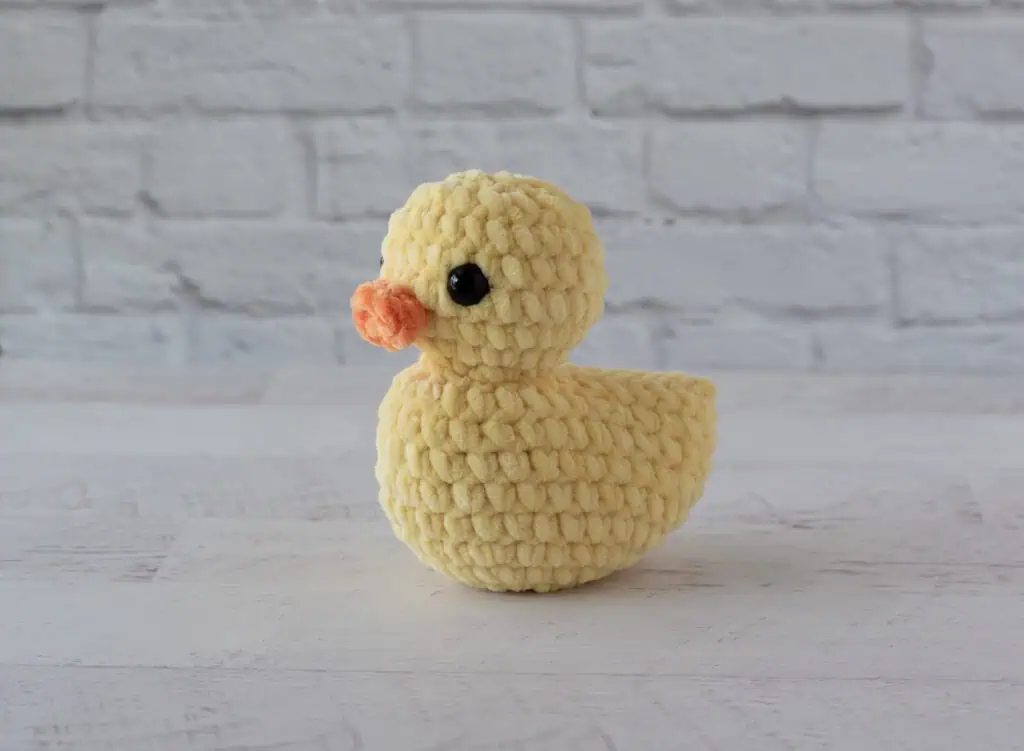
Meet Scout the Crochet Duck
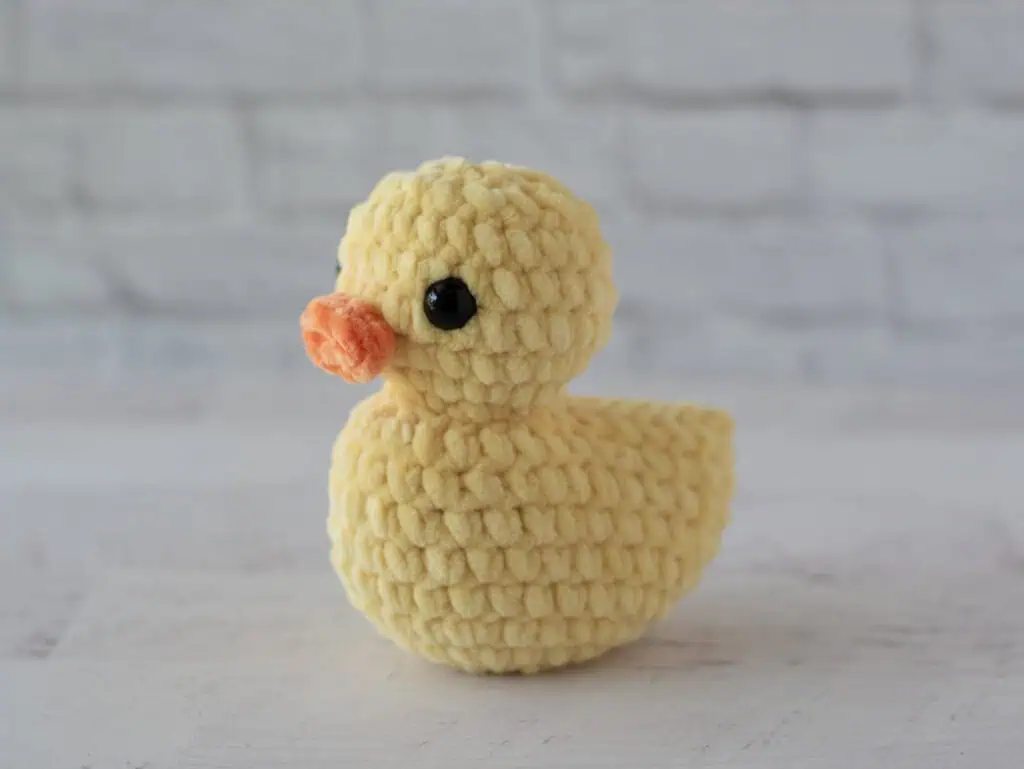
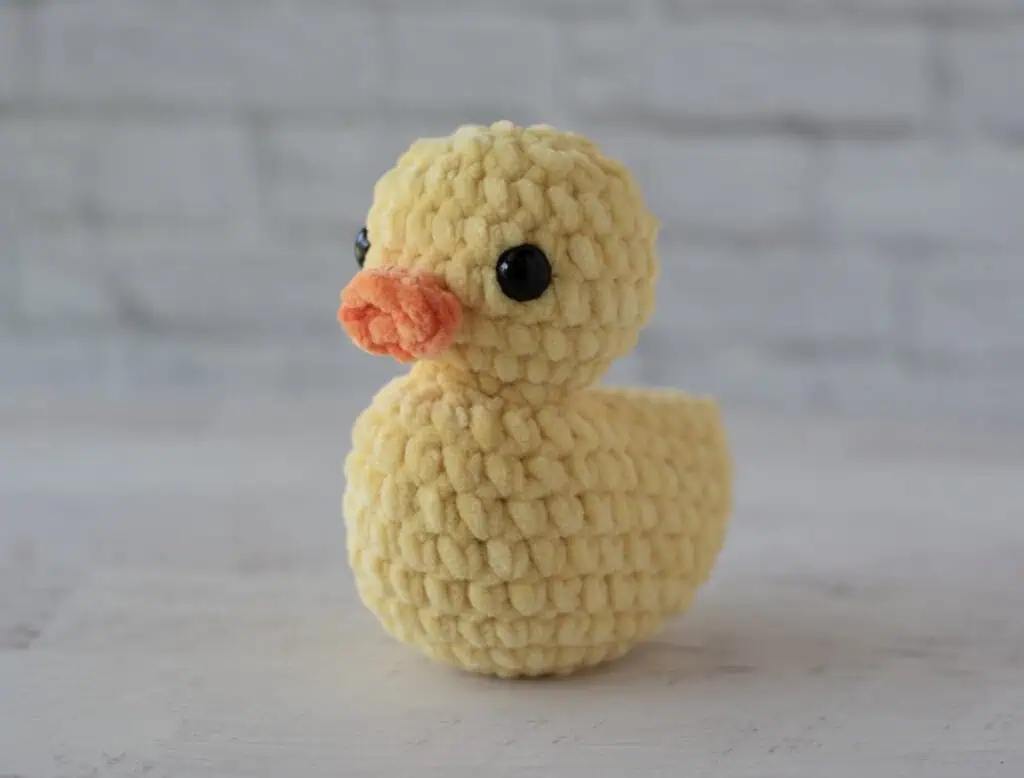
When I started designing Scout, I knew I wanted a plump little duck with a round body, a cute head and that unmistakable duck shape.
But I ran into a problem.
Duck anatomy, my friends.
With the head positioned toward the front of the body, a crochet duck can become surprisingly top heavy. Once you add stuffing, that adorable little head can pull the entire duck forward, leaving you with a duck that would much rather tip over than sit nicely.
And that simply would not do.
My solution is a small weighted pouch tucked inside the back portion of Scout’s body.
It acts as a counterweight, balancing the head so Scout sits upright the way he should. The pouch is completely hidden inside the finished duck, so you don’t see it at all—you just get a nicely balanced little duck sitting there looking adorable.
It’s one of those little details that makes such a difference in the finished project! And it’s so crazy easy to do. I used some poly pellets inside the toe of a nylon knee high sock.
What is a Crochet Duck Pattern?
A crochet duck pattern is an amigurumi pattern used to crochet a stuffed duck using basic crochet stitches and simple shaping.
Scout is worked primarily in single crochet using soft #6 super bulky chenille-style yarn. I used Premier Parfait Chunky which is one of my personal favorites. The plush yarn gives him his wonderfully soft, squishy texture while also helping the project work up quickly.
At approximately 5.25 inches tall and 5 inches wide, Scout is a cute little size for displaying, gifting or simply adding to your amigurumi collection. And if you’re into the popular “ducking” tradition of leaving ducks on vehicles for others to find, Scout is such a fun handmade way to join in and spread a little joy wherever you go.
And once you make one, you might find it hard to stop! They’re so quick and easy to crochet, you’ll have an entire collection of adorable little ducks before you know it.
Is This Crochet Duck Pattern Beginner Friendly?
If you’ve made amigurumi before, you’ll feel right at home crocheting Scout.
You’ll need to know a few basic amigurumi techniques, including:
- single crochet
- increases and decreases
- working in continuous rounds
- sewing pieces together
- basic stuffing and finishing
If you’re newer to amigurumi, don’t worry. Scout uses simple stitches and straightforward shaping, making him a fun project for building your skills. And don’t forget, I have an entire Beginner’s Guide to Amigurumi you might enjoy!
Why You’ll Love This Crochet Duck
There is a lot to love about this little guy.
First of all… look at him.
But beyond the cuteness, Scout is one of those satisfying crochet projects that comes together fairly quickly without a lot of complicated stitches. The super bulky yarn makes for fast crocheting, while the simple shaping gives you that classic rubber duck silhouette.
And I especially love the weighted pouch hidden inside the back of the body. Because the head sits toward the front, the extra weight in back helps balance the finished duck and keeps Scout sitting upright instead of tipping forward.
It’s a small construction detail, but one that makes the finished duck look—and sit—so much better.
Crochet Duck Pattern Essentials
ike most amigurumi patterns, Scout is worked in continuous rounds. That means you won’t join at the end of each round and instead will work in a continuous spiral fashion.
I always recommend using a stitch marker in the last stitch of each round so you always know where one round ends and the next begins. We also use stitch markers when we separate the stitches that will form the head vs the back.
You’ll start with a magic ring and work in single crochet, using increases to create Scout’s body. Then you’ll stuff the body and sew up the stitches that make up the back of the duck, inserting a small weighted pouch towards the back of the body before you close it all the way up. This pouch counterbalances the head and helps Scout sit properly once he’s completely assembled.
Then it’s time to work over those remaining body stitches to form the chubby little head of your duck. Finally, you’ll add those little details that give him his personality and before you know it.. you’re holding an adorable little duck in your hands that you made yourself!
What Yarn is Best for a Crochet Duck?
I designed Scout using Premier Parfait Chunky, a #6 super bulky chenille style yarn.
It’s one of my favorite yarns for plush amigurumi because it creates a beautifully soft finished piece while still giving enough stitch definition to show off the shaping.
Scout doesn’t require much yarn, either. I used about 35 yards of yellow and just a few yards of orange for his beak.
Of course, there’s no rule that says your duck has to be yellow!
Make a white duck, a pastel duck, or pull out those leftover bits of plush yarn and make an entire flock in every color imaginable.
A Crochet Duck for the Ducking Tradition
Of course, Scout can be made simply because he’s an adorable crochet duck—and that is reason enough! But there’s another fun possibility too.
If you’re familiar with the tradition of leaving little rubber ducks on certain vehicles as a surprise for their owners, Scout makes an extra-special handmade version of that idea.
Imagine finding this little face waiting for you!
The ad-free paid PDF version of Scout the Crochet Duck includes printable tags designed especially for the ducking tradition, making it easy to crochet a Scout, add a tag and send him off on a little adventure.
Or keep him for yourself. I wouldn’t blame you one bit.
Ready to Crochet Scout?
I have to admit… I’m completely smitten with this little guy.
He’s soft and squishy, quick enough to be a satisfying project, and that sweet little face makes me smile every time I look at him.
Whether you’re making Scout as a gift, adding another adorable animal to your amigurumi collection, or sending him out into the world for someone else to discover, I think you’re going to love crocheting him.
Ready to make your own? Let’s crochet!
print & stitch
Purchase the Beautifully Crafted AD-FREE PDF Download Today with BONUS Ducking tags!
Do you just want to relax and crochet? This nicely formatted pattern features clear instructions and perfectly sized photos for a more enjoyable crochet experience.
Get the free pattern below or purchase an ad-free pattern on Etsy or Ravelry
Crochet Duck Pattern
Here is what you will need:
- Premier Basix Chenille Brights, size 6 super bulky weight, 100% polyester, 112 yds/103m per 5.3 oz skein (try Herrschners, Amazon or Etsy)
- Yellow: 35 yards
- Tangerine (orange): 2 yards
- US H8/5.0mm crochet hook
- 12 mm Safety Eyes
- Stitch Marker
- 1/4 cup Poly Pellets and nylon sock or small plastic bag to hold pellets
- Fiberfill
- tapestry needle and scissors
Resources and tutorials you may find helpful in following this pattern: Crochet Abbreviations, US to UK Crochet Conversion Chart. Find links to stitches on the “Tutorial” menu: Getting Started will show basic stitches used in many patterns and Crochet Stitch Dictionary shows our growing collection of crochet stitch tutorials.
Gauge:
My gauge is 6 sc to 2 inches. However, gauge is not important in this pattern.
Resources and crochet tutorials you may find helpful in following this pattern: Crochet Abbreviations, US to UK Crochet Conversion Chart. Find links to stitches and basic crochet skills on the “Tutorial” menu: Getting Started will show basic stitches such as the slip stitch, single crochet, double crochet stitch and chain stitch used in many patterns and Crochet Stitch Dictionary shows our growing collection of crochet stitch tutorials.
Crochet Abbreviations:
- ch(s) = chain(s)
- sc = single crochet
- hdc = half double crochet
- sc2tog = single crochet 2 together (see special note below)
- sl st = slip stitch
- st = stitch(es)
Special Note:
When working a sc2tog decrease, use the invisible decrease method.
Finished Duck Size
Duck is approximately 5.25” tall x 5” wide.
How to Crochet this Duck
The body of the duck is worked in one piece starting at the bottom with a magic ring and then increasing. You’ll then separate the stitches for the back and the head, stuff the body and sew up the back, making sure to insert a little weighted pouch before completely closing the body. Then you’ll reattach the yarn to the unworked stitches of the body to work the head. Finally you’ll put it all together with safety eyes and that adorable little beak. Let’s dive in!
Duck Body
Using yellow yarn, make a magic ring.
R1: 6 sc into ring. Place stitch marker and work in continuous rounds. (6 st)
R2: 2 sc in ea st. (12 st)
R3: *Sc in next st, 2 sc in next. Repeat from * around. (18 st)
R4: *Sc in next 2 st, 2 sc in next. Repeat from * around. (24 st)
R5: *Sc in next 3 st, 2 sc in next. Repeat from * around. (30 st)
R6-10: Sc around. (30 st)
R11: Sc in next 9 st, place a stitch marker in the last stitch worked, (sc2tog) 6 times, sc in the next stitch and mark this stitch with another stitch marker, sc in next 7 st, sl st in last st. Leave the stitch markers in place. Fasten off, leaving a long strand. (24 st)
Next, we’ll close the back. To allow the duck to stand up without tipping over, we’ll place a small weighted bag in the back half of the duck while stuffing. Then the back gets sewn closed, leaving the rest of the stitches of the row for the head construction.
First place ¼ cup of poly pellets into the toe of a nylon sock (or into a small plastic bag) and knot off the bag. You may wish to use less than ¼ cup of poly pellets if you’d like more stuffing in the duck.
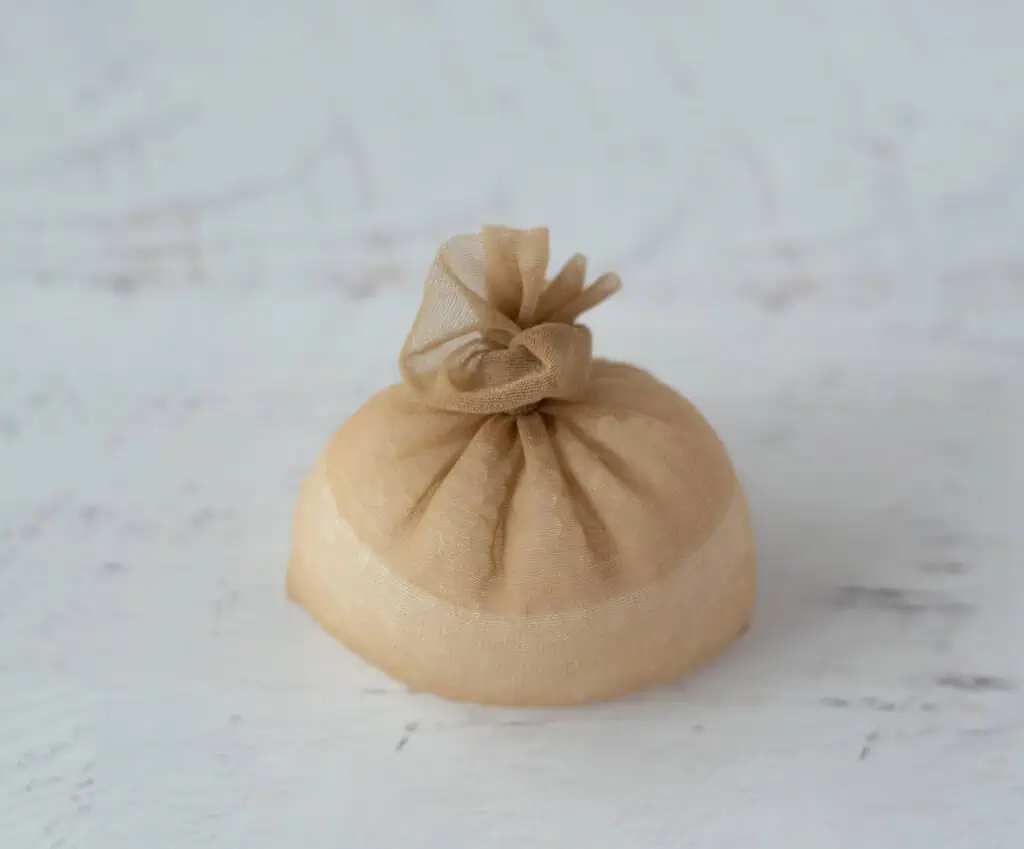
Fold duck body in half, orienting the duck’s body so that the decreases from the last round are on the left and the end of the row just worked is at the tail. The 2 stitch markers placed in the last round mark the end of the back stitches. The stitches to the left of the stitch markers will become the head. The stitches from the stitch markers to the tail will be sewn together to form the back.
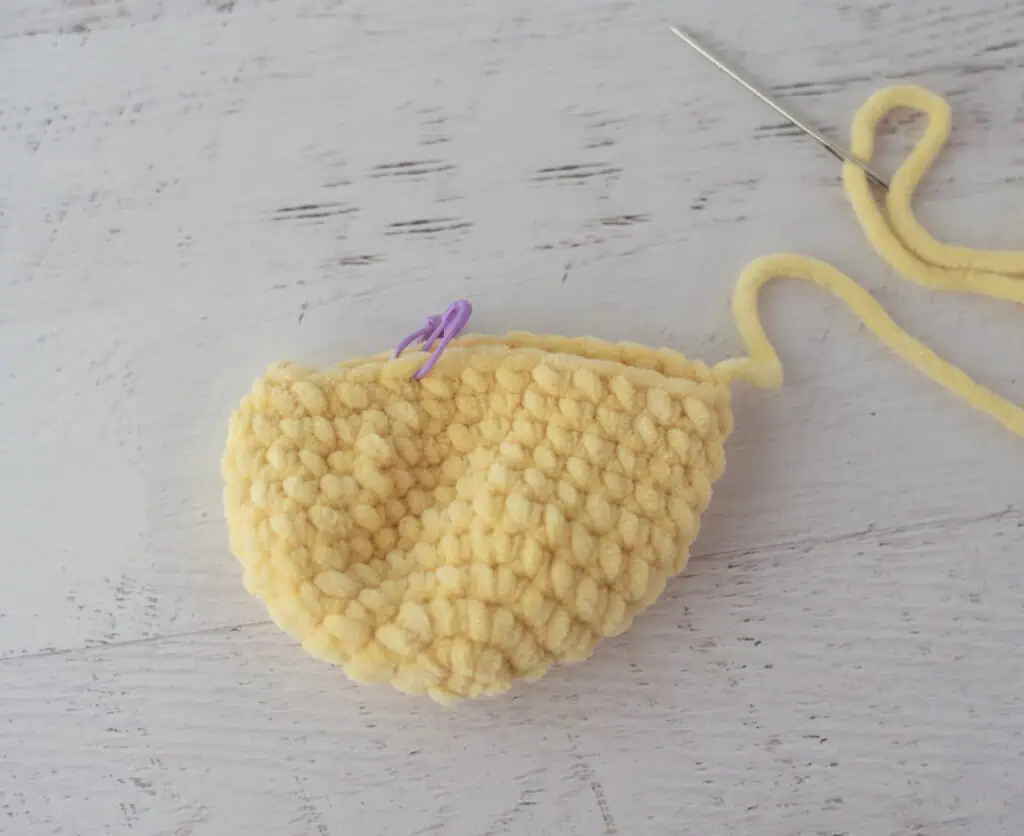
Lightly stuff the duck body, placing the weighted bag under the back (on the right side only) and stuffing the rest of the duck’s body with fiberfill stuffing.
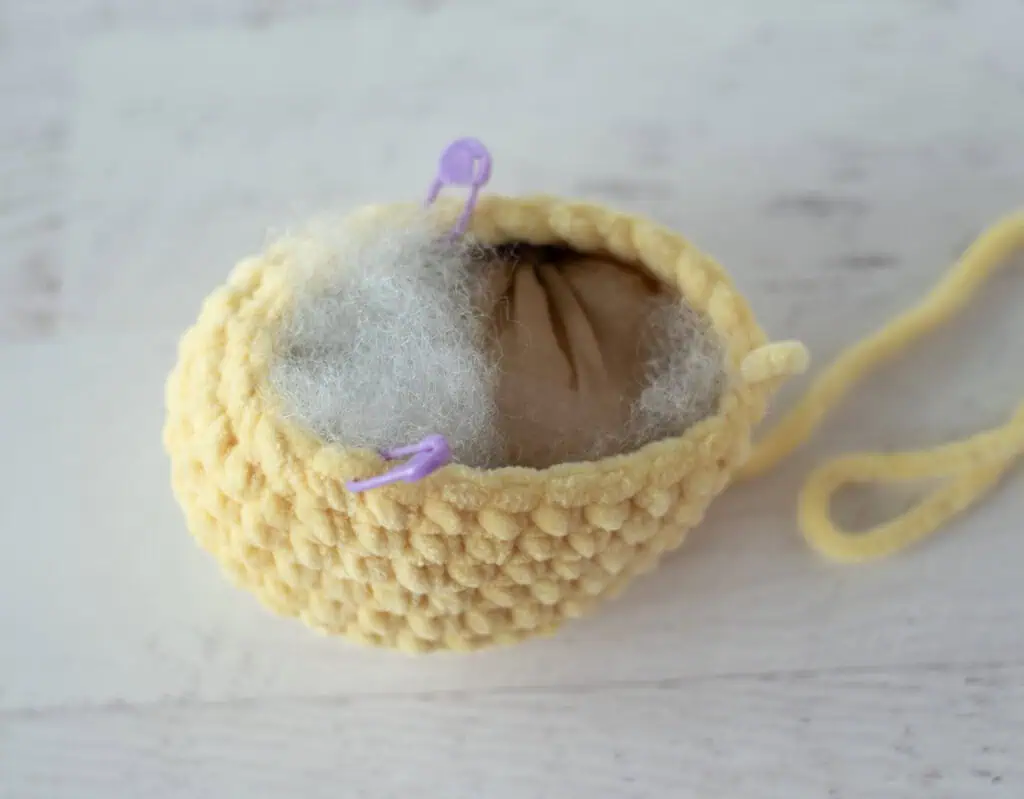
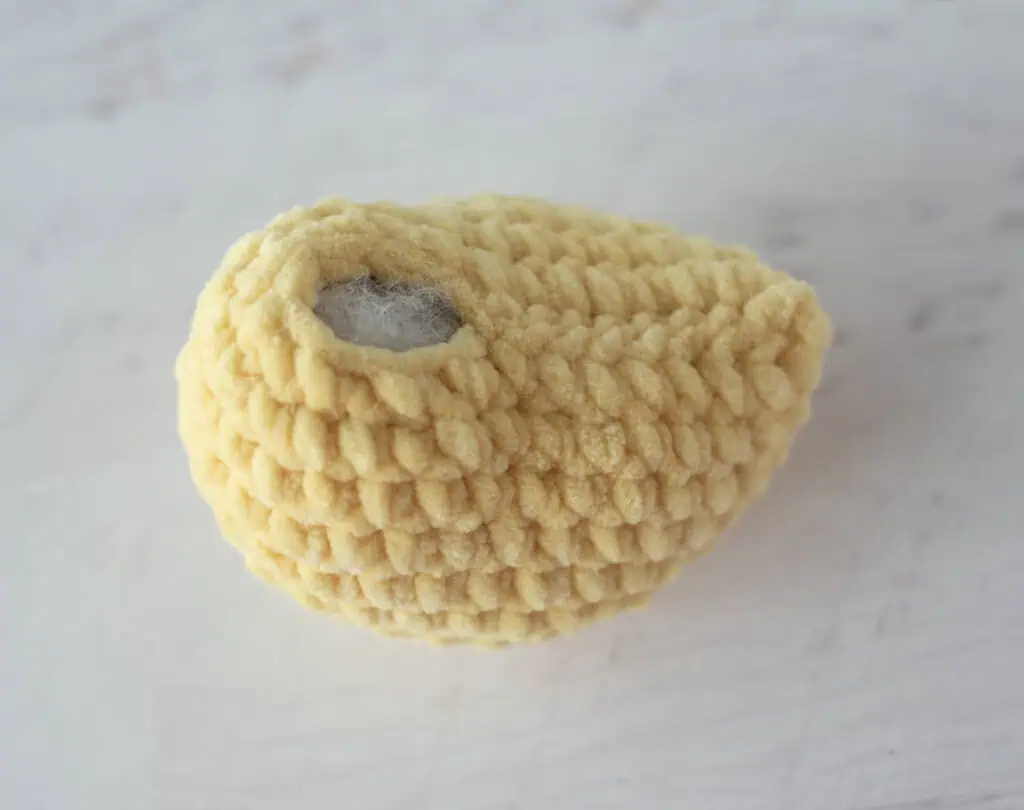
Then fold the body in half. Using the strand from the end of the round and starting at the tail (far right) end, whip stitch 9 stitches closed. This will leave a total of 6 stitches unworked on the body. Remove stitch markers and secure the yarn end to make sure the whip stitched seam does not unravel.
Duck Head
The head is worked over the remaining unworked stitches on the body as well as on the seam.
R1: Attach yellow yarn on the back seam and ch 1. Work 2 sc on the back seam (where each of the stitch markers were located), then work 2 sc in ea of the remaining sts on the body. Place stitch marker and work in continuous rounds. (14 st)
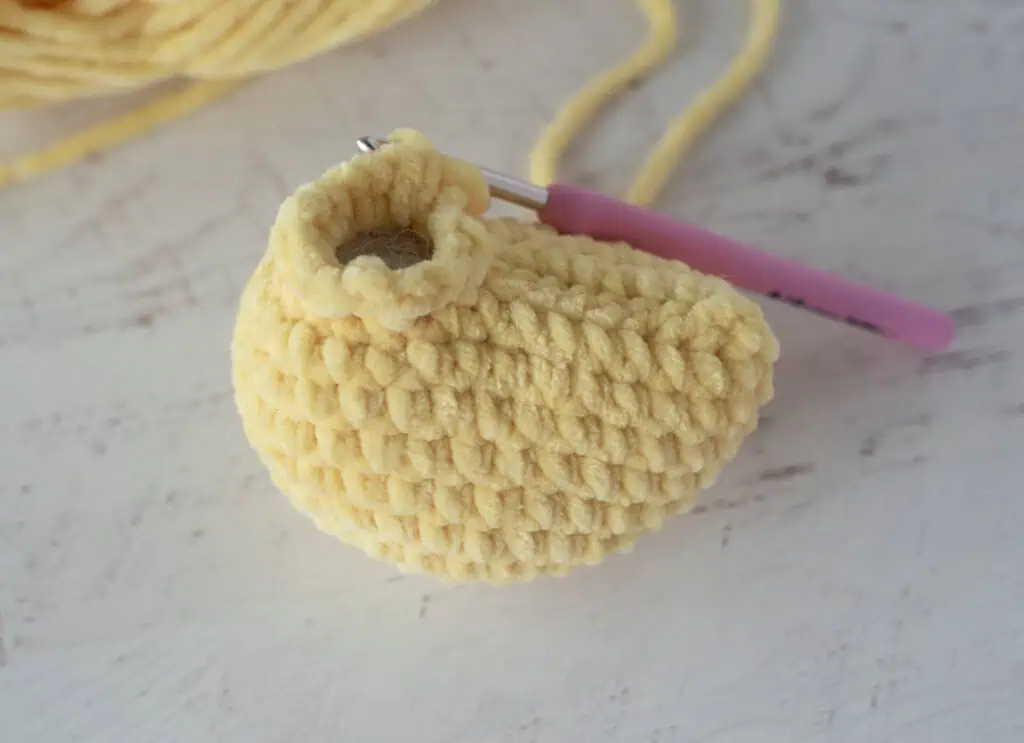
R2 *Sc in next st, 2 sc in next. Repeat from * around. (21 st)
R3: *Sc in next 6 st, 2 sc in next. Repeat from * around. (24 st)
R4-6: Sc around. (24 st)
R7: *Sc in next st, sc2tog. Repeat from * around. (16 st)
Insert safety eyes between rows 4 &5, leaving 6 stitches in between them. Stuff head and continue to stuff head as you work.
R8: *Sc2tog. Repeat from * around. (8 st) Fasten off, weave end through last stitches and pull tight.
Duck Beak
With tangerine yarn, ch 5
R1: Hdc in 3rd ch from hook, hdc in next 2 ch, rotate work, then hdc on opposite side of ch in next 3 st. Join with an invisible join and fasten off.
Sew beak between rows 3 & 4 of duck’s head, centering between the eyes.
Weave in any loose ends.
Make It Your Own
One of my favorite things about this crochet duck pattern is how easy it is to give Scout a completely different personality just by changing a few little details!
Try:
- Classic yellow with an orange beak for that iconic rubber duck look
- White or cream for a sweet little farm duck
- Pastel pink, blue, lavender or mint for a fun springtime flock
- Bright, bold colors for ducks that really stand out
- Making several in coordinating colors for an adorable duck collection
- Adding a tag and sending your Scout out into the world as part of the ducking tradition
With such a quick and easy pattern, Scout is the kind of project that practically begs you to make another. Change up the colors, give each one its own personality, and before you know it, you’ll have a whole flock!
Final Thoughts on this Darling Duck
I had so much fun designing Scout. I love how he’s just the perfect size and shape, and how the simple addition of the weighted pouch helps him sit up perfectly without a lot of fussing. And best of all? He’s a quick make too!
From his plump little body to that sweet orange beak and adorable face, Scout has all the things I love most in an amigurumi project: simple stitches, easy construction, and a finished piece that makes you smile.
Whether you’re crocheting Scout as a gift, making a whole bunch for the ducking tradition, or simply adding another cute little friend to your amigurumi collection, I hope you love every minute spent making him.
And don’t be surprised if one Scout leads to another. With a project this quick and cute, it’s awfully hard to stop at just one!
I love seeing your finished projects! If you enjoyed making Scout the Crochet Duck I’d love to see yours on Instagram, be sure to tag me @crochet365knittoo. If you are on Facebook, stop over to the Crochet 365 Knit Too Facebook page or pop over to the Crochet365KnitToo Club and share a photo! I’d love to see your work!