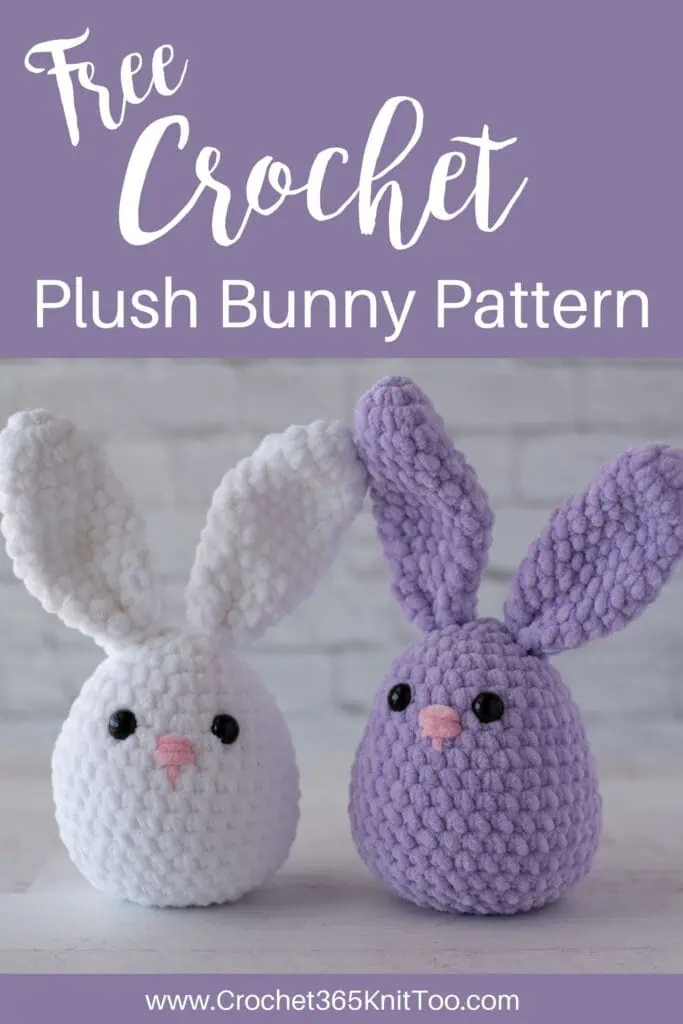
Crochet Amigurumi Bunny
This post may contain referral/affiliate links. Please read my disclosure for more info.
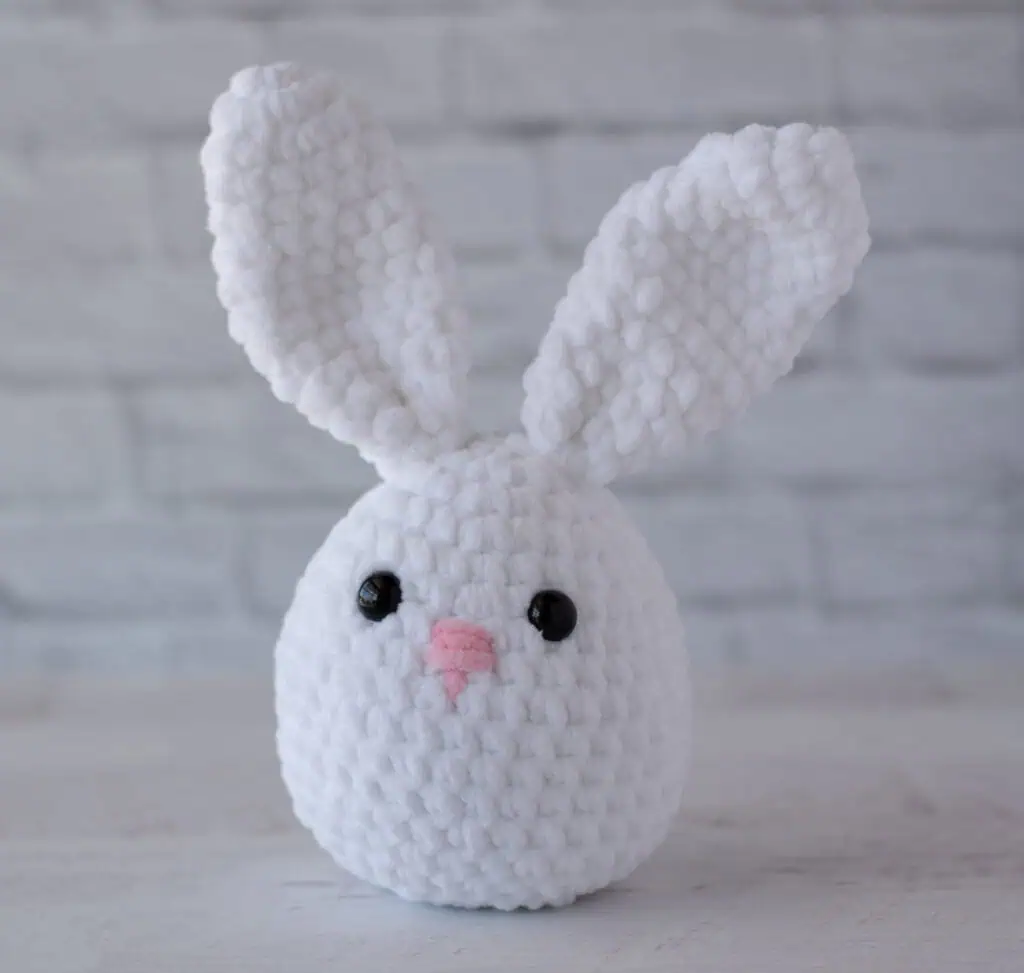
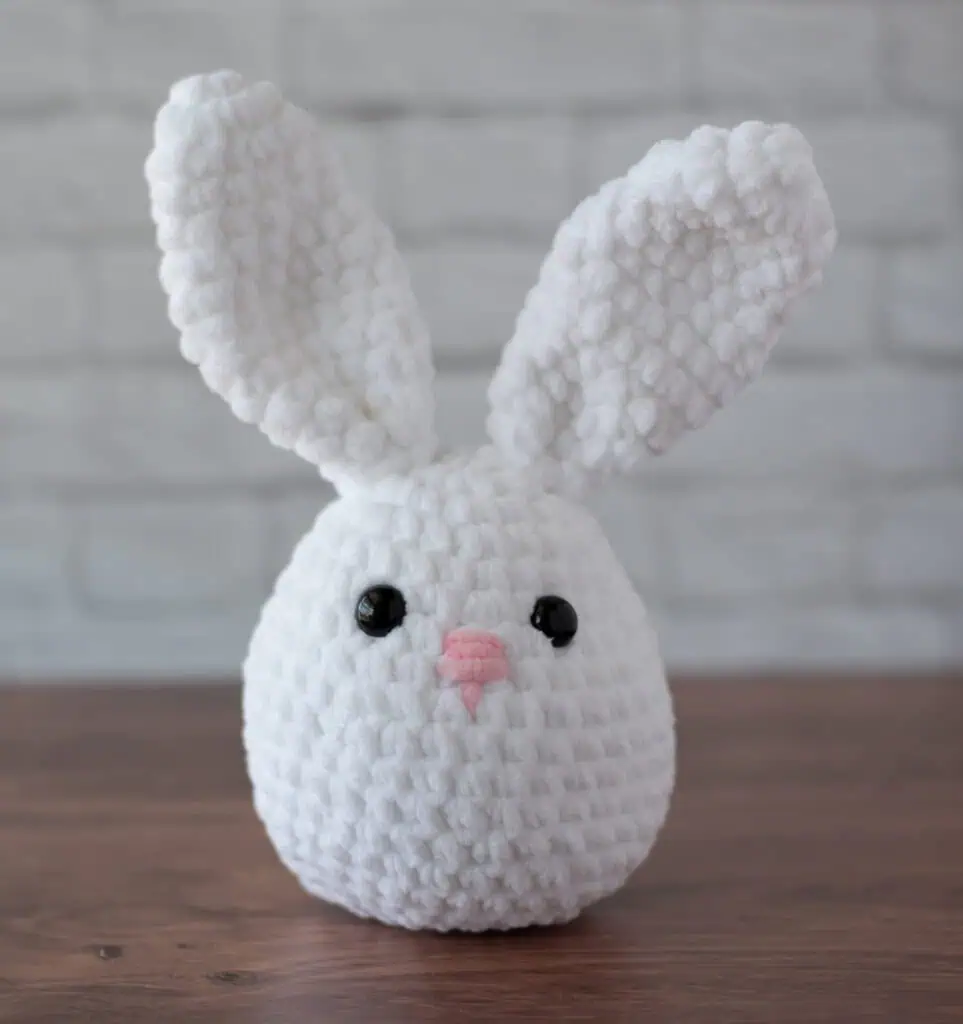
He’s cute! He’s squishy. He’s perfect for your Easter basket or spring decor. Meet my adorable squishy crochet amigurumi bunny!

This darling cutie is hopping right into your little crochet heart!
The best way I can describe this bit of cuteness is that I combined all the things I loved about my worsted weight Crochet Easter Egg Bunny , my darling Crochet Cardinal and those adorable ears on my Bunny Snuggler into one, perfect squishy bit of goodness.
I seriously wish you could reach right through the screen to feel this for yourself. So, so soft and squishy in the best ways possible. I also love the size of this guy. He’s big enough to feel like something special, but not enormous enough to be a major project.
He (or she) is literally the best evening crocheting you’re going to have. Quick. Fun. It is so fun to see this cutie come together. This crochet amigurumi bunny is perfect gift for the child in your life as a special Easter present. But it’s also pretty darn nice keeping it for yourself too!
Let’s talk the crochet details.
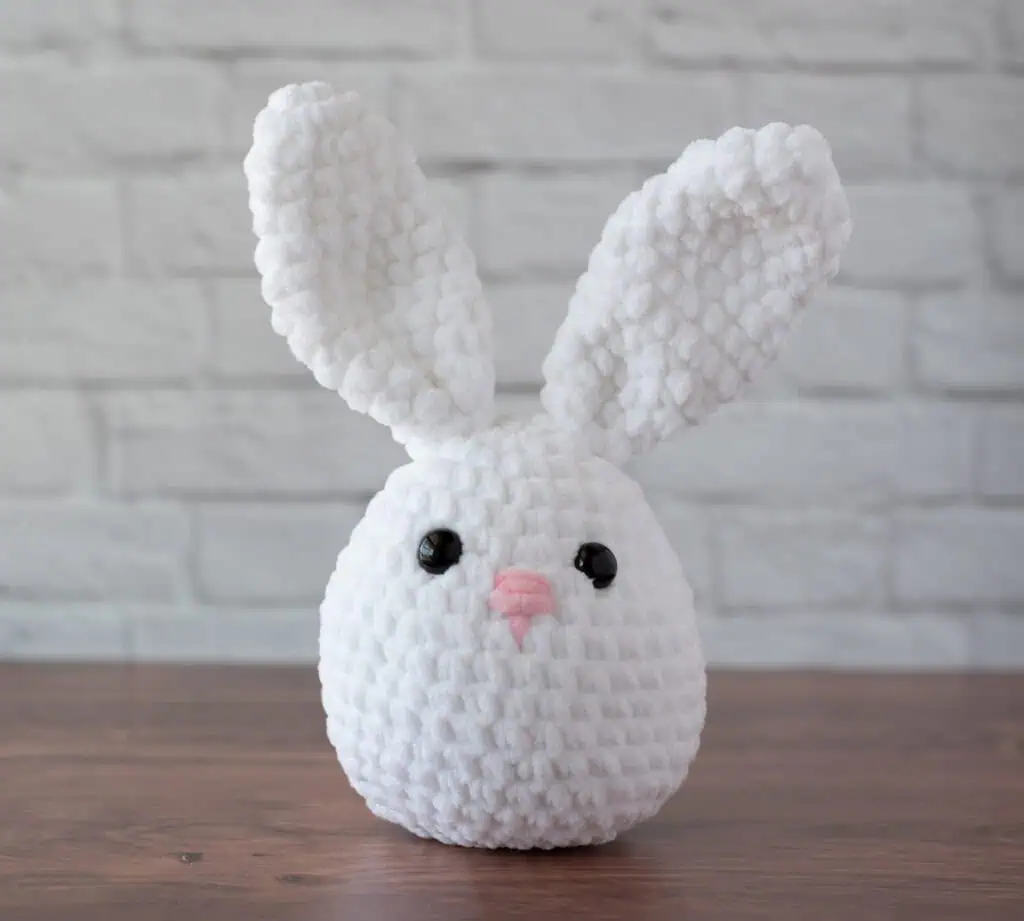
For the white version of the bunny, I’m using a Super Bulky Weight #6 chenille style yarn crocheted with a smaller than normal hook to give the piece just the right amount of stiffness. I’m a big fan of Premier Parfait Chunky yarn for this project because it always works up so lovely.
My favorite place to get Premier Parfait Chunky is from Herrschner’s for the best pricing or Amazon. If you can’t locate a color, this Etsy shop seems to stock them all and has pretty fast shipping.
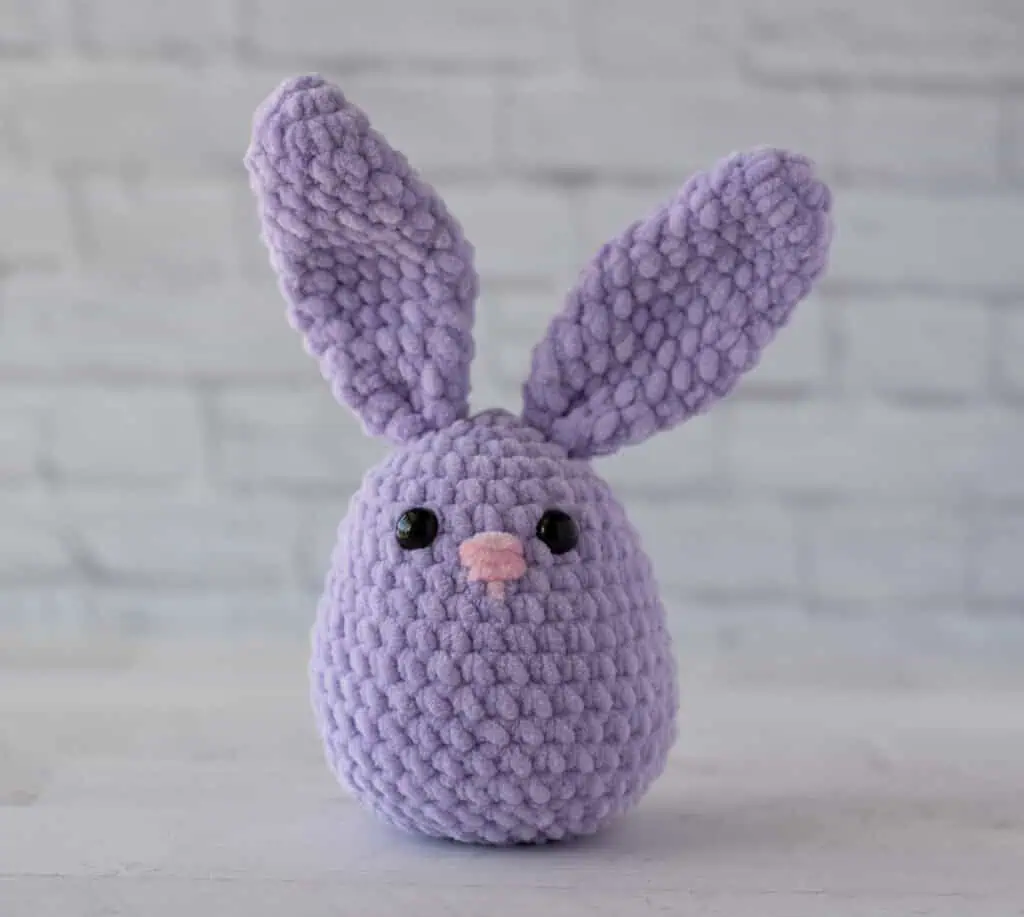
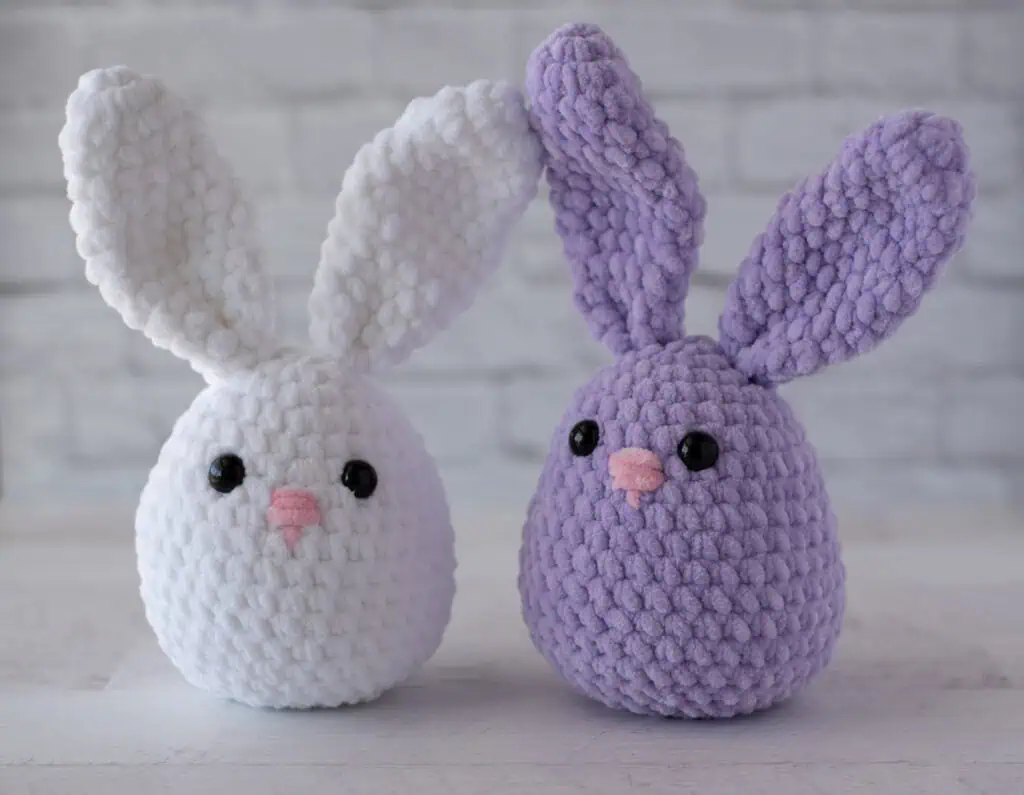
This purple little number is this delectable yarn exclusively from Herrschner’s called Soho Skwishy. The folks at Herrschner’s sent me a box of yarn to try and, of course, when I saw that perfect pastel purple, I just knew this bunny pattern was the perfect project to give it a try.
It’s actually a #5 weight bulky yarn, but it feels exactly like the Parfait Chunky and crochets to the same gauge. It’s a joy to crochet with. The stitches lay so nice and I really like the color saturation. It’s beautiful. I did have a little bit of trouble with “worming” which can happen sometimes with chenille yarn.
I found that I had to keep my magic ring at times a bit looser to prevent that (other times it was just fine). I also had it happen a bit when I weaved in the end. It’s easy to work around (and you can always cut another strand for sewing if you need to).
Purchase the Beautifully Formatted AD-FREE PDF DOWNLOAD
If you think that would bug the daylights out of you, maybe stick to the Premier Parfait Chunky instead. I personally liked the final result so much and enjoyed crocheting with it so much it was worth this downside.
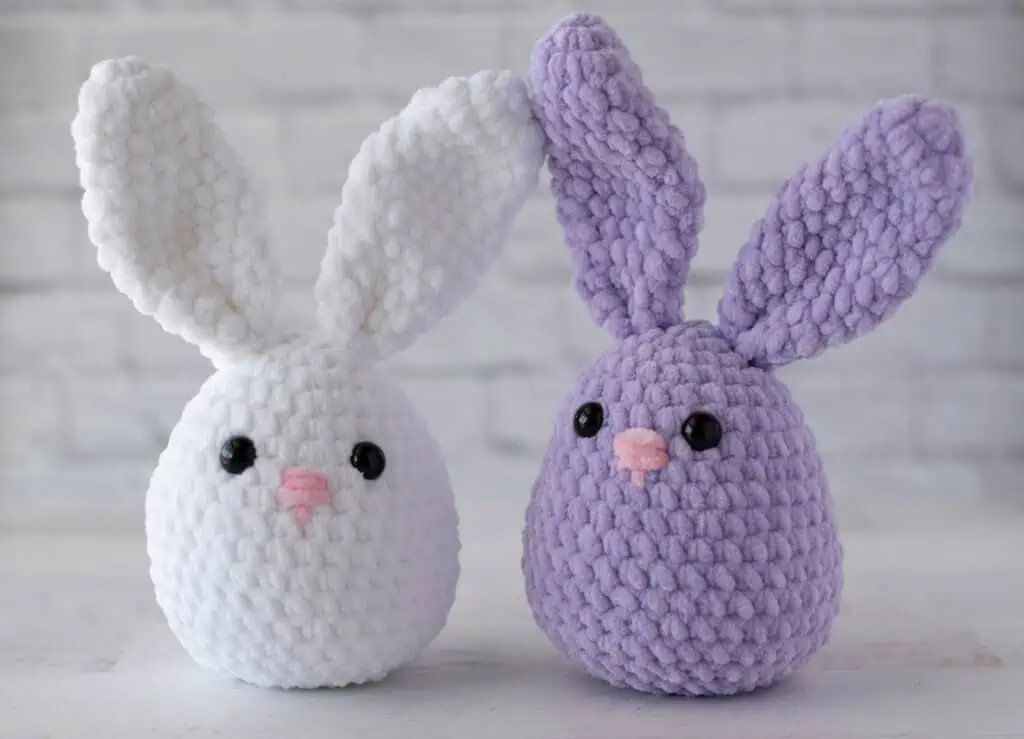
As you can see from the photo, how you stuff your piece does affect the finished project. Both of these bunnies are the exact same size. The white one is stuffed a little more for a plump look and the purple has more of an egg shaped vibe going on. I think I also may have squished one more than the other before taking the photo. In real life the 2 look adorably the same!
Let’s crochet!
Crochet Amigurumi Bunny
Materials
- Premier Parfait Chunky, size 6 super bulky weight, 100% Polyester, 131yds/120m per 3.5 oz/100g skein (try Herrschners, Amazon or Etsy)
- 1 skein #1150-01 White, 70 yards
- #1150-18 Ballet Pink, 1 yard (for nose embroidery for both bunnies)
- Soho Skwishy, size 5 bulky weight, 100% Polyester, 131yds/120m per 3.5 oz/100g skein (try Herrschners,)
- 1 skein #1017 Lilac, 70 yards
- US H8/5.00 mm crochet hook ( these are my absolute favorite hooks I recommend to everyone!)
- 12 mm safety eyes. NOTE: if making for a baby or young child, embroider eyes instead
- Stitch markers to keep track of rows
- Fiberfill
- Tapestry needle and scissors
Resources and tutorials you may find helpful in following this pattern: Crochet Abbreviations, US to UK Crochet Conversion Chart. Find links to stitches on the “Tutorial” menu: Getting Started will show basic stitches used in many patterns and Crochet Stitch Dictionary shows our growing collection of crochet stitch tutorials.
Gauge:
My gauge is 6 sc to 2 inches. However, gauge is not important in this pattern. You may use other weights of yarn. Adjust hook size to fit your needs.
Resources and crochet tutorials you may find helpful in following this pattern: Crochet Abbreviations, US to UK Crochet Conversion Chart. Find links to stitches and basic crochet skills on the “Tutorial” menu: Getting Started will show basic stitches such as the slip stitch, single crochet, double crochet stitch and chain stitch used in many patterns and Crochet Stitch Dictionary shows our growing collection of crochet stitch tutorials.
Crochet Abbreviations:
- ch = chain
- sc = single crochet
- sl st = slip stitch
- st = stitch(es)
Finished Crochet Bunny Size
Bunny is 4.5” tall (minus ears) x 4” wide.
How to Crochet a Bunny Amigurumi
This bunny is egg shaped, starting at the top and worked in one piece until the bottom. The ears are then crocheted and sewn to the top of the body.
Bunny
Using main color yarn, make a magic ring.
R1: 6 Sc into ring. Work in rounds. (6 sts).
R2: 2 Sc in ea st. (12 st)
R3: *Sc in next st, 2 sc in next. Repeat from * around. (18 st)
R4: *Sc in next 2 st, 2 sc in next. Repeat from * around. (24 st)
R5: Sc around. (24 st)
R6: *Sc in next 3 st, 2 sc in next. Repeat from * around. (30 st)
R7: Sc around. (30 st)
R8: *Sc in next 6 st, 2 sc in next, sc in next 7 st, 2 sc in next. Repeat from * once. (34 st)
R9-14: Sc around. (34 st)
R15: *Sc in next 6 st, sc next 2 st together, sc in next 7 st, sc next 2 st together. Repeat from * once. (30 st)
R16: *Sc in next 3 st, sc next 2 st together. Repeat from * around. (24 st)
R17: *Sc in next st, sc next 2 st together. Repeat from * around. (16 st)
Insert safety eyes between rows 6 & 7, leaving 5 stitches in between them. Stuff and continue to stuff as you complete bunny.
R18: *Sc next 2 st together. Repeat from * around. (8 st)
Fasten off, weave end through last stitches and pull tight.
Ears (Make 2)
With main color yarn, make a magic ring.
R1: 6 Sc into ring. Work in rounds. (6 sts).
R2: *2 Sc in ea st, repeat from * around. (12 st)
R3-5: Sc around. (12 st)
R6: *Sc in next 3 st, 2 sc in next st, repeat from * around. (15 st)
R7-9: Sc around. (15 st)
R10: *Sc in next 3 st, sc 2 tog, repeat from * around. (12 st)
R11-12: Sc around. (12 st)
R13: *Sc in next 2 st, sc 2 tog, repeat from * around. (9 st)
R14: Sc around. (9 st).
Then sl st to next stitch. Fasten off, leaving a long strand for sewing. Fold bottom edge in half and whip stitch closed. Then sew on top of head on an angle over row 2 and 3 or as desired.
Finishing
Thread tapestry needle with pink thread and referring to photo, make 3 stitches between the nose as shown. Make one vertical stitch underneath and below nose. Fasten off and weave in ends.
I love seeing your finished projects! If you enjoyed making this Crochet Bunny pattern, I’d love to see yours on Instagram, be sure to tag me @crochet365knittoo. If you are on Facebook, stop over to the Crochet 365 Knit Too Facebook page or pop over to the Crochet365KnitToo Club and share a photo! I’d love to see your work!