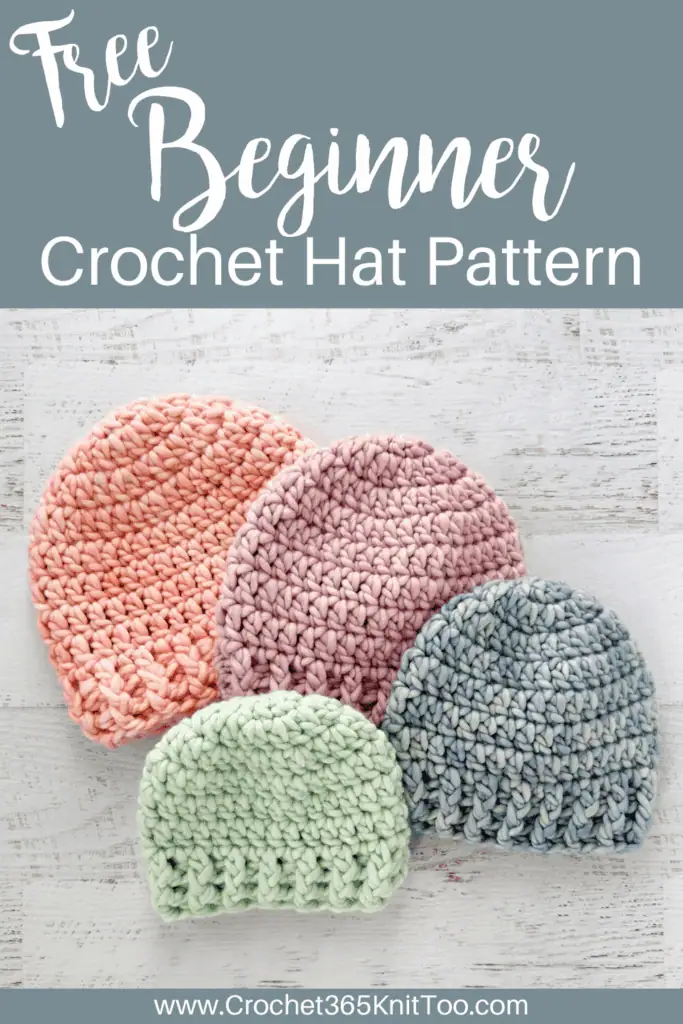
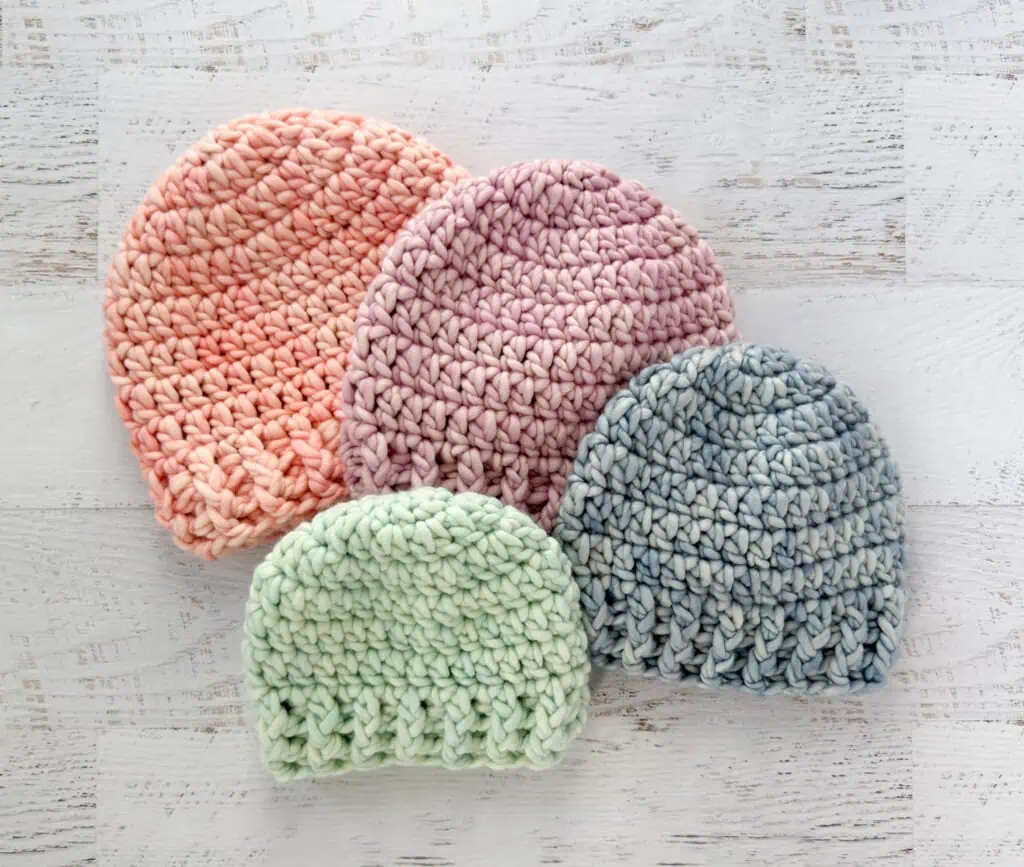
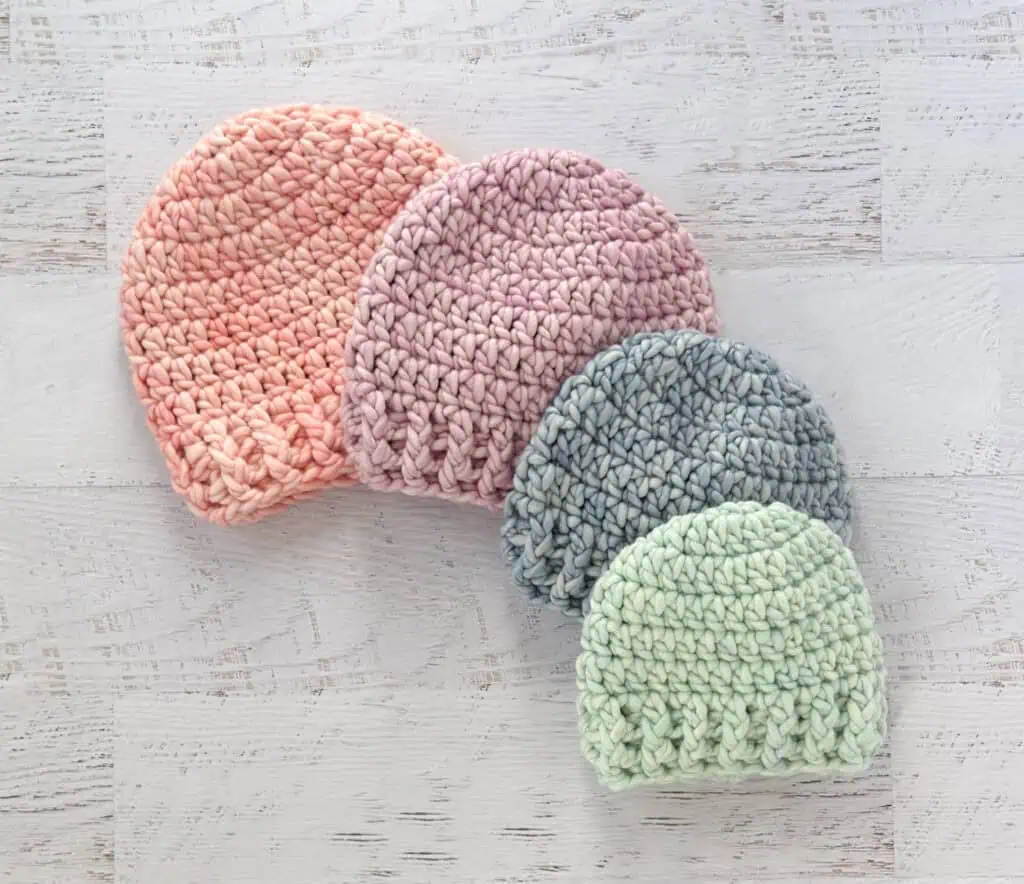
Basically Brilliant Beginner Beanie
This post may contain referral/affiliate links. Please read my disclosure for more info.
Take a beautiful, high quality thick yarn. Add a simple stitches and a short evening of your time crocheting this beginner crochet hat and voila! A beautiful hat no one will believe you made yourself!
Meet the Basically Brilliant Beanie: the easiest, most decadent thing you’ll have on your hook this season.
I love this pattern so much that it’s hard for me to decide which to talk about first: the luxurious yarn or the simple easy to work pattern.
Sigh. The yarn. It always wins.
I used a stunning yarn purchased at a local yarn shop. If you’ve been waiting to indulge, this might be the time. (Side note: if this is not in your budget or you simply want an alternative, you can simply substitute any other Super Bulky #6 yarn that matches gauge.)
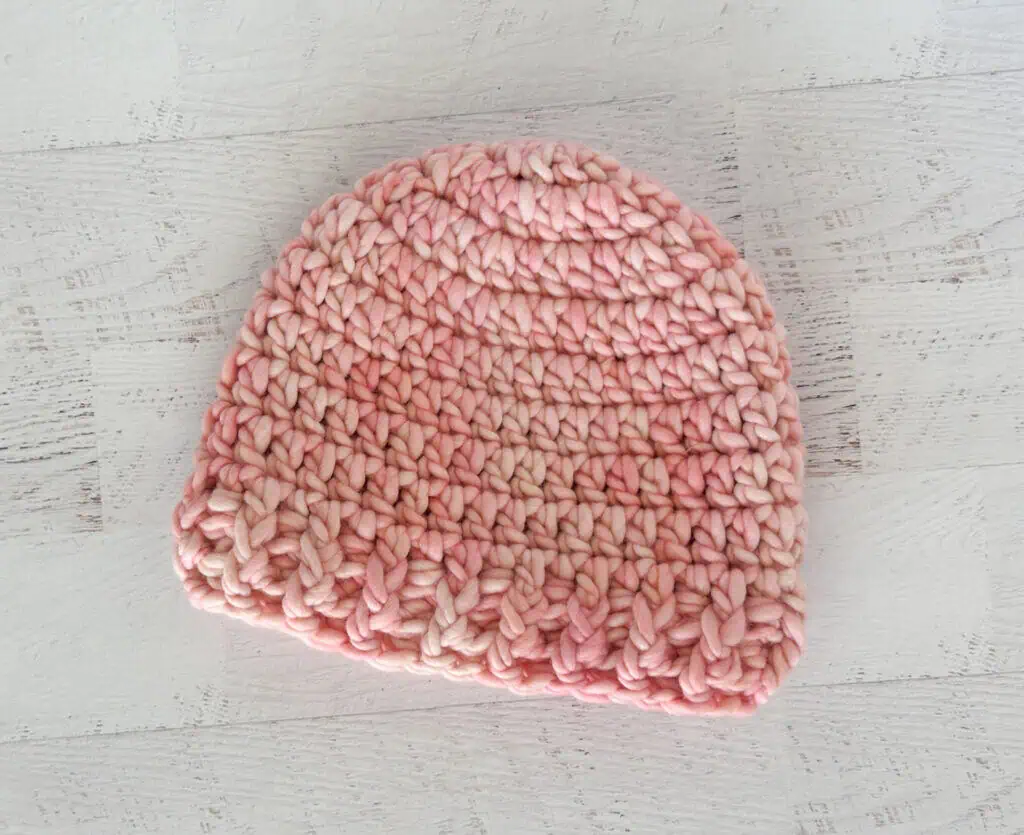
For this pattern I’m using Rasta by Malabrigo. I could pretty move in to wherever they make Malabrigo yarn, because I literally love every single line they carry. Rasta is a premium Uruguayan merino fiber that’s a single ply which is ever so slightly felted.
The color. Oh man. The color. Malabrigo is known for their range of “watercolor multi” colorways and semi-solid basics. I suppose the yarn colors I chose for this basic crochet hat falls into the semi-solid basic category, but in person they have a depth of color that just makes me so happy. Little parts where the dye is ever so slightly darker or lighter. And the whole skein of Rasta is a squishy bit of goodness I love.
I loved this yarn so much, I used it for my Superior Ridge Beanie too. It’s simply delicious.
This is one yarn I really recommend getting in person at a local yarn shop. You can, in a pinch, grab it on Amazon. But often the colors are hard to “read” on screen. Plus a local yarn shop will often wind the skein into a cake for you. Otherwise you’re going to need a yarn swift and a ball winder too.
It is well worth the effort because this yarn is simply gorgeous.
Let’s talk about the pattern itself. It features easy peasy stitches, making this a perfect pattern for a beginner. Because it’s worked with a super bulky weight yarn, the stitches go fast! And the wool yarn fills in all the little gaps you might normally find when working double crochet to make a beautifully warm winter hat.
I love that!
I’m also using a stacked double crochet stitch instead of a turning chain. This is a thing of brilliance, in my opinion. If you’ve been crocheting awhile, you know that the normal chain 3 at the start of a double crochet row can sometimes be problematic. It’s not quite the thickness of a regular double crochet.
So it looks different and is a little narrower and for some of us, that’s an annoyance. The stacked single crochet is a great solution because it creates a stitch that looks almost exactly like a double crochet.
Scroll down into the special stitches section of the instructions for instructions on how to make the stacked double crochet.
Purchase the Beautifully Formatted AD-FREE PDF DOWNLOAD
Of course if that is not your cup of tea or you simply want to stick with something easy, a chain 3 turning chain instead will work just fine.
Let’s dive into the pattern.
Basically Brilliant Beginner Beanie
Materials
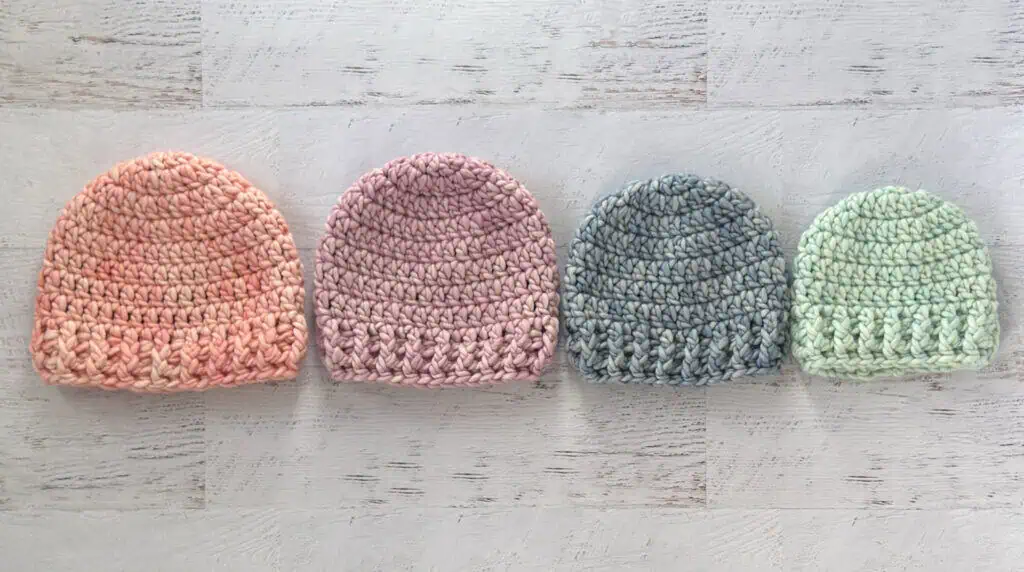
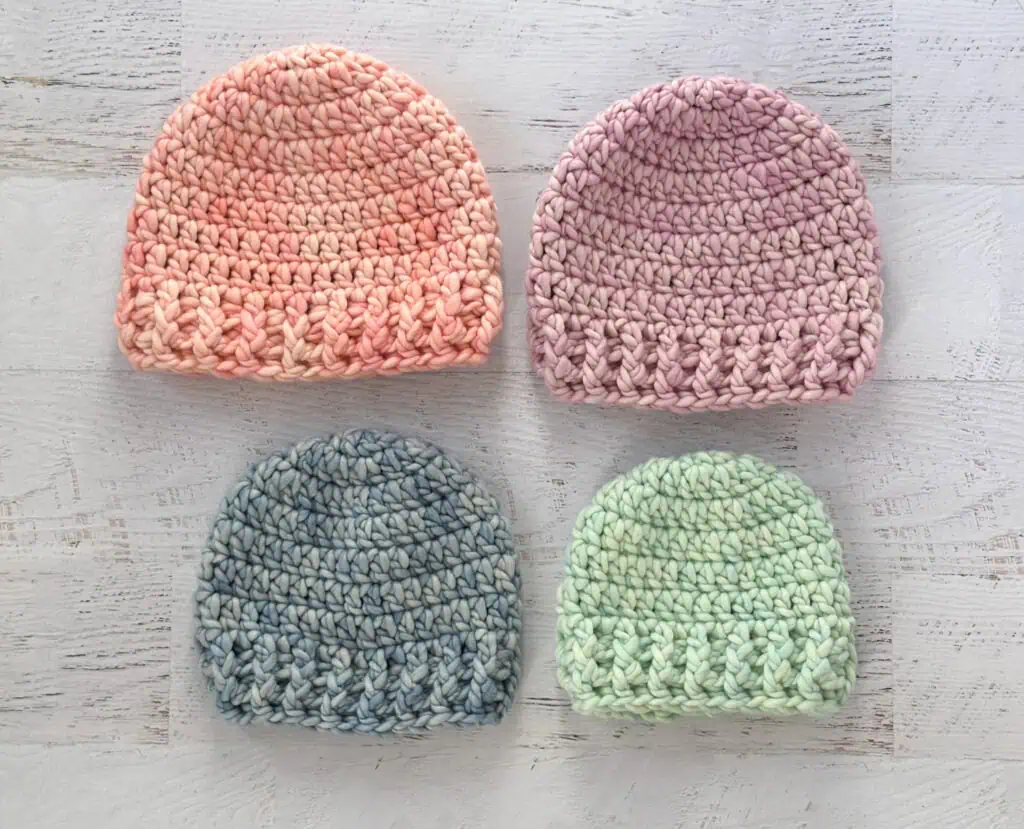
- Malabrigo Rasta, size 6 super bulky weight, 100% merino wool, 90yds/82m per 5.29oz/150g skein. 1 skein needed for each hat, 3 – 5 oz used per hat:
- 703 Almond Blossom (pink)
- 689 Valentina (purple)
- 706 Cosmos (blue)
- 708 Cucumber (green)
- US L11/8 mm crochet hook
- Stitch markers (helpful but not required)
- Tapestry needle and scissors
Resources and tutorials you may find helpful in following this pattern: Crochet Abbreviations, US to UK Crochet Conversion Chart. Find links to stitches on the “Tutorial” menu: Getting Started will show basic stitches used in many patterns and Crochet Stitch Dictionary shows our growing collection of crochet stitch tutorials.
Gauge:
My gauge is approximately 8 st and 5 rows to 4 inches.
Resources and crochet tutorials you may find helpful in following this pattern: Crochet Abbreviations, US to UK Crochet Conversion Chart. Find links to stitches and basic crochet skills on the “Tutorial” menu: Getting Started will show basic stitches such as the slip stitch, single crochet, double crochet stitch and chain stitch used in many patterns and Crochet Stitch Dictionary shows our growing collection of crochet stitch tutorials.
Crochet Abbreviations:
- ch(s) = chain(s)
- dc = double crochet
- BPDC = back post double crochet
- FPDC = front post double crochet
- sl st = slip stitch
- st = stitch(es)
Special Stitch:
STSC = stacked single crochet
I used a stacked single crochet as an alternative to a turning chain in this hat pattern. You can absolutely work a chain 3 instead, but if you’d like to give the stacked single crochet a try, here are the steps:
- Do NOT chain at the beginning of the row. Instead, insert hook into the first stitch, yarn over and pull up a loop
- Yarn over and pull through both loops on the hook. (Looks like a single crochet stitch at this point)
- Looking at the front of the stitch completed in step 2, insert hook into the left leg (or vertical bar) of the single crochet just worked.
- Yarn over and pull through both loops on hook.
This results in 2 single crochet stitches on top of each other (equal to the height of a double crochet stitch) and replaces a ch-3 turning chain.
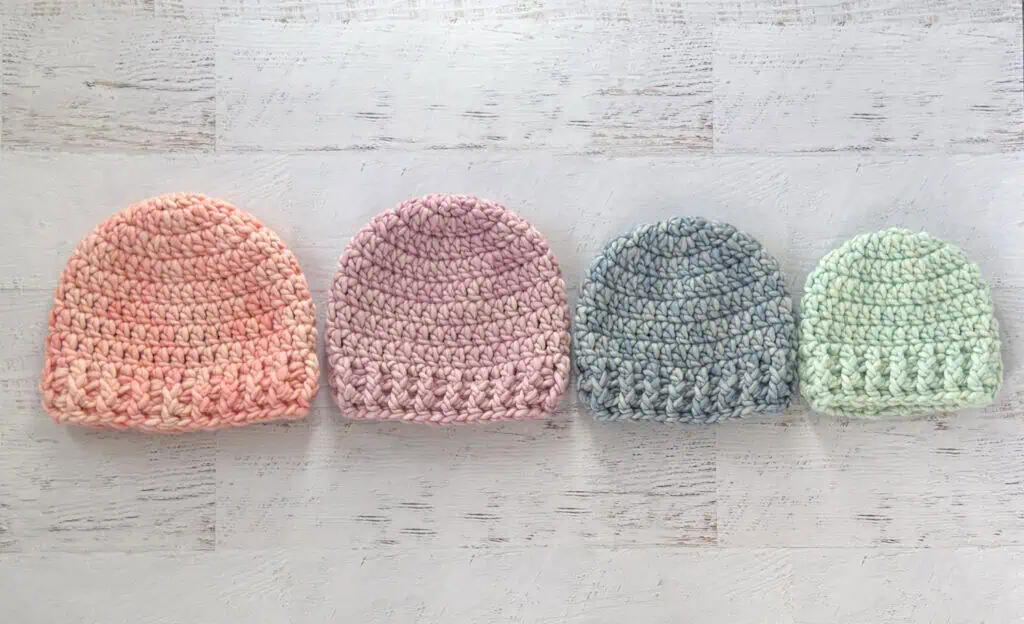
Finished Hat Size
Sizes listed as Adult (toddler, child, teen)
Circumference 20 (14.5, 17, 18.5)” around.
Height 8.5 (7, 7.5, 8.5)” tall
How to Crochet a Hat
The hat is worked top down. It starts with a magic ring and is worked in double crochet stitches. The ribbing is a few rows of post stitches. The super bulky weight yarn means this is a very quick pattern to make with few stitches. Perfect for beginners who wish to learn basic techniques with a hat that is high boutique ready.
Let’s dive in!
Hat (Adult)
Make a magic ring
R1: Ch 3 (counts as dc) and work 9 dc in the ring. At end of round, join to top of starting stitch. (10 st)
Note: Pattern uses a STSC (stacked single crochet) as an alternative to a turning chain. If you prefer, you can work a ch-3 in place of the STSC. (See Special Stitch section)
R2: STSC in 1st st (counts as dc here and throughout), dc in same st, 2 dc in ea st around. At end of round, join to top of starting stitch. (20 st)
R3: STSC in 1st st, 2 dc in next st, *dc in next st, 2 dc in next st, repeat from * around. At end of round, join to top of starting stitch. (30 st)
R4: STSC in 1st st, dc in next st, 2 dc in next st, (dc in next 2 st, 2 dc in next st) 3 times, dc in next 5 st, 2 dc in next st, (dc in next 2 st, 2 dc in next st) 3 times, dc in next 3 st. At end of round, join to top of starting stitch. (38 st)
R5-9: STSC in 1st st, dc in ea st around. At end of round, join to top of starting stitch. (38 st).
Proceed to Ribbing
Hat (Toddler)
Make a magic ring
R1: Ch 3 (counts as dc) and work 9 dc in the ring. At end of round, join to top of starting stitch. (10 st)
Note: Pattern uses a STSC (stacked single crochet) as an alternative to a turning chain. If you prefer, you can work a ch-3 in place of the STSC. (See Special Stitch section)
R2: STSC in 1st st (counts as dc here and throughout), dc in same st, 2 dc in ea st around. At end of round, join to top of starting stitch. (20 st)
R3: STSC in 1st st, 2 dc in next st, *dc in next st, 2 dc in next st, repeat from * around. At end of round, join to top of starting stitch. (30 st)
R4-7: STSC in 1st st, dc in ea st around. At end of round, join to top of starting stitch. (30 st).
Proceed to Ribbing
Hat (Child)
Make a magic ring
R1: Ch 3 (counts as dc) and work 9 dc in the ring. At end of round, join to top of starting stitch. (10 st)
Note: Pattern uses a STSC (stacked single crochet) as an alternative to a turning chain. If you prefer, you can work a ch-3 in place of the STSC. (See Special Stitch section)
R2: STSC in 1st st (counts as dc here and throughout), dc in same st, 2 dc in ea st around. At end of round, join to top of starting stitch. (20 st)
R3: STSC in 1st st, 2 dc in next st, *dc in next st, 2 dc in next st, repeat from * around. At end of round, join to top of starting stitch. (30 st)
R4: STSC in 1st st, dc in next 5 st, 2 dc in next st, dc in next 7 st, 2 dc in next st, dc in next 6 st, 2 dc in next st, dc in next 7 st, 2 dc in next st. At end of round, join to top of starting stitch. (34 st)
R5-8: STSC in 1st st, dc in ea st around. At end of round, join to top of starting stitch. (34 st).
Proceed to Ribbing
Hat (Teen)
Make a magic ring
R1: Ch 3 (counts as dc) and work 9 dc in the ring. At end of round, join to top of starting stitch. (10 st)
Note: Pattern uses a STSC (stacked single crochet) as an alternative to a turning chain. If you prefer, you can work a ch-3 in place of the STSC. (See Special Stitch section)
R2: STSC in 1st st (counts as dc here and throughout), dc in same st, 2 dc in ea st around. At end of round, join to top of starting stitch. (20 st)
R3: STSC in 1st st, 2 dc in next st, *dc in next st, 2 dc in next st, repeat from * around. At end of round, join to top of starting stitch. (30 st)
R4: STSC in 1st st, dc in next 3 st, 2dc in next st, *dc in next 4 st, 2 dc in next st. Repeat from * around. At end of round, join to top of starting stitch. (36 st)
R5-9: STSC in 1st st, dc in ea st around. At end of round, join to top of starting stitch. (36 st).
Proceed to Ribbing
Ribbing All Sizes
R1-2: Ch 3 (counts as dc), *FPDC in next st, BPDC in next st* repeat * to * around.
Fasten off and weave in ends.
I love seeing your finished projects! If you enjoyed making the Basically Brilliant Beanie pattern, I’d love to see yours on Instagram, be sure to tag me @crochet365knittoo. If you are on Facebook, stop over to the Crochet 365 Knit Too Facebook page or pop over to the Crochet365KnitToo Club and share a photo! I’d love to see your work!