
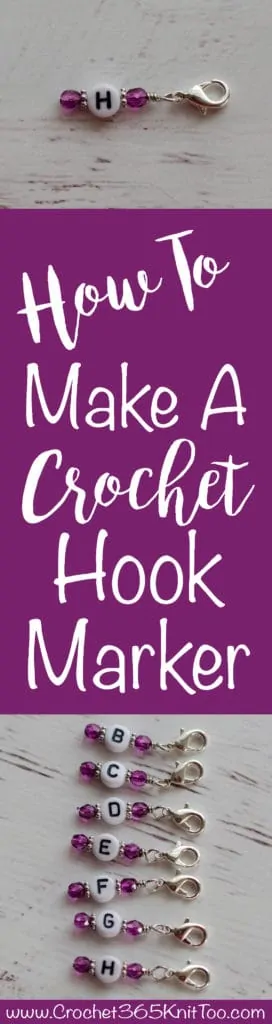
How to Make A Crochet Hook Marker
This post may contain referral/affiliate links. Please read my disclosure for more info.
Ever wonder how to keep track of your spot in your crochet and never forget your hook size again? Enter this Crochet Hook Marker!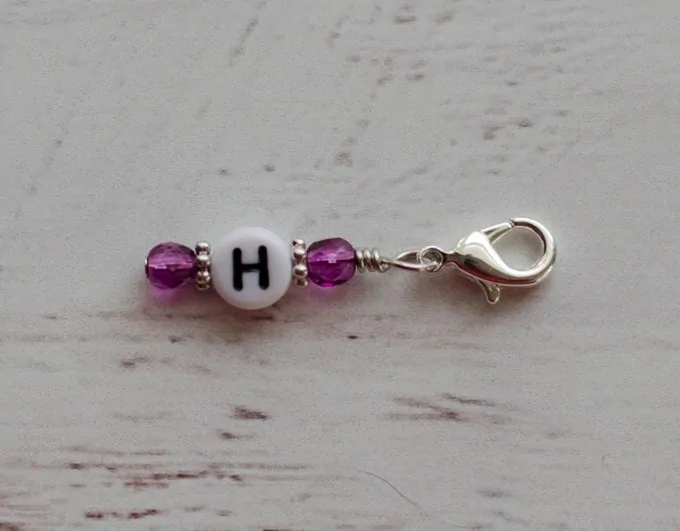
I have a problem. I start multiple projects at once. Then I steal the hook from one project to go to another. And then.. you guessed it… I forget which hook I was using in the first project. It is SO. AGGRAVATING.
And yes, I do own multiple hooks. In fact, I like to “rescue” hooks from garage sales and estate sales. I know. I know. I have a problem. But somehow I manage to LOSE hooks in my house. So when I spotted a cute crochet hook marker online, I just knew I had to make some!
And I figured.. hey.. you’re probably a crafty person too, so maybe you’d like to make some too. Maybe you’d even like to make a set for your sister. You know the sister. The one who always finishes every project she starts and probably doesn’t even need these guys. But they are pretty. And she might someday take a chance in life, live on the edge and start a 2nd or 3rd (or 100th) project before finishing the first and she might need these. And then she will be ready. Because you’re thoughtful that way.
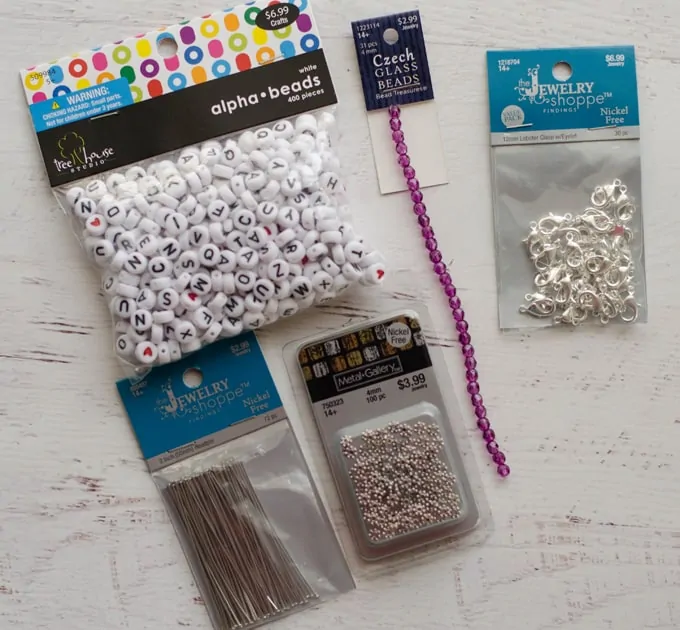
Here is what you need:
- Alphabet letter beads. If you keep track of your hooks by number, you could get number beads instead.
- 4mm beads, I like the Czech glass beads
- 4mm spacer beads
- 12mm lobster clasps
- 2 inch head pins
- Round nose pliers and wire cutters (I already had these at home so links show similar items)
I purchased my supplies for my crochet hook markers (minus the pliers and cutters) at Hobby Lobby. If you get the supplies on sale and/or use coupons the cost is reasonable. Plus if you plan on making more than 1 set, the cost per set is pretty reasonable.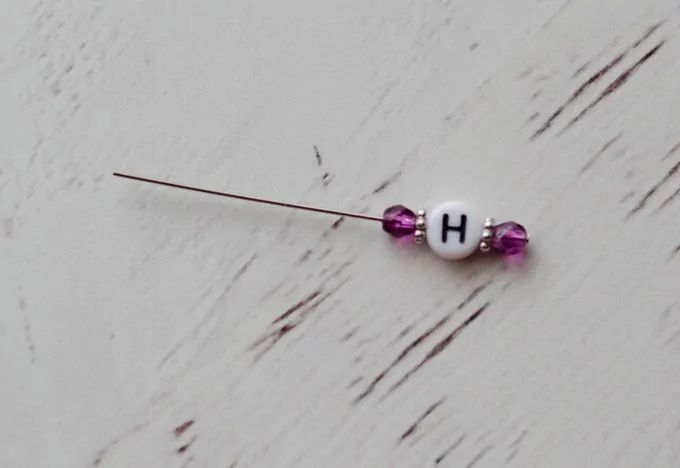
Thread the beads on the pin: first a Czech bead, then a spacer, then the alpha bead, then another spacer, and another Czech bead. If you haven’t used the pins before, there is a little “head” at the end which will keep the beads from falling off the end. Jewelry makers will often use these head pins for making earrings.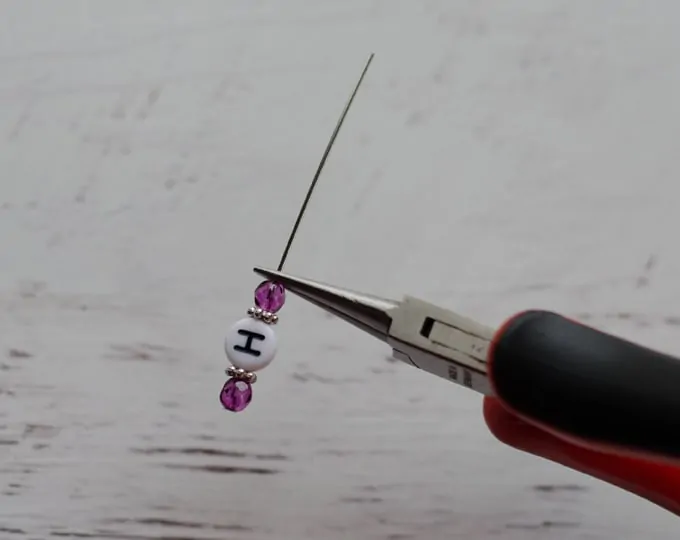 Next, make sure your beads are snugged down and position your pliers right at the top of the bead.
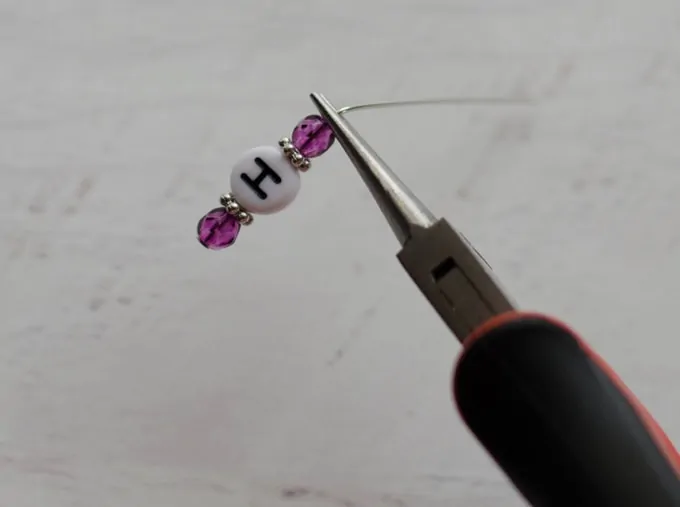 Then bend the wire 90 degrees over top of the right side of the pliers.
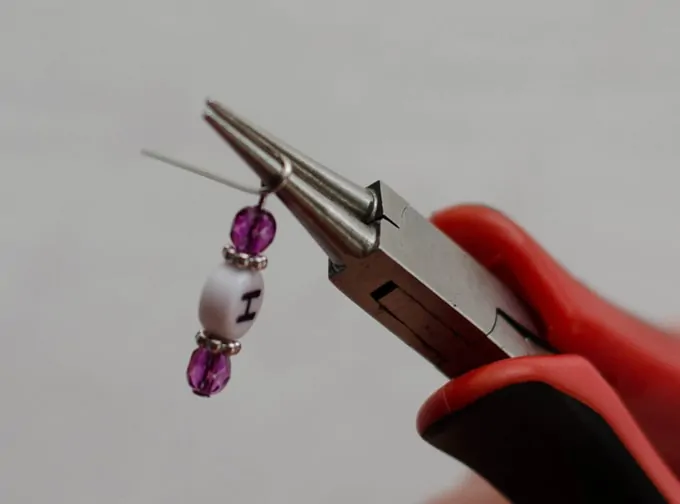 Next, reposition the pliers so they are on the opposite side of the bend and pull the wire up and over to make a circle around the pliers. If you haven’t done this before, it might take you a couple of tries. Also, at any time, if things aren’t working out as you’d like, you can cut the wire and start over. I do that sometimes when I am not happy about how things are looking. It takes a bit of practice to learn jewelry making.
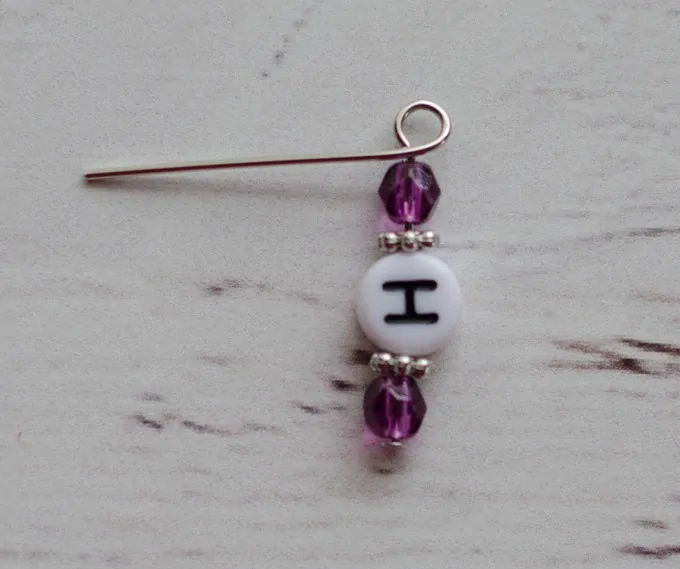 Now you should have a piece that looks like this. There is actually a little bit of slack space in the beaded area that will be used to wrap the wire around. But before we do any wrapping, now is the time to slip the lobster clasp on the loop.
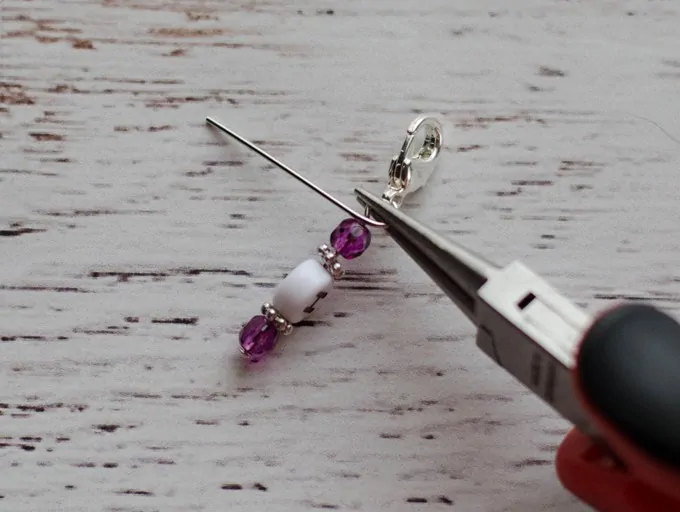 Now pick up the piece, this time with the pliers grasping right on to the loop. Hold the whole piece up so the beads adjust to the bottom of the pin and there will be a small space between the loop and the start of the pins. Wrap the wire around this space a few times until it is snug. Usually 2 times around will do the job.
Cut the wire close to the wraps and use your pliers to push in any protruding wire in between the wraps and beads. I usually run my finger along the cut area to make sure nothing is poking out. You don’t want to poke yourself or snag some yarn later when you use the crochet hook markers.And there you go! A finished Crochet Hook Marker. Just clip this on the open loop of a project and you’ll never forget what hook size you were using!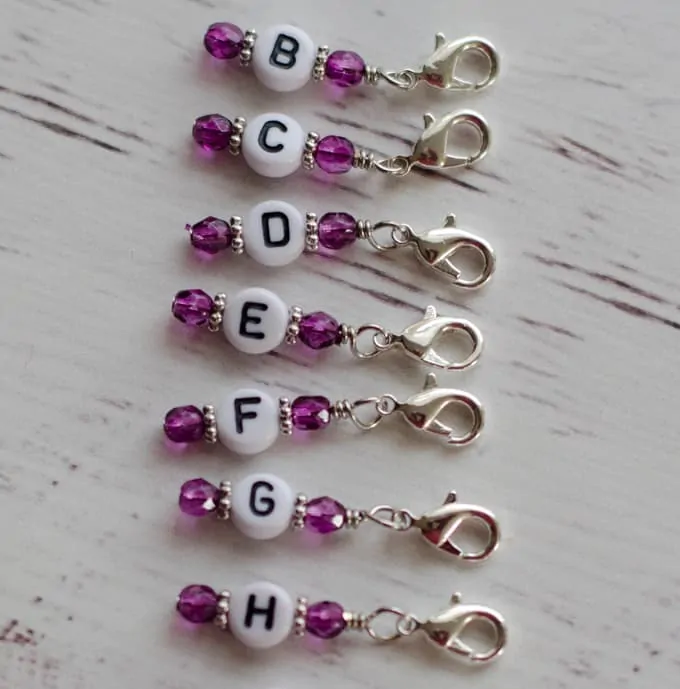 Of course, you will want to make one to correspond with every hook size you have.
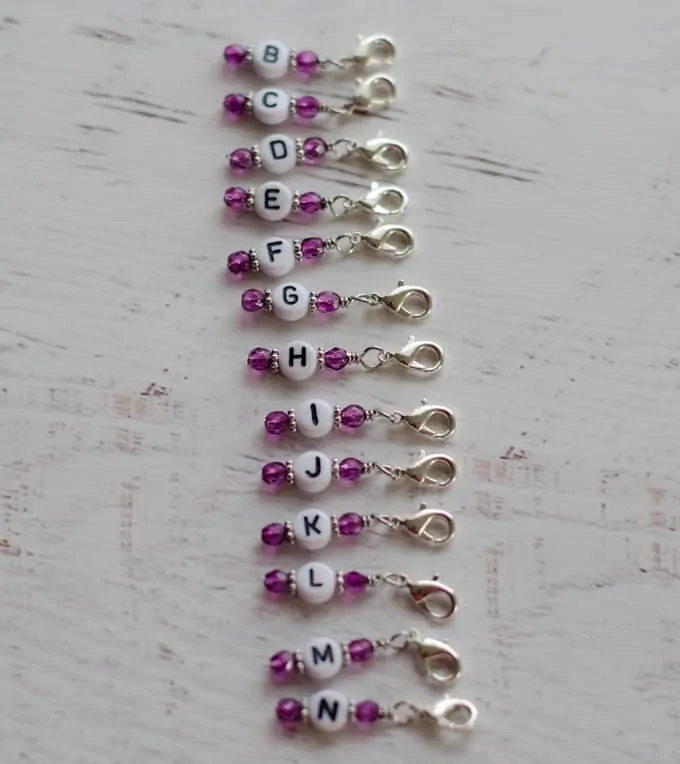 In my case, that is a lot!
I love seeing your finished projects! If you enjoyed making these crochet stitch markers I’d love to see yours on Instagram, be sure to tag me @crochet365knittoo. If you are on Facebook, stop over to the Crochet 365 Knit Too Facebook page or pop over to the Crochet365KnitToo Club and share a photo! I’d love to see your work!
Thanks for this easy tutorial. I recently started taking a picture on my phone with the hook on top of my projects, in order to remember which hook for each project. I have four going right now, but I love this cute idea!
I like the idea of using the camera on your phone! 🙂
What a great idea!!!! Just found a shawl I was working on and the hook wasn’t with it. I can’t remember the hook size. Probably used it for another project. I’m so going to make these and put them with my hooks.
Thanks for the awesome idea
Happy Holidays
Thanks again
Lynn
I am glad I’m not the only one who does this!
I love this idea! Although I live in the United States, it makes more sense to me to use the “mm” sizes for my crochet hooks. With mm sizing one knows what size they are working with even if they can’t translate the different US letters for the hooks. Hook a, or S, or P don’t amount to much in my eyes, but when you say 5 mm or 10 mm i know whether I’m using a huge hook or a small one. The guide to crochet hooks you’ve written is really great and i like how you reviewed many brands.