
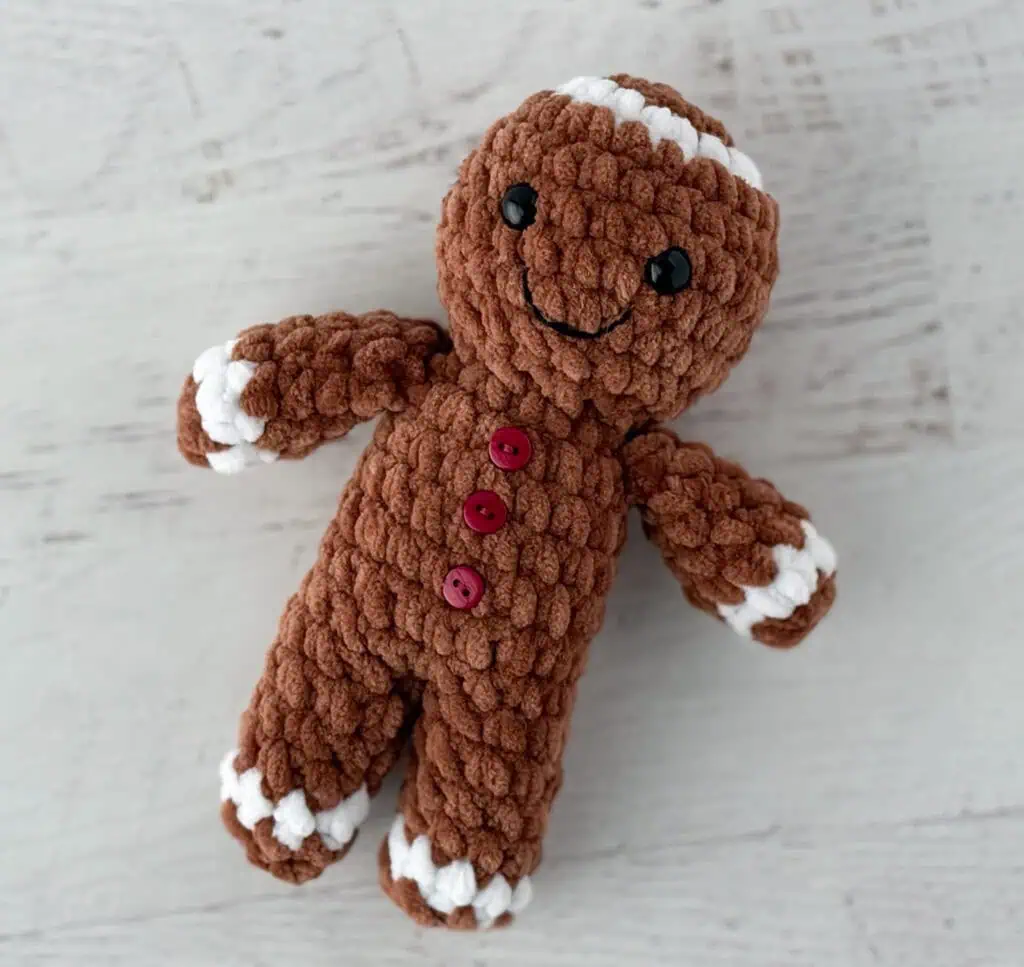
Ginger Graham Gingerbread Man
This post may contain referral/affiliate links. Please read my disclosure for more info.
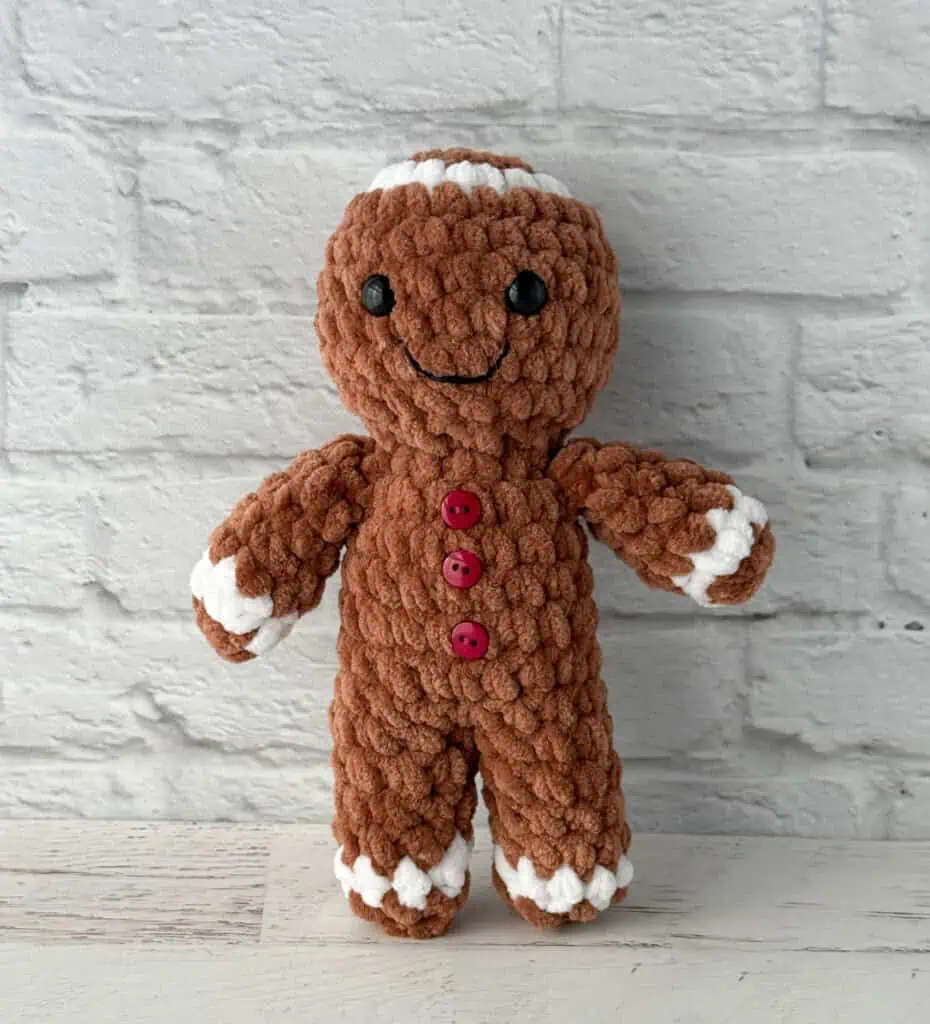
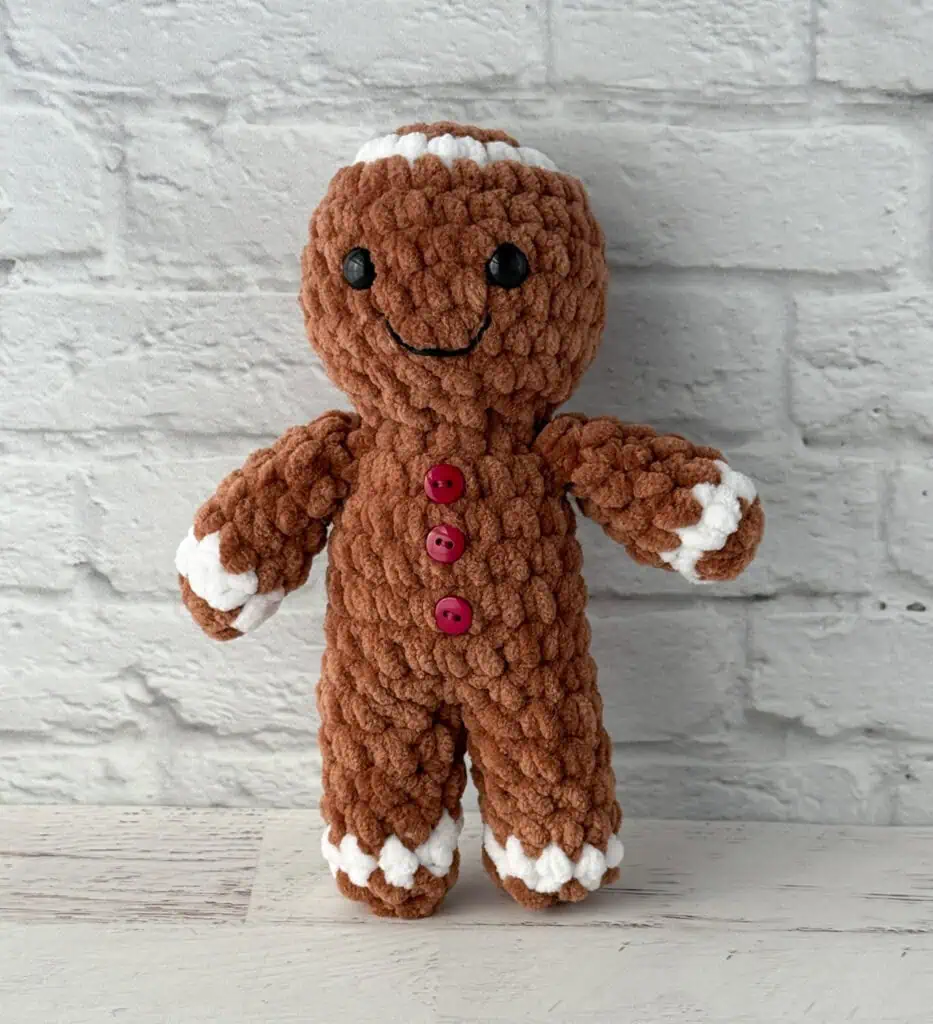
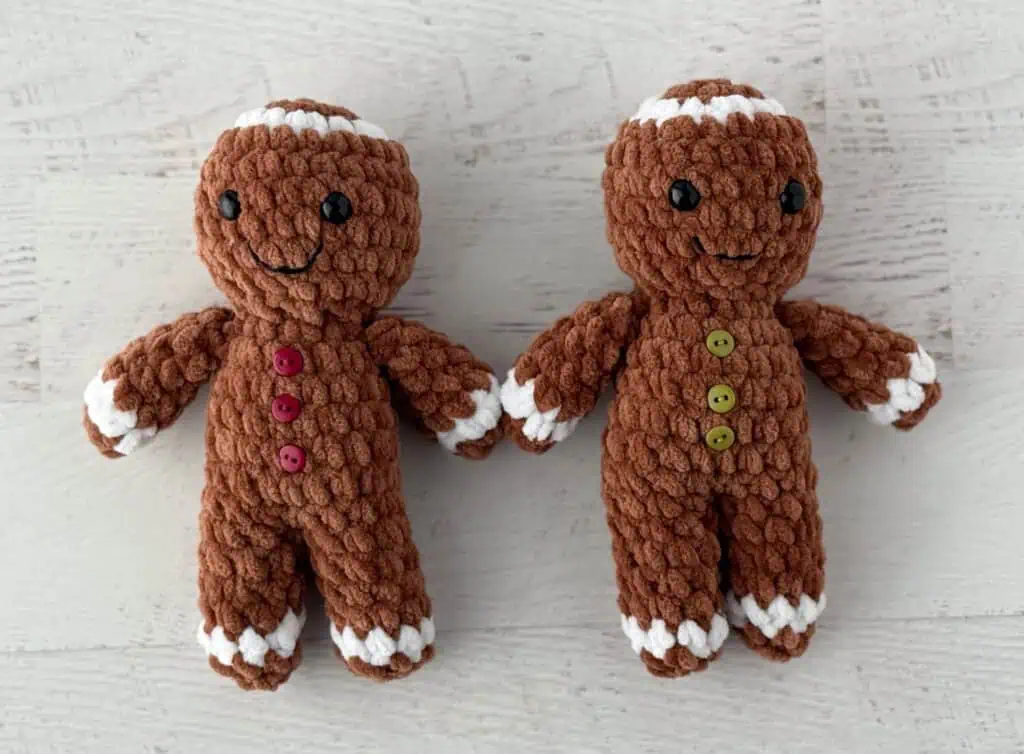
Meet the cutest thing you’re going to have on your hook this week: Ginger Graham, the absolutely adorable crochet Gingerbread Man.
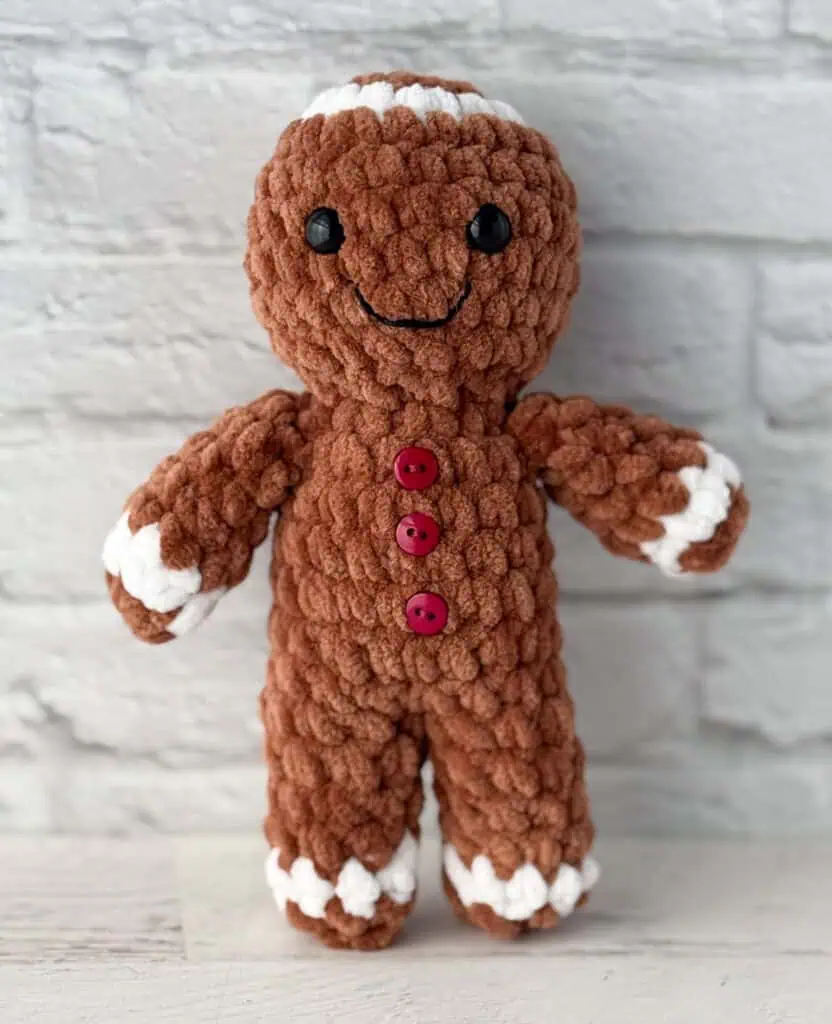
There is something about a Gingerbread Man that gives me all the Christmas baking feels even though, truth be told, I rarely actually bake gingerbread. In fact, I’m not a huge ginger flavor kinda girl. But do I love looking at gingerbread houses and adorable little gingerbread men? Absolutely!
That’s why crocheting one is so much more fun instead! And bonus.. you don’t have to roll out dough or clean up dishes afterwards. And.. no calories!
Perfect!
This little cutie has a few unique crochet design tips that make him absolutely perfect. And by unique, I mean a little unconventional.
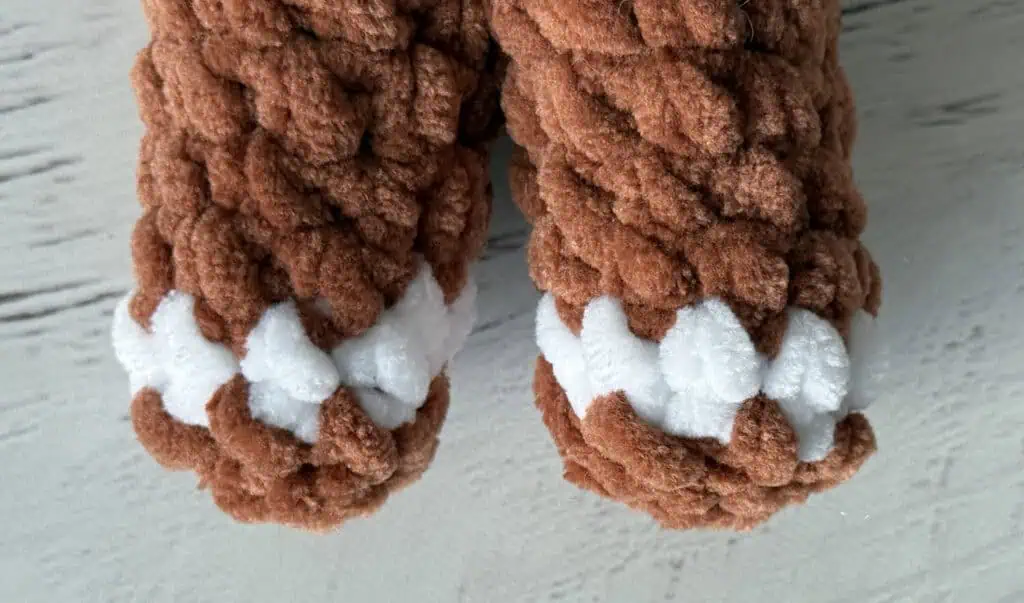
Much of the design challenges revolve around those stipes of frosting our gingerbread friend has going on. Even though it looks adorable, crocheting a one row stipe can be problematic especially on a plushie style amigurumi where there’s not a lot of room for fudging.
Problem One: amigurumi are made by crocheting in the round which is essentially working in a spiral. When you change colors, this can create a “jump” or a “step” which is super noticeable. Here’s how we solve that problem: for the white stripe rows we work a jogless join. It’s written into the pattern, but you can pop over to a whole tutorial on how to work a jogless join here.
Problem Two: Do you know that you sometimes get a completely different look when you work top down vs bottom up? For most of my doll patterns, I prefer working toe up because it feels like it makes more sense to make 2 legs, join them to work the body and then finish off with the head. But in this case it didn’t work well, thanks again to that pesky little white stripe at the top of the head.
When I started at the top of the head, the white stripe looks lovely (as shown) because the white is actually an increase row. However, when I tried making this guy bottom up, the white row on the head became a decrease round and honestly.. that looked horrible. Like I couldn’t believe how awful that white stripe looked as a decrease round. It ruined the entire look.
So top of the head down is “the way” for this cutie pie.
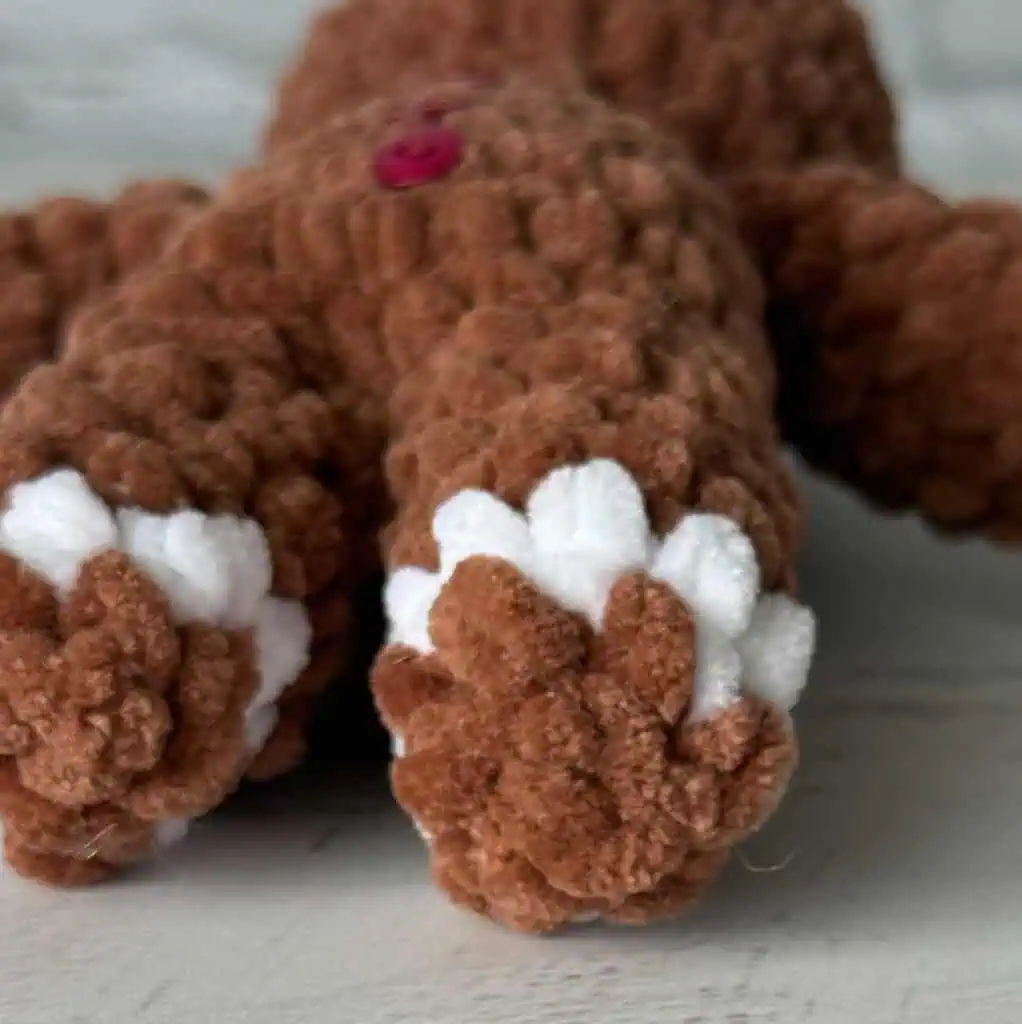
Which leads to Problem Three: The traditional “sign off” for amigurumi (which is basically working down to 6 stitches and then cutting the yarn and cinching it) did not work for the bottom of the feet. It created a flat bottom foot that looked especially awkward with that striped round of ‘frosting’ at the bottom of the leg.
Now maybe in a worsted weight yarn this would have been workable but in the plushie yarn for our Ginger Graham? Hard no! So, we’re doing something that, frankly, I’ve NEVER seen done in an amigurumi before!
We work an extra round of decreases to 3 stitches, which makes a point. Then we fasten off, take a whip stitch over those 3 stitches and then insert the needle back through the point and into the bottom of the foot and give a tug which actually pulls those end bits partially into the foot, creating the beautiful rounded bottom of the foot.
Pretty genius if I don’t say so myself.
Purchase the Beautifully Formatted AD-FREE PDF DOWNLOAD
On the yarn front, I’m using Premier Parfait Chunky yarn, the same that I love for my crochet bird patterns. Pop over to Herrschner’s for the best pricing or Amazon. If you can’t locate a color, this Etsy shop seems to stock them all and has pretty fast shipping.
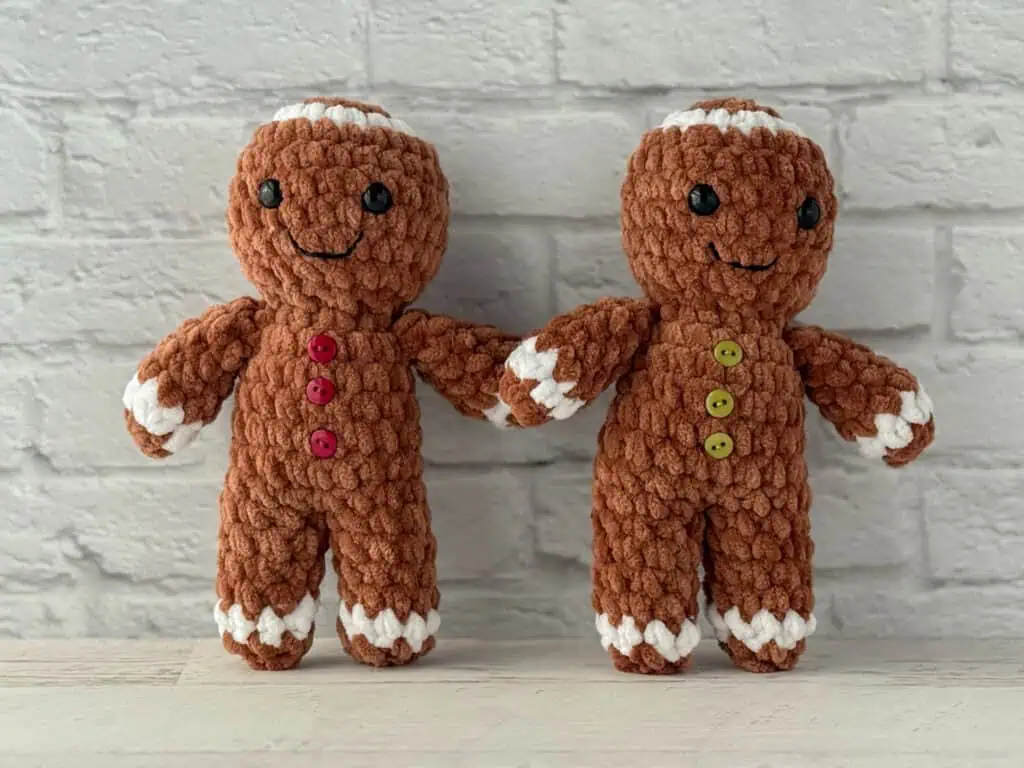
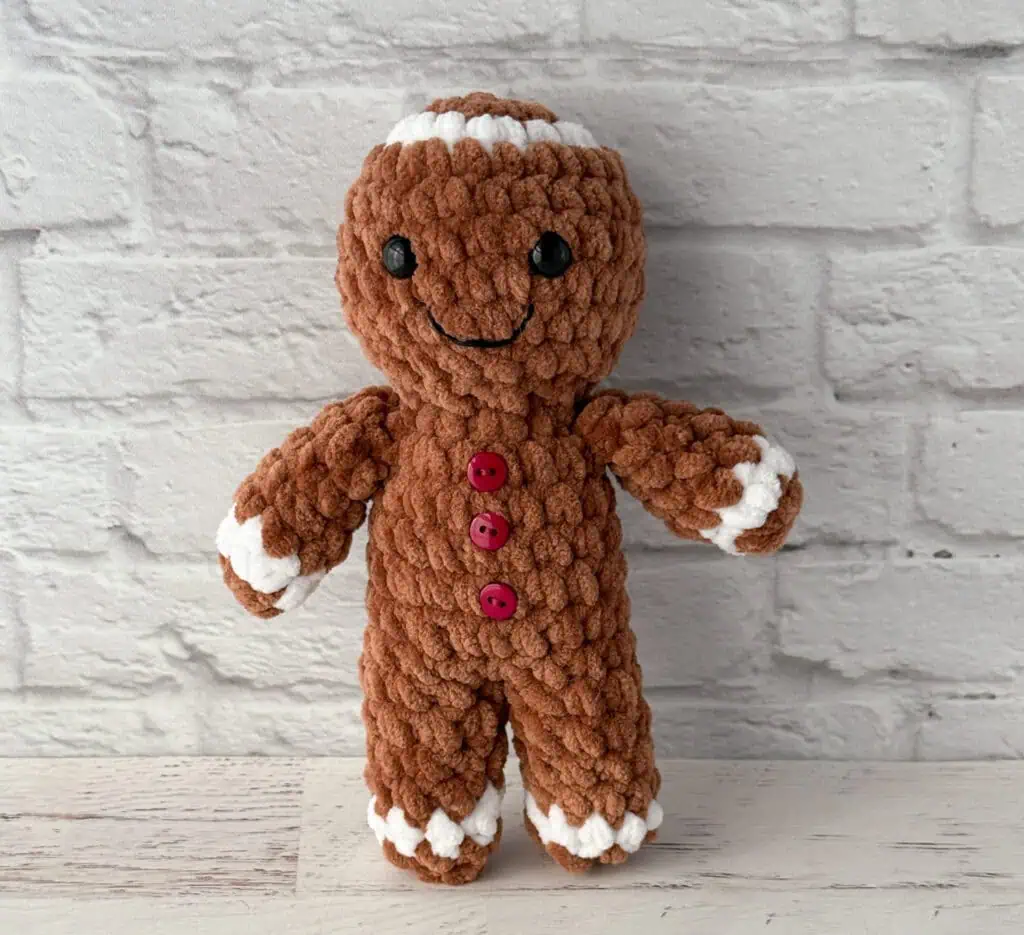
So, our Ginger Graham Gingerbread Man is a bit unconventional, yet easy and fun to make in a quick evening. I see him popping out of Christmas Stockings this year but he also looks adorable tucked into your holiday décor. Or keep him by your desk to make you smile every time you look at him!
Let’s dive into this fun holiday make:
Crochet Gingerbread Man
Materials
- Premier Parfait Chunky, size 6 super bulky weight, 100% polyester, 131 yds/120m per 3.5 oz skein (try Herrschners, Amazon or Etsy)
- Teddy Bear (Brown): 40 yards
- White: 8 yards
- US H8/5.00 mm crochet hook these are my absolute favorite hooks I recommend to everyone!)
- 10 mm safety eyes. NOTE: if making for a baby or young child, embroider eyes instead
- Stitch markers to keep track of rows
- Fiberfill
- Tapestry needle fro weaving in ends, sewing needle for sewing on buttons and embroidering mouth and scissors
Resources and tutorials you may find helpful in following this pattern: Crochet Abbreviations, US to UK Crochet Conversion Chart. Find links to stitches on the “Tutorial” menu: Getting Started will show basic stitches used in many patterns and Crochet Stitch Dictionary shows our growing collection of crochet stitch tutorials.
Gauge:
My gauge is 6 sc to 2 inches. However, gauge is not important in this pattern. You may use other weights of yarn. Adjust hook size to fit your needs.
Resources and crochet tutorials you may find helpful in following this pattern: Crochet Abbreviations, US to UK Crochet Conversion Chart. Find links to stitches and basic crochet skills on the “Tutorial” menu: Getting Started will show basic stitches such as the slip stitch, single crochet, double crochet stitch and chain stitch used in many patterns and Crochet Stitch Dictionary shows our growing collection of crochet stitch tutorials.
Crochet Abbreviations:
- ch = chain
- sc = single crochet
- sc2tog = single crochet 2 together
- sl st = slip stitch
- st = stitch(es)
Finished Crochet Gingerbread Man Size
The gingerbread man is approximately 7.5” tall.
Gingerbread Man Pattern Notes
Here are some tips for working through this special pattern:
Jogless Join: This amigurumi gingerbread doll is worked in the round. To prevent the “jump” or “step up” that can occur when changing colors in the round, we will be working a jogless join on the white stripe rounds. We will start the white row with a slip stitch (instead of a single crochet). At the end of the round, we’ll work a single crochet into the very first stitch and then move the end-of-round stitch marker to create a new end of round.
When we change back to brown, we’ll start with a slip stitch, but then continue with single crochet and will not move the marker for these rounds.
This is detailed in the directions for those specific rows, so no need to remember the details.
Construction: The head and body are worked in one piece starting the top of the head, decreasing to the neck and then increasing to work the body. Then we’ll work on half of the stitches at a time to work each leg, ending at the bottom of the foot. The arms are worked and sewn on the sides at the neck.
Finishing the Foot: The fasten off for the bottom of the foot is a bit unconventional. We work down to 3 stitches which makes the foot seem to come to a point. Then we’ll fasten off, fold the work together, thread a yarn needle and make 1 stitch to close it off. Then insert needle into the center bottom of the foot and up into the leg and give a tug to pull the ending stitches inside the leg. This creates a rounded bottom. Knot the yarn and bury it securely in your work.
Gingerbread Head and Body
Using brown yarn, make a magic ring.
R1: 6 sc into ring. Place stitch marker in last st and work in continuous rounds. (6 st)
R2: 2 sc in ea st. Change to white in last st. (12 st)
R3: With white, sl st in next st, 2 sc in next st. *Sc in next st, 2 sc in next. Repeat from * around. At end of round work a sc into the 1st sl st of round, changing to brown yarn with the last yarn over (to prep for the next row). Mark this stitch as the new last st in round. (18 st)
R4: With brown, sl st in next st, sc in next st, 2 sc in next, *sc in next 2 st, 2 sc in next. Repeat from * around. (24 st)
R5-8: Sc around. (24 st)
R9: *Sc in next 2 st, sc2tog. Repeat from * around. (18 st)
R10: Sc2tog around. (9 st)
Insert safety eyes between rows 6 & 7, leaving 4 stitches in between them. Stuff head and continue to stuff body as you work.
R11: 2 sc in ea st. (18 st)
R12-17: Sc around (18 st)
Leg 1
Flatten the body to determine center front of doll and mark this stitch. Each leg is worked on half of the stitches of the final body round. From the center marker, count back 9 stitches and mark this stitch on the back of the doll. Both the 1st and the 9th stitches are marked.
R1: Starting at the back of the leg, attach yarn and work a sc in each st to the next stitch marker (at center front), then rotate work and single crochet in the stitch with the marker marking the center back, and continue to work a sc in each remaining st. Mark the end of round with a stitch marker and remove the other 2 stitch markers. (9 st)
R2-4: Sc around. At end of R4, change to white yarn (9 st)
R5: With white, sl st in next st, sc in next 8 st. At end of round work a sc into the 1st sl st of round and change to brown. Mark this stitch as the new last st in round. (9 st)
Stuff the leg, making sure the body and leg are both stuffed firm. Continue to add stuffing as needed as you finish up the leg.
R6: With brown, sl st in next st, sc2 tog, *sc in next st, sc2tog. Repeat from * around (6 st)
R7: Sc2tog around (3 st). This leaves a bit of a point at the bottom of the leg. Fasten off yarn, thread a yarn needle and make one whip stitch to hold the 2 sides together and pull tight, then insert the needle through the center of the foot and up into the leg and tug. This pulls the final stitches inside the work and makes a rounded end to the leg. Knot tight and bury the end inside the doll.
Leg 2
Leg 2 is worked on the remaining 9 stitches of the body. I find it easiest to mark the 1st and 9 stitches with stitch markers as we did for leg 1. Attach the yarn at the back of the 2nd leg, leaving a long strand for weaving in later and then repeat R1-7 of the first leg. When leg is complete, use the unworked yarn to sew up any opening between the legs of the doll.
Arms (Make 2)
Make a magic ring.
R1: 6 sc into ring. At end of round, change to white yarn. Place stitch marker and work in continuous rounds. (6 st)
R2: With white, sl st in next st, sc in next st, 2sc in next, sc in next 2 st, 2sc in next. At end of round, change to brown yarn. (8 st)
R3: With brown, sl st in next st, then sc around. (8 st)
R4-6: sc around. (8 st)
Lightly stuff the hand. Leave the rest of arm unstuffed.
R7: *Sc in next 2 st, sc2tog. Repeat from * once. (6 st)
Fasten off, leaving a long strand. Use a yarn needle to whip stitch top of arm closed and sew onto Gingerbread man on the side, just below the neck.
Finish Your Gingerbread Man
Weave in any remaining ends. Embroider a mouth with black embroidery floss. Sew on 3 small buttons to body of gingerbread man.
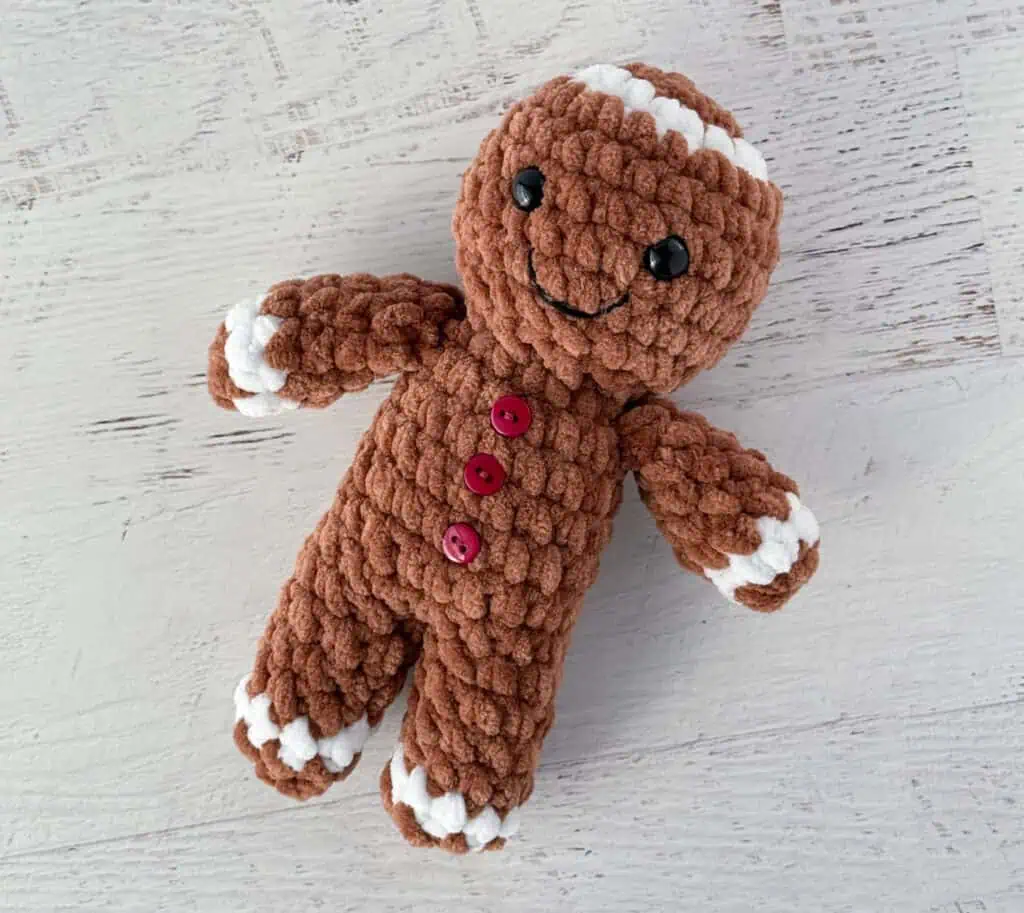
And your own little Ginger Graham Gingerbread Man is complete!
I love seeing your finished projects! If you enjoyed making this Crochet Gingerbread Man pattern, I’d love to see yours on Instagram, be sure to tag me @crochet365knittoo. If you are on Facebook, stop over to the Crochet 365 Knit Too Facebook page or pop over to the Crochet365KnitToo Club and share a photo! I’d love to see your work!
