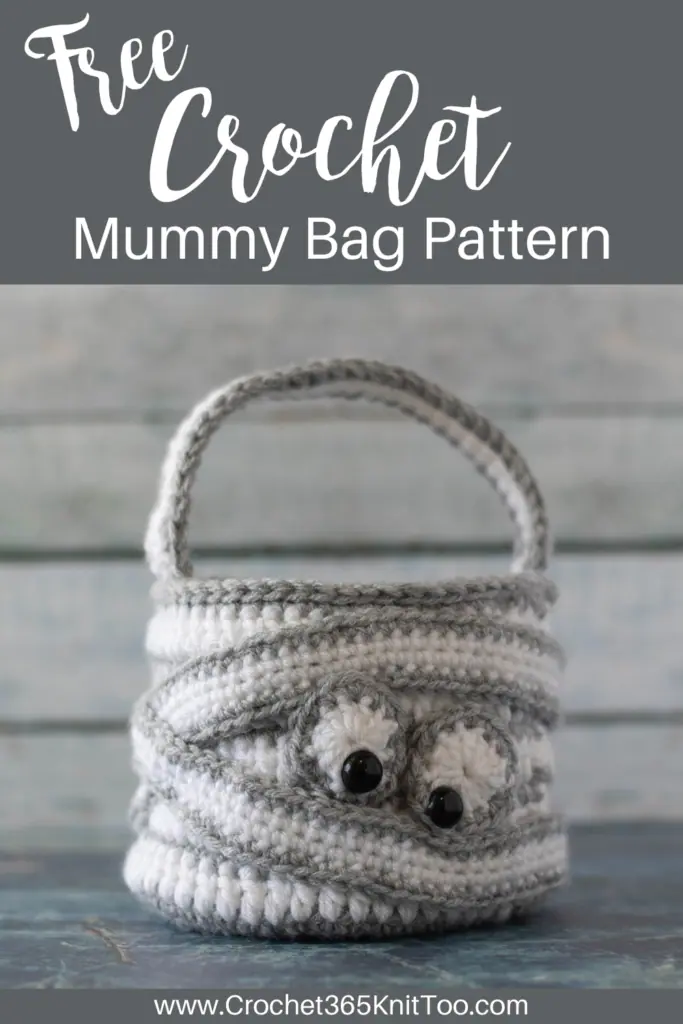
Crochet Halloween Bag
This post may contain referral/affiliate links. Please read my disclosure for more info.
Do you love spooky season? If so, you might just love this cute little crochet Halloween bag!
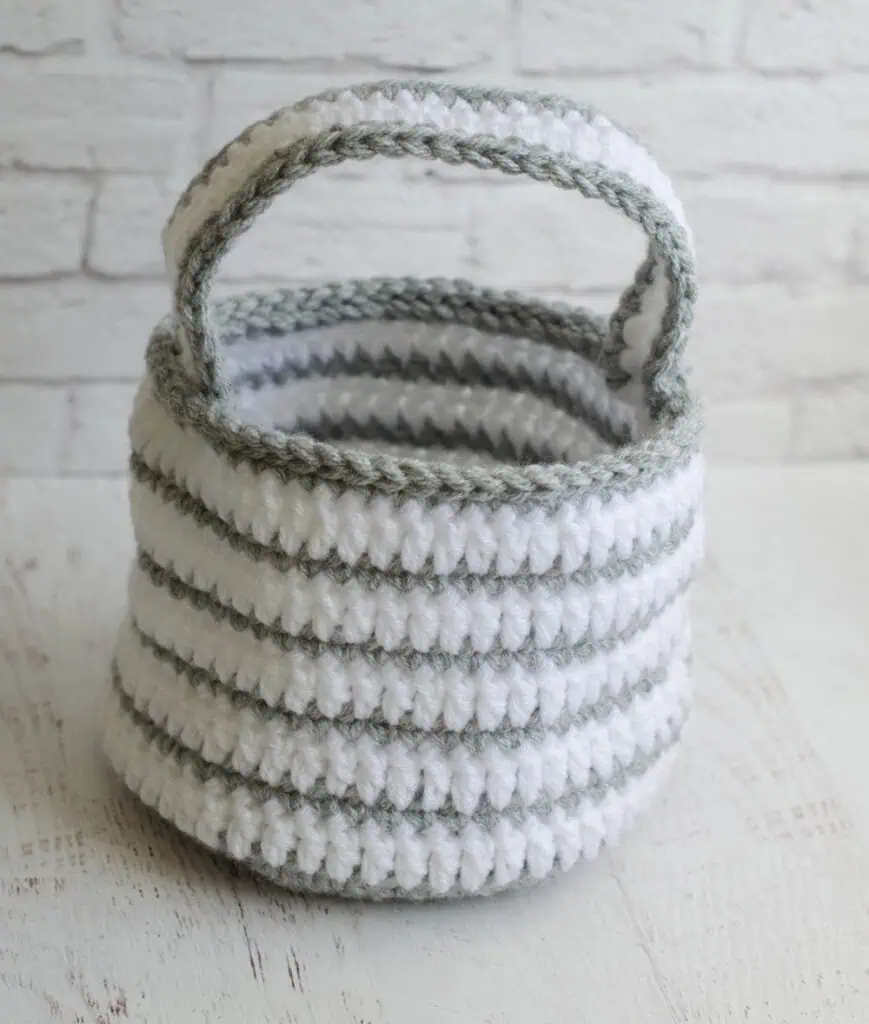
This mummy crochet bag is such a fun size. Fill it with candy or other goodies and tuck it in your Halloween decor. Or let a little one take it out trick or treating.
It’s fast and fun to make. The bag and handle are worked in a stripe pattern, holding 2 strands of yarn held together at once. Then switch to one strand of yarn to make a long “bandage” to wrap around your bag and then add eyes for the finishing touch. The pattern uses the same hook size throughout the pattern to make things easy.
If this cute little guy looks familiar, it’s because this pattern started out as a paid only pattern in my shops. I’ve been slowly moving those patterns here to my website so that a free version is available to all!
We had a whole new photo shoot day with this guy and I’ve added some things to the pattern to make it even more helpful. Isn’t this Halloween crochet bag just so darn cute?!
Let’s dive into this fun Halloween pattern.
Crochet Mummy Bag
Materials
Here is what you will need:
- US J 10/6mm crochet hook (these are the hooks I recommend to everyone!)
- Worsted Weight Yarn, sample used Lion Brand Vanna’s Choice
- 150 yards in White
- 200 yards in Silver Heather (a light gray color yarn)
- 15mm black safety eyes
- Stitch markers to keep track of rows
- Straight pins, optional (to help position eyes and bandage before sewing)
- Tapestry needle and scissors
Gauge:
Using double thickness of yarn and the hook size given, gauge is 6 double crochet stitches to 2 inches. However, gauge is not important in this pattern. You may need to adjust yarn quantity if your gauge is different.
Resources and tutorials you may find helpful in following this pattern: Crochet Abbreviations, US to UK Crochet Conversion Chart. Find links to stitches on the “Tutorial” menu: Getting Started will show basic stitches used in many patterns and Crochet Stitch Dictionary shows our growing collection of crochet stitch tutorials.
Crochet Abbreviations
- ch(s) = chain(s)
- sc = single crochet
- dc = double crochet
- sp = space(s)
- sl st = slip stitch
- st = stitch(es)
Special Note
The bag and handle are crocheted with 2 strands of yarn held together at once. Before starting, wind half the yarn into a separate ball. Alternatively, use 2 separate skeins of yarn. Then hold 2 strands together, crocheting as if they were one.
Crochet Bag Size
Bag is approx 10” tall including the handle (5.5” tall excluding the handle). The diameter of the bag is approx 6.5”
Mummy Bag Extras
Halloween Bag
With gray yarn and holding 2 strands together throughout, make a magic ring.
R1: 6 sc into ring (6 sts). Work in rounds.
R2: 2 sc in ea st around (12 st)
R3: *sc in next st, 2 sc in next st, repeat from * around (18 st)
R4: *sc in next 2 st, 2 sc in next st, repeat from * around (24 st)
R5: *sc in next 3 st, 2 sc in next st, repeat from * around (30 st)
R6: *sc in next 4 st, 2 sc in next st, repeat from * around (36 st)
R7: *sc in next 5 st, 2 sc in next st, repeat from * around (42 st)
R8: *sc in next 6 st, 2 sc in next st, repeat from * around (48 st)
R9: *sc in next 7 st, 2 sc in next st, repeat from * around. At end of round, sl st to next stitch. (54 st)
Now you will join each round starting with round 10.
R10: Continuing in gray, ch 1 and sc in same st, sc around, join with sl st to top of 1st st. Fasten off and join white. (54 st)
R11: With white, ch 3 (counts as 1st dc), dc in ea st around, join with sl st to top of 1st st. Fasten off and join gray.
R12-19: Repeat rounds 10 & 11 (4) more times for a total of 5 stripe sequences, ending with white.
R20: With gray, ch 1 and sc in same st, sc around, join with sl st to top of 1st st. (54 st)
R21: Continuing with gray, and working in the front loop only, sl st in ea st around. Fasten off and weave in ends.
Handle
Handle is worked with 2 strands of yarn, on the right side only, starting and stopping the yarn at each row. Leave a long strand on each side for sewing the handle on the bag)
With white, and holding 2 strands together throughout, chain 35.
R1: sc in 2nd chain from hook and in each chain across. Fasten off. (34 st)
R2: Rotate work and attach white on opposite side of starting chain and single crochet in each chain across. Fasten off. (34 st)
R3: With right side facing, attach gray to the 1st st in row 2, ch 1, sc in same stitch as joining, sc across. Fasten off. (34 st)
R4: Rotate work and attach gray to the 1st st in row 1, ch 1, sc in same stitch as joining, sc across. Fasten off. (34 st).
You can sew the handle on the bag now, or wait until the bandage and eyes are placed. Sew each side of the handle on the bag across from each other. Sew just under the gray border. Weave in any ends.
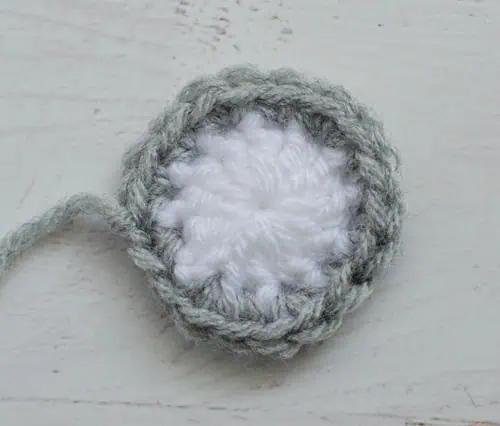
Eyes (Make 2)
The eyes are made with ONE strand of yarn.
R1: Make a magic ring, ch 3 (counts as 1st dc) and work 11 double crochet stitches in ring. Join with a slip stitch to the top of the starting ch 3 and fasten off white. (12 st)
R2: Attach gray to any stitch in round 1. Ch 1, sc in same stitch as joining, 2 sc in next st, *sc in next st, 2sc in in next. Repeat from * around. Join with a sl st to the first sc and fasten off, leaving a long strand for joining. (18 st)
Bandage
The bandage is worked with ONE strand of yarn. Note: The finished piece is rounded on either end and is worked in the round.
Chain 135
R1: sc in 2nd chain from hook, sc across row until last stitch. 3 sc in last stitch (forms 1st rounded end), rotate work and sc on the opposite side of chain until last st. Sc 2 in last st (forms 2nd rounded end), change to gray in last stitch.
R2: 2 sc in 1st st, then sc in ea st across, stopping before the 3 rounded end stitches on the opposite end. Work 2 sc in the next st, sc in the next st, 2 sc in the next st to complete the rounded end. Then sc in each st across, until the last 2 st in round, 2 sc in next st, sc in last st. Sl st to next st. Fasten off and weave in ends.
Finishing
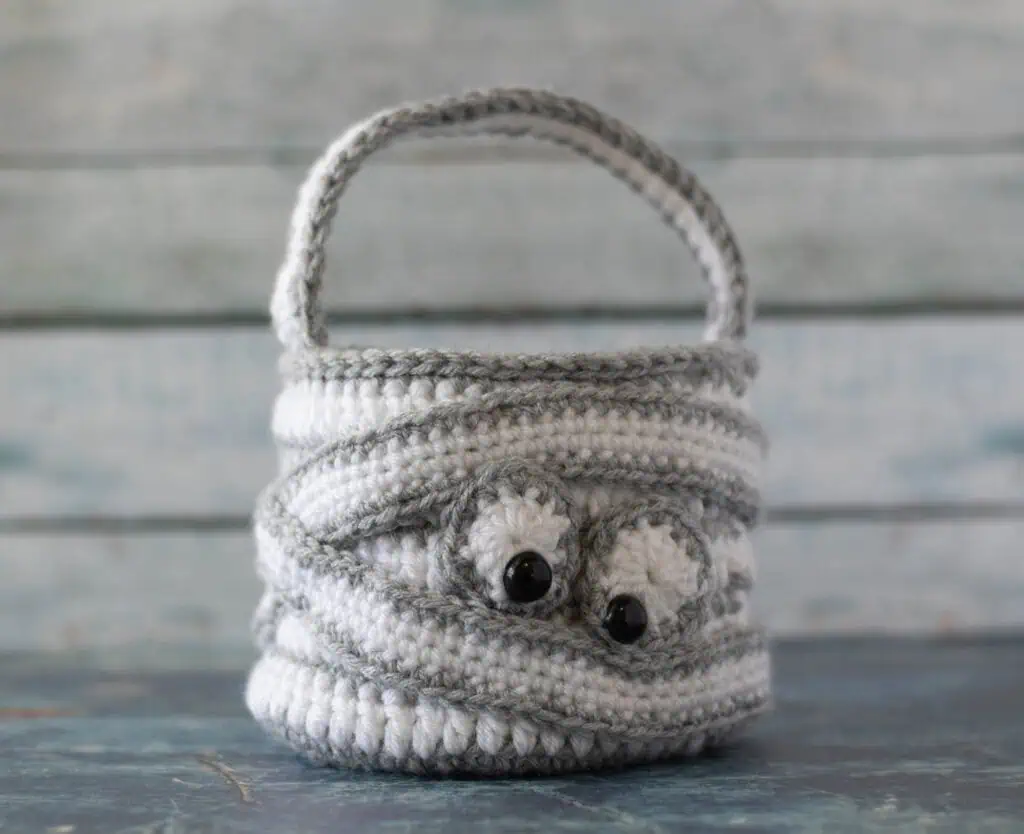
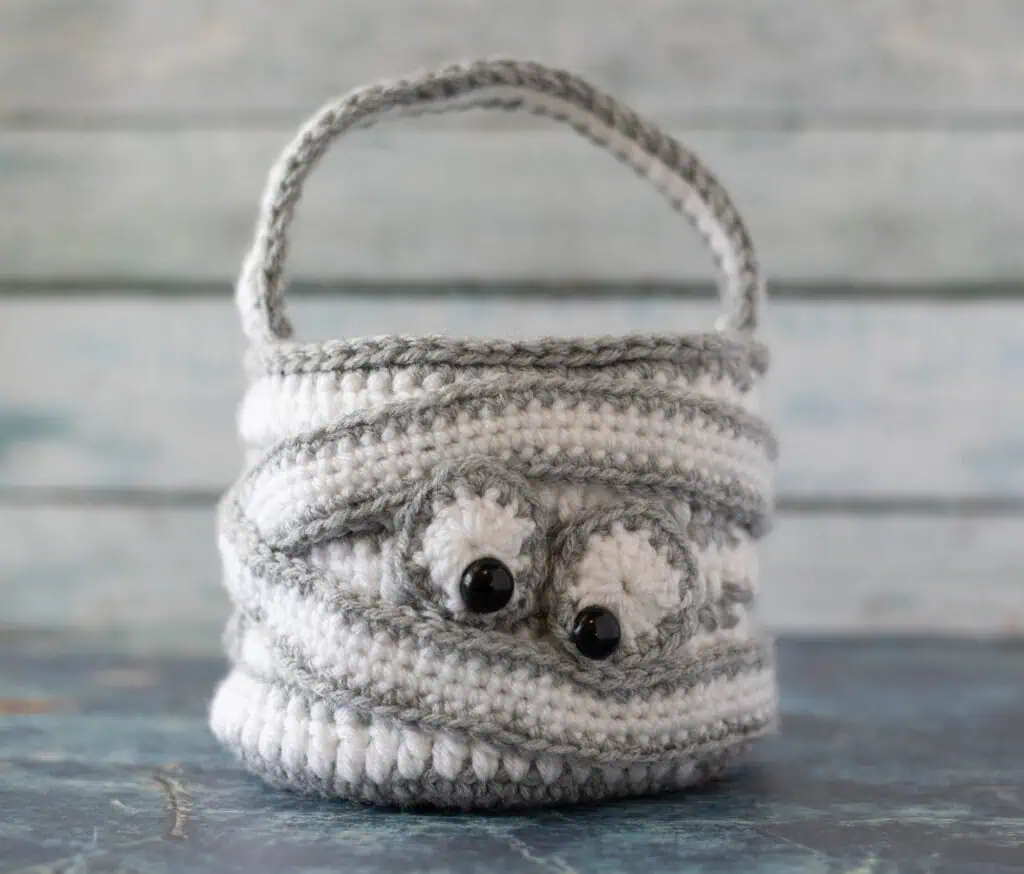
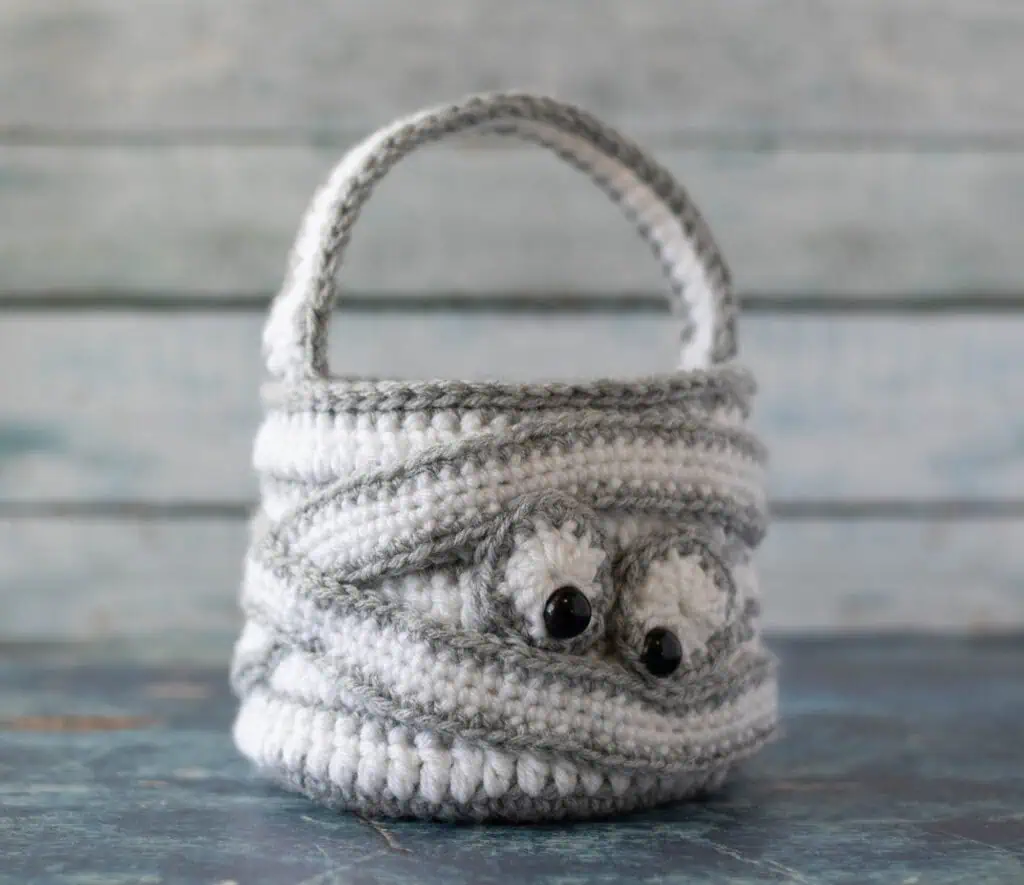
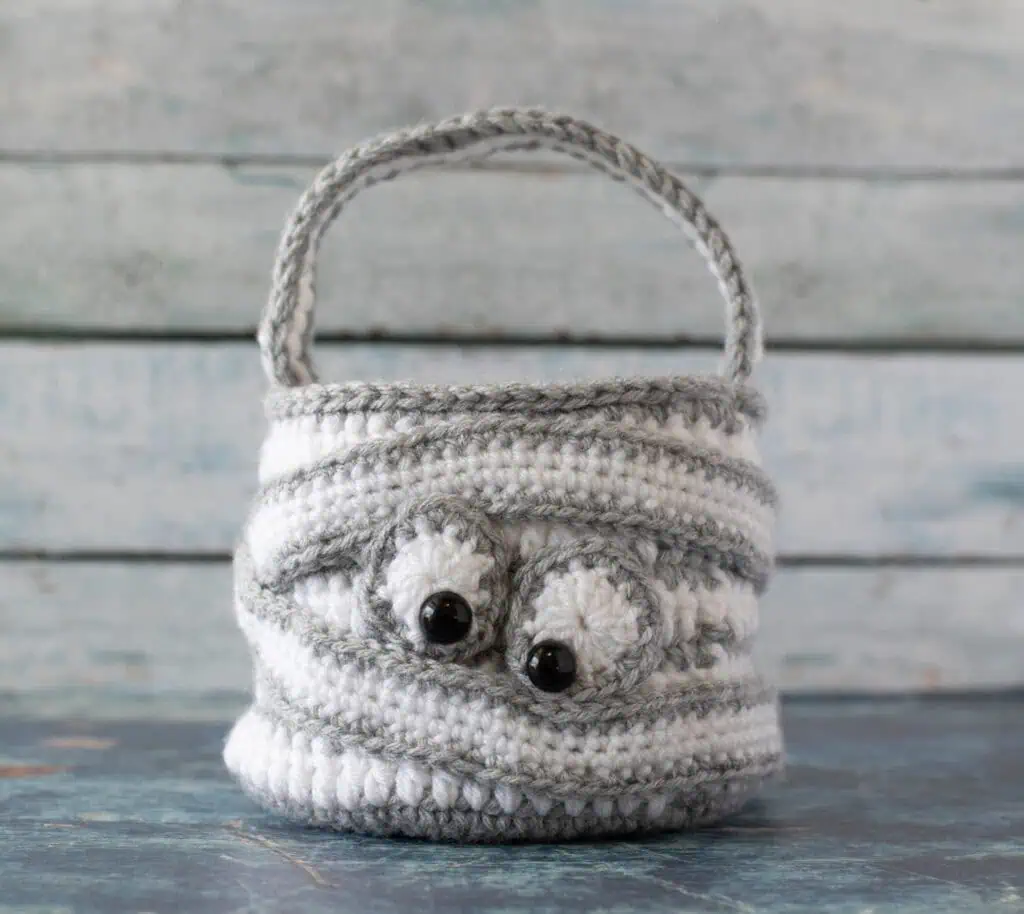
Referring to the photo, fasten the safety eyes on the lower portion of each crocheted eye.
Thread a tapestry needle with gray yarn. Referring to the photo, sew the eyes and bandage on the bag. I found the best way to determine placement of the bandage and the eyes is to pin them in place first.
Start with the eyes and pin them on the bag on the front on the right half, about halfway down on the bag. Then take the bandage and put one end on the lower left side towards the back, wrap the bandage up and over the eyes and back around the back. Continue to wrap and pin the bandage back around the front, this time wrapping it below the eyes. The opposite end should be on the back of the bag. Look at the photo for placement and adjust the eyes and bandage position a bit to make it appear like the eyes are peeking out from the bandage.
Once you are satisfied with the placement, sew on the eyes first. Then tack down the bandage. Tack it down every inch or so, making sure to keep the bandage laying loosely so it looks like the mummy was just wrapped.
Sew on the handles if you haven’t done so already. Note that you might want to try different positions as the mummy bag has a different look when the eyes are centered on the front versus placing the eyes to one side.
Weave in any remaining loose ends.
I love seeing your finished projects! If you enjoyed making the Mummy Crochet Halloween Bag, I’d love to see yours on Instagram, be sure to tag me @crochet365knittoo. If you are on Facebook, stop over to the Crochet 365 Knit Too Facebook page or pop over to the Crochet365KnitToo Club and share a photo! I’d love to see your work!