
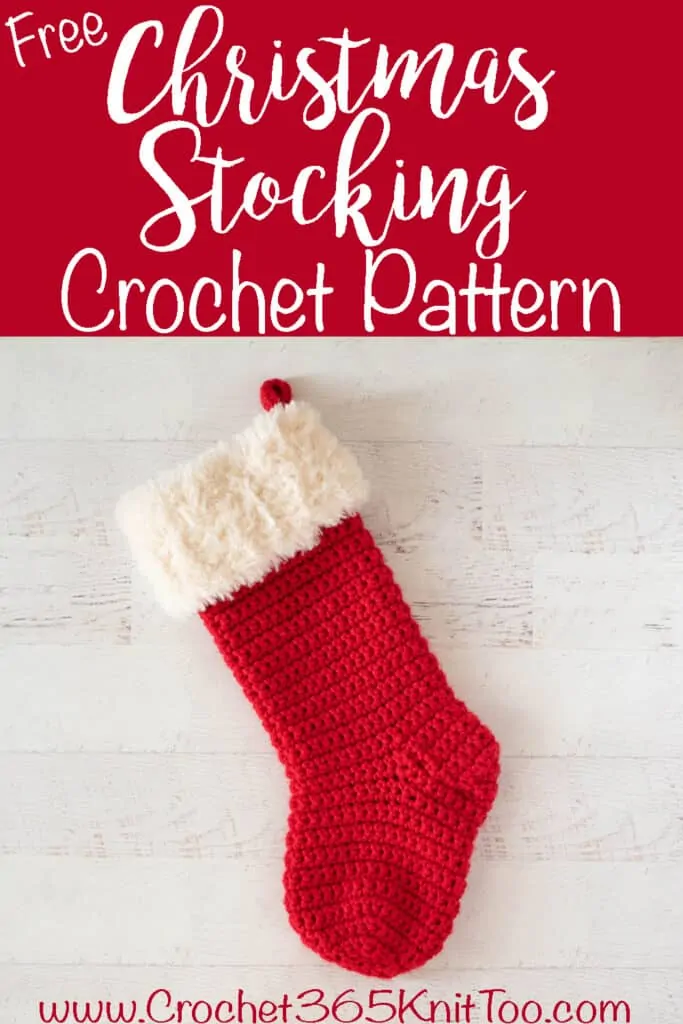
Classic Christmas Crochet Stocking
This post may contain referral/affiliate links. Please read my disclosure for more info.
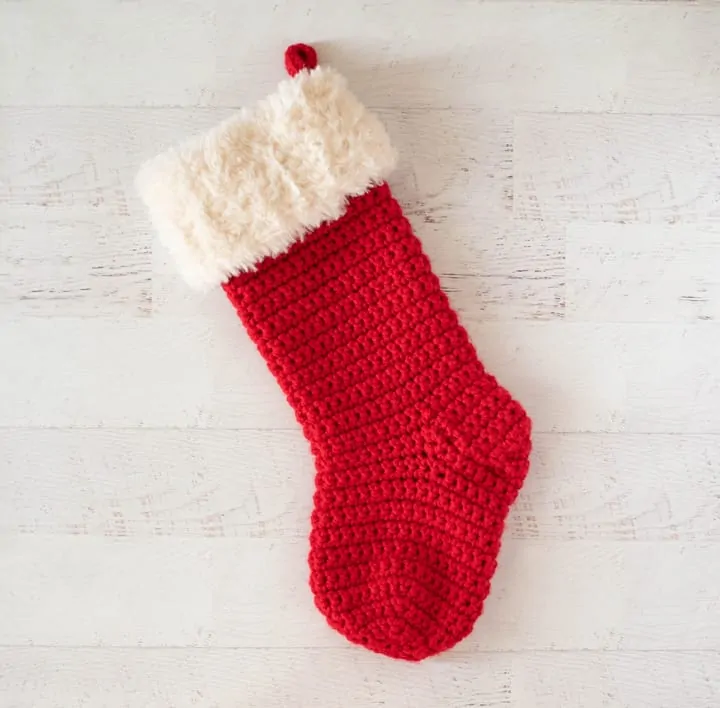
Behold.. a Christmas Crochet Stocking. Beautiful. Classic. Fast and fun to make. It might just be your next favorite holiday crochet make!
This crochet stocking reminds me of my earliest memories of childhood Christmases. Only better.
In the 1970s version of my childhood, our family stockings were mass-produced red stockings with oh-so-cheap white fur cuffs. Onto this cuff, my mother wrote our names with glue and then sprinkled glitter on top of that. If you squinted just right, they looked somewhat festive hung on our fireplace mantle.
To be honest, our family has a bit of an identity crisis with the whole Christmas stocking tradition anyway. In our heritage, St. Nicholas comes on December 6th in the wee hours to fill shoes left outside our bedroom doors. However, as we all know, the stocking routine happens in the wee hours between the 24th and 25th. And really… does the big man make an appearance twice in the same month? Maybe? I’m not sure.
In any case, between the glitter craziness and the identity crisis, I suppose it’s no wonder I’ve spent most of my entire adult life quietly searching for THE Crochet Christmas stocking. After all, perhaps the two most iconic Christmas items are a Christmas Tree and a crocheted stocking, right?
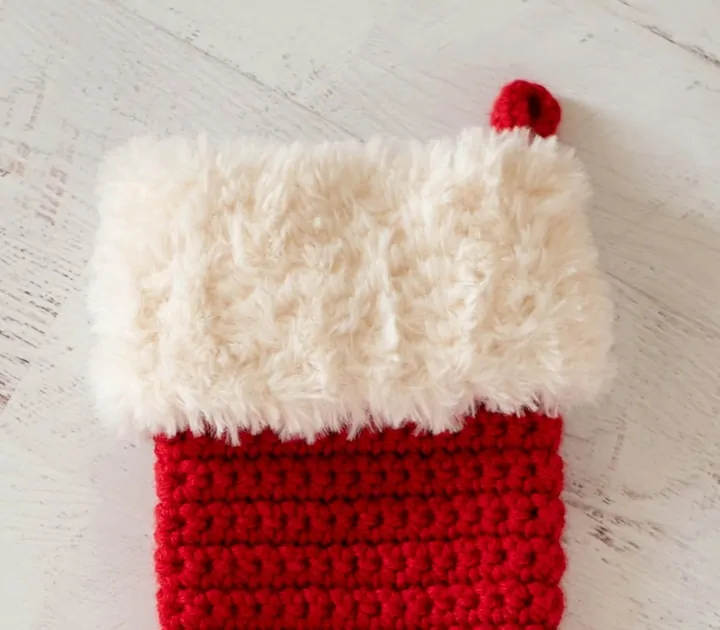
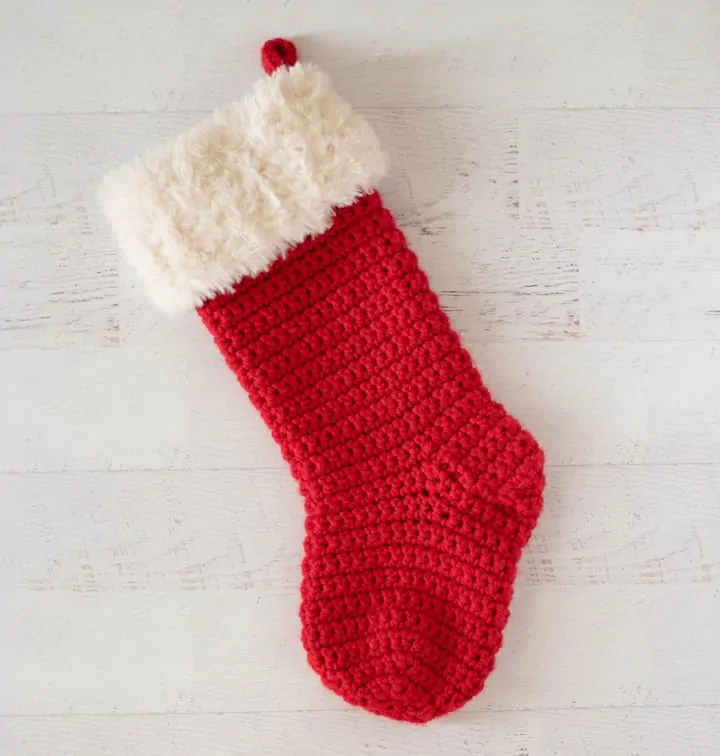
I’ve made quite a few stockings, but I’m a bit smitten with this brand-new crochet stocking. A classic trimmed white fur cuff with the red yarn of the stocking itself to me is the perfect color combination for this crochet Christmas stocking sure to brighten up your christmas morning!
Tips for Beautiful Crochet Christmas Stockings
I really love the look of the bulky-weight yarn in this crochet Christmas stocking pattern. It makes this a quick and easy crochet project with simple stitches. It also makes the stocking the perfect weight for hanging.
There is something about a fur Christmas stocking cuff that gets me every time. The faux fur yarn is perfect for a beautiful cuff. If you haven’t worked with faux fur yarn it can be a bit tricky at first. If you’re new to working with faux fur yarn it can feel a little disconcerting to see instructions to “insert hook” and then realize it’s hard to see that next stitch! I find it best to use my sense of touch and feel for the stitch as well.
You could also try working the cuff in white yarn if you want to avoid the faux fur yarn altogether, but you would likely need to experiment to get the look you want.
Yarn Weights for Your Crochet Stocking
When it comes to your yarn weights, you might be wondering if you can substitute a worsted weight yarn for the bulky weight yarn in this crochet pattern. Using a worsted medium-weight yarn would make the stocking smaller. If the worsted weight yarn is on the lighter side, you could try holding two strands together and working as one strand for a similar gauge.
MORE HOLIDAY PATTERNS
If you love the Crochet Stocking Pattern, you might also like to check out these other patterns for the season:
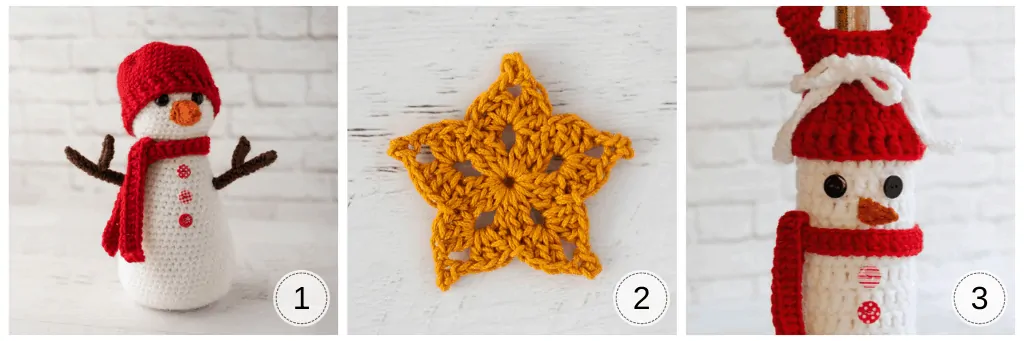
1. Snowman // 2. Easy Crochet Star // 3. Snowman Wine Cozy
Crochet Stocking Pattern
There’s so much to love about this free pattern for a classic Christmas crochet stocking. The classic red makes my heart sing. And that furry bit… every time I see it, I can’t HELP but dig my fingers into its squishy goodness. So delightful.
The main part of the basic stocking is crocheted with Lion Brand’s Color Made Easy, which is a #5 Bulky yarn. It’s the same yarn you know and love from the popular Ribbed Wonder Hat pattern. The stocking starts with the red yarn at the top down to the heel. Then things get a bit interesting as we make a heel flap on half the stitches, turn the heel, and start working on all the stitches again. Once the stocking is made, crochet a hanger and a fur stocking cuff. Then sew them both to the stocking and you’re done!
The heel on the crochet stocking can be a little tricky which is why I’m rating this an advanced pattern. My best advice here is to carefully read through the heel instructions and the photos to make sure you feel confident before starting. The actual stitches used in the stocking are very basic and because it’s a bulky weight yarn, the stocking is a very fast make!
Let’s dive into making this crochet Christmas Stocking Pattern!

Crochet Stocking
Here is what you will need:
- US K 10.5/6.5mm crochet hook (these are my absolute favorite hooks I recommend to everyone!)
- US L 11/8mm crochet hook
- 4.5 oz Bulky Weight yarn, sample used Lion Brand Yarn Color Made Easy in Crimson color
- 1 oz Super Bulky Weight Faux Fur yarn, sample used Lion Brand’s Go for Faux in Baked Alaska color
- Stitch Marker (optional)
- Tapestry needle and scissors
Resources and tutorials you may find helpful in following this pattern: Crochet Abbreviations, US to UK Crochet Conversion Chart. Find links to stitches on the “Tutorial” menu: Getting Started will show basic crochet stitches such as the single crochet stitch (sc), slip stitch (sl st), and chain stitch used in this free crochet pattern as well as other basic stitches such as the hdc, double crochet (dc), and treble crochet stitch. The Crochet Stitch Dictionary shows our growing collection of crochet stitch tutorials.
This finished piece is approximately 17″ tall from the top of the cuff to the bottom of the toe and 6″ across when the holiday stocking is laid flat.
Crochet Stocking:
With red yarn and K hook, chain 32. Join with a slip stitch to first chain, without twisting so that the chain is in one large loop. This will be the top edge of the stocking.
Note that every row until the heel is joined with a sl st, then turned to work the next row (no need for a stitch marker). The joining point will become the center back of the stocking.
R1-29: ch 1, sc across. Slip stitch to top of first sc and turn. (32 st)
At the end of the 29th row, fasten off, leaving a long strand for weaving in.
Heel Flap:
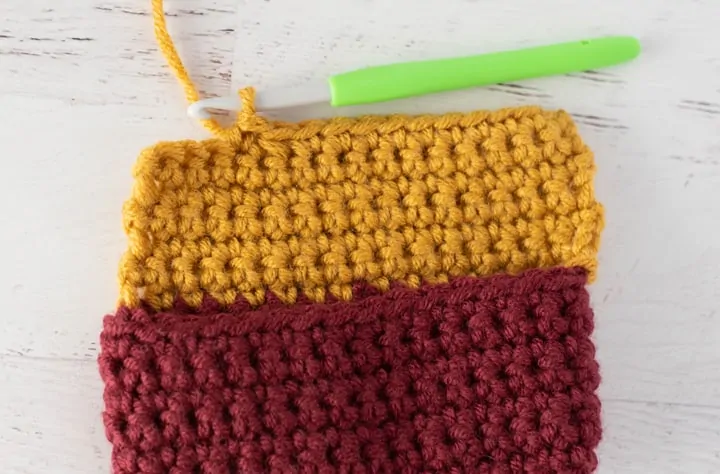
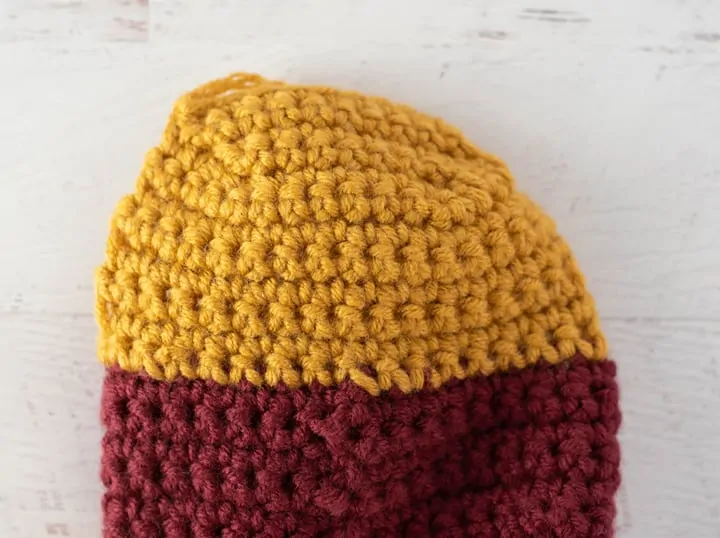
Note: The Christmas Stocking is worked in one solid color. To illustrate the heel portion, I’m using two different colors of yarn for the heel and the main part of the crochet stocking to make it easier to understand.

The heel flap is worked back and forth on half the stitches. Note that the center back will be in the center of the heel flap.
As you work the Christmas stocking, be mindful that every row (rnd) needs to turn so that the single crochet pattern is consistent through the whole stocking.
To attach yarn for the heel flap, turn work as if starting a new row (wrong side of work will be facing). Then attach yarn with a slip stitch 8 stitches to the right of the center back.
R30-35: ch 1, sc across 16 stitches. turn (16 st)
Turn Heel:
In this section we make “short rows”, which means at first we don’t work across ALL the center stitches and then in subsequent rows we move a little closer to the edges of the work each row. This creates the heel “cup”.
R36: ch1, sc in next 10 st, sc 2 tog, sc in next stitch, leave remaining 3 stitches unworked. Turn
R37: ch 1, sc in next 6 st, sc 2 tog, sc in next st. This leaves the 3 stitches at the opposite end unworked. Turn.
R38: ch 1, sc in next 7 st, sc 2 tog, sc in next st. Turn.
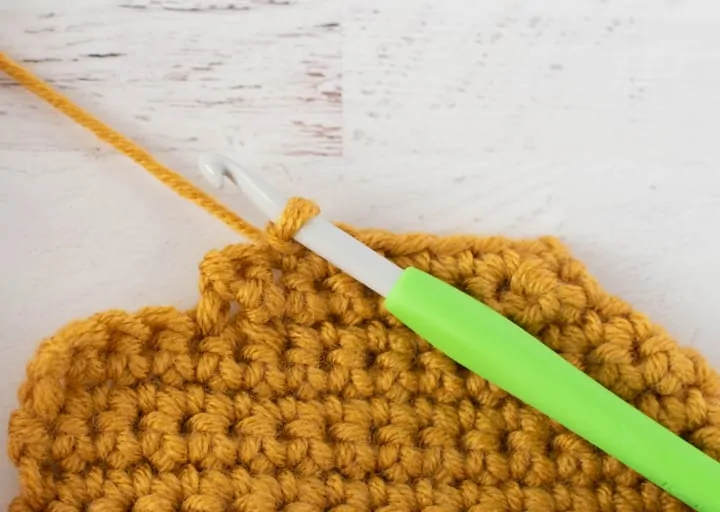
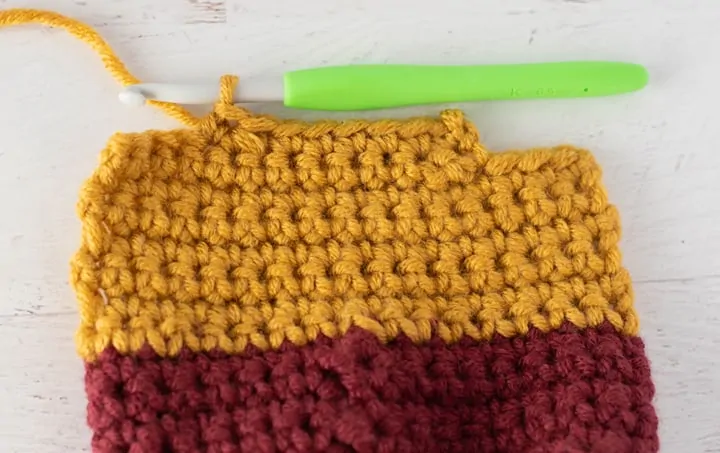
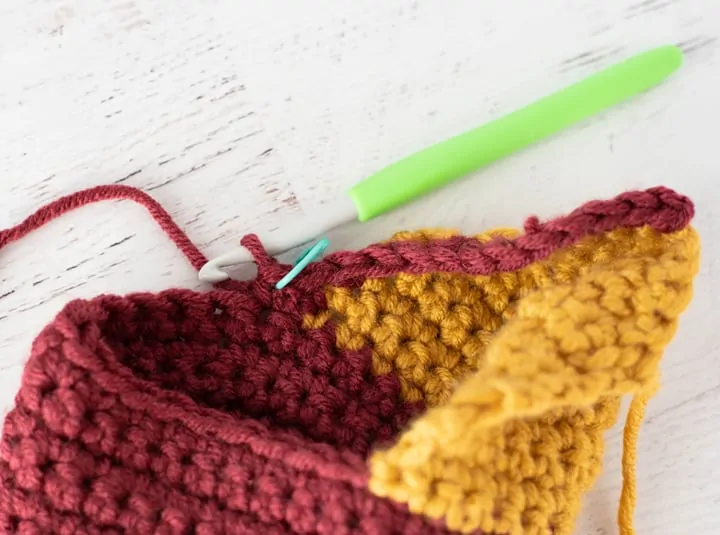
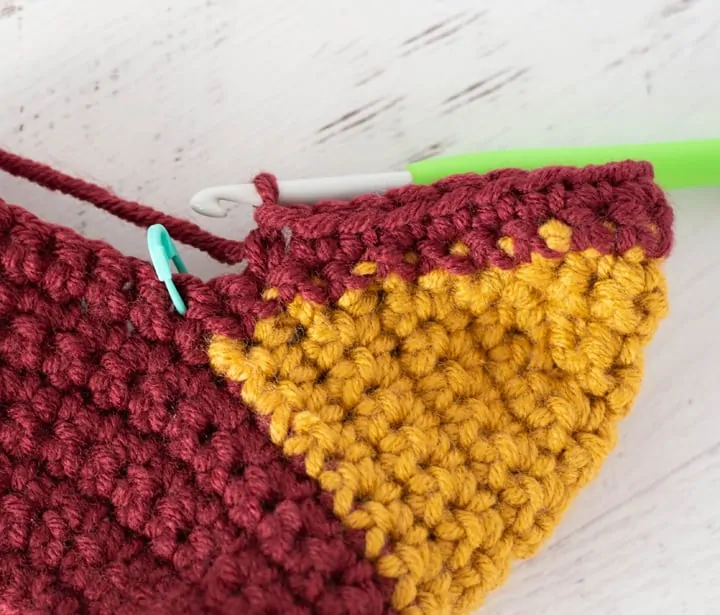
Let’s take a closer look at the decreases in this section. Note that in this row, the 7th single crochet is worked in the stitch just before the “ledge” created by the previous row:
Then the decrease is worked over that last stitch and then the NEXT stitch below the edge as shown below. This creates an angle:

R39: ch 1, sc in next 8 st, sc 2 tog, sc in next st. Turn.
R40: ch 1, sc in next 9 st, sc 2 tog.Turn.
R41: ch 1, sc in next 9 st, sc 2 tog. Turn.
At the end of this section, the heel is done and there is a “cup” shape. Next we’ll crochet over the stitches all around the Christmas stocking and do some decrease rounds in the instep area before we get to the foot.
Crochet Christmas Stocking Instep:
Fasten off yarn and re-attach at center back. Note that in the next round we work on all the stitches around the finished heel and the body of the Christmas stocking. Then we will decrease on either side until the stocking body stitches are the same as they were before the heel was started.
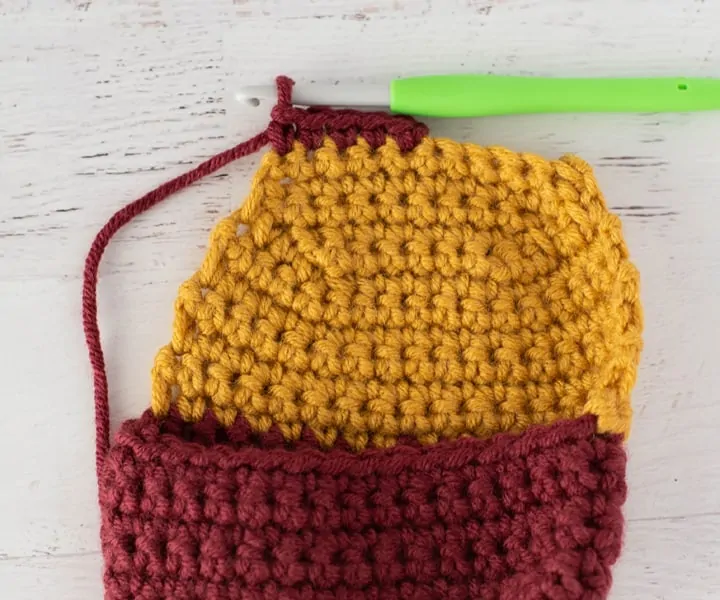
R42: With wrong side facing and with yarn joined at the center back, ch 1, sc in each of the next 5 stitches on back of heel. Sc 7 stitches across side of heel flap.
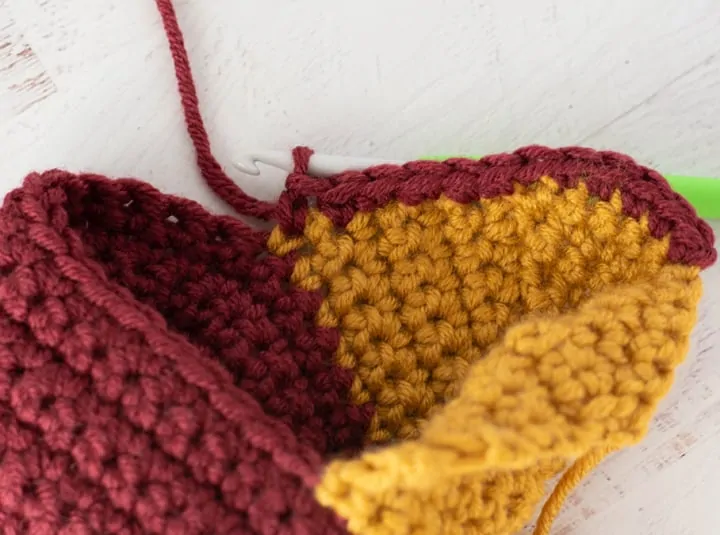
Place a marker at the corner.
Sc across the stitches in the body of the stocking. Sc 7 stitches across the other side of the heel flap. Place a marker at the 2ndcorner. Then sc across the last 5 stitches on the back of the heel. Join with a slip stitch to the first sc in the row and turn. (40 st)
Note for the next decrease rounds: markers are used to designate the corner stitch. In the decrease rounds, (sc 2 tog) over the 2 corner stitches that make up the corner. Replace the marker for the subsequent round.
R43: ch 1, sc across to next marker, (sc 2 tog), sc to next marker (sc 2 tog), sc across to end of row. Turn (38 St)
R44: ch 1, sc across to next marker, (sc 2 tog), sc to next marker (sc 2 tog), sc across to end of row. Turn (36 St)
R45: ch 1, sc across to next marker, (sc 2 tog), sc to next marker (sc 2 tog), sc across to end of row. Turn (34 St)
R46: ch 1, sc across to next marker, (sc 2 tog), sc to next marker (sc 2 tog), sc across to end of row. Turn (32 St)
Foot of Crochet Stocking:
Now the Christmas stocking has the same number of stitches as it did before the heel. Remove markers.
R47-58: ch 1, sc across row, join with sl st to first st. Turn. (32 st)
R59: Ch 1, sc in next 6 st, sc 2 tog. Repeat from * around. Join with sl st to first st. Turn. (28 st)
R60: Ch 1, sc in next 5 st, sc 2 tog. Repeat from * around. Join with sl st to first st. Turn. (24 st)
R61: Ch 1, sc in next 4 st, sc 2 tog. Repeat from * around. Join with sl st to first st. Turn. (20 st)
R62: Ch 1, sc in next 3 st, sc 2 tog. Repeat from * around. Join with sl st to first st. Turn. (16 st)
R63: Ch 1, sc in next 2 st, sc 2 tog. Repeat from * around. Join with sl st to first st. Turn. (12 st)
Fasten off, leaving a long strand for sewing. Then thread strand into a yarn needle and weave through the tops of the stitches and cinch closed. Weave in ends, knotting off if necessary, on the inside of work so that the toe of the stocking stays closed. Then weave in any remaining ends.
Christmas Stocking Faux Fur Cuff:
The faux fur cuff is worked flat, in rows and then seamed and sewn to the top of the stocking.
Using the fur yarn and a L hook, ch 8
R1: sc in 2nd chain and across. Turn. (7 st)
R2: ch 1, sc across, ch 1 and turn (7 st).
Repeat row 2 until faux fur strip cuff is long enough to cover top of the Christmas stocking. Fasten off, leaving a long strand for joining. Sew 2 ends together to form a large loop (or cuff) of fur. Then slide the fur over the top edge of the Christmas stocking, lining up the top edge of the stocking to the top edge of the fur edge. Using stocking color yarn, carefully sew fur to top edge on the right side of stocking using a whip stitch. Make sure to work under a loop of the stich of the fur and be careful the stitches do not show through the fur.
Hanging Loop:
With red yarn and K hook, chain 18.
R1: working in the back bumps of chain only, sc in the 2nd chain from hook and across. Fasten off and sew ends together. Then sew in place at the center back of stocking.
Weave in any remaining ends.
Sigh! Isn’t your Classic Christmas Crochet Stocking just lovely? Did you enjoy making this free pattern? You might even want to make crochet stockings for everyone on your list!
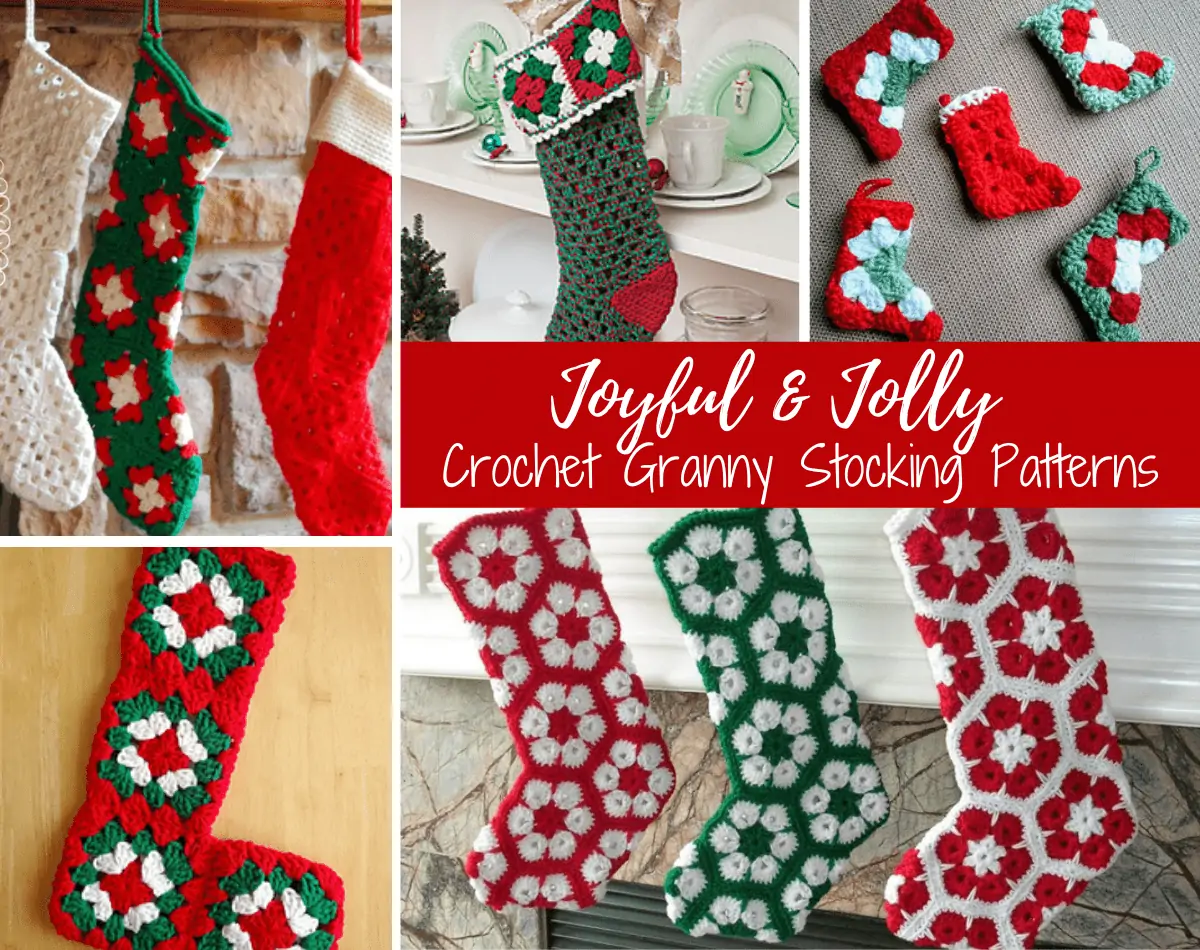
Did you love this crocheted stocking? Are you ready to craft even more Christmas crochet patterns? If you’re looking for even more Crochet Stocking patterns, check out this granny stocking collection!
Explore More Crochet Patterns
Do you love crochet as much as I do? I think you’re going to love these other fun crochet patterns:
I love seeing your finished projects! If you enjoyed making this Christmas Stocking Pattern I’d love to see yours on Instagram, be sure to tag me @crochet365knittoo. If you are on Facebook, stop over to the Crochet 365 Knit Too Facebook page or pop over to the Crochet365KnitToo Club and share a photo! I’d love to see your work!
Love, love ,love this pattern and your demonstration in different colored yarn. I was just wondering if the cuff could be made with a regular yarn instead of the fur yarn, because I have a difficult time being able to see so I have avoided fur yarn. ( The fur yarn on the stocking is beautiful, though) Like what yarn could I substitute and still use this pattern? Your patterns are sooo nicely written!
The fur yarn can be challenging to work with. I cannot see it either. I FEEL where the stitches are. And for this particular pattern, because there are so few stitches in a row, I feel like it’s not so daunting… you may want to try it and see if you can get ‘ok’ with feeling your way through the stitches instead of actually seeing them. If you’re going to try with another yarn, you could either just add some rows to start in a contrasting color and flip it over (like you might do for a brim of a hat). Or if you want to work side to side, you could just chain to the length you want the depth of the cuff to be, then keep working until you can wrap your piece around the stocking and then stitch it down.
I read the heel pattern several times and I’m still confused. When you say crochet two together a the end of the row, is that an increase or decrease?
Crocheting 2 together makes 2 stitches become one, so that is a decrease. Hope that helps!
Thank you for this pattern, I made 9 of them for Christmas, they are beautiful and so easy. I battled with the heel, but eventually got it right. Lol 😂