
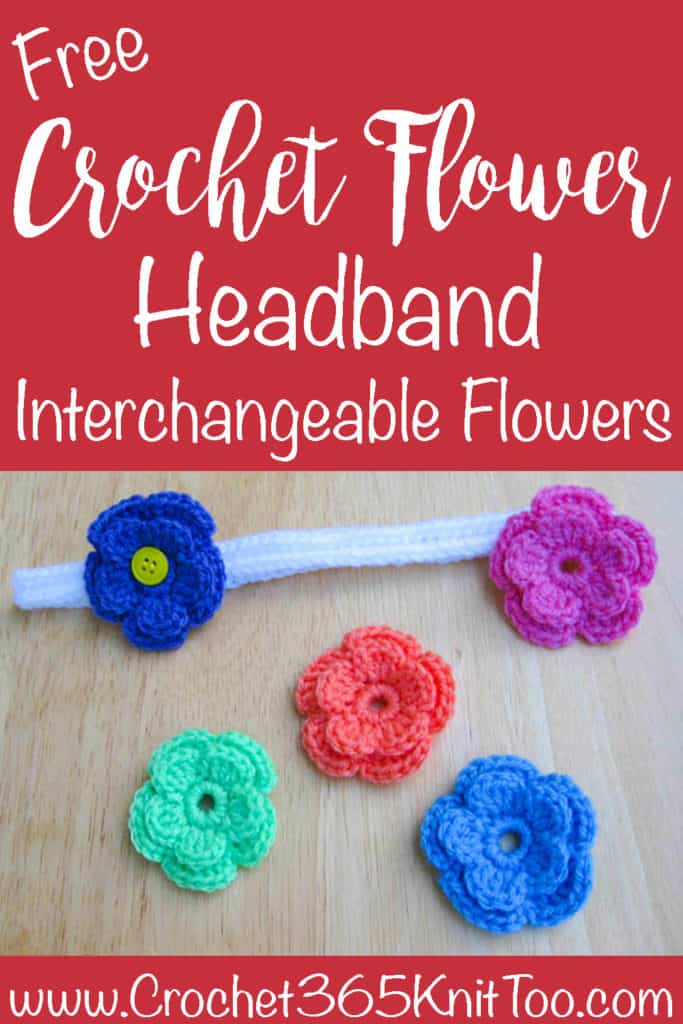
Changeable Crochet Flower Headband
This post may contain referral/affiliate links. Please read my disclosure for more info.
A changeable crochet flower headband. Easy. Brilliant. Customizable. What’s not to love?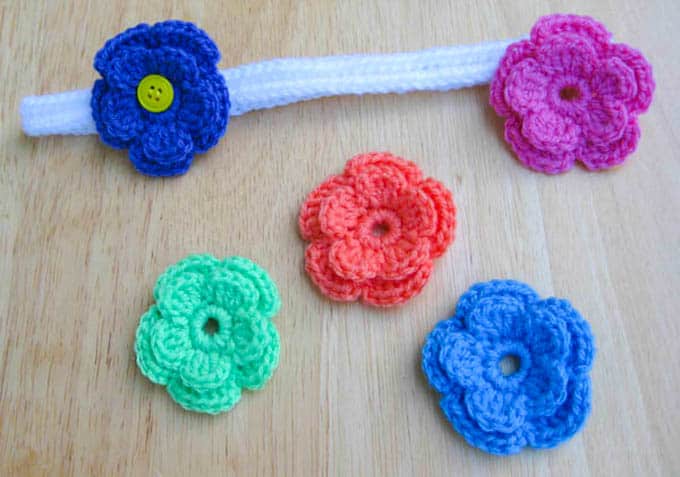
Once upon a time before there was a Crochet 365 Knit Too, I designed and sold a few patterns under another name. Then life got busy. I was a single mom juggling a full time job, trying to help my son get through school and dipping my toe into the dating pool and something had to give.
So I put my dreams of being a crochet designer on hold. Fast forward several years and now I’m a crochet designer and blogger. I’m happily married to Mr. Wonderful and my son is about ready to get married himself! I’ve thought about listing my old patterns on Etsy, but somehow that just didn’t feel quite right. So I thought now and then I’d share them with you instead.
This is a changeable crochet flower headband. Here’s what I love about this: The pattern works like a recipe so you can literally make it out of any yarn to fit any person and use any hook. Plus the whole concept of changing the flowers with the center button staying on the headband is kind of brilliant, I think. It would be fun to use the same concept to adorn a little girl’s dress or sweater, don’t you think?

Here are a couple of pictures of my beautiful niece so kindly modeling the changeable flower headband. Now… here’s where I need you to keep a little, bitty secret. I completely got permission to take these photos. I promise, I really did. However.. now she’s 21, in college and, frankly, even more beautiful, kind of model beautiful even. She may have forgotten about her cute little ‘ole braces self. She might not appreciate the need you have to actually SEE this cute headband modeled by a real girl. So let’s not tell her, ok? It’s our little secret.
Changeable Crochet Flower Headband Pattern
Here is what you will need:
- Your choice of yarn (sport weight yarn used in sample) in main color and contrasting colors for the flowers
- Crochet hook size appropriate to your yarn (Size G hook used in sample)
- Button
- Sewing needle and thread
- Tapestry needle, scissors.
Resources and tutorials you may find helpful in following this pattern: Crochet Abbreviations, US to UK Crochet Conversion Chart. Find links to stitches on the “Tutorial” menu: Getting Started will show basic stitches used in many patterns and Crochet Stitch Dictionary shows our growing collection of crochet stitch tutorials.
Step One: Determine your Gauge
Ok.. did you see the word “gauge” and think, ‘oh heck no!’? I have to admit, I kinda fall into the category of hating to do a gauge swatch. For this pattern, though, I really do encourage you do follow the steps below and take a few minutes to work a gauge swatch. It is key to customizing this headband for the weight of yarn, hook size and the individual so that it fits properly.
You will need to determine how many stitches you are getting per inch with the yarn and hook you’ve chosen. Chain 20 and work back and forth in single crochet for several rows (6 or so should be enough). Use a ruler to measure how many stitches you get per 2 inches. Measure this in 3 different spots to be sure you are getting the right amount of stitches. Write this number down:
# of stiches per 2 inches: ______________
Now, divide this number by 2 to get the # of stitches per inch. Write down that number:
# of stitches per inch: _____________ (A)
Step Two:
Measure the head of the person along the spot where the headband will be worn.
Write that number down too:
Head in inches: _____________ (B)
Step Three:
The changeable crochet flower headband will need to be a bit smaller than the actual head measurement in order to stretch and fit snugly. To determine the length of the headband, subtract 1 to 1.5 inches from the head measurement. I subtracted 1.5 inches, but you may find that 1 inch is a better fit. Write the numbers below:
Head (B) above: ____________
MINUS 1.5 inches -1.5 inches
EQUALS (C) ____________
Step Four:
You’re almost done with the math! Now take the headband length in inches (C) above and multiply that by the gauge you got in the first step (B). Write your numbers here:
Headband Measurement (C) __________
Times Stitches per inch (B) __________
Equals Total # of stitches (D) _________
OK! Now you’re in the home stretch and ready to crochet your custom made headband! Let’s Go:
Crocheting the Headband:
R1: Chain # of stitches (D) above. Carefully attach to form a ring, being careful not to twist work. Ch 1, then sc around, joining with a slip stitch to the first Ch 1, again being careful not to twist work. Fasten off.
R2: Turn work so that the row you just worked is on the bottom and the foundation chain is on the top. Join yarn with slip stitch to the first stitch of the foundation chain. Ch 1, then sc. Around, sl st to 1st stitch. Fasten off and weave in loose ends.
5 Petal Flower
Make several in a variety of colors!
R1: Ch 6, sl st to join.
R1: Ch 1, 10 sc in ring (10 sc)
R2: Ch 2, 3 dc, ch 2 in same st as joining, sl st in next st *ch 2, 3 dc, ch 2 in next sc, sl st in next sc* around (1st row of 5 petals made).
R3 (2nd row of petals): pull 1st row of petals forward *ch 3, 1 sc in between 1st and 2nd petal*, repeat around. (5 ch-3 loops)
R4: sl st in next loop, working in same loop, ch 2, 5 dc, ch 2, sl st. *ch 2, 5 dc, ch 2, sl st in next loop* repeat around. (2nd row of 5 petals made). Fasten off. Weave in ends.
Finishing:
Your changeable crochet flower headband is almost done! Just a few finishing touches! Purchase a button that will fit with the flowers you made. If you choose a flat button, with no shank, you will need to create a shank out of thread to accommodate the bulk of the flower on the headband. Here’s how:

Start to sew the button on the headband, placing a yarn needle underneath the holes in the button as you sew the button in place. When you have finished this step, carefully pull out the yarn needle, do NOT break thread. You will now have a button that is very loosely attached to the headband. Maneuver the sewing needle so that it is between the button and the headband. Wrap the thread several times around so that you create a thread shank. To finish off, knot around the button with a slip stitch or two, then pull needle through to the wrong side of the headband and knot off.
And there you have it. A changeable crochet flower headband pattern that you can make for anyone!
I love seeing your finished projects! If you enjoyed making this Crochet Flower Headband I’d love to see yours on Instagram, be sure to tag me @crochet365knittoo. If you are on Facebook, stop over to the Crochet 365 Knit Too Facebook page or pop over to the Crochet365KnitToo Club and share a photo! I’d love to see your work!

This is such a cute idea!
Dear Cheryl: I am a subscriber and am having trouble getting some of the patterns and tutorials to print. Am I missing a link in the pattern that I am supposed to click on? I would really like to work up the headband with the interchangable flowers. Thanks for your help. Lorie Homiak
All my patterns are available to read free on the blog. If there is an ad-free low-cost version available, there will be a link in the post. I also offer a variety of free printables (like the journal and stitch dictionary) to newsletter subscribers in a password protected library. You can get to those freebies by following the link and password at the bottom of every newsletter I send. For this particular pattern there is not an ad-free version available at this time.