
What is Tapestry Crochet?
This post may contain referral/affiliate links. Please read my disclosure for more info.
Some call it tapestry crochet. Others call it color-work, fair isle or intarsia. A search online will quickly show that people use a variety of terms for what seems to be the same thing. So… What is Tapestry Crochet? Although sometimes used interchangeably, the terms above actually mean slightly different things. Color-work is a broad term and just means changing color within the crochet item. Colorwork can be as simple as a stripe pattern. It really is just any color changing within the crochet project.
Intarsia is done by working each color section with a separate ball or bobbin of yarn. Graphgans are typically done in intarsia. In Intarsia, the unworked color is NOT carried behind the working yarn. Rather, the color is changed and dropped with each color change. Depending on the pattern, this can result in a lot of separate balls and bobbins while working a project. With careful work, the color changes can be done neatly and the piece will be reversible. It can, however, be a challenge to keep the yarn untangled and the changes neat and tidy.
Fair isle is a knitting term that has been incorporated into the crochet world. In Fairisle style, the unworked yarn is carried behind the piece. So when the work is completed, there are nice and tidy strands strung across the back. There is a definite “right” side and a definite “wrong” side to the piece. You could certainly use the same technique for crochet.
But what is tapestry crochet? Unlike intarsia or fair isle, in tapestry crochet, the unworked yarn is carried along the row. The carried yarns are encapsulated within the working stitches. Tapestry is often worked in single crochet on the right side in rounds. But it can be worked in different stitches, flat from one direction or back and forth with different results.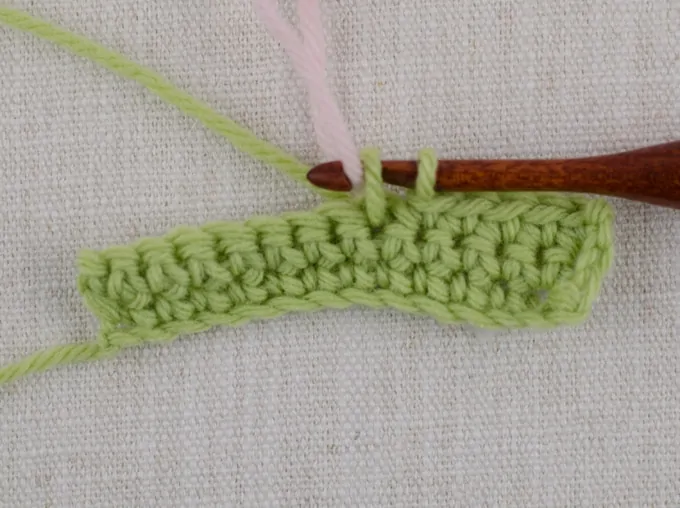 Learning how to work tapestry crochet is really easy. It uses basic crochet stitches. To change color, simply work the stitch until the last yarn over.
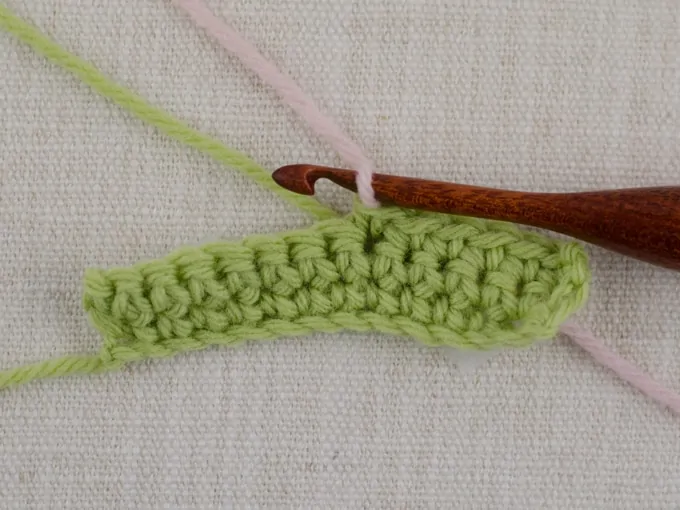 Then pull through the loop with the new color.
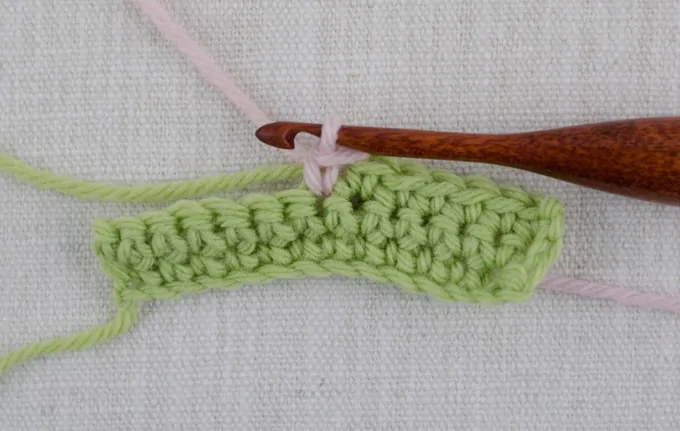 When you make the next stitch, just crochet over the unworked yarn. When it is time for a new color, on the last stitch in the old color, just pull through the new color on the last yarn over and drop the old color, working over it with the next stitch. When the stitches are fairly tight, the carried yarn is not seen at all.
Tapestry crochet instructions typically include a chart in a grid format. One block on the chart represents one stitch. Be mindful of where you stop and start each row on the chart. If you are working in one direction and are right handed, for instance, every row on the chart will start on the right side. If you are working back and forth in rows, you will which side of the chart you start on with each row.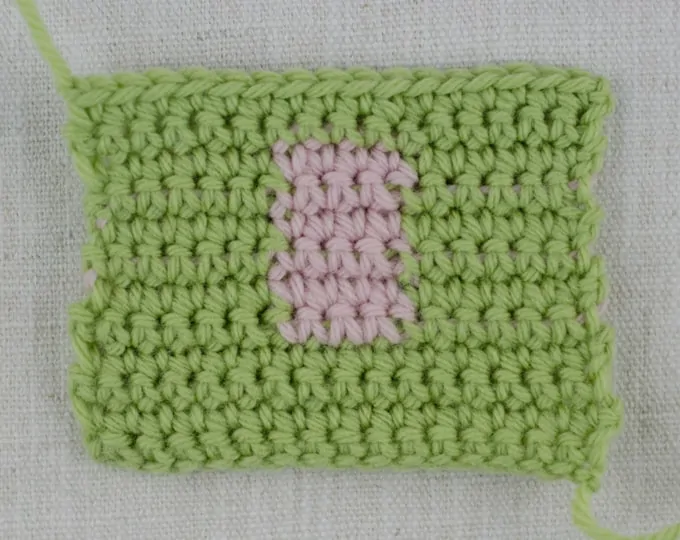
Tapestry crochet can be worked back and forth rows like the photo above. Notice that the color change is nice and neat and the fabric is reversible. However, the rectangle does not form perfectly straight vertical sides.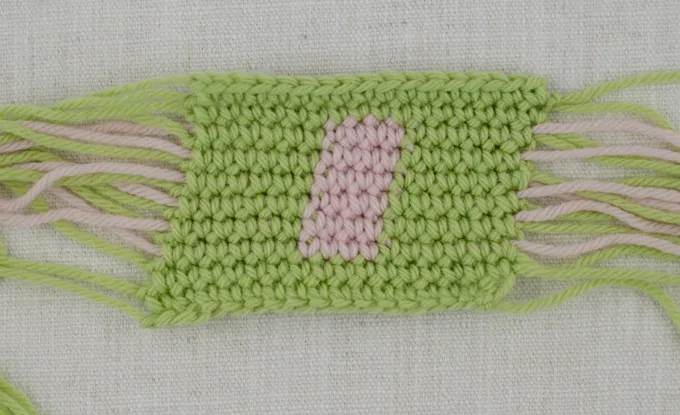
This is an example of classic tapestry crochet. In this method, the stitches are worked from the right side, in both loops. Here is a refresher on the parts of a stitch for reference. In the round, there are just the starting and ending ends to weave in. When worked flat, the work starts with a standing stitch and ends with a cut end. A standing stitch is just a stitch that is started with a slip stitch on the hook. After the last stitch in the row is made, just cut the yarn and pull the end through the open loop to finish off.
You will notice one inherent problem with working classic tapestry crochet through both loops. The resulting fabric leans to the right (if you are a right handed crocheter) or to the left (if you are a left handed crocheter). In crochet, the stitches do not sit perfectly on top of one another, but are shifted ever so slightly. When working back and forth, this is eliminated because one row will lean slightly one direction. Then the work is turned and the the stitches lean slightly back the opposite way, offsetting the effect.
When worked in the round, this effect might not be very noticeable dependent on the color design. But when worked flat, it is a different story. The work will decidedly slant one direction.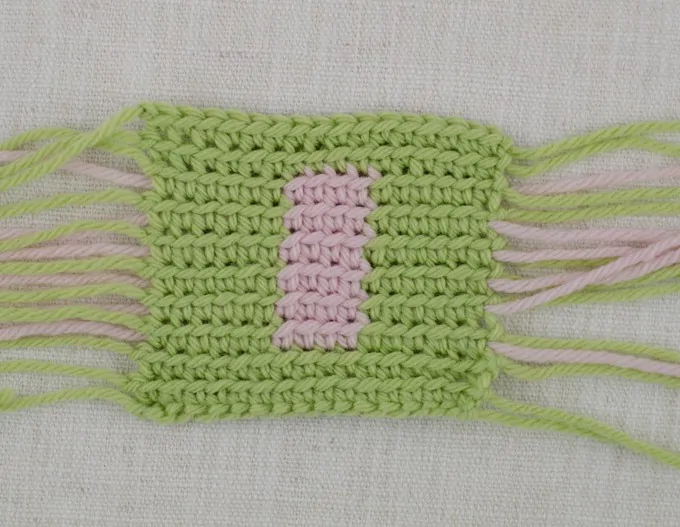
Enter the perfect solution: working tapestry crochet through the back loop only! Working through the back loop only, creates a ridge in the front of the work and allows the stitches to sit a bit more directly on top of one another while also distracting the eye a bit. The end result is a piece with nice crisp lines and definition of pattern and a fairly even piece of fabric.
Tapestry Crochet Tips and Tricks
- Choose a hook size that will allow for a fairly firm stitch. This will help hide the carried yarn
- To avoid tangles when using two colors in a row, when unused, always keep one color to the back and the other to the front. I keep the main color towards the front and the accent color towards the back.
- The unworked yarn is best hidden by letting it rest on the top of the stitches of the previous row as you work over it with the working yarn.
- If a carried yarn can still be seen from the front of the work, try pulling it slightly and carrying it slightly behind the stitches (instead of on top of or in front of the stitches)
- Carried yarn should be carried over the entire row, every row. That way the stitch tension stays the same throughout the work. Do this even on rows that have no color changes. (Note: I disobeyed this rule in the previous photo..and if you look at the last 2 rows on the top, you can tell. I left it so you could see and learn from my mistake)
- Check your work periodically on the wrong side for any strands or bulk. If you’ve missed working over a stitch, rip out and re-do that area. For any bulkiness on the wrong side of the work, just tug on the non working yarn to firm up the area.
- When working back and forth in rows, decide on which side will be the “right” side. To minimize the look of the carried yarn along the side of the work, at the beginning of a new row, hold the non working yarn BEHIND the work. That way the carried yarn will be seen on the “wrong” side, but will be invisible on the “right” side
- Similarly, when working back and forth, work the carried yarn slight behind the stitches when working on the right side and slightly in front of the stitches while working on the wrong side
- Periodically tug the non working yarn to firm up the stitches.
- Keep track of where you are on a tapestry crochet chart by using post it notes. Just place one or more post it note under the working row and move up the note(s) each row!
So now you know what is tapestry crochet and how to work it like a pro!
I love seeing your finished projects! If you enjoyed making one of my patterns I’d love to see yours on Instagram, be sure to tag me @crochet365knittoo. If you are on Facebook, stop over to the Crochet 365 Knit Too Facebook page or pop over to the Crochet365KnitToo Club and share a photo! I’d love to see your work!

Thanks!
Your clear explanations were helpful.
Good to learn new terms and techniques
So glad it helped!
A really great tutorial – clearly and very well explained. Thanks so much!
You are welcome! Glad it helped.
So am iunderstanding this right, you drop both colors every row and work in only one direction? Thats a lot of tails to work in if so. That alone keeps me from doing tbis
No, quite the opposite actually . You work with one color, over the non-working color. The bag is worked in rounds, so you just keep single crocheting around and around, following the pattern. You should only have the starting and ending strands to weave in. Hope that helps!
I’ve used bobbins before. If I choose to do that will the result be different?
You can certainly use bobbins! The result will be the same!
My work is still leaning to the right; I’ve checked my tension, always begin in the correct stitch a tht beginning of the row and I’m working the back loop only. Makes no difference; could it still be the tension do you think? I’m used to making toys in the round using a smaller hook size rather than mess with the tension but I’ve tried different hook sizes for my Fair Isle crochet and no luck.
As I mentioned in the post, when I work tapestry crochet through the back loop, it greatly decreases that tendency lean to the right (I’m a right handed crocheter). If you’re finding that it’s still leaning TOO much to the right, you could try blocking it to get it a bit more straight, or you could just work back and forth (turning after each row).