
Slip Knot, Chain and Slip Stitch
This post may contain referral/affiliate links. Please read my disclosure for more info.
I’m so excited to teach you how to crochet! My grandma taught me to crochet and I want to be that person for you! Kind of like a BFF or sister to help you along the way. I want Crochet 365 Knit Too to be the resource you turn to when you want to learn how to crochet anything. Just click on Tutorials and you’ll find all my tutorials in one spot. I will keep adding them regularly, so, please, check back often. First up: How to make a slip knot, chain and slip stitch!
You already learned about crochet hooks and you have some yarn so you are ready to start!
How to Make a Slip Knot
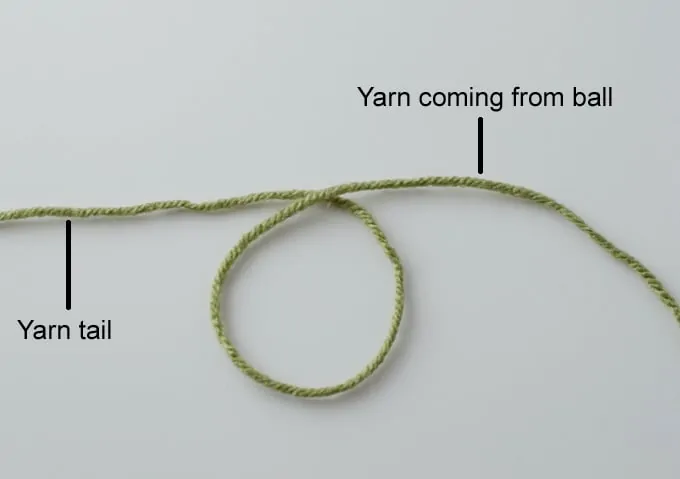
First you need to make a slip knot. Loop your yarn like this, making sure to overlap it the same way you see in the picture.
Then, use the hook to pull the yarn through the little loop you just made, like this:
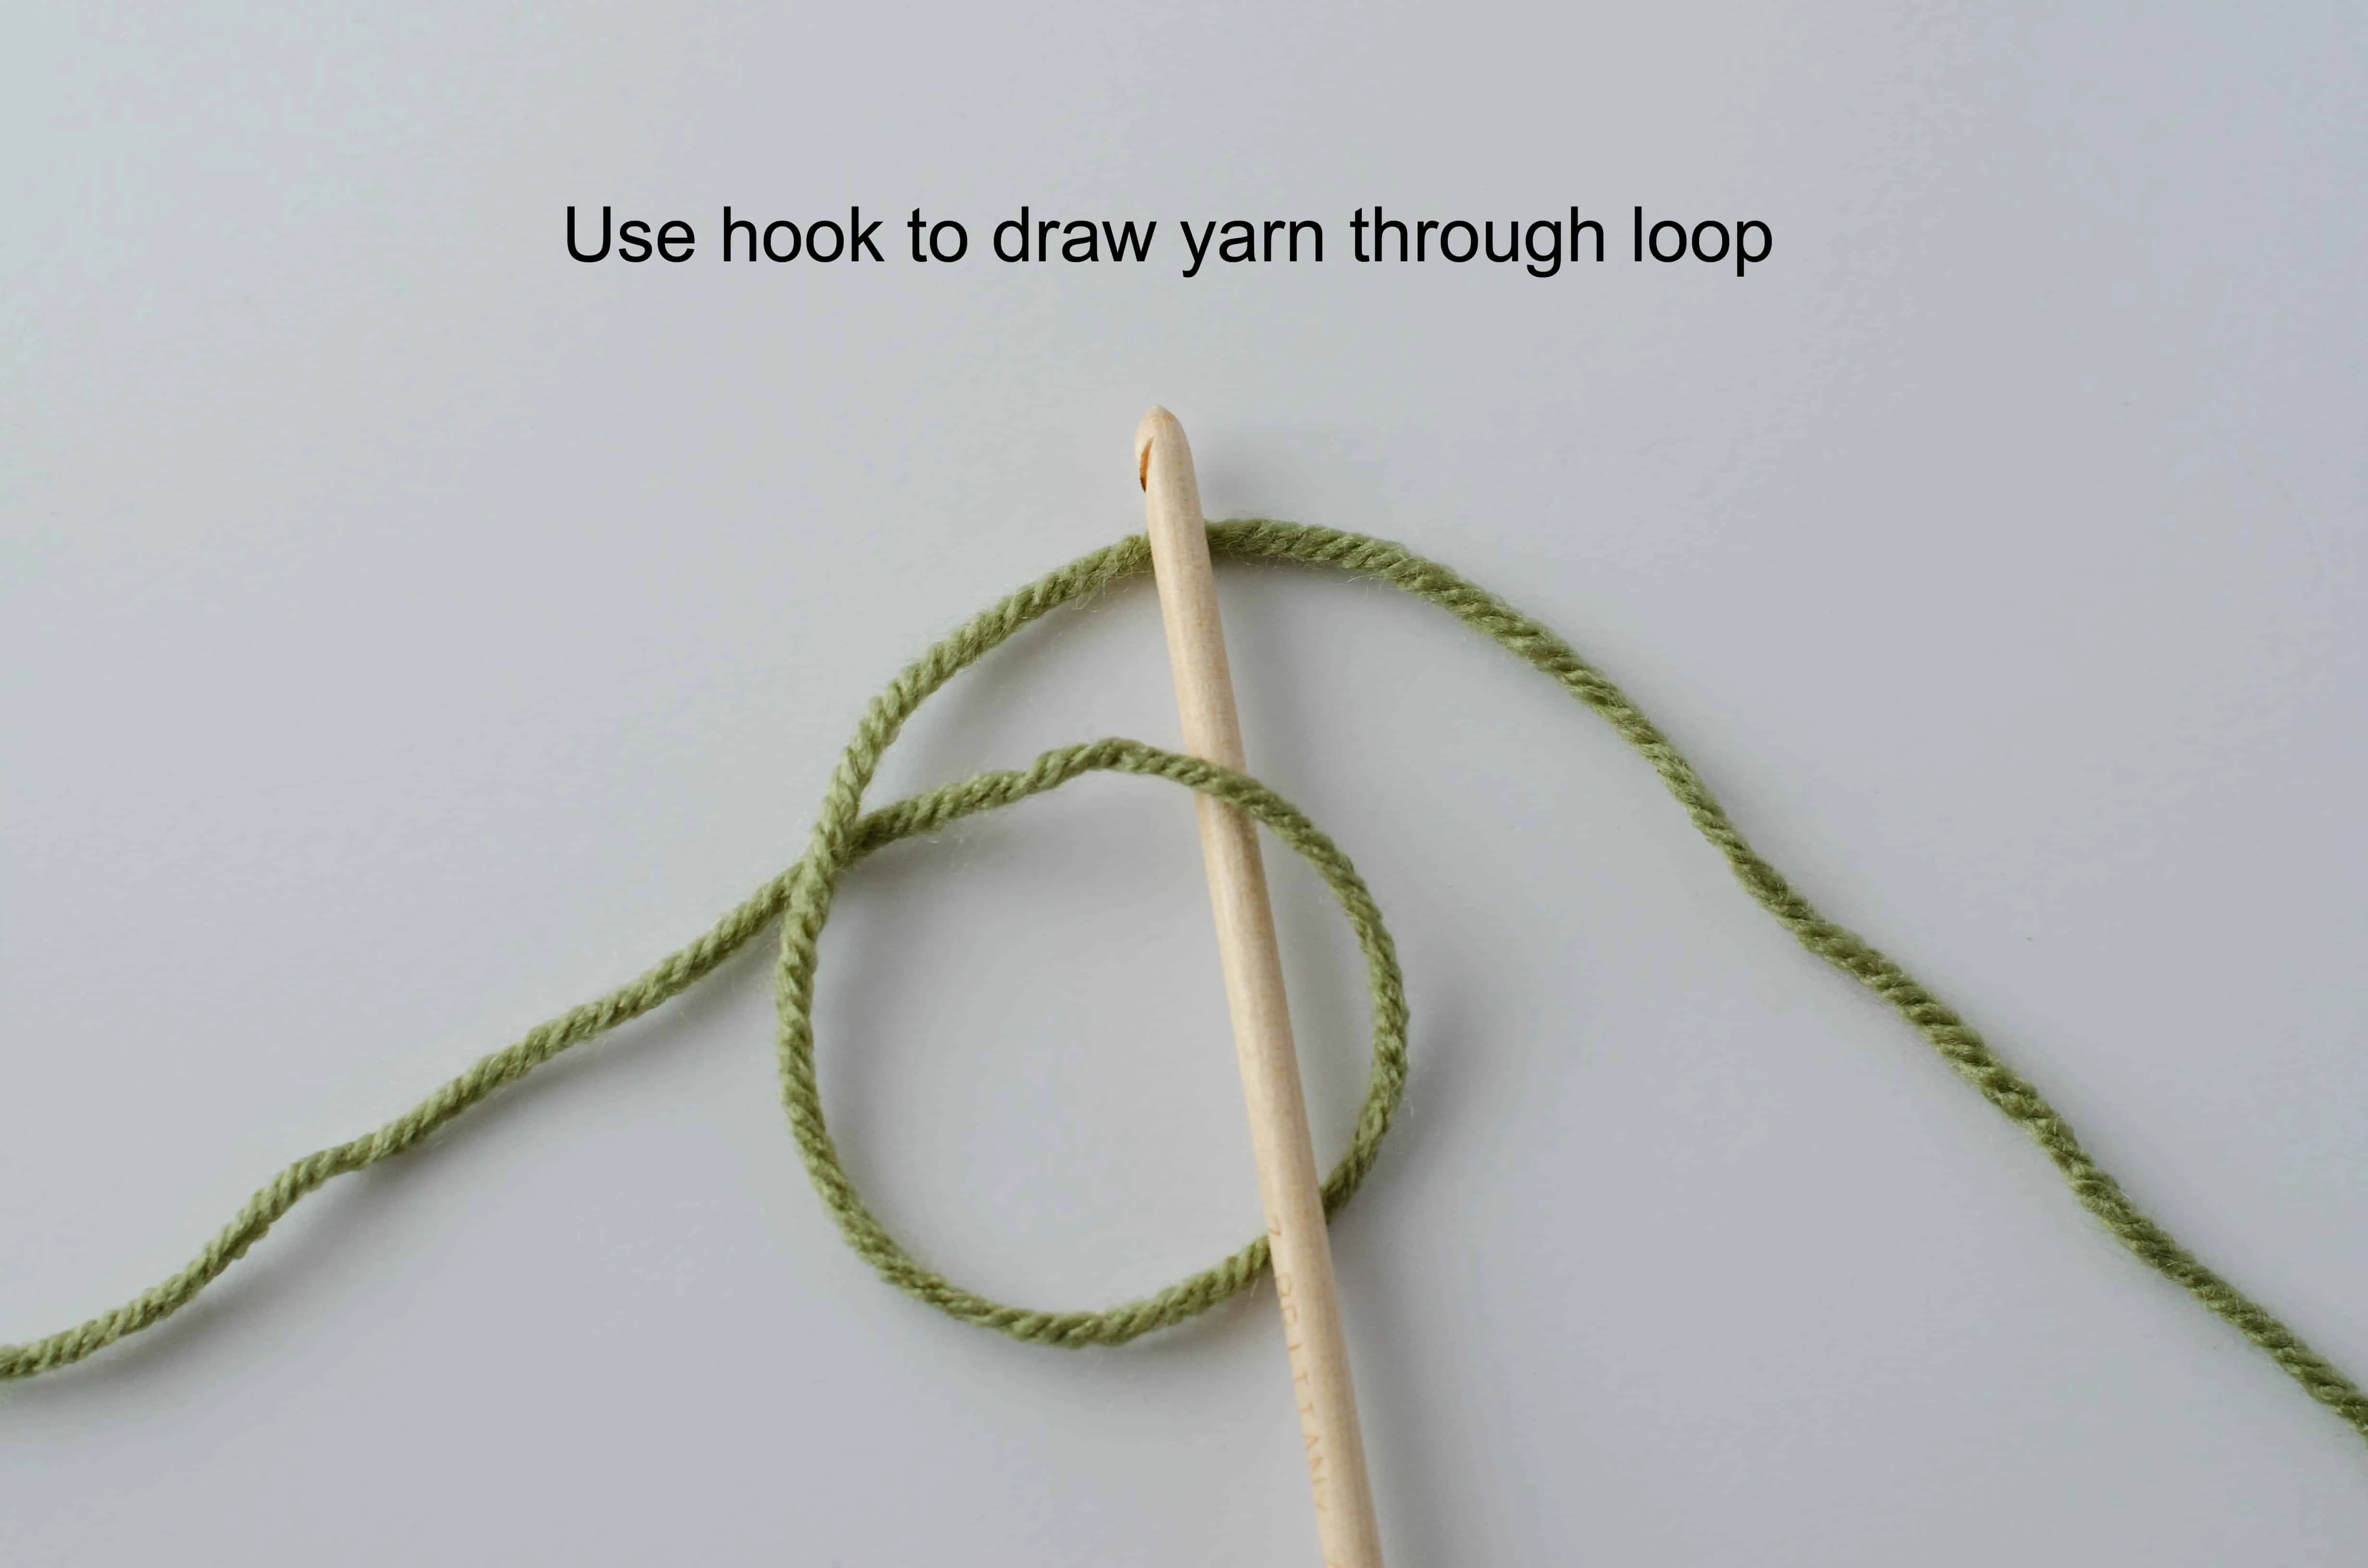

Pull the loop through like loop… and then tighten it up.
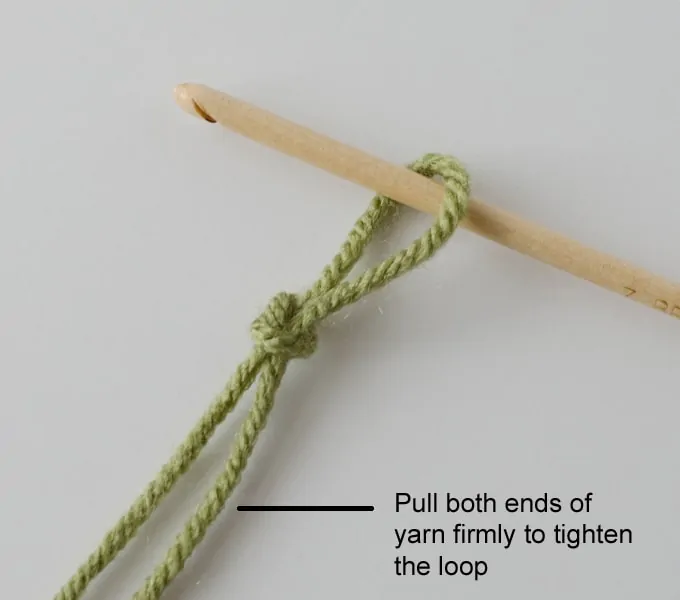
Now just tighten this slip knot up so it is snugged up against the needle. You made a slip knot! You will start every crochet project with a slip knot or slip stitch. When you read instructions, they will never tell you to make a slip knot. They assume you know you need to make one. Instead, instructions will usually start with the number of chains you need to make.
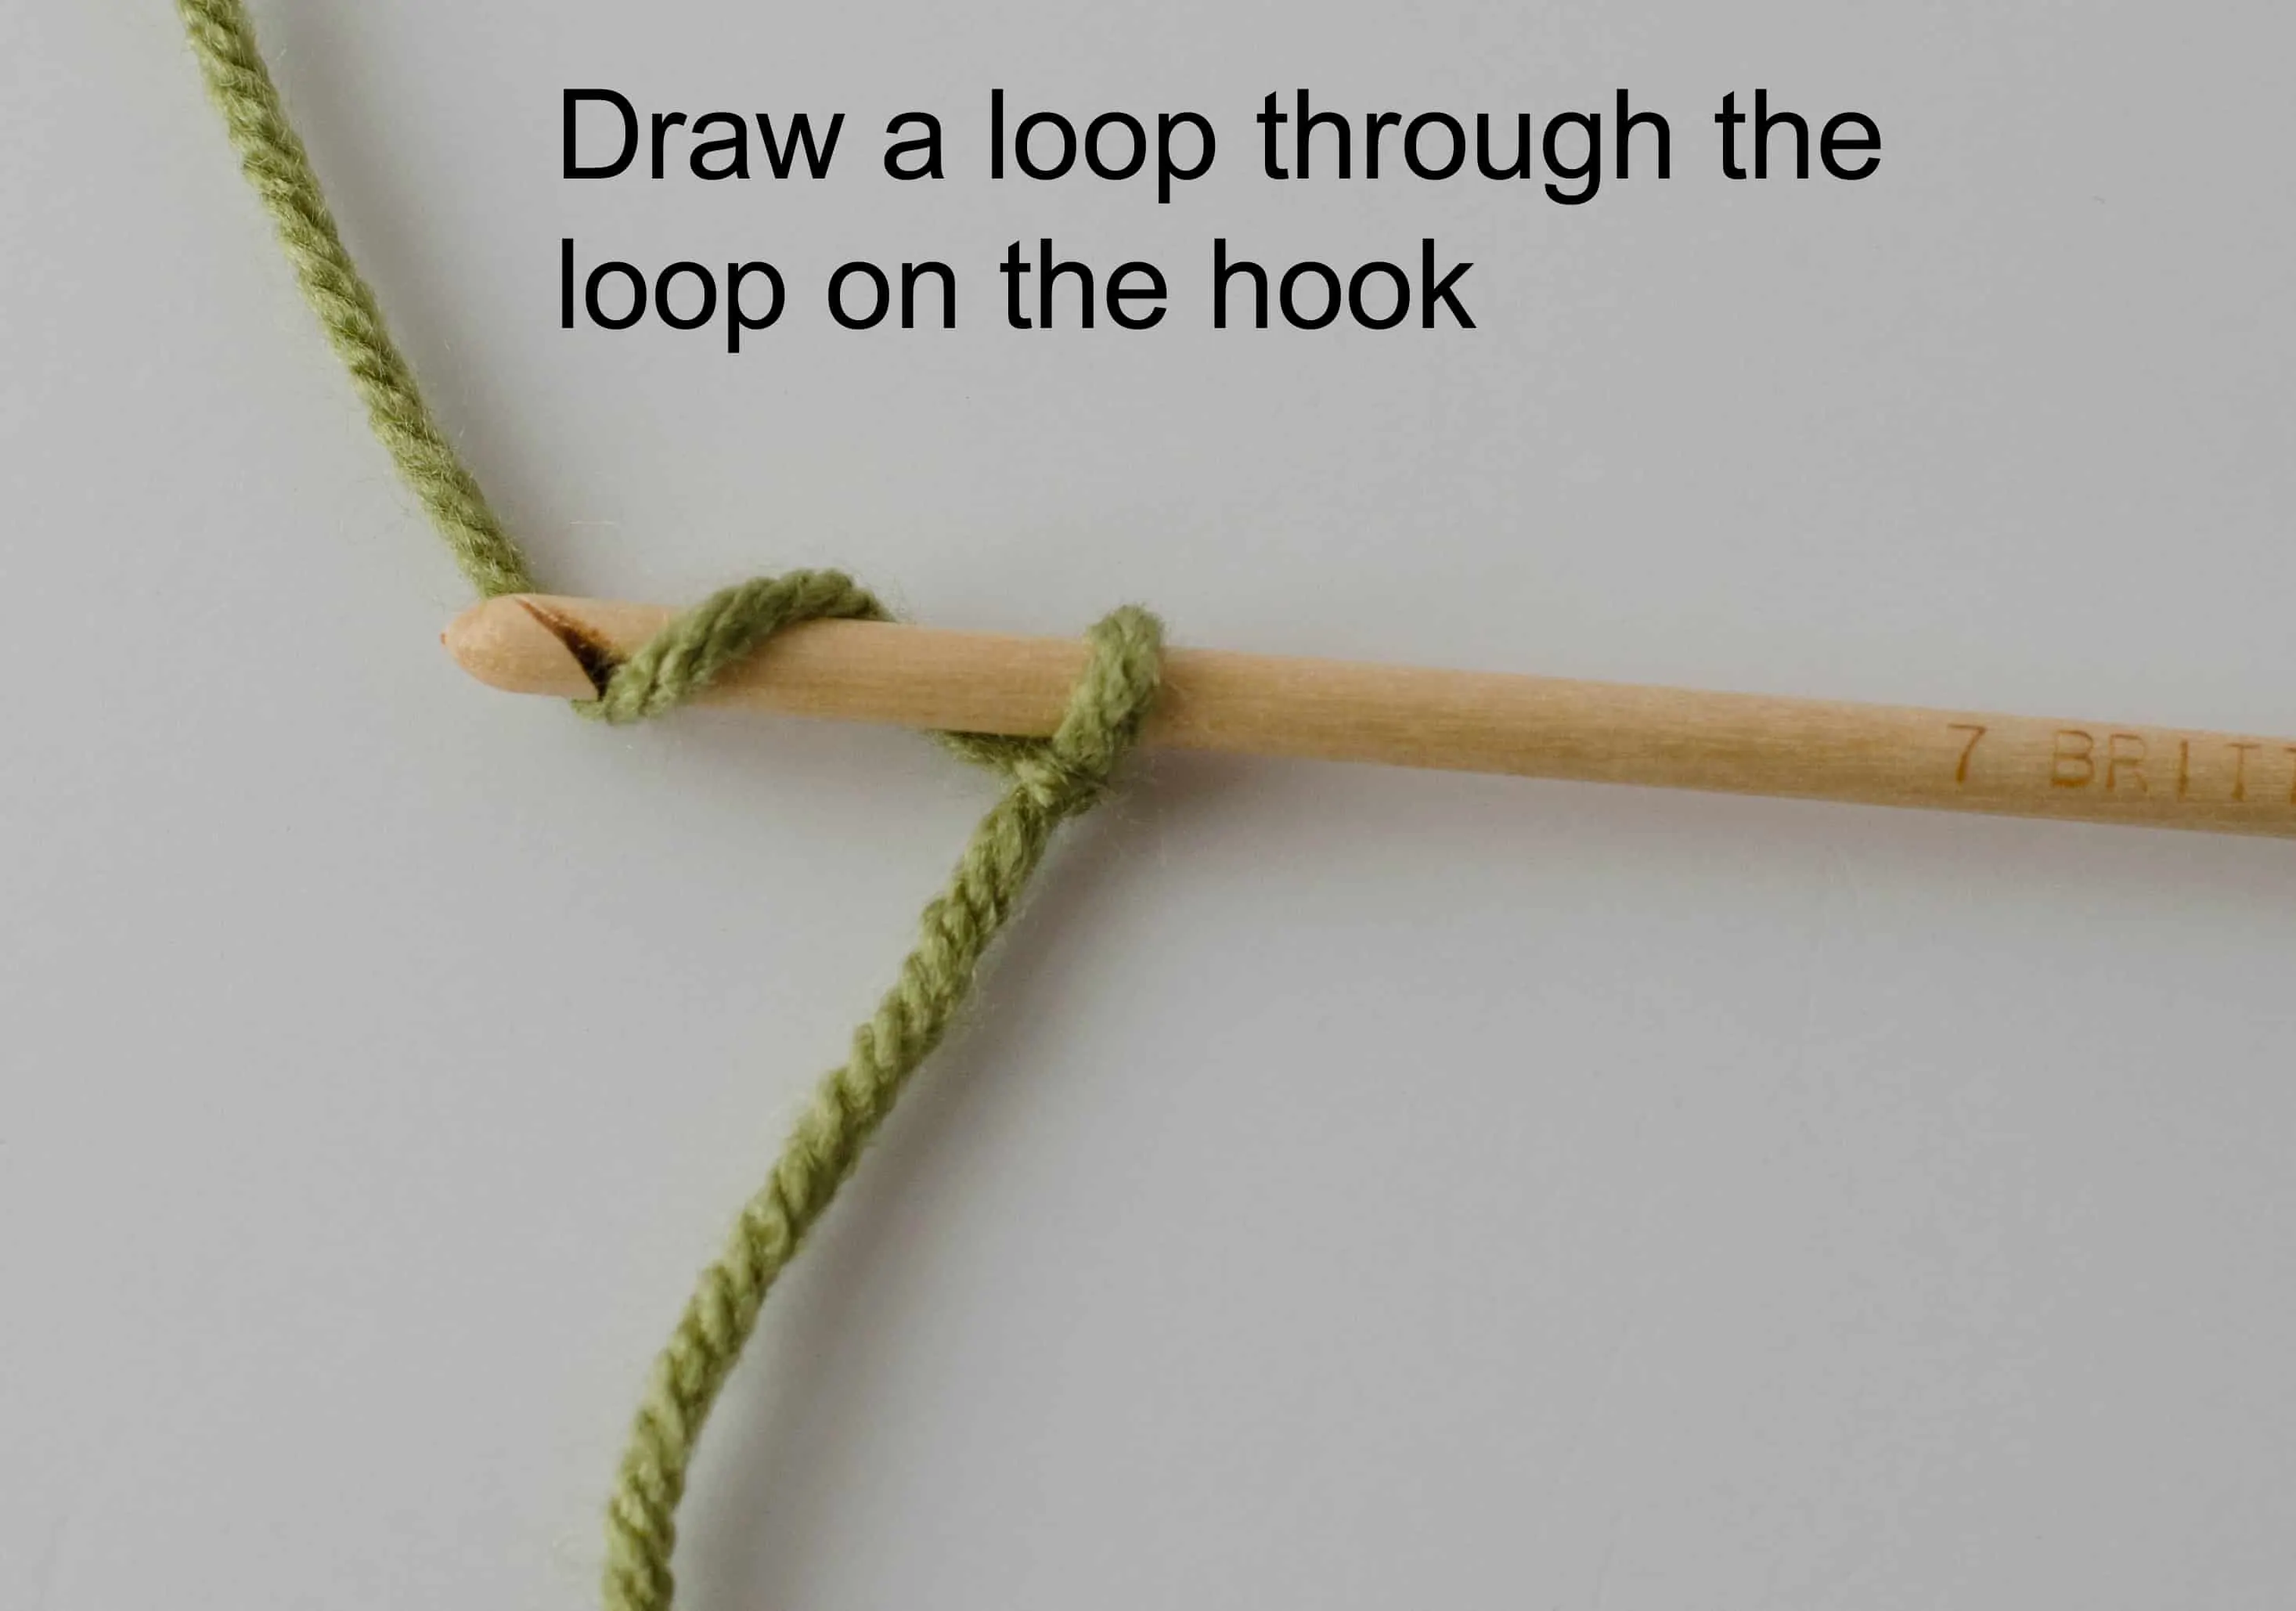
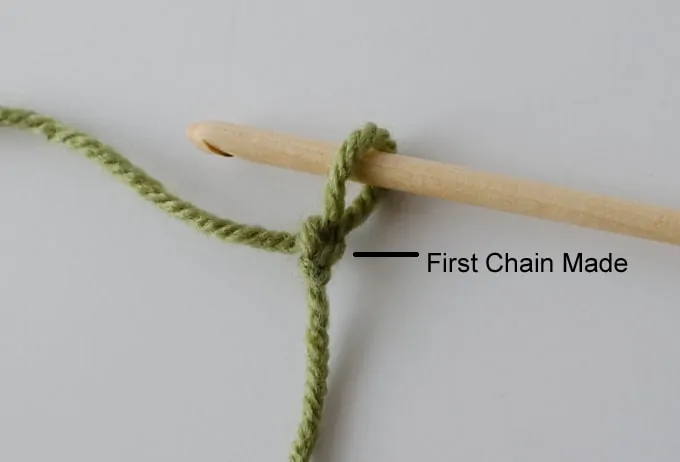
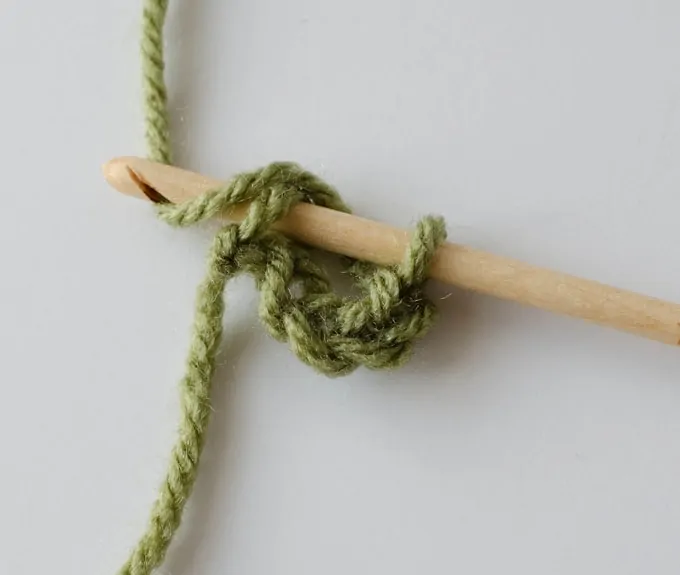
How to Chain
So here’s how you make a chain. Draw a loop through the slip knot on your hook like so…
This is what it looks like with one chain.
Then repeat the process to make additional chains. You will want to practice to make the stitches as uniform in size as possible. This takes practice, so don’t feel bad if it takes you awhile to make even stitches. It is all part of the learning process. I usually wrap the yarn coming from the ball over and under the fingers on my left hand and then I hold the chains I’ve already completed with my left index finger and thumb. This is called “tension”. By tensioning your yarn you control how tight or loose the yarn is as you make each stitch. You will find the way that works best for you.
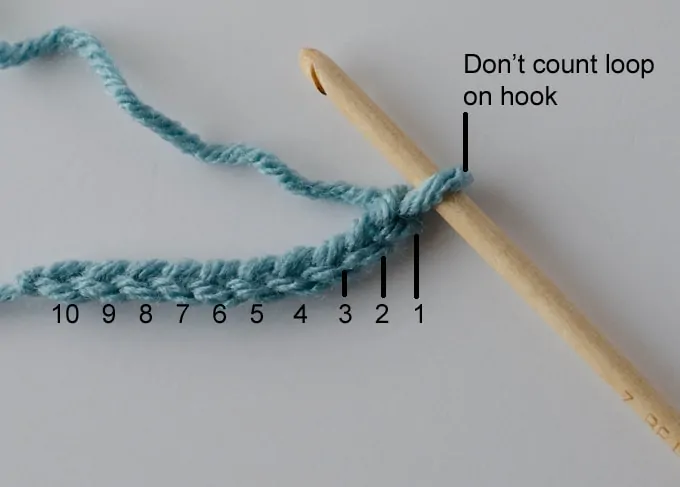
How to Count Chains
Counting chains is pretty easy. You do not count the loop on your hook. When I am following a pattern, I count the chains as I make them. Then when I have made the required number of chains, I stop and count them again. If you’ve made too many, it’s easy to unravel a few. Just take the loop off the hook and carefully pull the working strand of yarn coming from the ball. And, of course, if you need to make a few more, you just do so! Easy peasy! When you are reading directions you might see “chain” abbreviated as “ch”. Here’s a list of abbreviations if you want to see more.
There are a few more things to learn for your first lesson.
How to Finish Your Work
When you are done with your project, you will need to finish off the work so it doesn’t unravel when you take your hook out of the last loop. Cut the yarn and pull it through the last loop and pull tight. An easy way to do this is to cut the yarn and then start to make another chain, except pull the yarn straight through.

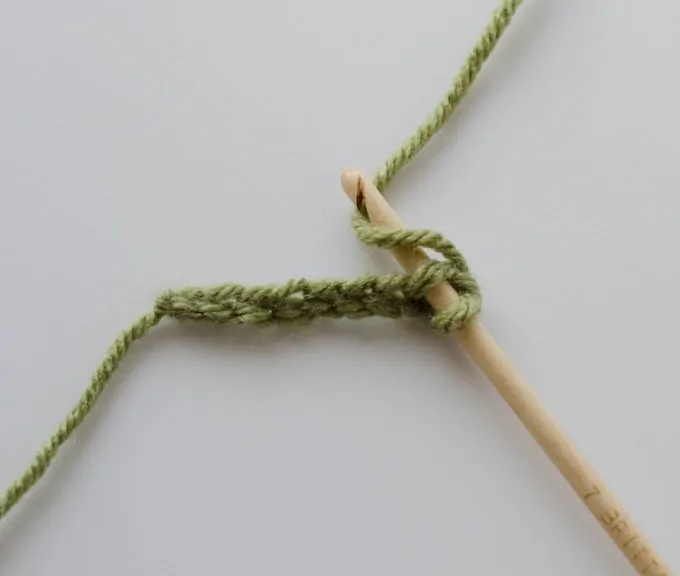
How to Slip Stitch a Row
To make a row of slip stitches, skip the first chain and then insert your hook into the next stitch. Wrap the yarn around just like you did with the chain stitch, except this time you will pull the yarn through both the loop from the chain AND the loop on your hook.
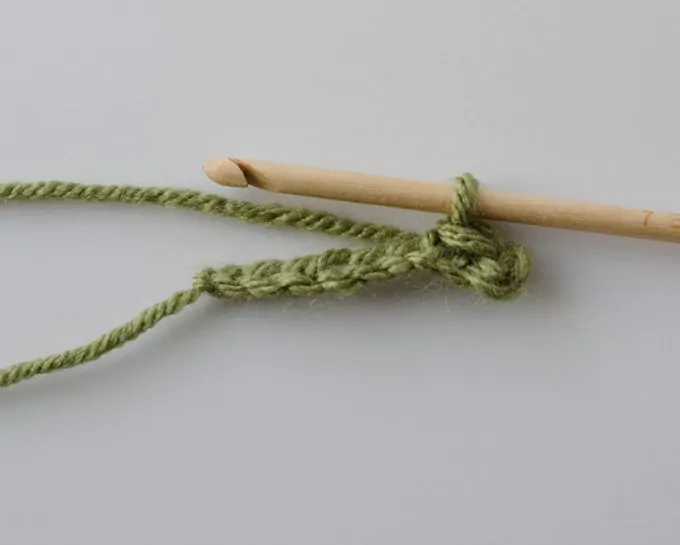
This is how one slip stitch looks. You can slip stitch across the entire row. If you finish it off at the end (and start with a longer chain), it would make a nice bracelet or hair tie. A slip stitch is the shortest crochet stitch. When will you use a slip stitch? Quite a bit, actually! Crochet instructions might direct you to attach a new color using a slip stitch. You might use a slip stitch to get to a better spot to start a new row in your crochet. Or you might use it for a decorative edge on a finished piece. When reading instructions you will find a slip stitch abbreviated as “sl st”. Now you will know what to do!
How to Make a Foundation Ring
A foundation ring is often the start of crochet that is done in a circle or “rounds”. The instructions will tell you to chain a certain number (usually 5 or 6) and then to “form a ring”. To do this, just slip stitch to the very first chain like this:
Congratulations! You’ve learned a lot in your first lesson! You know how to make a slip knot. You know how to chain and you know how to slip stitch. Plus you learned how to end your work and how to make a foundation ring!
Next up, I will show you how to single crochet! I can’t wait!
I love seeing your finished projects! If you enjoyed making one of my patterns I’d love to see yours on Instagram, be sure to tag me @crochet365knittoo. If you are on Facebook, stop over to the Crochet 365 Knit Too Facebook page or pop over to the Crochet365KnitToo Club and share a photo! I’d love to see your work!

Thank you so much!!!
The best tutorials ever, Cheryl, you have fantastic teaching skills, Thank you for sharing!