
Great Lakes Beanie Crochet Pattern
This post may contain referral/affiliate links. Please read my disclosure for more info.
Winter in the Great Lake State is a beautiful thing. And sigh.. this Great Lakes Beanie crochet pattern! 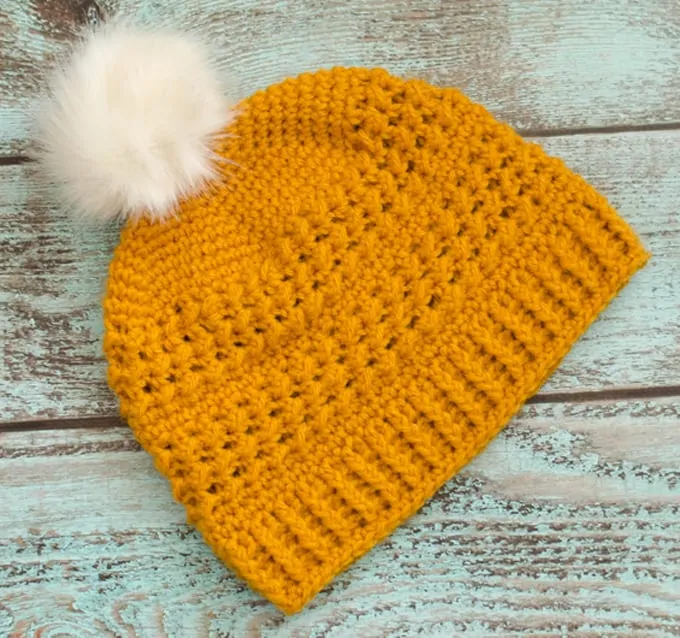
There is nothing quite like the first real snow of the season. The softly falling snow covering the ground. The stark contrast of the wet trees against the white snow and gray sky. The quiet. I like it best when snow falls at night. I wake up to white, clean snow, undisturbed yet by foot traffic and cars.
I take a deep breath and let the cold, crisp air fill my lungs. It reminds me of the fresh new day…open wide with possibility and opportunity. And then there’s this hat. She’s ready to get out there in the big bright world and make things happen. Meet the Great Lakes Beanie.
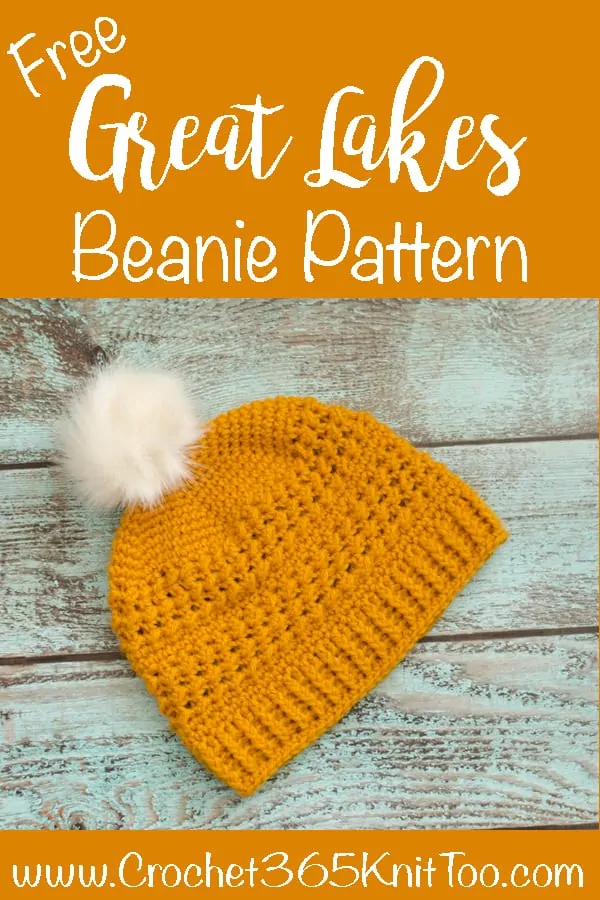
The Great Lakes Beanie is sized for an average size woman. If you want to make it larger or smaller, increase or decrease in increments of 2 and add or subtract rows to get the correct length. This hat is made with Lion Brand Wool-Ease (thank you Lion Brand for providing this amazing yarn). Wool-Ease and Vanna’s Choice are both made by Lion Brand and are both worsted weight yarn.
I find that the Wool-Ease is a little bit thinner and so it works up a little bit smaller. I’ve worked the Great Lakes Beanie in both yarns because I’m pretty much in love with this pattern. If you want to use Wool-Ease or another lighter weight worsted yarn and you are concerned about it being a little tight, you could bump up to an I hook.
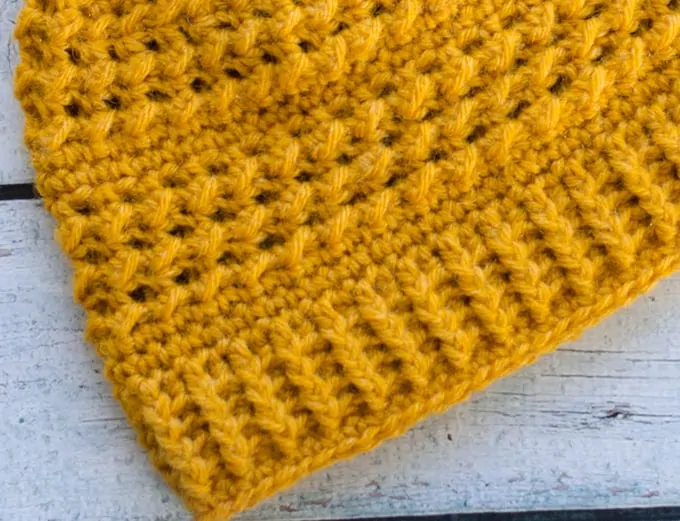
The stitches in this pattern are basic. What gives the Great Lakes Beanie that awesome texture is how it is worked. Pay close attention to whether you are working in the round, joining a round, or joining a round and turning your work to work on the wrong side for a row. I will talk you through it every step of the way!
Are you loving the ribbing on the Great Lakes Beanie? The ribbing is just half double crochet post stitches, alternating between front post half double crochet and back post double crochet. It forms a rib that is just perfect. It stretches yet it is snug.
I finished off the rows of post stitches with a row of single crochet. That row is entirely optional. If you like the look without it, you can just stop after the last round of post stitches. You can also increase the ribbing by adding another row or two of post stitches.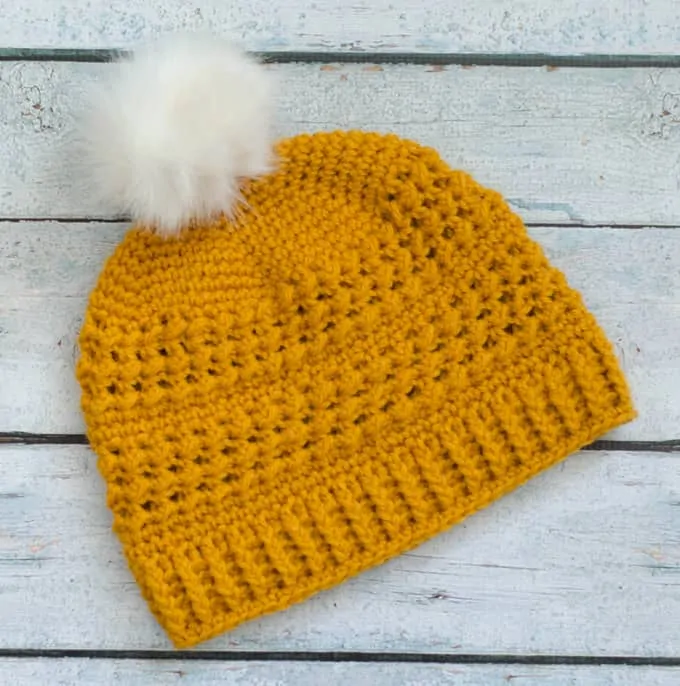
Purchase an ad-free printable version of this pattern
Disclaimer: This post includes affiliate links; yarn provided by Lion Brand
Great Lakes Beanie Pattern
Here is what you will need:
- US H8/5 mm crochet hook (Did you know you can purchase my go-to hooks on Amazon?)
- 4 oz Worsted weight yarn. I used Lion Brand Wool-Ease in gold
- Fur Pom Pom (learn how to make your own fur pom pom)
- tapestry needle and scissors
Fits a medium sized adult. Finished size: About 20″ around by 8.5″ long.
Resources and tutorials you may find helpful in following this pattern: Crochet Abbreviations, US to UK Crochet Conversion Chart. Find links to stitches on the “Tutorial” menu: Getting Started will show basic stitches used in many patterns and Crochet Stitch Dictionary shows our growing collection of crochet stitch tutorials.
Make a magic ring
R1: 6 sc into ring (6 sts). Work in rounds through row 11.
R2: 2 sc in ea st around (12 st)
R3: *sc in next st, 2 sc in next st, repeat from * around (18 st)
R4: *sc in next 2 st, 2 sc in next st, repeat from * around (24 st)
R5: *sc in next 3 st, 2 sc in next st, repeat from * around (30 st)
R6: *sc in next 4 st, 2 sc in next st, repeat from * around (36 st)
R7: *sc in next 5 st, 2 sc in next st, repeat from * around (42 st)
R8: *sc in next 6 st, 2 sc in next st, repeat from * around (48 st)
R9: *sc in next 7 st, 2 sc in next st, repeat from * around (54 st)
R10: *sc in next 8 st, 2 sc in next, repeat from * around (60 st)
R11: *sc in next 4 st, 2 sc in next, repeat from * around (72 st)
Note: in the next section, work rows by starting and stopping each round, joining with a sl st to the start of each round.
 R12: Slip stitch to next st. ch1, sc in same st, ch 1, skip next st, *sc in next st, ch 1, skip next st*, repeat * to * around. Sl st to first sc at end of round.
R13: TURN WORK so wrong side of hat is now facing you. *Sl st in next space, hdc in same space*. Repeat * to * around. At the end of the round, sl st to 1st sl st. This will make bumps on the right side. At the end of the row, there should be 36 bumps.
R14: TURN WORK so right side of hat is now facing. Ch 1, sc in same st as joining, ch 1, skip next st, *sc in next st, ch 1 , skip next st* Repeat * to * around.
R15-18: repeat rows 13 & 14 twice
R19: Ch 1, sc in same st as joining, *sc in next space, sc in next st*, repeat around working a sc in ea st and space around. (72 st)
R20: On right side of work, ch1, sc in same space as joining. sc around (72 st)
R21-29: Repeat rows 12-20 once
Now continue to work the brim as follows:
R30: ch 2, hdc around (72 st), join.
R31-34: ch 3, *front post hdc in next st, back post hdc in next st* repeat * to * around.
R35: Ch 1, sc around.
Fasten off and weave in ends.
Purchase an ad-free printable version of this pattern
Love the Great Lakes Beanie? Be sure to check out the Great Lakes Slouch!
I love seeing your finished projects! If you enjoyed making one of my patterns I’d love to see yours on Instagram, be sure to tag me @crochet365knittoo. If you are on Facebook, stop over to the Crochet 365 Knit Too Facebook page or pop over to the Crochet365KnitToo Club and share a photo! I’d love to see your work!
There is nothing quite like a winter in the Mitten state is there? Loving that hat!
You know it! Thanks for the kind words about the hat pattern! 🙂
I just found your blog through Oombawka Design–so glad I did. I live in the Lansing area, and I’m about to go out to shovel yesterday’s snowfall. Living in the Great Lakes State is a mixed blessing–love to look at the snow; not so crazy about removing it. I love the look of this beanie–a good project for this afternoon as I warm up after shoveling. Thank you!
Well hello, neighbor! 🙂 I am glad you found me! I agree with you on the snow. The removal part is not so fun. Thankfully for me, my hubby takes care of that task for us! Enjoy making the beanie!
That texture is amazing! Love the hat.
Cheryl thank you for sharing your pattern. I love this hat, it’s super cute. I love working on a crochet project and watching it snow. I’m not crazy about the removal part of it either. I do have a two question. I love the texture and I would like to make this into a scarf or a cowel. I would just repeat rows 13 & 14 until it’s the width or length that I would like it to be? Would the muptiples be 2 + 1 or just any even number?
Thank you for
I am so glad you love the pattern! I am thinking of making a cowl myself in this pattern too! Yes, the pattern is just a repeat of 2 stitches. So you would need to chain in a multiple of 2 and then an extra chain for turning. Rows 13 & 14 give you the texture. And then just single crochet to break up the texture now and then.
Thank you, Cheryl. I think I’ll work it lengthwise, rows 13 & 14 twice then two rows of single crochets. I cant wait to make a scarf/cowel. ?
Christy–I thought about making a scarf with this stitch, too, but I hadn’t considered working it lengthwise–what a good idea! Thank you.
Hello Cheryl. I have two question. For row 13, do you skip a stitch after the Sl st, hdc in same space? In the pattern for the hat you state there will be 36 bumps (that’s half of the stitches).
For row 14, is the sc worked into the slip stitch or the hdc from the previous row?I’m making a scarf with your beautiful pattern and I don’t want to mess it up.?
Thank you.
Hi Christy. In row 13, you are working into the spaces of the prior row. So when you are done, you will have 36 bumps. For Row 14, I like to work the sc in the hdc from the prior row. But you can really do it either way. Since you are making a scarf, try it both ways and see which way you like best. Just make sure that you end up with a total of 72 stitches at the end of the row (or whatever number of stitches you have to start with) I hope that helps.
.
Hi, the hat looks great. But now that I am actually making it, I’m looking at it at 72 stitches and it just looks like a large circle. The pattern does not have any decrease rows. Have I missed something here or is there a printing error. I have repeated rows 13 and 14 as instructed but see no sign of a hat ( its more of a mat!!!) Can you explain ?? Thanks x
I am not sure what row you started on, but the pattern starts with a magic ring and 6 sc at the top of the hat and increases through row 12 to get to the 72 stitches. Be sure to scroll up so that you are seeing all of the pattern. 🙂 If you are interested in purchasing an ad-free PDF, there is a link at the top of the pattern as well.
How many skeins of the Lion Brand Wool ease yarn did you use to make the hat ?
A skein of Wool Ease is 3 oz and this pattern requires 4, so I used all of one skein and part of a 2nd skein.
So if I wanted the hat a little bigger, I would start with 8 sc instead of 6?
I would either start with a bigger hook or work extra increases–either in the last row, or add 1 more row of increases. If you start with 8 sc and work the same number of rows of increases, you are going to end up with a very large hat–because the increases build on each other.
I’ve never made a garment by crocheting – so need to know in your “Make a magic ring” — how many do I first chain?
You should chain 1 into the ring and then the sc as described in the pattern.
I just finished a modified buck-eye beanie and I’m looking at your other hats for more inspiration and patterns to add to my list. I’m usually a knitter but am trying to expand more into crochet.
In your description, you say you do a half double crochet front post and a double crochet back post. I thought that would be a very clever change rib. However, in the pattern, you say both are HDC. Darn, I’m guessing the description is just missing a “half” . Anyway, I ususally guess that mistakes and mis-interpretations are the way new stitches are invented! I may just give this mixed rib a try! : )
Anyway, thanks for sharing your designs!
I loved making this beanie! It worked up quick and easy and was a fun repeat. I made it for my 7 yo and it’s a little big, but I just folded the brim up in front and added the Pom Pom and it’s super cute!
I just love this pattern ! I have made many of the Great Lakes
Beanie for donations to a group that supplies them to many
Charity groups. They always tells me how much they appreciate
The hats.