
How to Crochet Post Stitches
This post may contain referral/affiliate links. Please read my disclosure for more info.
Crochet stitches can be worked around a post to create a great texture. Today I’m going to teach you how to crochet post stitches! 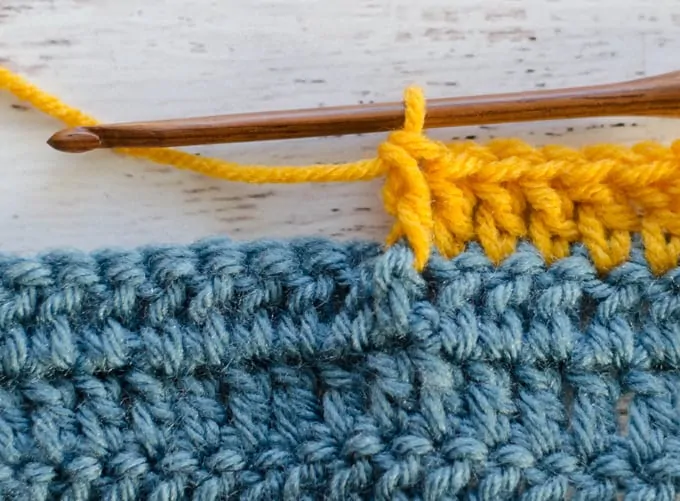 A front post stitch will pop the stitch out towards the front and a back post stitch will move it to the back. By alternating them, you can create a a ribbing effect, great for hats, sweaters, etc.
Post stitches are also used in other design work. Often post stitches are worked in double crochet, but they can be worked in half double crochet and other stitch heights as well. Let’s dive in.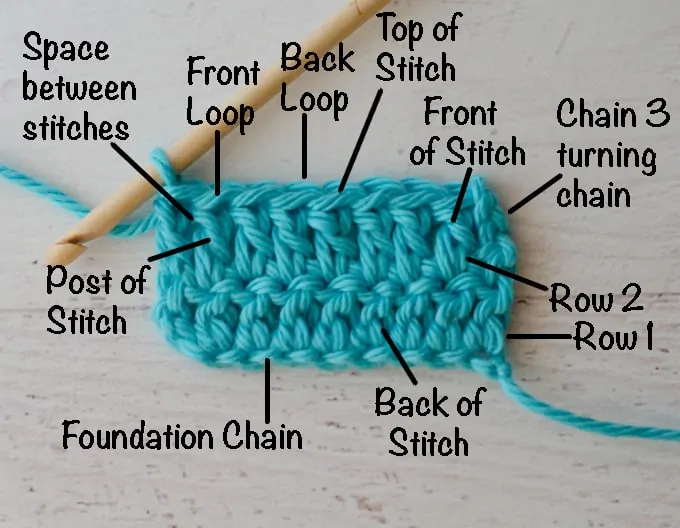 Remember when I showed you the parts of a crochet stitch? See the post part of the stitch? Instead of inserting the hook into the front and back loops of the stitch, when working post stitches, we work around the post.
Front Post Double Crochet
To work a front post double crochet, start off just as you would any other double crochet, by yarning over.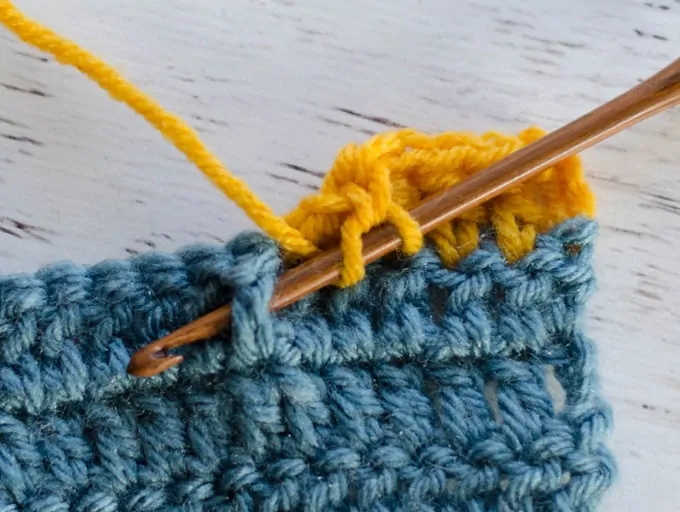 Then insert the hook under the post of the next stitch, starting in the front. So basically you dig in and sort of scoop up the post with your crochet hook.
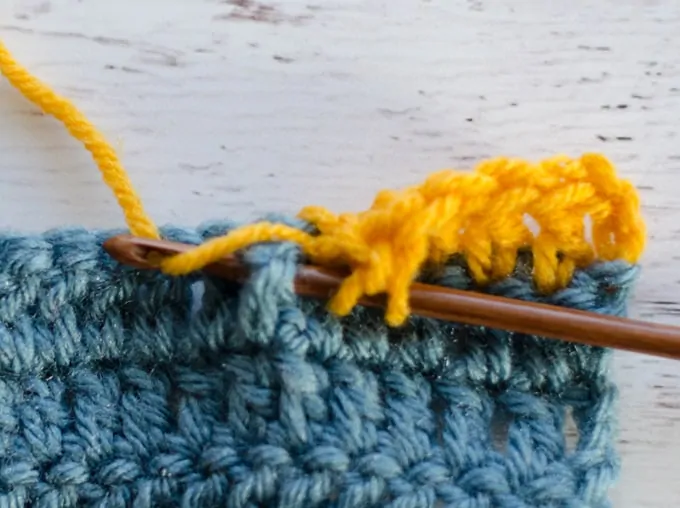 Wrap the yarn around, just like you normally would for a double crochet.
 And pull the yarn through. Now you have 3 loops on the hook. Finish off the double crochet as you normally would by yarning over and pulling through 2 loops. Then yarn over again and pulling through the remaining 2 loops.This is what a front post double crochet looks like when complete. It really is just a double crochet that is worked around the post.
Back Post Double Crochet
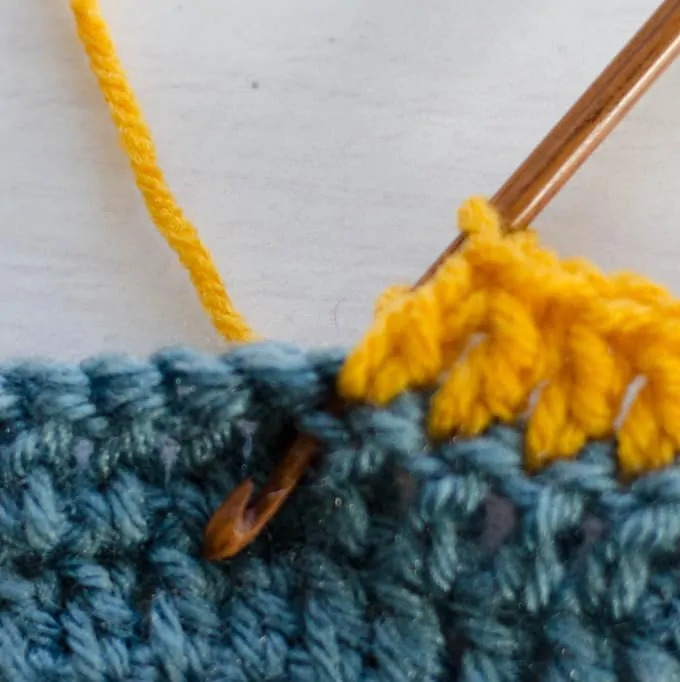 A back post double crochet is worked similarly except that you insert the hook around the post, starting from the back. In this photo, I’ve already yarned over for the double crochet and inserted the hook from the back. Then..
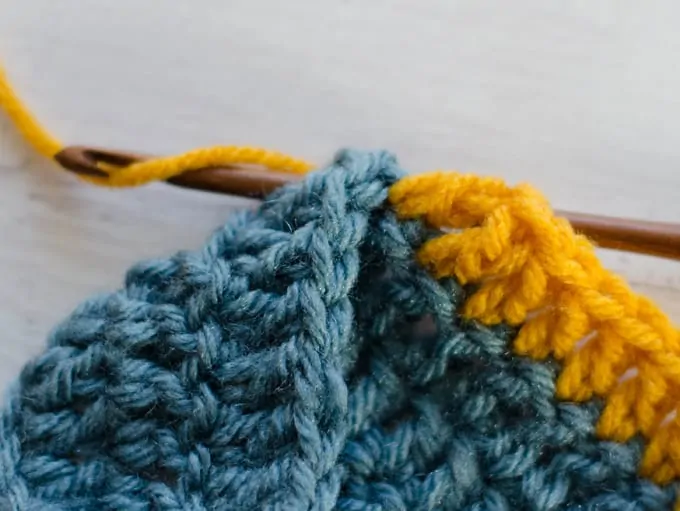 The hook returns to the back and yarn over again and pull the loop through. Once that is done, there are 3 loops on the hook. Finish off the double crochet as normal from this point.
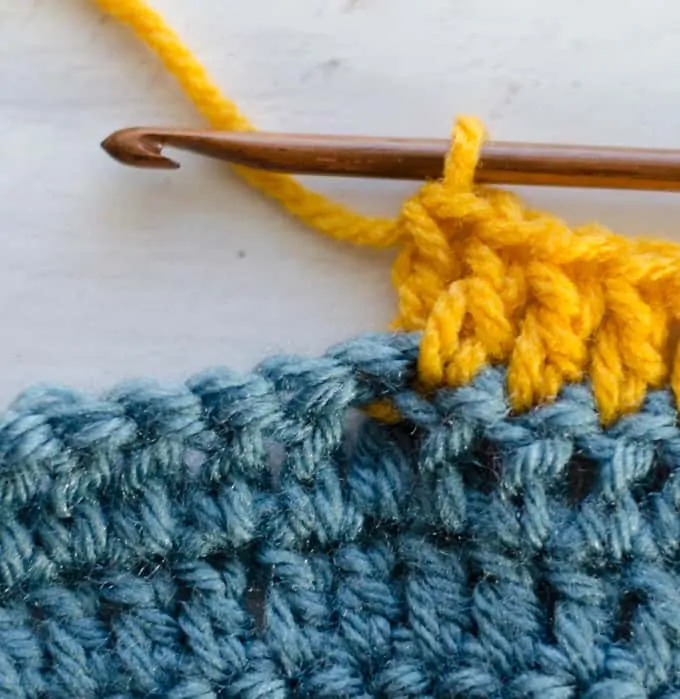 And here is the back post double crochet as it looks from the front of the work.
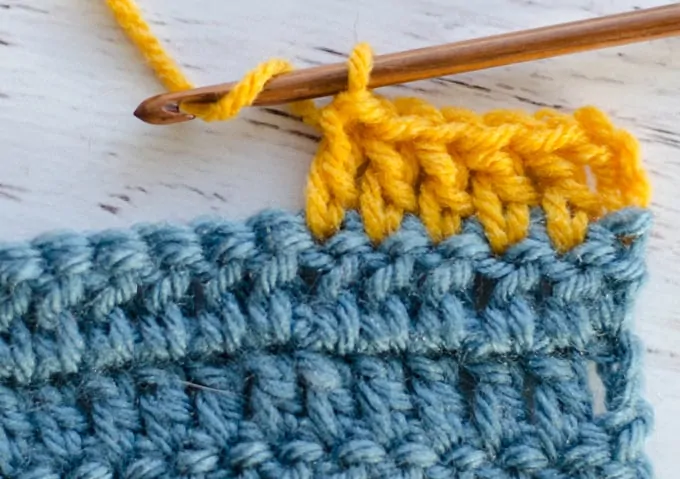
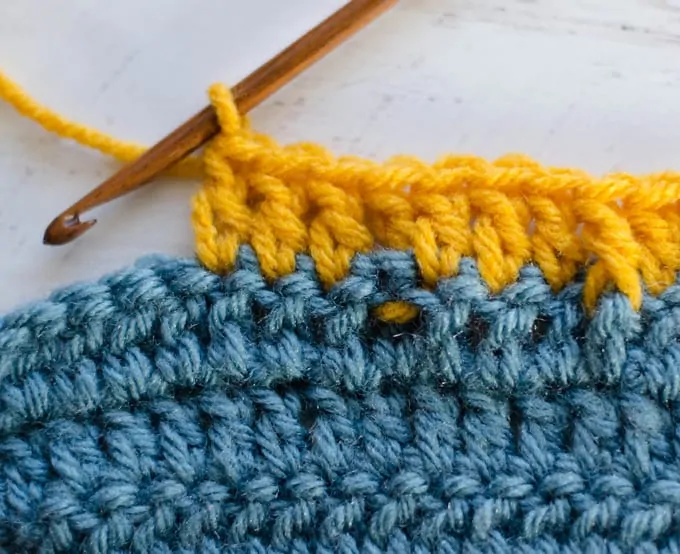 Here is a row showing one front post double crochet and one back post double crochet. And that is how to crochet post stitches!
A Few More Things To Know
Post stitches are abbreviated in a written by putting a “FP” or a “BP” in front of the normal stitch abbreviation. So a Front Post Double Crochet would be written as “fpdc” and a Back Post Double Crochet would be written as “bpdc”. Likewise, half double crochet post stitches would be shown as “fphdc” and “bphdc”.
Half Double Crochet post stitches are worked the same way as shown above, except that you finish the stitch as a half double crochet instead of a double crochet.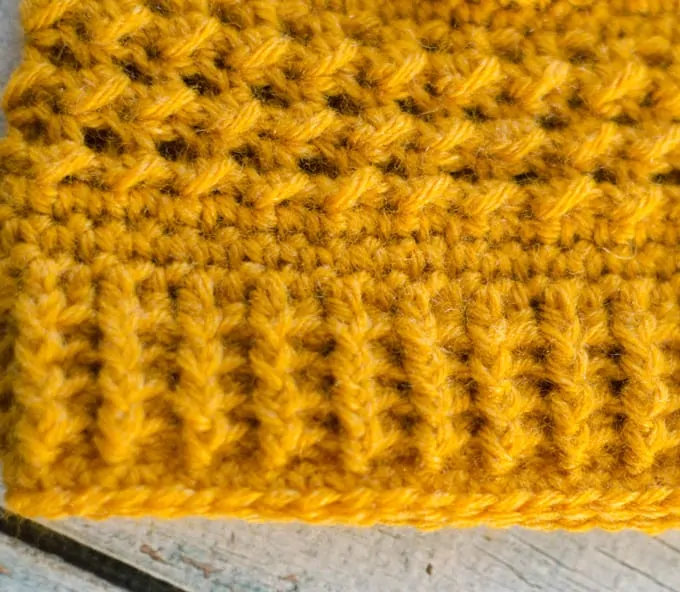
The brim of this hat is worked in a ribbing made by alternating front post half double crochet and back post half double crochet. This particular ribbing is finished off with a row of single crochet, but that is not necessary. Using the alternating post stitches makes a very nice rib all on its own!
Now that you’ve learned how to crochet post stitches, do you want to learn more? The Getting Started section will show you all the stitches and other things you need to know including how to make a half double crochet and how to make a double crochet.
I love seeing your finished projects! If you enjoyed making one of my patterns I’d love to see yours on Instagram, be sure to tag me @crochet365knittoo. If you are on Facebook, stop over to the Crochet 365 Knit Too Facebook page or pop over to the Crochet365KnitToo Club and share a photo! I’d love to see your work!
I am so excited about this. I’m not a great crocheter, so I have so much to learn. I really started getting excited when the Lord blessed us with a beautiful set of twins girls. I want to make everything I see, so thank you so much.
Thankyou so much for this lesson . I am fairly new to this so to see it done to be able to copy is amazing.
I’m so glad it helped!
Thanks so much for your step by step instructions and accompanying photos of post stitches. I have never had it explained so I could understand. You made my day so I just wanted to let you know. Have a wonderful day!
So glad it helped!
Hello! I’m pretty new to my crochet and am trying to learn how to crochet your mandala flower. I have a couple questions. I would love to see either some step-by-steps on the front post stitches (but in relation to the flower) or a video tutorial. I realize experienced crafters could figure it out easily. But I’m still trying to figure things out!
I would suggest making a practice swatch of double crochet stitches just to practice the front post stitches. That way you can follow the step-by-step photos in this post before trying it on your project. In the Mandala flower, you working the post stitches into double crochet stitches, just like are shown in this step-by-step tutorial. However, that pattern is worked in the round, which may be what’s throwing you. The mechanics of the stitch are the same.